Introduction
So, you've got your hands on a shiny new USB microphone and you're ready to start using it with your Windows 10 computer. Whether you're a podcaster, a gamer, or simply someone who wants to improve the audio quality of their video calls, using a USB microphone can greatly enhance your audio experience. Windows 10 provides a user-friendly platform for setting up and using USB microphones, and with a few simple steps, you'll be ready to start recording or communicating with crystal-clear sound.
In this guide, we'll walk you through the process of using a USB microphone on your Windows 10 system. From plugging in the microphone to adjusting the settings and conducting a test, we've got you covered every step of the way. By the end of this guide, you'll feel confident and empowered to make the most of your USB microphone and enjoy high-quality audio on your Windows 10 device.
Let's dive in and get your USB microphone up and running on Windows 10!
Step 1: Plug in the USB Microphone
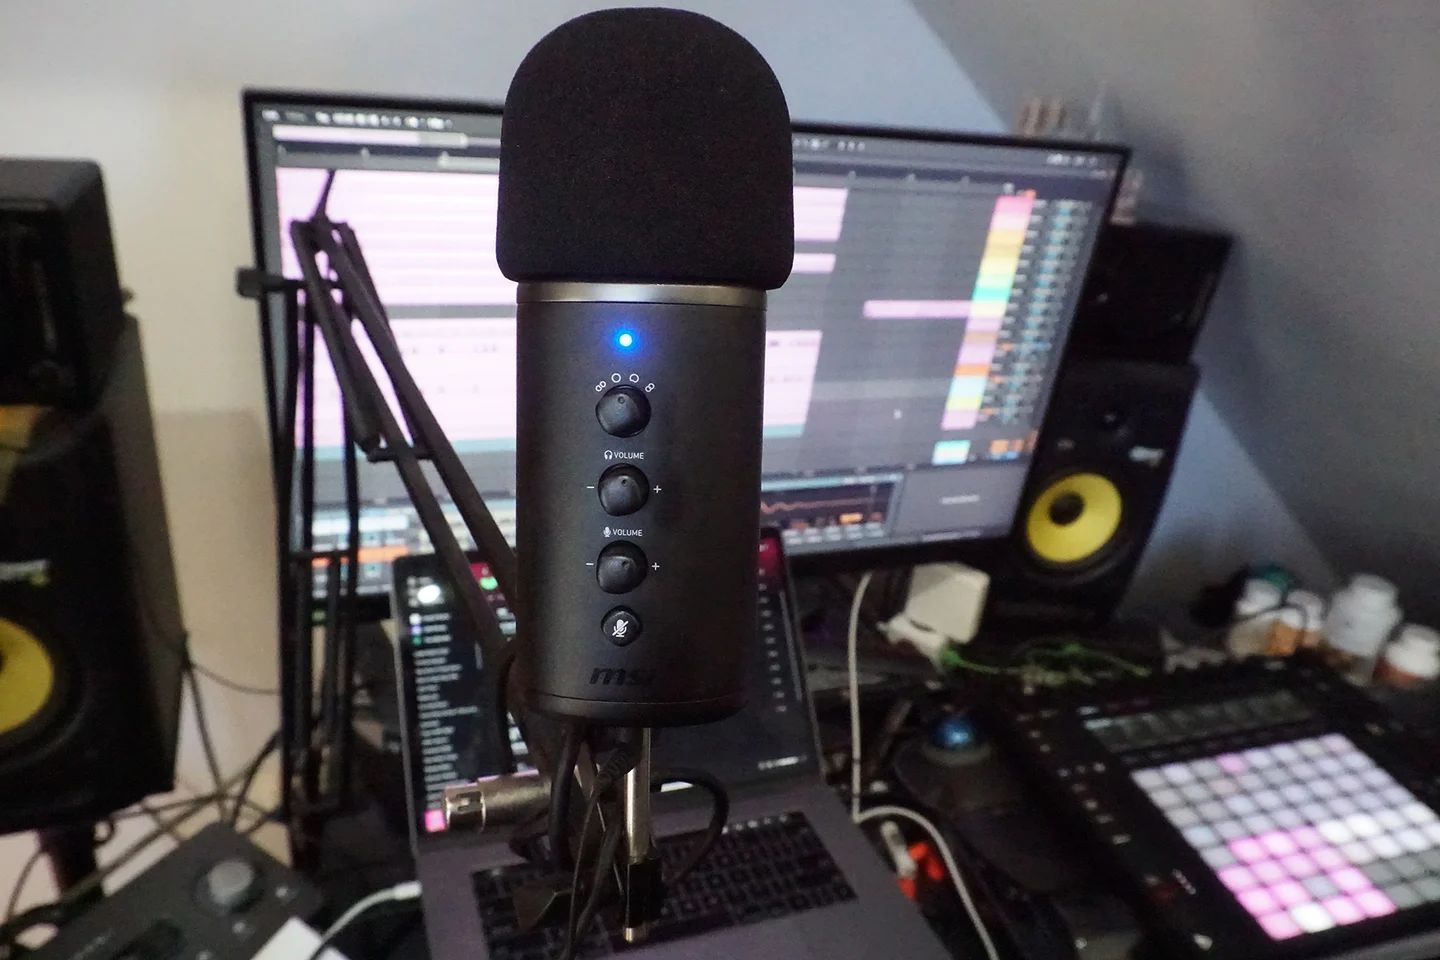
The first step in using your USB microphone with Windows 10 is to physically connect it to your computer. This process is incredibly straightforward and requires minimal effort. Here’s how to do it:
- Locate an available USB port: Before you can connect your USB microphone, identify an available USB port on your Windows 10 computer or laptop. USB ports are typically found on the front, back, or sides of the device, and they are rectangular in shape.
- Insert the USB connector: Take the USB cable attached to your microphone and carefully insert it into the USB port. Ensure that the connector is inserted in the correct orientation to avoid any potential damage.
- Wait for the drivers to install: Upon connecting the USB microphone, Windows 10 will automatically detect the new device and begin the driver installation process. This may take a few moments, and you may see a notification indicating that the device is being set up.
- Confirm the connection: Once the drivers have been successfully installed, you may receive a notification confirming that the USB microphone is ready to use. At this point, the physical connection is complete, and your USB microphone is now linked to your Windows 10 system.
By following these simple steps, you’ve successfully connected your USB microphone to your Windows 10 computer. With the physical connection established, you’re ready to proceed to the next step and set up the microphone within the Windows 10 operating system.
Step 2: Set Up the Microphone in Windows 10
Now that your USB microphone is physically connected to your Windows 10 computer, it’s time to set it up within the operating system. Windows 10 provides a straightforward process for configuring and recognizing external audio devices, ensuring that your USB microphone is ready to capture high-quality sound. Follow these steps to set up your microphone:
- Access the Sound settings: To begin the setup process, right-click on the speaker icon located in the system tray at the bottom right corner of your screen. From the context menu, select “Open Sound settings” to access the sound control panel.
- Select the Input device: Within the Sound settings, navigate to the “Input” section. Here, you will see a list of available input devices, including your USB microphone. Click on the drop-down menu under “Choose your input device” and select your USB microphone from the list of available options.
- Adjust microphone properties: Once your USB microphone is selected as the input device, you can further customize its settings by clicking on “Device properties.” This will allow you to adjust the microphone volume, sample rate, and other advanced properties to optimize its performance.
- Test the microphone: To ensure that the microphone is functioning as expected, click on “Test your microphone” to initiate a test recording. Speak into the microphone, and Windows 10 will play back the recorded audio, allowing you to verify the sound quality and volume levels.
By following these steps, you’ve successfully set up your USB microphone within the Windows 10 operating system. The microphone is now recognized as the input device, and its properties have been configured to suit your preferences. With the setup complete, you’re ready to move on to the next step and fine-tune the microphone settings for optimal performance.
Step 3: Adjust Microphone Settings
Now that your USB microphone is set up in Windows 10, it’s essential to fine-tune its settings to ensure optimal performance and audio quality. Windows 10 provides a range of customizable options that allow you to adjust the microphone’s properties and behavior according to your specific needs. Follow these steps to adjust the microphone settings:
- Access the Sound Control Panel: To access advanced microphone settings, right-click on the speaker icon in the system tray and select “Open Sound settings.” From the Sound settings window, click on “Sound Control Panel” to access additional properties and settings for your USB microphone.
- Configure microphone properties: Within the Sound Control Panel, locate your USB microphone in the “Recording” tab. Right-click on the microphone and select “Properties” to access its advanced settings. Here, you can adjust the microphone’s levels, enhancements, and exclusive mode options to optimize its performance.
- Adjust levels and enhancements: In the microphone properties window, navigate to the “Levels” tab to adjust the microphone volume and boost levels. Additionally, explore the “Enhancements” tab to enable audio enhancements such as noise suppression, acoustic echo cancellation, and more to enhance the microphone’s audio output.
- Enable exclusive mode: If your USB microphone supports exclusive mode, you can enable this feature in the microphone properties window. Exclusive mode allows applications to take full control of the microphone, potentially improving the overall audio experience during specific tasks or applications.
By carefully adjusting the microphone settings in Windows 10, you can ensure that your USB microphone delivers exceptional audio quality and meets your specific requirements. With the settings fine-tuned, you’re now ready to proceed to the next step and conduct a test to verify the microphone’s performance.
Step 4: Test the Microphone
After setting up and adjusting the settings for your USB microphone on Windows 10, it’s crucial to conduct a thorough test to ensure that the microphone is functioning as intended and delivering high-quality audio. Performing a test recording allows you to verify the microphone’s performance and make any necessary adjustments before using it for your intended purposes. Follow these steps to test your USB microphone:
- Open the Sound settings: Begin by accessing the Sound settings on your Windows 10 system. Right-click on the speaker icon in the system tray and select “Open Sound settings” to access the sound control panel.
- Initiate a test recording: Within the Sound settings, navigate to the “Input” section and locate your USB microphone. Click on “Device properties” and then select “Test your microphone” to initiate a test recording. Speak into the microphone, and Windows 10 will capture the audio input for playback.
- Verify audio playback: After recording your voice, Windows 10 will play back the audio through the selected output device, allowing you to listen to the recorded sound. Verify the audio quality, volume levels, and clarity to ensure that the USB microphone is performing as expected.
- Make adjustments if necessary: If you notice any issues with the test recording, such as low volume, background noise, or distortion, return to the microphone settings to make further adjustments. Fine-tune the levels, enhancements, and exclusive mode options to optimize the microphone’s performance based on the test results.
By conducting a comprehensive test of your USB microphone in Windows 10, you can confirm its functionality and address any potential issues before using it for recording, communication, or other audio-related tasks. With the microphone successfully tested and optimized, you’re now fully prepared to leverage its capabilities and enjoy high-quality audio on your Windows 10 device.
Conclusion
Congratulations! You’ve successfully navigated the process of using a USB microphone on your Windows 10 system. By following the steps outlined in this guide, you’ve not only connected and set up your USB microphone but also fine-tuned its settings and conducted a thorough test to ensure optimal performance. As a result, you’re now equipped to harness the power of your USB microphone for various audio-related activities, whether it’s recording podcasts, engaging in online gaming, participating in video calls, or creating high-quality audio content.
With your USB microphone seamlessly integrated into your Windows 10 environment, you have unlocked a world of possibilities for capturing clear and professional-grade audio. Whether you’re a content creator, a remote worker, or simply someone who values superior audio experiences, your USB microphone is poised to enhance your digital interactions and creative endeavors.
As you embark on your audio journey with your USB microphone and Windows 10, remember that the flexibility and versatility of your setup allow you to explore new avenues of expression and communication. Whether you’re fine-tuning the microphone settings for a specific project or simply enjoying the improved audio quality during everyday tasks, your USB microphone stands ready to elevate your digital experiences.
By mastering the process of using a USB microphone on Windows 10, you’ve empowered yourself to make the most of this essential audio tool, unlocking its potential to enrich your digital interactions and creative pursuits. Embrace the enhanced audio capabilities at your fingertips and enjoy the seamless integration of your USB microphone with your Windows 10 system.