Why Use a USB Microphone?
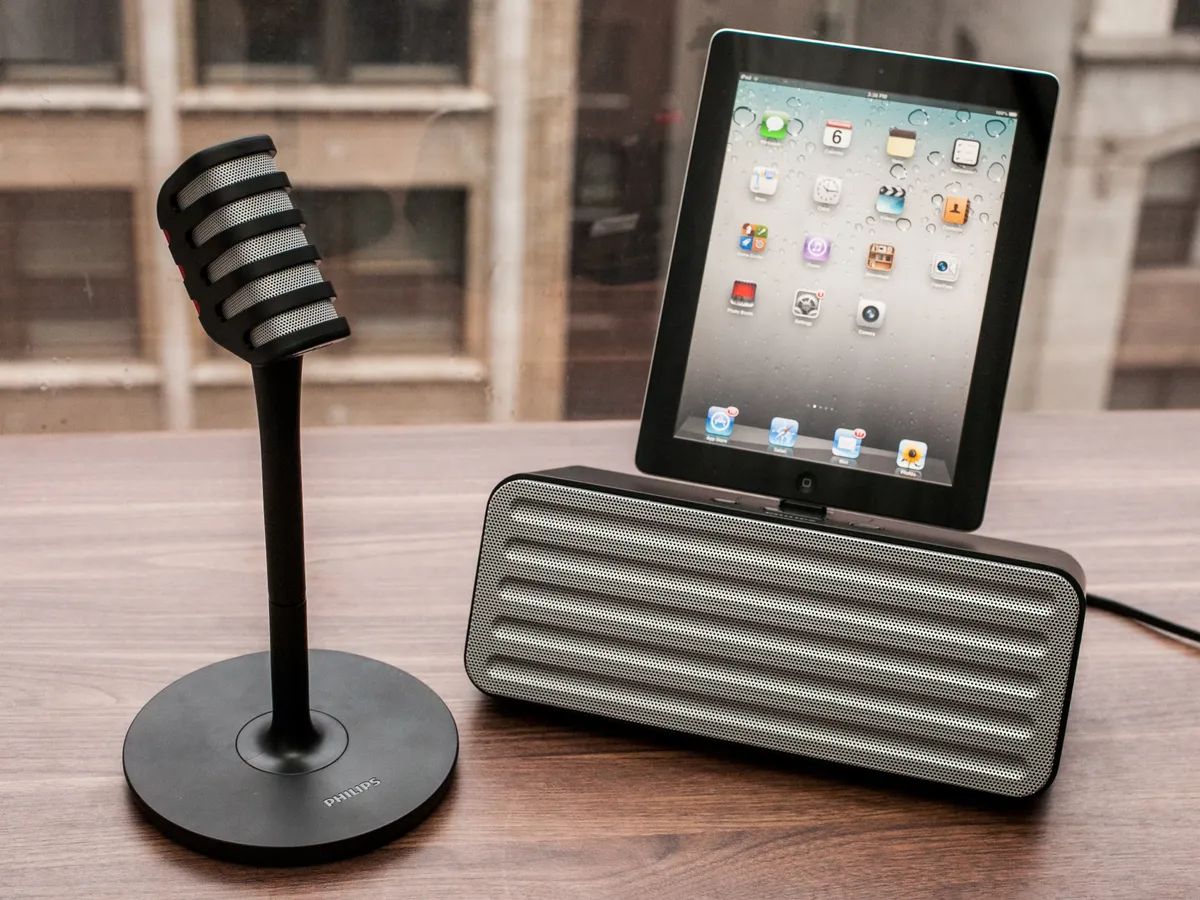
A USB microphone is a popular choice for individuals who want to record high-quality audio on their computers or mobile devices. Here are a few reasons why using a USB microphone can greatly enhance your recording experience:
- Easy to use: USB microphones are incredibly simple to set up and use. Unlike other types of microphones that require additional audio interfaces or mixers, USB microphones can be plugged directly into your computer’s USB port, eliminating the need for complicated connections.
- Cost-effective: USB microphones are often more affordable compared to professional studio microphones. With a USB microphone, you can achieve professional-level audio quality without breaking the bank.
- Portability: USB microphones are lightweight and compact, making them perfect for on-the-go recording. Whether you’re a content creator, podcaster, or musician, you can easily bring your USB microphone with you and record wherever and whenever inspiration strikes.
- Versatility: USB microphones are compatible with a wide range of devices, including PCs, Macs, and mobile devices. This versatility allows you to use your USB microphone for various recording purposes, from podcasting and audio streaming to voiceovers and musical recordings.
- Quality performance: USB microphones are designed to deliver exceptional audio quality. They often come with built-in features such as noise cancellation and voice enhancement, ensuring that your recordings are clear and crisp.
Whether you’re a professional content creator or simply an enthusiast looking to improve your recording quality, using a USB microphone can provide you with an efficient and hassle-free solution. With its ease of use, cost-effectiveness, portability, versatility, and top-notch performance, a USB microphone is a valuable tool for any recording endeavor.
Compatible USB Microphones
When choosing a USB microphone to use with StarMaker or any other recording software, it’s essential to ensure compatibility for optimal performance. Here are some of the popular USB microphones that are known to work well with StarMaker:
- Blue Yeti: The Blue Yeti is a versatile and highly regarded USB microphone that offers excellent audio quality. It features multiple pickup patterns, including cardioid, bidirectional, omnidirectional, and stereo, making it suitable for various recording situations.
- Audio-Technica ATR2100x-USB: This USB microphone is a solid choice for both beginner and intermediate users. It offers a dynamic cardioid pickup pattern, built-in headphone jack, and excellent sound quality at an affordable price point.
- Rode NT-USB: Rode is well-known for producing professional-grade audio equipment, and the NT-USB is no exception. It delivers clear and crisp sound, features a headphone jack with volume control, and comes with a tripod desk stand for convenience.
- Samson Meteor Mic: The Samson Meteor Mic is a compact and stylish USB microphone that offers impressive sound quality. It features a cardioid pickup pattern and a fold-back leg design for easy portability.
- Audio-Technica AT2020USB+: Another popular option from Audio-Technica, the AT2020USB+ delivers exceptional audio quality with its cardioid pickup pattern and 16-bit, 44.1/48 kHz resolution. It also has a built-in headphone jack for real-time monitoring.
It’s important to note that compatibility can vary depending on your operating system and specific software requirements. Before purchasing a USB microphone, make sure to check the manufacturer’s specifications and verify that it is supported by your device and StarMaker.
Remember, while these USB microphones are recommended for use with StarMaker, there are many other brands and models available in the market. In case you already have a USB microphone that is not listed here, it may still be compatible with StarMaker. Simply ensure that it meets the necessary technical requirements and has the appropriate drivers installed.
By choosing a compatible USB microphone for StarMaker, you can enjoy crystal-clear audio recordings and enhance your singing and recording experience on the platform.
Connecting the USB Microphone to Your Device
Connecting your USB microphone to your device is a straightforward process that requires only a few simple steps. Here is a step-by-step guide on how to connect a USB microphone to your computer or mobile device:
- Check the USB port: Ensure that your device has an available USB port. Most computers have USB ports located on the front or back panel, while mobile devices may have a USB port or require an adapter.
- Inspect the USB cable: Take a close look at the USB cable provided with your microphone. Connect one end of the cable to the USB port on the microphone and the other end to the USB port on your device.
- Device recognition: After connecting the USB cable, your device should recognize the USB microphone automatically. Depending on your operating system, you may see a notification or hear a sound indicating that a new device has been detected.
- Check microphone settings: Once your device has recognized the USB microphone, you may need to adjust the microphone settings. On a computer, go to the control panel or system preferences and select the appropriate audio input device. On a mobile device, navigate to the settings menu and select the audio input options.
- Testing the microphone: Open your recording software or app, such as StarMaker, and check the audio input settings. Make sure that your USB microphone is selected as the primary input device. You can test the microphone by speaking or singing into it and checking the audio levels or playback.
- Position the microphone: Position the USB microphone according to your recording needs. Make sure it is within an appropriate distance and angle for optimal sound capture. Consider using a microphone stand or boom arm if necessary.
Remember, the specific steps may vary depending on your device’s operating system and recording software. If you encounter any issues during the connection process, refer to the manufacturer’s instructions or consult their customer support for assistance.
By following these simple steps, you can quickly and easily connect your USB microphone to your device and start recording high-quality audio for your singing or recording sessions on StarMaker.
Adjusting Microphone Settings on StarMaker
Once you have connected your USB microphone to your device, it’s important to adjust the microphone settings within StarMaker to ensure optimal recording quality. Here are the steps to adjust the microphone settings on StarMaker:
- Launch StarMaker: Open the StarMaker app on your device and log in to your account. Ensure that you have the latest version of the app installed to access the most recent settings.
- Access settings: Locate the settings menu within StarMaker. This may be represented by a gear icon or listed in the app’s main menu. Tap on the settings option to enter the settings screen.
- Select audio settings: Within the settings menu, look for the audio settings section or an option related to the microphone. Tap on this option to access the microphone settings.
- Choose USB microphone: In the microphone settings, you should see a list of available microphones. Select your USB microphone from the list to ensure that StarMaker recognizes it as the primary audio input device.
- Adjust gain: Depending on your USB microphone and recording environment, you may need to adjust the microphone gain. The gain determines the sensitivity of the microphone and can be adjusted using a slider or numerical input. Experiment with different gain levels to find the optimal setting for your recordings.
- Enable monitoring: In some cases, you may want to enable monitoring to hear yourself in real-time while recording. Check for an option to enable monitoring or “listen to self” in the microphone settings. This can help you maintain proper audio levels and ensure that your voice is coming through clearly.
- Test and adjust: After making the necessary microphone settings adjustments, it’s important to test your microphone within StarMaker. Start a recording or go to the practice mode to test the audio quality. Monitor the recording for any issues such as distortion, low volume, or background noise. If needed, go back to the settings and make further adjustments until you achieve the desired results.
By adjusting the microphone settings on StarMaker, you can optimize your USB microphone’s performance and ensure that your recordings sound their best. Remember to regularly check and fine-tune these settings as needed to accommodate different recording scenarios and maintain consistent audio quality.
Testing Your USB Microphone on StarMaker
After connecting and adjusting the settings of your USB microphone on StarMaker, it’s crucial to conduct a microphone test to ensure that everything is working correctly. By performing a test recording, you can assess the audio quality, volume levels, and identify any potential issues. Here are the steps to test your USB microphone on StarMaker:
- Select a song: Choose a song on StarMaker that you want to use for your microphone test. Select a song that showcases different vocal ranges and dynamics to thoroughly evaluate your microphone’s performance.
- Access recording options: Look for the recording options within StarMaker, usually represented by a microphone icon or conveniently located within the song interface. Tap on this option to enter the recording screen.
- Choose microphone input: Before starting the test recording, make sure that your USB microphone is selected as the input device. There may be an option to toggle between the device’s internal microphone and the USB microphone. Select the USB microphone to ensure that it’s being used for the recording.
- Pick a recording mode: StarMaker often offers different recording modes, such as solo, duet, or group. Select the mode that fits your test scenario. For this microphone test, it’s recommended to choose the solo mode to focus solely on your voice and the USB microphone’s performance.
- Perform the microphone test: Start the recording and perform the selected song using your USB microphone. Sing with different vocal techniques, volumes, and intensities to evaluate the microphone’s ability to capture and reproduce the nuances of your voice. Pay attention to clarity, balance, and any potential issues such as distortion or background noise.
- Review and analyze the recording: After finishing the test recording, play it back on StarMaker. Listen carefully to the recorded audio and assess its quality. Pay attention to vocal clarity, volume levels, and any unwanted artifacts or inconsistencies. If necessary, repeat the test recording and make adjustments to the microphone settings in StarMaker.
- Make refinements: Based on the results of your microphone test, refine the microphone settings, such as gain or input levels, to improve the audio quality. Experiment with different settings and test recordings until you achieve a satisfactory outcome.
By testing your USB microphone on StarMaker, you can ensure that it’s functioning correctly and delivering the desired audio quality. Use these test recordings as a way to fine-tune your microphone settings and make any necessary refinements for optimal performance during your singing and recording sessions on StarMaker.
Troubleshooting Common USB Microphone Issues
While USB microphones are generally user-friendly, you may encounter occasional issues that can affect their performance. Here are some common USB microphone issues and troubleshooting steps to help you resolve them:
- No audio input: If your USB microphone is not producing any sound or being recognized by your device, check the following:
- Ensure that the USB cable is securely connected to both the microphone and your device’s USB port.
- Try connecting the USB microphone to a different USB port on your device.
- Restart your device and try reconnecting the USB microphone.
- Poor audio quality: If your USB microphone is producing distorted or low-quality audio, try the following troubleshooting steps:
- Check the microphone gain or input levels. Adjust them accordingly to avoid clipping or distorted audio.
- Ensure that there are no obstructions or physical damage to the microphone that may affect its performance.
- Try using a different USB cable or connecting the USB microphone to a different USB port.
- Background noise: If your USB microphone is picking up unwanted background noise, consider these troubleshooting steps:
- Move the microphone closer to the sound source and away from noise-generating elements.
- Utilize a pop filter or foam windscreen to minimize plosives and unwanted noise.
- Enable noise reduction or suppression features if available on your USB microphone or recording software.
- Device compatibility: If you are experiencing compatibility issues with your USB microphone and your device, take the following steps:
- Check if there are any driver updates available for your USB microphone. Visit the manufacturer’s website for the latest drivers.
- Verify that your device’s operating system supports USB microphones. Check the system requirements or consult the manufacturer’s documentation.
- Try connecting the USB microphone to a different device to determine if the issue is specific to your current device.
- Interference or hum: If you hear unwanted interference or hum in your recordings, try these troubleshooting steps:
- Ensure that the USB microphone is not placed near any electronic devices that may be causing interference.
- Use a high-quality shielded USB cable to minimize interference.
- Connect the USB microphone to a powered USB hub to ensure a stable power supply.
If you have exhausted these troubleshooting steps and are still experiencing issues with your USB microphone, it may be helpful to consult the manufacturer’s support resources or contact their customer service for further assistance. Remember that resolving USB microphone issues quickly will ensure smooth and uninterrupted recording sessions on StarMaker and other platforms.
Tips for Using a USB Microphone Effectively on StarMaker
To make the most out of your USB microphone and enhance your recording experience on StarMaker, consider implementing these tips:
- Positioning and distance: Experiment with the positioning of your USB microphone to find the sweet spot. Ideally, place the microphone about 6-12 inches away from your mouth to achieve a balanced sound and minimize plosives.
- Room acoustics: Choose a quiet recording environment to minimize background noise and echo. If possible, use acoustic treatment like foam panels or blankets to improve the sound quality by reducing reflections.
- Pop filter usage: To prevent plosive sounds, such as “p” and “b” sounds, invest in a pop filter. It helps to reduce the impact of the air from your mouth hitting the microphone, resulting in cleaner and clearer recordings.
- Monitor your audio: Use headphones while recording on StarMaker to monitor your audio in real-time. This allows you to adjust your microphone technique, volume levels, and ensure that your performance is on point.
- Practice microphone control: Maintain consistent microphone technique by staying aware of your distance and angle from the microphone. Pay attention to your proximity to avoid sudden volume changes or distortions while singing or speaking.
- Warm-up and hydration: Warm up your voice before recording to improve vocal clarity and reduce strain. Stay hydrated with water or warm beverages to keep your vocal cords lubricated for better singing performances.
- Experiment with microphone settings: Adjust the gain or input levels on your USB microphone to find the optimal settings for your voice. This can help you achieve a balanced and clear sound without clipping or distortion.
- Practice and rehearse: Before recording your performances on StarMaker, practice and rehearse your songs to familiarize yourself with the lyrics, melody, and dynamics. This will result in more confident and polished recordings.
- Take breaks if necessary: Recording sessions can be physically and mentally demanding. If you feel fatigued or your voice is getting tired, take breaks to rest and rejuvenate. This will help maintain the quality and consistency of your performances.
- Embrace creativity and authenticity: Use your USB microphone on StarMaker as a tool to express your unique style and personality. Embrace your creativity, experiment with different vocal techniques, and let your authentic voice shine through in your recordings.
By applying these tips, you can maximize the capabilities of your USB microphone and create high-quality recordings on StarMaker. Remember to have fun, enjoy the process, and continually strive to improve your singing and recording skills.


