Introduction
Setting up a MIDI keyboard in Cubase is a fundamental step for musicians and producers looking to integrate hardware instruments into their digital audio workstation (DAW). By connecting a MIDI keyboard to your computer and configuring it within Cubase, you can harness the expressive capabilities of the keyboard to create, record, and manipulate music more intuitively. This guide will walk you through the process of setting up your MIDI keyboard in Cubase, allowing you to seamlessly incorporate it into your music production workflow.
Whether you're a seasoned musician or a budding producer, understanding how to connect and configure a MIDI keyboard in Cubase is essential for unleashing the full potential of your musical creativity. With the ability to control virtual instruments, record MIDI performances, and manipulate parameters in real-time, a MIDI keyboard serves as a versatile tool for music production within the Cubase environment.
In the following steps, you'll learn how to connect your MIDI keyboard to your computer, configure MIDI devices in Cubase, set up the MIDI keyboard as a MIDI input device, and test its functionality within the DAW. By following these instructions, you'll be well-equipped to seamlessly integrate your MIDI keyboard into your Cubase projects, opening up a world of musical possibilities and enhancing your production capabilities. Let's dive into the process of setting up your MIDI keyboard in Cubase and unlock the potential for creative expression and musical innovation.
Step 1: Connecting the MIDI Keyboard to Your Computer
Before you can begin using your MIDI keyboard in Cubase, you need to establish a physical connection between the keyboard and your computer. This typically involves using a USB cable or MIDI cables, depending on the available connections on your keyboard and computer. Follow these steps to connect your MIDI keyboard:
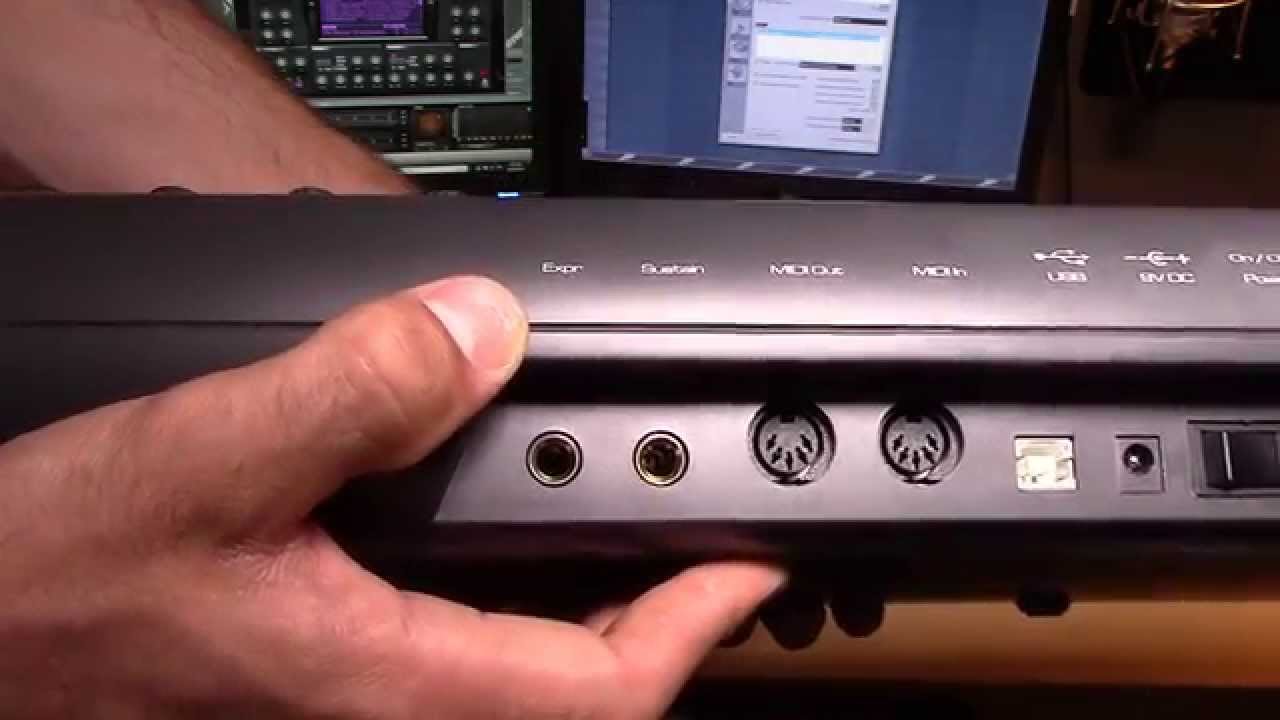
- Locate the MIDI Ports: Identify the MIDI OUT and MIDI IN ports on your MIDI keyboard. These ports allow communication between the keyboard and your computer.
- Choose the Connection Type: Depending on your MIDI keyboard and computer, you can use either a USB connection or MIDI cables. Many modern MIDI keyboards feature a USB port for direct connection to a computer, while older models may require MIDI cables.
- USB Connection: If your MIDI keyboard has a USB port, simply connect it to an available USB port on your computer using a USB cable. Your computer should automatically detect the MIDI keyboard as a new device.
- MIDI Cable Connection: For keyboards with MIDI ports but no USB connectivity, use MIDI cables to connect the MIDI OUT port on the keyboard to the MIDI IN port on a MIDI interface or audio interface connected to your computer.
- Install Drivers (if necessary): In some cases, you may need to install specific drivers for your MIDI keyboard to ensure proper communication with your computer. Check the manufacturer’s website for the latest drivers and installation instructions.
Once you have successfully connected your MIDI keyboard to your computer, you have completed the first crucial step in setting up your MIDI keyboard in Cubase. The physical connection establishes the link between your keyboard and the DAW, laying the foundation for integrating the expressive capabilities of the MIDI keyboard into your music production process.
Step 2: Configuring MIDI Devices in Cubase
Once your MIDI keyboard is physically connected to your computer, the next step is to configure MIDI devices within Cubase. This involves ensuring that Cubase recognizes and communicates with your MIDI keyboard as a valid input device. Follow these steps to configure MIDI devices in Cubase:
- Open Cubase: Launch Cubase on your computer to begin the configuration process.
- Access the Studio Setup: In Cubase, navigate to the “Studio” menu and select “Studio Setup” to access the configuration settings for MIDI devices.
- Select MIDI Port Setup: Within the Studio Setup window, locate and click on “MIDI Port Setup” to view the available MIDI input and output ports.
- Add MIDI Device: If your MIDI keyboard is not automatically detected, click on “Add Device” within the MIDI Port Setup window. Select your MIDI keyboard from the list of available devices to add it to Cubase’s recognized MIDI input devices.
- Verify Device Connection: After adding your MIDI keyboard as a device, ensure that it is set to “Visible” and “Active” within the MIDI Port Setup window. This confirms that Cubase recognizes and can communicate with your MIDI keyboard.
- Apply and Close: Once you have configured your MIDI devices, click “Apply” and then “Close” to save the settings and exit the Studio Setup window.
By following these steps, you have successfully configured MIDI devices in Cubase, allowing the DAW to recognize and communicate with your MIDI keyboard as a valid input device. This crucial configuration step sets the stage for integrating the expressive capabilities of your MIDI keyboard into your music production workflow within Cubase.
Step 3: Setting Up the MIDI Keyboard as a MIDI Input Device
After configuring MIDI devices in Cubase, the next step is to set up your MIDI keyboard as a MIDI input device within the DAW. This process enables Cubase to receive MIDI data from your keyboard, allowing you to record, play, and manipulate virtual instruments and MIDI tracks. Follow these steps to set up your MIDI keyboard as a MIDI input device in Cubase:
- Create or Open a Project: Launch a new project in Cubase or open an existing project where you want to use your MIDI keyboard as an input device.
- Access the MIDI Device Manager: In Cubase, navigate to the “Devices” menu and select “MIDI Device Manager” to access the MIDI device settings.
- Add MIDI Input: Within the MIDI Device Manager, click on “Install Device” to add a new MIDI input device to Cubase.
- Select MIDI Keyboard: From the list of available MIDI input devices, choose your MIDI keyboard and configure its settings, including the MIDI input port and channel assignments.
- Enable MIDI Input: Ensure that the MIDI input device corresponding to your keyboard is enabled for the project. This allows Cubase to receive MIDI data from your keyboard during recording and playback.
- Apply and Close: Once you have configured the MIDI input settings for your keyboard, click “Apply” and then “Close” to save the changes and exit the MIDI Device Manager.
By completing these steps, you have successfully set up your MIDI keyboard as a MIDI input device in Cubase, enabling seamless communication between your keyboard and the DAW. This pivotal setup process empowers you to harness the expressive capabilities of your MIDI keyboard to control virtual instruments, record MIDI performances, and enhance your music production workflow within Cubase.
Step 4: Testing the MIDI Keyboard in Cubase
After setting up your MIDI keyboard as a MIDI input device in Cubase, it’s essential to test its functionality within the DAW to ensure that it responds as expected and integrates seamlessly with your music production workflow. Follow these steps to test your MIDI keyboard in Cubase:
- Create a MIDI Track: In your Cubase project, create a new MIDI track where you can test the functionality of your MIDI keyboard.
- Select a Virtual Instrument: Load a virtual instrument or software synthesizer onto the MIDI track. This instrument will be controlled by your MIDI keyboard during the testing process.
- Record MIDI Input: Arm the MIDI track for recording and play your MIDI keyboard. Verify that Cubase receives MIDI input from your keyboard and that the virtual instrument responds to your playing in real-time.
- Playback and Manipulation: After recording MIDI input from your keyboard, play back the recorded performance and experiment with manipulating the MIDI data using your keyboard’s controls, such as mod wheels, pitch bend, and other assignable parameters.
- Real-Time Control: While the MIDI track is playing, use your MIDI keyboard to control the virtual instrument in real time, adjusting parameters and creating expressive musical performances directly within Cubase.
- Test Additional Functionality: Explore additional features and functionality of your MIDI keyboard, such as drum pads, faders, and knobs, to test their integration with Cubase and their impact on your music production process.
By following these steps and testing the functionality of your MIDI keyboard in Cubase, you can ensure that it seamlessly integrates with the DAW, allowing you to leverage its expressive capabilities to enhance your music production workflow. This testing process provides valuable insights into how your MIDI keyboard interacts with Cubase, empowering you to create, record, and manipulate music with precision and creativity.
Conclusion
Setting up a MIDI keyboard in Cubase is a pivotal process that empowers musicians and producers to integrate hardware instruments seamlessly into their digital music production environment. By following the steps outlined in this guide, you have successfully connected your MIDI keyboard to your computer, configured MIDI devices within Cubase, set up the keyboard as a MIDI input device, and tested its functionality within the DAW. This comprehensive approach ensures that your MIDI keyboard becomes an integral part of your music production workflow, allowing for expressive performances, real-time control of virtual instruments, and enhanced creativity.
With the physical connection established and the software configuration completed, your MIDI keyboard is now ready to unleash its full potential within Cubase. Whether you’re recording intricate melodies, controlling dynamic parameters, or crafting expressive performances, the seamless integration of your MIDI keyboard into Cubase opens up a world of musical possibilities. The ability to harness the tactile and expressive nature of a MIDI keyboard within a powerful DAW like Cubase empowers you to elevate your music production to new heights.
As you continue to explore the capabilities of your MIDI keyboard within Cubase, consider experimenting with different virtual instruments, recording techniques, and real-time performance controls. Embrace the versatility of your MIDI keyboard and leverage its features to infuse your music with emotion, nuance, and creativity. By integrating the expressive capabilities of your MIDI keyboard into Cubase, you can enrich your music production process and bring your musical ideas to life with unparalleled depth and authenticity.
In conclusion, the successful setup of a MIDI keyboard in Cubase is not merely a technical process; it represents a harmonious fusion of technology and musical expression. With your MIDI keyboard seamlessly integrated into Cubase, you are poised to embark on a journey of musical discovery, innovation, and artistic fulfillment within the boundless realm of digital music production.