Introduction
Repairing a cracked electric guitar body can be a daunting task, especially for those who are new to instrument maintenance. However, with the right materials, a methodical approach, and a bit of patience, it's possible to restore a cracked guitar body to its former glory. Whether the damage is due to an accidental drop, changes in temperature and humidity, or simply the result of aging, addressing the issue promptly can prevent further structural deterioration and preserve the instrument's integrity.
In this comprehensive guide, we will walk through the step-by-step process of repairing a cracked electric guitar body. From assessing the extent of the damage to applying wood glue and finishing the repair, each stage is crucial to achieving a seamless and durable restoration. By following these instructions and taking the time to execute each step with care, guitar enthusiasts can gain the confidence and skills needed to tackle this common issue.
Furthermore, learning how to repair a cracked electric guitar body not only saves money on professional repairs but also fosters a deeper connection with the instrument. As the repair progresses, individuals may develop a greater appreciation for the craftsmanship and materials that make up their guitar. This hands-on experience can enhance their overall understanding of the instrument and empower them to take a proactive approach to maintenance and upkeep.
With a positive attitude and a willingness to learn, even those with minimal experience in woodworking or instrument repair can successfully mend a cracked electric guitar body. So, let's dive in and explore the process of restoring a beloved instrument to its optimal condition.
Assessing the Damage
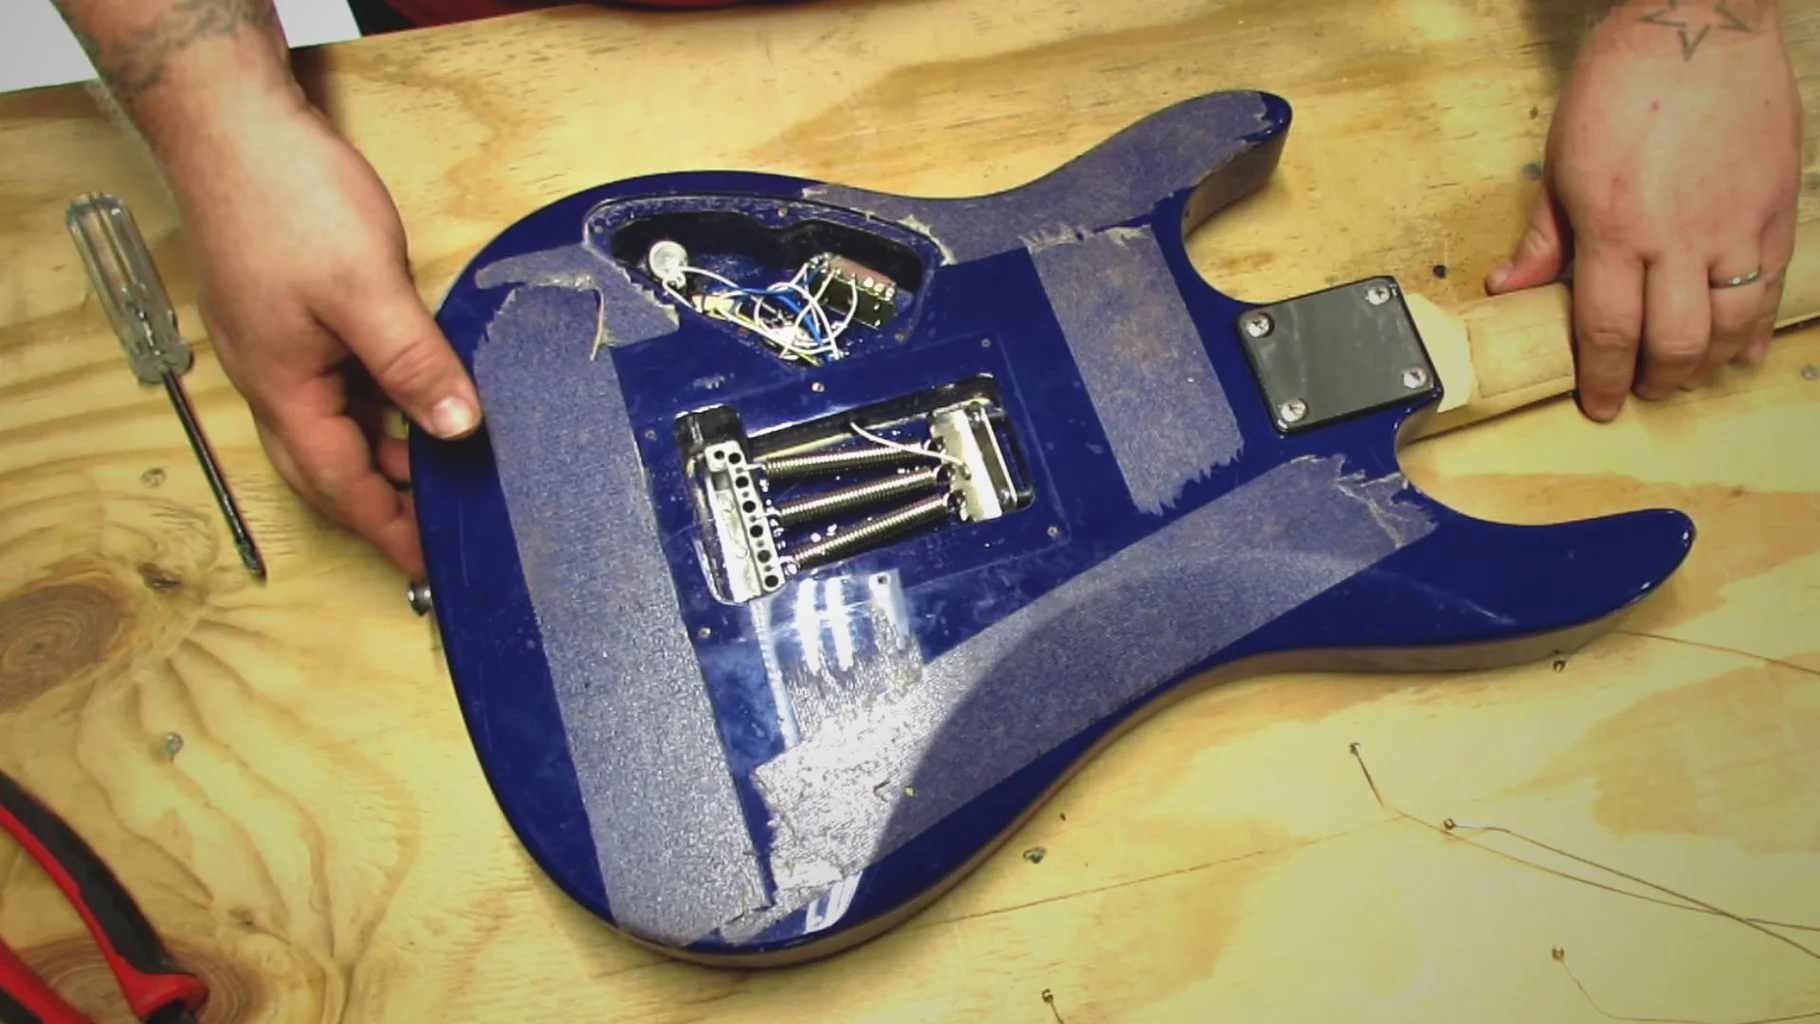
Before embarking on the repair journey, it’s crucial to thoroughly assess the extent of the damage to the electric guitar body. This initial step sets the foundation for the subsequent repair process, ensuring that the appropriate measures are taken to address the issue effectively.
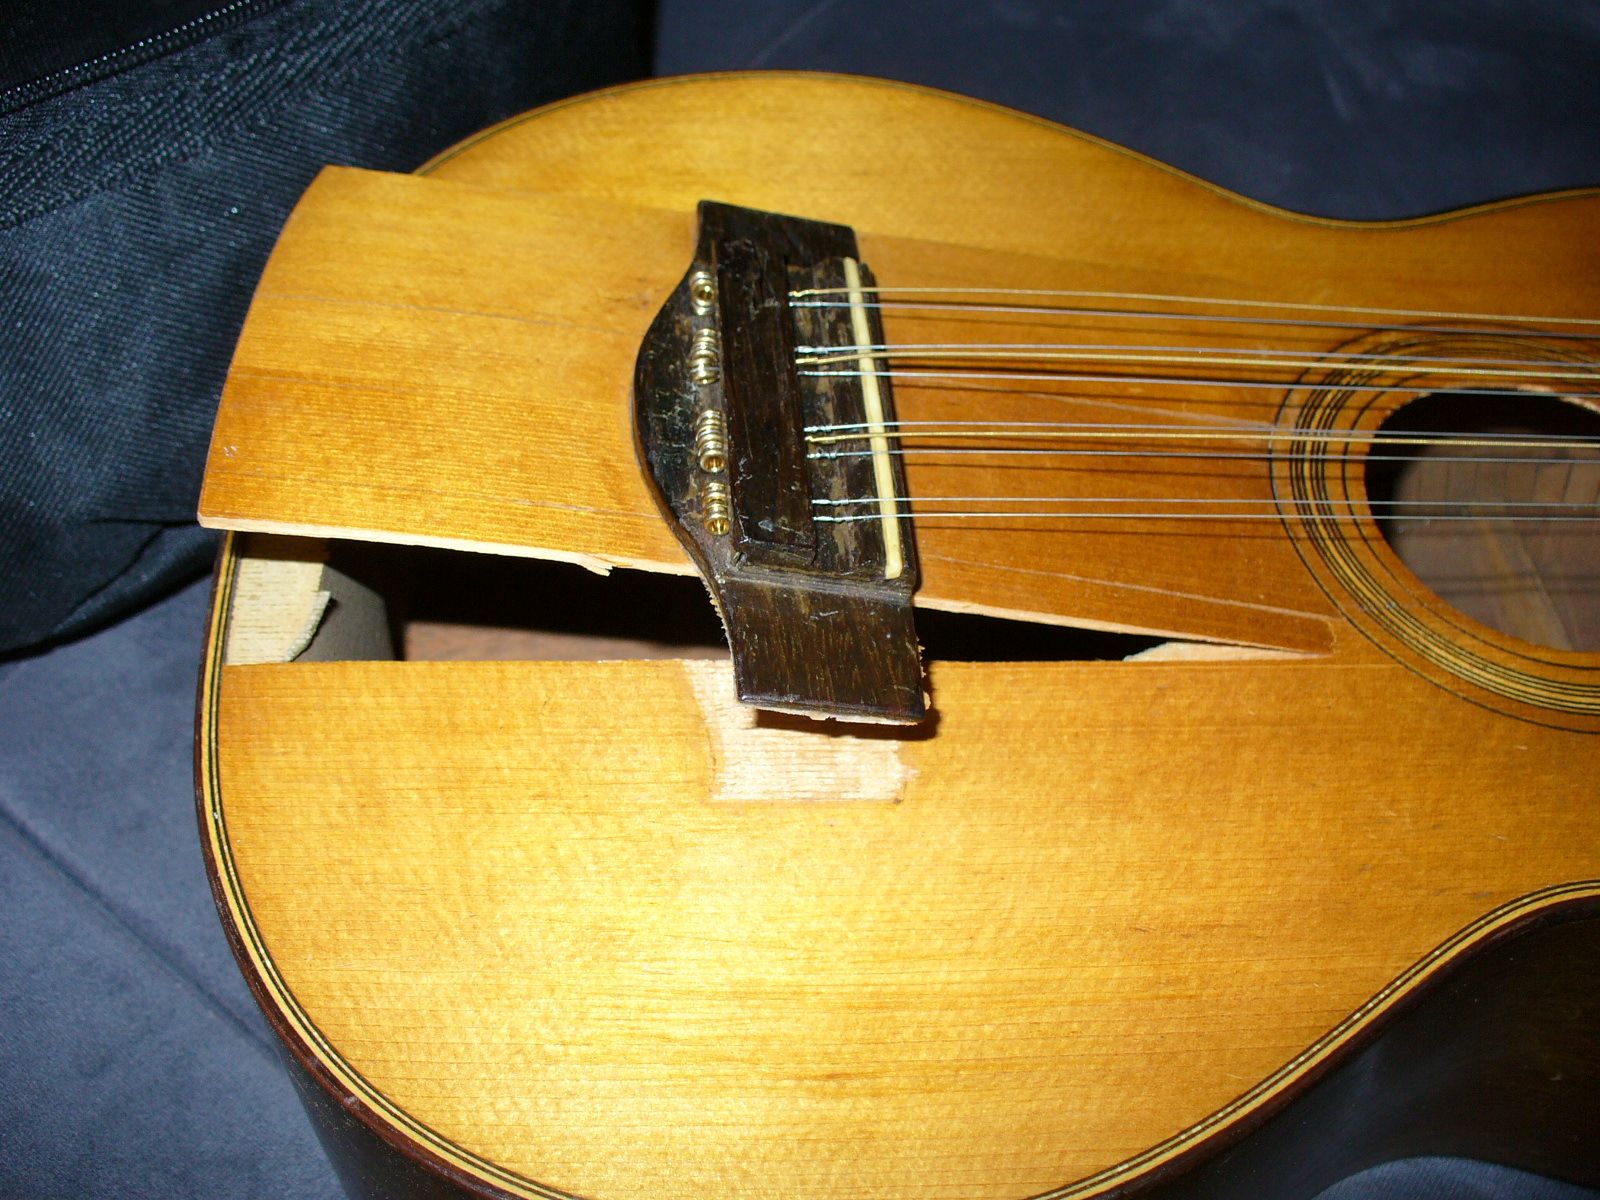
Begin by carefully examining the cracked area. Take note of the length, depth, and location of the crack, as well as any associated splintering or separation of the wood fibers. It’s essential to determine whether the crack is superficial or if it extends through the entire thickness of the body. Superficial cracks may only require cosmetic repair, while deeper cracks will necessitate more extensive restoration.
Next, evaluate the stability of the cracked area. Gently press around the crack to check for any movement or flexing of the wood. A stable crack indicates that the surrounding wood is still structurally sound, making the repair process more straightforward. However, if the cracked area feels loose or unstable, additional measures may be needed to reinforce the wood and ensure a durable repair.
Consider the impact of the crack on the guitar’s playability and tone. Cracks near the guitar’s neck joint or bridge can affect its structural integrity and resonance, potentially compromising the instrument’s performance. Additionally, cracks that intersect with electronic cavities or hardware mounting points may pose challenges during the repair process.
Finally, take into account the cosmetic implications of the crack. While some guitarists may prioritize functionality over aesthetics, others may place equal importance on preserving the instrument’s visual appeal. Understanding the aesthetic impact of the crack will guide the approach to the repair, whether it involves seamless blending of the repair or embracing visible traces of the instrument’s history.
By meticulously assessing the damage, guitar enthusiasts can make informed decisions regarding the appropriate repair techniques and materials. This proactive approach sets the stage for a successful restoration, laying the groundwork for the subsequent steps in the repair process.
Gathering the Necessary Materials
Before diving into the repair process, it’s essential to gather the required materials and tools to ensure a smooth and effective restoration of the cracked electric guitar body. Having the right supplies at hand streamlines the repair process and minimizes interruptions, allowing for focused attention on the task at hand.
- Wood Glue: Opt for a high-quality wood glue specifically designed for bonding wood surfaces. Look for a waterproof and strong-bonding adhesive to ensure the longevity of the repair.
- Clamps: Select sturdy clamps capable of exerting sufficient pressure to close the crack tightly during the gluing process. Spring clamps, bar clamps, or C-clamps are commonly used for this purpose.
- Sandpaper: Prepare a range of sandpaper grits, including coarse, medium, and fine grades, to facilitate the sanding and finishing stages of the repair.
- Masking Tape: Utilize masking tape to protect the surrounding areas of the guitar body during the repair, preventing accidental damage to the finish.
- Solvent or Naphtha: Have a solvent or naphtha on hand to clean the crack and remove any dirt, debris, or residue that may hinder the bonding of the wood glue.
- Scrap Wood and Wax Paper: Prepare scrap wood and wax paper to create a barrier between the clamps and the guitar body, preventing the adhesive from sticking to the clamps.
- Gloves and Safety Gear: Prioritize safety by wearing protective gloves and, if necessary, safety goggles or a mask, especially when handling solvents or performing sanding tasks.
Additionally, ensure that the work area is well-ventilated and adequately lit to facilitate precision and attention to detail during the repair process. Having a clean and organized workspace minimizes the risk of misplacing tools and materials, enabling a more efficient and focused approach to the repair.
By gathering the necessary materials and preparing the work environment, individuals can embark on the repair process with confidence, knowing that they have the essential components to execute each step effectively. This proactive preparation sets the stage for a successful and rewarding restoration of the cracked electric guitar body.
Preparing the Surface
Before applying the wood glue, it’s crucial to prepare the surface of the cracked electric guitar body to ensure optimal adhesion and a seamless repair. This preparatory stage sets the foundation for a strong and durable bond between the wood fibers, enhancing the overall effectiveness of the repair.
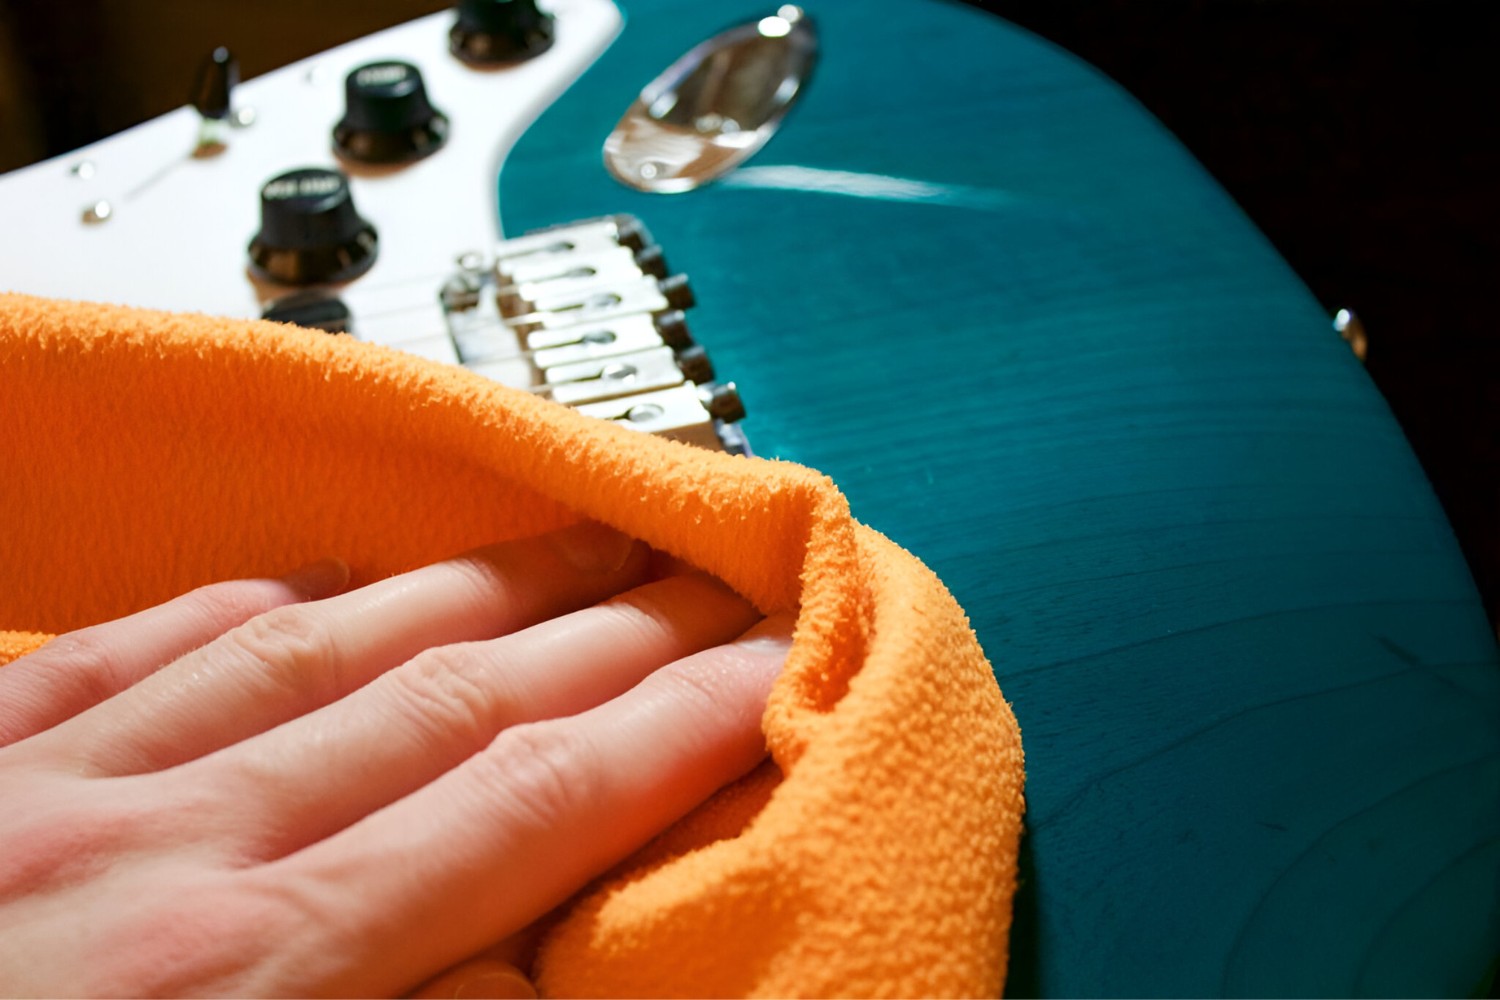
Begin by cleaning the cracked area using a solvent or naphtha to remove any dirt, debris, or residue that may hinder the bonding of the wood glue. Gently wipe the crack and its immediate surroundings, ensuring that the surface is free from contaminants that could compromise the integrity of the repair.
Next, carefully align the cracked edges to ensure a precise fit before applying the wood glue. If the crack has resulted in misaligned or uneven surfaces, consider using a small chisel or razor blade to create a clean and uniform joint along the crack. This step is crucial for achieving a seamless bond and minimizing visible traces of the repair.
Protect the surrounding areas of the guitar body using masking tape to prevent accidental damage to the finish during the repair process. By creating a barrier around the cracked area, individuals can focus on the repair without the concern of inadvertently marring the guitar’s aesthetic appeal.
Once the cracked area is clean, aligned, and protected, it’s essential to ensure that the wood surfaces are free from excess moisture. Use a dry cloth to remove any residual solvent or moisture, as the presence of water can interfere with the adhesive properties of the wood glue, compromising the effectiveness of the repair.
By meticulously preparing the surface of the cracked electric guitar body, individuals set the stage for a successful and durable repair. Attention to detail during this crucial stage lays the groundwork for the subsequent application of wood glue and clamping, ensuring a seamless and structurally sound restoration of the instrument.
Applying the Wood Glue
Once the surface of the cracked electric guitar body is meticulously prepared, the next critical step in the repair process involves the application of wood glue. Choosing the right type of wood glue and applying it with precision are essential for achieving a strong and enduring bond that restores the structural integrity of the instrument.
Begin by selecting a high-quality wood glue designed for bonding wood surfaces. Opt for a waterproof adhesive with strong bonding properties to ensure the longevity and resilience of the repair. Apply a small amount of the wood glue along the cracked area, ensuring even coverage on both sides of the crack. Use a small brush or a disposable tool to spread the glue evenly, working it into the crack to facilitate optimal adhesion.
When applying the wood glue, it’s crucial to avoid excess adhesive that could seep out and create a messy or uneven finish. Exercise caution to prevent the glue from coming into contact with areas of the guitar body where it is not needed. A precise application of the wood glue minimizes the need for extensive cleanup during the subsequent stages of the repair.
Once the wood glue is applied, carefully align the cracked edges, ensuring a snug and uniform fit. Gently press the cracked area together to allow the adhesive to make full contact with the wood fibers. This step is crucial for creating a seamless bond and minimizing visible traces of the repair once the restoration is complete.
After applying the wood glue and aligning the cracked edges, promptly remove any excess adhesive using a clean, dry cloth. Thoroughly inspect the cracked area to ensure that the adhesive is evenly distributed and that the surfaces are tightly joined. This meticulous approach sets the stage for the subsequent clamping process, which is essential for achieving a strong and durable repair.
By applying the wood glue with precision and care, individuals can lay the groundwork for a successful restoration of the cracked electric guitar body. This critical step paves the way for the subsequent clamping and drying process, setting the stage for a structurally sound and visually seamless repair.
Clamping the Cracked Area
Following the precise application of wood glue, the next crucial step in repairing a cracked electric guitar body involves clamping the cracked area to ensure a strong and seamless bond between the wood fibers. Proper clamping exerts uniform pressure, facilitating the optimal adhesion of the wood glue and promoting a durable and structurally sound repair.
Begin by selecting appropriate clamps capable of exerting sufficient pressure to close the crack tightly. Depending on the size and location of the crack, choose between spring clamps, bar clamps, or C-clamps to effectively secure the cracked area. Position the clamps strategically to evenly distribute pressure along the length of the crack, ensuring a uniform bond.
Before applying the clamps, place a protective barrier between the clamps and the guitar body to prevent the adhesive from sticking to the clamps. Utilize scrap wood and wax paper to create a buffer that shields the guitar’s finish and facilitates the removal of the clamps once the wood glue has dried. This precautionary measure minimizes the risk of inadvertently damaging the guitar’s exterior during the clamping process.
Gently tighten the clamps to exert pressure along the cracked area, gradually closing the gap and promoting intimate contact between the wood surfaces. Exercise caution to avoid over-tightening the clamps, as excessive pressure may force an excess of glue out of the joint or cause deformation of the guitar body. Strive for a balance between sufficient pressure and the preservation of the guitar’s structural integrity.
Once the clamps are in place and the cracked area is securely fastened, carefully inspect the alignment of the crack to ensure that the wood surfaces are snugly joined. Confirm that the clamps are positioned to maintain a uniform and tight bond, minimizing the visibility of the repair once it is complete. This attention to detail during the clamping process is essential for achieving a seamless and visually appealing restoration.
By methodically clamping the cracked area with precision and care, individuals set the stage for a successful and durable repair of the electric guitar body. This critical step, when executed with attention to detail, ensures that the wood glue forms a strong and enduring bond, laying the groundwork for the subsequent sanding and finishing stages of the restoration process.
Sanding and Finishing the Repair
After the wood glue has dried and the cracked area has been securely clamped, the final stages of restoring a cracked electric guitar body involve sanding and finishing the repair. This critical phase focuses on refining the surface, seamlessly blending the repair with the surrounding wood, and enhancing the overall aesthetic appeal of the instrument.
Begin by removing the clamps and inspecting the cracked area. Use a sharp chisel or razor blade to carefully remove any excess dried glue that may have seeped out during the clamping process. Exercise caution to avoid damaging the surrounding wood, ensuring that the cleaned area is smooth and free from irregularities.
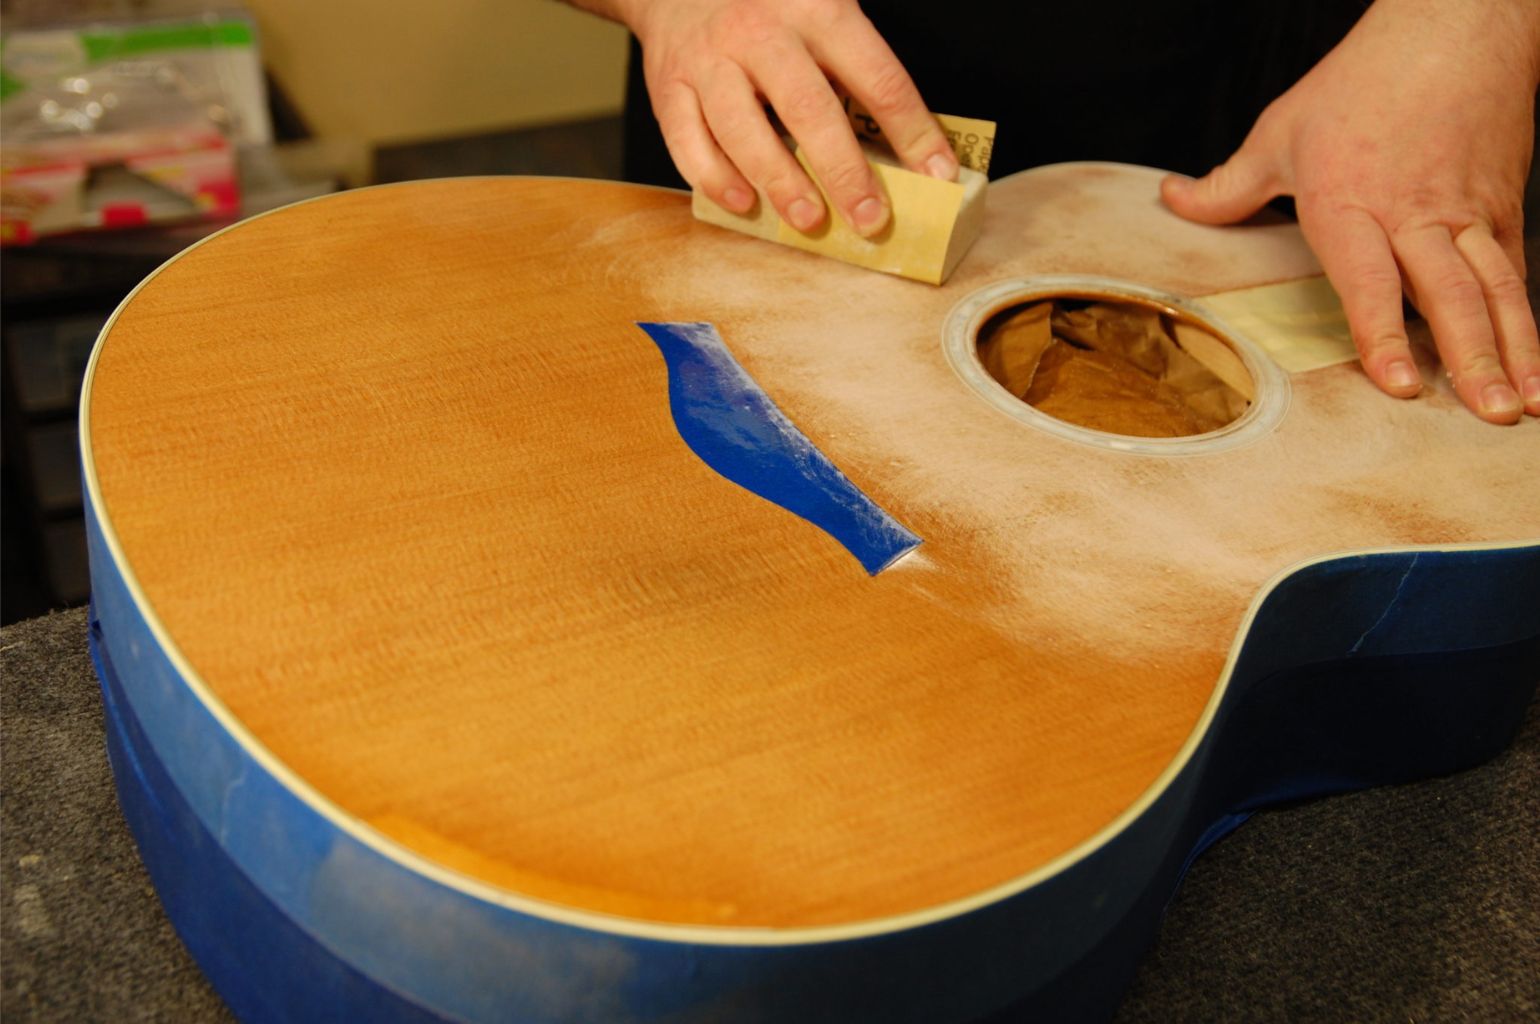
Next, embark on the sanding process, gradually smoothing the repaired area to achieve a uniform and seamless finish. Start with coarse-grit sandpaper to level the repaired surface, gradually progressing to finer grits to refine the texture and remove any remaining imperfections. This meticulous approach ensures that the repaired area blends harmoniously with the rest of the guitar body, creating a visually cohesive result.
While sanding, pay close attention to the contours and curves of the guitar body, striving to maintain the original shape and profile of the instrument. Carefully sand the repaired area in line with the wood grain, employing gentle and consistent strokes to achieve a smooth and uniform surface. This deliberate technique contributes to the overall aesthetic continuity of the instrument.
Following the sanding process, thoroughly clean the repaired area to remove any dust or debris. Inspect the surface under adequate lighting to ensure that the repair seamlessly integrates with the surrounding wood, achieving a visually imperceptible transition. Any remaining blemishes or inconsistencies can be addressed through additional sanding and meticulous attention to detail.
Once the repaired area is smooth and visually seamless, proceed to the finishing stage. Apply a suitable wood finish, such as lacquer or polyurethane, to protect the repaired area and restore the luster and sheen of the guitar body. Select a finish that matches the existing finish of the instrument, ensuring a harmonious and consistent appearance.
By meticulously sanding and finishing the repair, individuals can elevate the aesthetic appeal of the electric guitar while preserving the structural integrity of the instrument. This final phase of the restoration process culminates in a visually seamless and durable repair, allowing guitar enthusiasts to enjoy their beloved instrument with confidence and pride.
Final Thoughts
Repairing a cracked electric guitar body is not merely a restoration of form and function; it is a testament to the care and dedication that individuals invest in their musical instruments. As the repair process concludes, it’s essential to reflect on the journey and appreciate the newfound skills and connection forged with the instrument.
Throughout the repair process, individuals have gained valuable insights into the craftsmanship and materials that constitute their guitar. This hands-on experience fosters a deeper understanding of the instrument’s construction and instills a sense of empowerment, enabling guitar enthusiasts to take an active role in maintaining and preserving their musical companion.
Moreover, the successful repair of a cracked electric guitar body signifies a triumph over adversity. What was once a source of concern and dismay has been transformed into a testament to resilience and resourcefulness. The repaired instrument serves as a reminder of the dedication and commitment required to overcome challenges and restore beauty and functionality.
As the final touches of sanding and finishing are completed, the repaired guitar body embodies a story of renewal and transformation. Visible traces of the repair serve as a testament to the instrument’s history, showcasing the resilience and enduring spirit of the guitar. Each imperfection and blemish tells a tale of perseverance and restoration, adding character and depth to the instrument’s identity.
Ultimately, the repair of a cracked electric guitar body is a celebration of craftsmanship, resilience, and the enduring bond between a musician and their instrument. It is a testament to the dedication and passion that individuals invest in their musical pursuits, fostering a deeper connection and appreciation for the artistry and artisanship of the guitar.
As the repaired electric guitar is returned to its rightful place, ready to create melodies and evoke emotions once more, it stands as a testament to the transformative power of care and dedication. The repaired instrument embodies not only the beauty of restoration but also the enduring spirit of creativity and resilience.
May the repaired electric guitar body serve as a reminder of the unwavering commitment to craftsmanship, the enduring spirit of music, and the profound connection between a musician and their instrument.