Introduction
So, you've got a MIDI keyboard and you're itching to capture your musical brilliance in digital form. Whether you're a seasoned musician or just starting out, recording from a MIDI keyboard can open up a world of creative possibilities. With the right setup and software, you can easily transform your musical ideas into polished tracks that sound like they were produced in a professional studio.
In this guide, we'll walk you through the process of recording from a MIDI keyboard, from setting up your equipment to fine-tuning your recordings. By the end of this journey, you'll be well-equipped to unleash your musical genius and share your creations with the world.
Recording from a MIDI keyboard offers a level of flexibility and control that traditional recording methods can't match. With MIDI, you can easily edit individual notes, change instrument sounds on the fly, and quantize your performance to ensure perfect timing. Whether you're a solo artist looking to create full arrangements or a producer seeking to add live instrumentation to your tracks, a MIDI keyboard can be a powerful tool in your musical arsenal.
Throughout this guide, we'll cover everything you need to know to get started with recording from your MIDI keyboard. From choosing the right software to connecting your keyboard to your computer and capturing your performance, we'll provide step-by-step instructions and expert tips to help you along the way.
So, grab your MIDI keyboard, fire up your computer, and let's dive into the exciting world of recording from a MIDI keyboard. Whether you're creating lush orchestral arrangements, laying down funky basslines, or crafting intricate electronic soundscapes, the possibilities are endless. Let's embark on this musical adventure together!
Setting Up Your MIDI Keyboard
Before you can start recording from your MIDI keyboard, it's essential to ensure that your setup is optimized for seamless integration with your computer and recording software. Here are the key steps to get your MIDI keyboard up and running:
- Positioning Your MIDI Keyboard: Find a comfortable and ergonomic position for your MIDI keyboard. Ensure that it is within reach of your computer and any necessary audio interfaces or cables.
- Powering Up Your MIDI Keyboard: Connect your MIDI keyboard to a power source, if required, and power it on. Some MIDI keyboards can be powered via USB, while others may require an external power supply.
- Connecting MIDI Cables: If your MIDI keyboard features traditional MIDI connectors, you may need to connect MIDI cables from the keyboard to a MIDI interface or audio interface connected to your computer.
- USB Connection: Many modern MIDI keyboards can be connected directly to your computer via USB. Simply connect the USB cable from your keyboard to an available USB port on your computer.
- Installing Drivers: If your MIDI keyboard requires specific drivers to communicate with your computer, ensure that these are installed and up to date. Check the manufacturer's website for the latest driver downloads.
Once your MIDI keyboard is set up and connected to your computer, you're ready to move on to the next crucial step: choosing the right software for recording and producing your music. The proper software will allow you to harness the full potential of your MIDI keyboard and unleash your creativity without limitations.
Choosing the Right Software
When it comes to recording from a MIDI keyboard, the choice of software is paramount in shaping your creative process and the quality of your recordings. Here are some key considerations to keep in mind when selecting the right software for your musical endeavors:
- DAW (Digital Audio Workstation): Your DAW serves as the central hub for recording, editing, and producing your music. Look for a DAW that offers robust MIDI capabilities, a user-friendly interface, and a diverse selection of virtual instruments and effects. Popular options include Ableton Live, Logic Pro, FL Studio, and Pro Tools.
- Virtual Instruments and Sound Libraries: Consider the availability of high-quality virtual instruments and expansive sound libraries within the software. These resources will allow you to explore a wide range of realistic instrument sounds and electronic textures to complement your MIDI performances.
- MIDI Editing and Manipulation: Ensure that the software provides comprehensive MIDI editing tools, including quantization, note velocity adjustments, and the ability to easily rearrange and manipulate MIDI data. This flexibility is essential for refining your performances and achieving the desired musical expression.
- Compatibility and Integration: Check for compatibility with your MIDI keyboard and any additional hardware or controllers you plan to use. Seamless integration between your MIDI keyboard and the software will streamline your workflow and enhance the overall creative experience.
- Workflow and User Experience: Consider the workflow and user experience offered by the software. Look for intuitive features, customizable interfaces, and efficient navigation to ensure that the software empowers your creativity rather than hindering it.
Ultimately, the right software will empower you to translate your musical ideas into polished productions with ease. Take the time to explore different software options, experiment with demo versions, and consider the specific requirements of your musical style and workflow. By choosing the software that resonates with your creative vision, you’ll set the stage for seamless integration with your MIDI keyboard and a fulfilling recording experience.
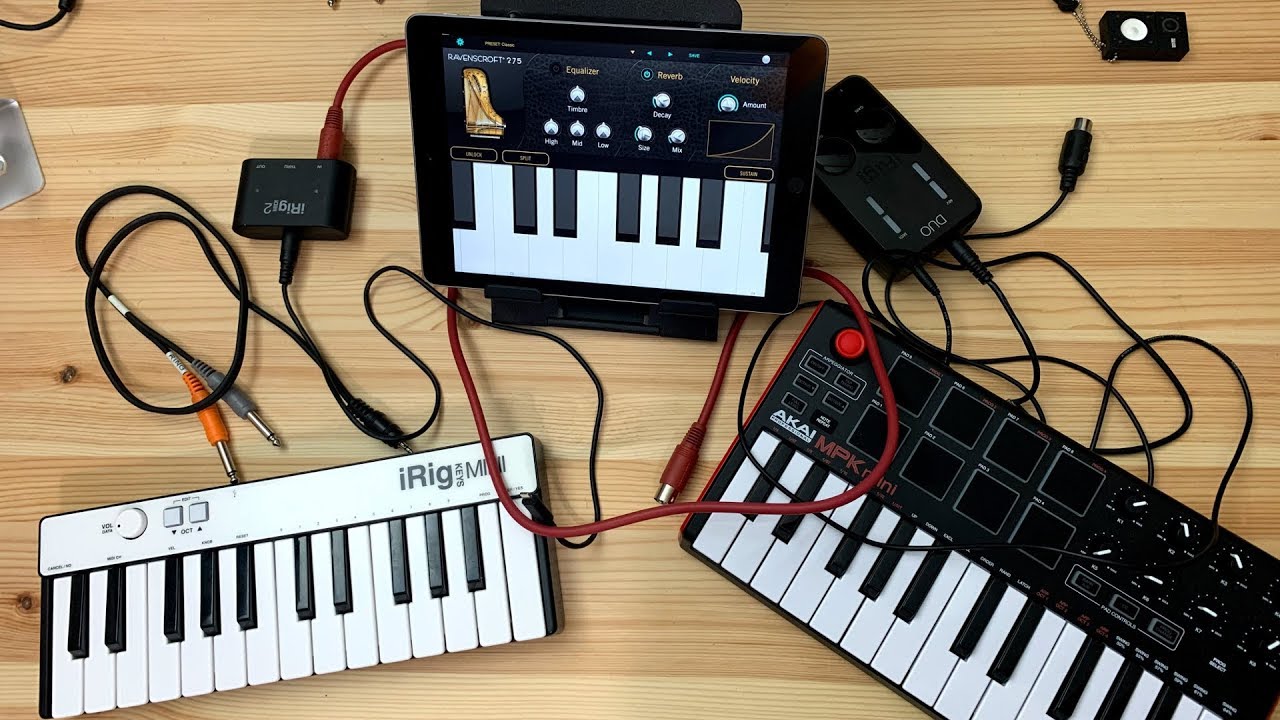
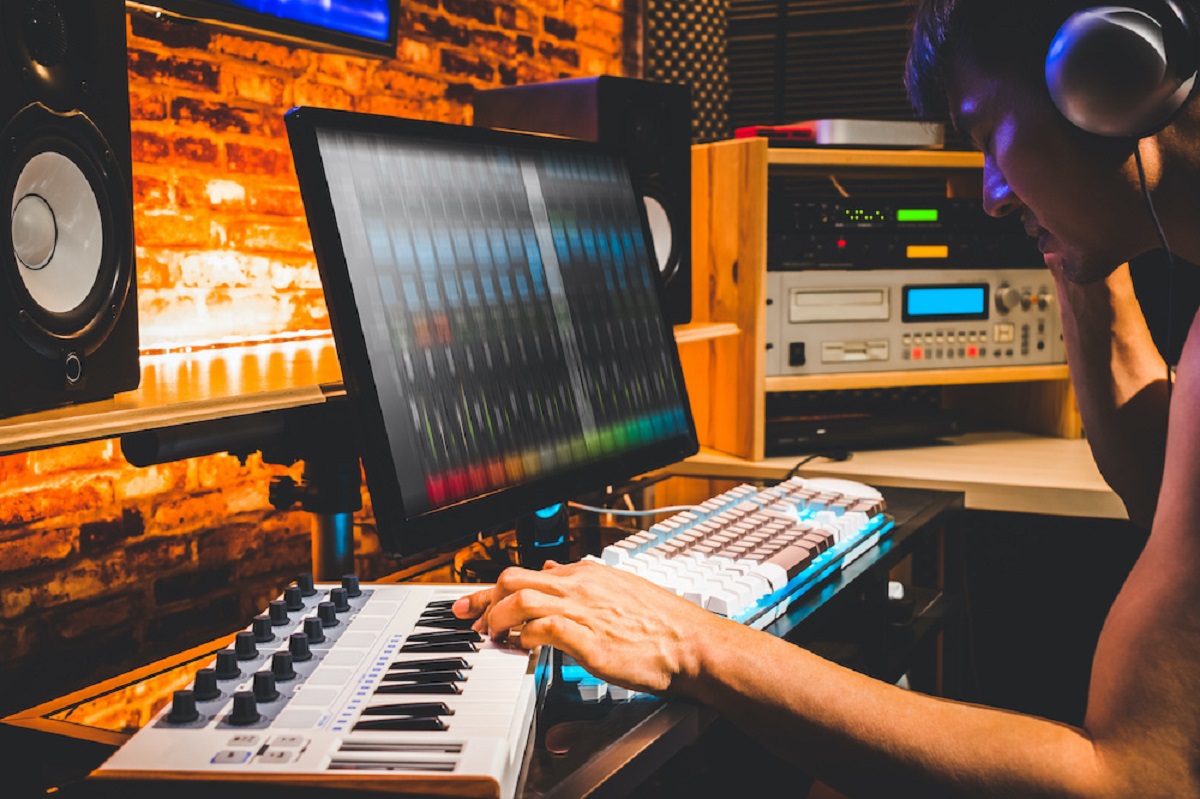
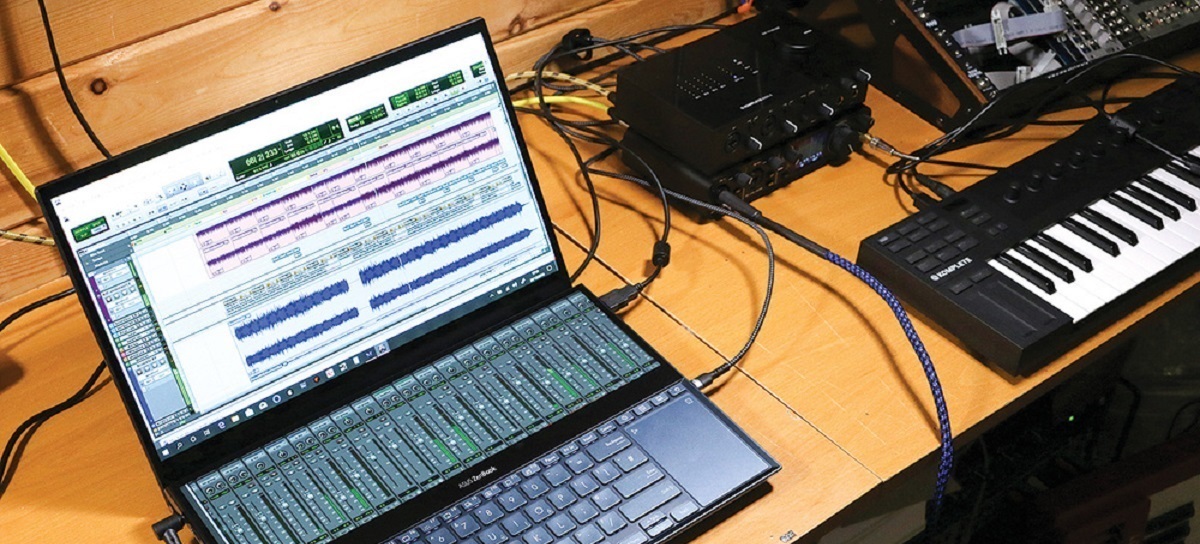
Connecting Your MIDI Keyboard to Your Computer
Once you’ve set up your MIDI keyboard and chosen the right software, the next step is to establish a solid connection between your keyboard and your computer. This connection is essential for transmitting MIDI data from your keyboard to the recording software, allowing you to capture and manipulate your musical performances. Here’s how to connect your MIDI keyboard to your computer:
- USB Connection: If your MIDI keyboard features a USB port, connect it directly to an available USB port on your computer. This connection will transmit MIDI data and, in some cases, provide power to the keyboard, eliminating the need for an external power supply.
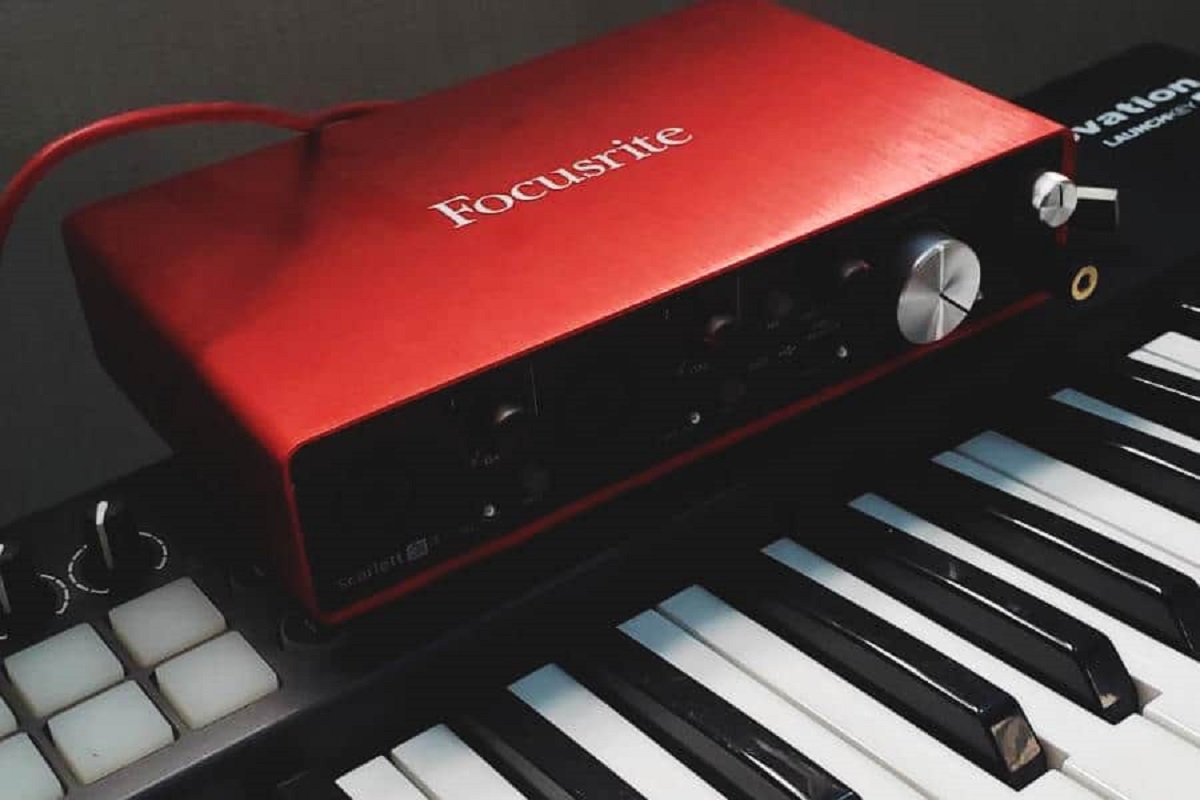
- MIDI Cables and Audio Interface: If your MIDI keyboard utilizes traditional MIDI connectors, you’ll need to connect it to a MIDI interface or audio interface connected to your computer. Use standard MIDI cables to establish the connection, ensuring that the MIDI input on the interface corresponds to the MIDI output on your keyboard.
- Driver Installation: In some cases, your computer may require specific drivers to recognize and communicate with your MIDI keyboard. If this is the case, follow the manufacturer’s instructions to install the necessary drivers, ensuring seamless integration between your keyboard and your recording software.
- Configuring MIDI Settings: Once the physical connection is established, configure the MIDI settings within your recording software to recognize and communicate with your MIDI keyboard. This may involve selecting the MIDI input and output ports and ensuring that the software is receiving MIDI data from your keyboard.
By establishing a reliable connection between your MIDI keyboard and your computer, you’ll be ready to harness the full creative potential of your instrument within your chosen recording software. This seamless integration sets the stage for capturing your musical performances and exploring the vast sonic possibilities offered by your MIDI keyboard and virtual instruments.
Configuring Your Software
With your MIDI keyboard connected to your computer, it’s time to configure your recording software to recognize and utilize the MIDI input from your keyboard effectively. Proper configuration ensures that your software accurately captures and responds to your MIDI performances, setting the stage for a seamless recording experience. Here’s how to configure your software for optimal MIDI integration:
- Setting Up MIDI Input: Within your recording software, navigate to the MIDI settings or preferences and configure the MIDI input to recognize your connected MIDI keyboard. Select the appropriate MIDI input port that corresponds to your keyboard to establish communication between the two devices.
- Assigning MIDI Channels: If your MIDI keyboard supports multiple MIDI channels, ensure that the software is configured to receive MIDI data on the correct channel. This step is crucial for recording and playing back individual tracks and instrument parts within your software.
- Configuring MIDI Mapping: Many recording software platforms allow for MIDI mapping, which enables you to assign specific MIDI controls, such as knobs, faders, and buttons on your keyboard, to various parameters within the software. Take advantage of MIDI mapping to streamline your workflow and access essential functions directly from your keyboard.
- Testing MIDI Input: Verify that your MIDI keyboard is successfully transmitting data to the software by playing a few notes or triggering MIDI commands. Monitor the input indicators within the software to ensure that MIDI data is being received accurately and in real time.
- Exploring MIDI Capabilities: Familiarize yourself with the MIDI capabilities of your recording software, including features for quantization, MIDI editing, and real-time MIDI recording. Understanding these capabilities will empower you to make the most of your MIDI keyboard during the recording and production process.
By effectively configuring your software to accommodate your MIDI keyboard, you’ll establish a direct and responsive connection between your musical performances and the digital realm. This seamless integration lays the foundation for capturing your creativity with precision and unleashing the full expressive potential of your MIDI keyboard within your chosen recording environment.
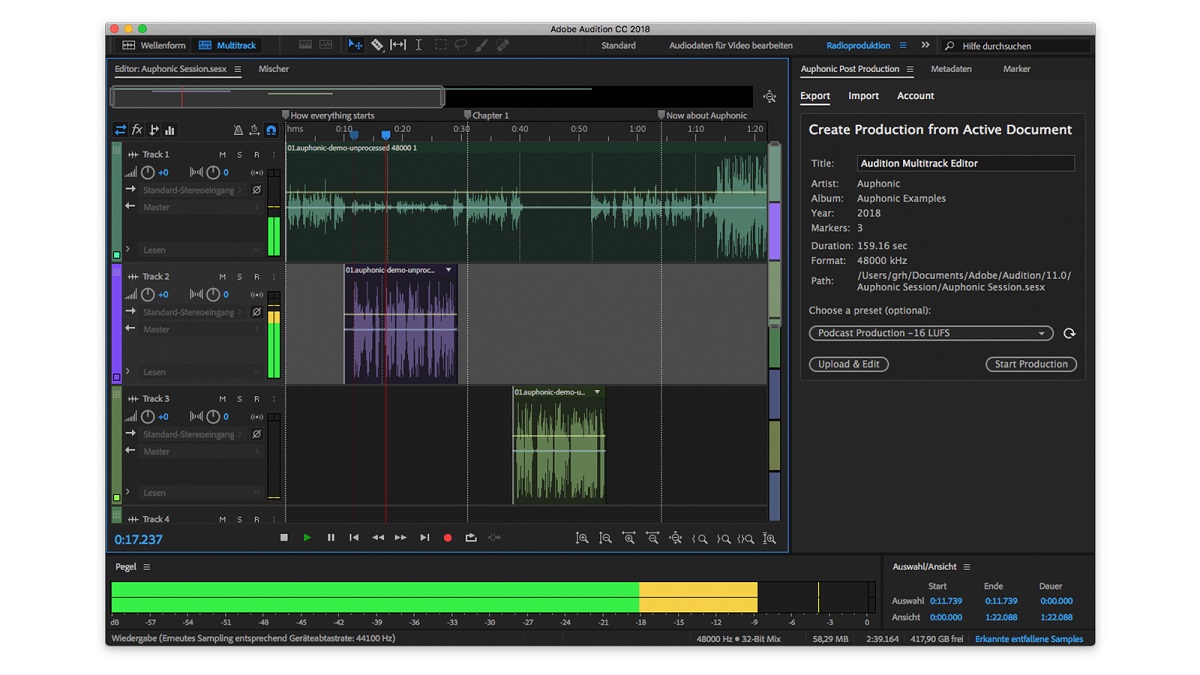
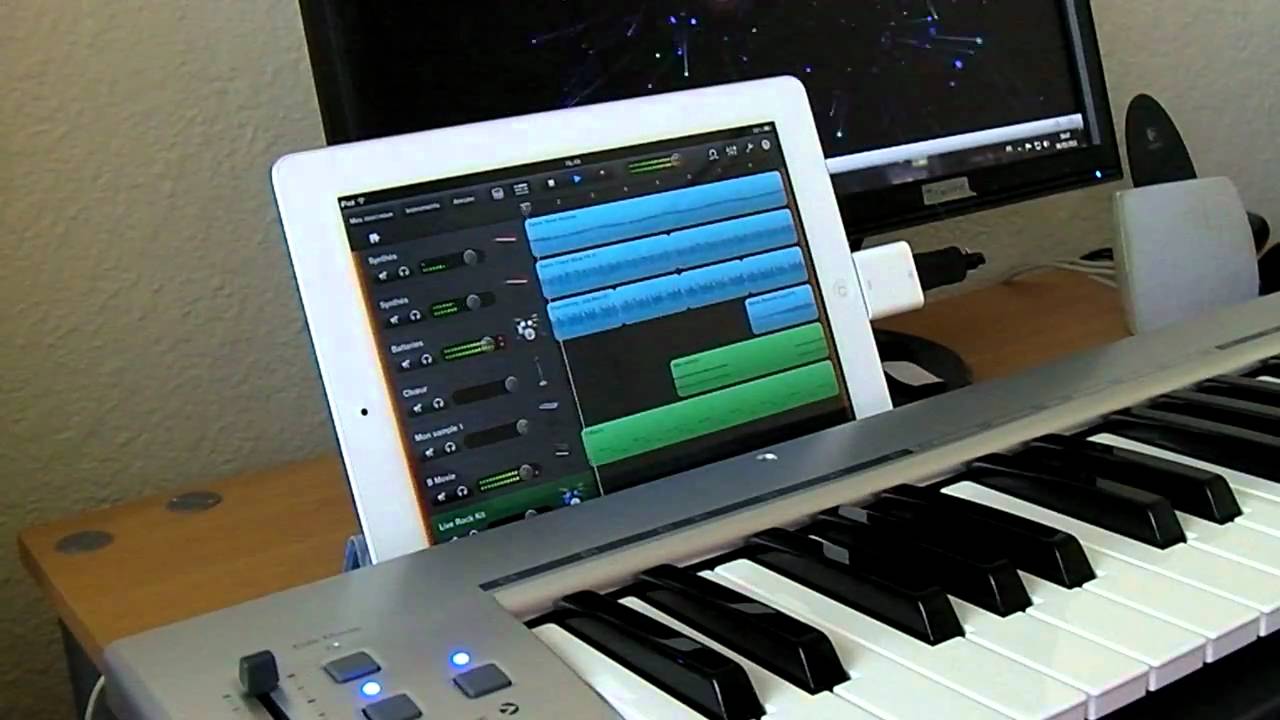
Recording Your MIDI Performance
Once your MIDI keyboard and software are properly configured, you’re ready to embark on the exhilarating process of capturing your musical performances in digital form. Recording from a MIDI keyboard offers unparalleled flexibility and creative control, allowing you to shape and refine your musical ideas with precision. Here’s a step-by-step guide to recording your MIDI performance:
- Preparing Your Workspace: Set the stage for your recording session by ensuring a comfortable and distraction-free environment. Adjust your keyboard, computer, and any additional controllers or equipment to facilitate an effortless and inspiring performance.
- Selecting Instrument Sounds: Explore the diverse array of virtual instrument sounds available within your recording software. Choose the instrument or ensemble that best complements your musical composition and sets the tone for your performance.
- Setting Recording Parameters: Configure the recording parameters within your software, including the desired tempo, time signature, and recording mode (e.g., real-time MIDI recording or step sequencing). Ensure that your software is ready to capture your performance according to your preferences.
- Initiating the Recording: Press the record button within your software to commence the recording process. As you play your MIDI keyboard, your performance will be captured in real time, preserving the nuances of your playing and musical expression.
- Embracing Musical Freedom: Embrace the freedom that MIDI recording offers by experimenting with different musical ideas, improvising, and exploring the sonic capabilities of your virtual instruments. MIDI recording allows for non-destructive creativity, empowering you to refine and revise your performance at any time.
- Overdubbing and Layering: Leverage the power of MIDI recording to overdub additional instrument parts, layer harmonies, and build intricate arrangements. With MIDI, you can easily layer multiple performances to create rich, dynamic compositions.
By following these steps, you’ll capture your musical performances with precision and artistic freedom, leveraging the full potential of your MIDI keyboard and recording software. The recording process becomes an immersive and rewarding experience, allowing you to translate your musical vision into tangible digital creations with unparalleled flexibility and control.
Editing and Fine-Tuning Your Recording
Once you’ve recorded your MIDI performance, the next phase involves refining and enhancing your musical creations through meticulous editing and fine-tuning. This stage empowers you to sculpt your recordings, correct imperfections, and elevate the overall quality of your musical productions. Here’s a comprehensive guide to editing and fine-tuning your MIDI recordings:
- Quantization and Timing Adjustment: Utilize the quantization feature within your recording software to align the timing of individual notes and ensure rhythmic precision. This process enhances the overall coherence and groove of your performance, refining the musical timing without sacrificing the organic feel of your playing.
- Velocity and Expression Editing: Adjust the velocity levels of individual notes to modulate the dynamics and expressive nuances of your performance. Fine-tune the velocity to accentuate musical phrases, create dynamic contrasts, and infuse your recordings with emotive depth.
- MIDI Note Editing: Dive into the MIDI editor to refine the pitch, duration, and articulation of individual notes. This level of detail allows for precise sculpting of your musical phrases, ensuring that each note resonates with clarity and intention.
- Layering and Arrangement Refinement: Experiment with layering additional instrument parts, harmonies, and textures to enrich your compositions. Refine the arrangement by adjusting the placement of musical elements, creating seamless transitions, and crafting a compelling sonic narrative.
- Exploring Sound Design: Delve into sound design capabilities within your recording software to sculpt and manipulate the timbral characteristics of your virtual instruments. Tailor the sonic palette to evoke the desired mood and atmosphere, infusing your recordings with sonic identity and depth.
- Automation and Dynamic Control: Harness automation tools to modulate parameters such as volume, panning, and effects over time. This dynamic control adds movement and dimension to your recordings, enhancing the overall sonic impact and emotional resonance.
By engaging in meticulous editing and fine-tuning, you’ll transform your MIDI recordings into polished, evocative musical expressions. This stage of the creative process empowers you to refine every aspect of your performance, sculpting a sonic landscape that captivates and resonates with listeners. Embrace the editing process as an opportunity to elevate your musical vision and breathe life into your compositions with precision and artistry.
Conclusion
Congratulations on embarking on the journey of recording from a MIDI keyboard! Throughout this guide, we’ve explored the essential steps and considerations for capturing your musical performances with precision and creativity. By setting up your MIDI keyboard, choosing the right software, establishing a seamless connection to your computer, and refining your recordings, you’ve unlocked a world of possibilities for translating your musical ideas into captivating digital productions.
Recording from a MIDI keyboard offers an unparalleled level of flexibility, control, and expressive freedom. Whether you’re a seasoned musician or an aspiring producer, the ability to harness the sonic capabilities of your MIDI keyboard and virtual instruments empowers you to craft rich, dynamic compositions that resonate with depth and emotion.
As you continue on your musical journey, remember to embrace the creative process with curiosity and openness. Experiment with different instrument sounds, explore innovative recording techniques, and allow your musical intuition to guide your artistic decisions. The recording process is not only a technical endeavor but also a deeply personal and emotive expression of your musical identity.
Furthermore, the editing and fine-tuning stage presents an opportunity to refine your recordings with precision and artistry. By delving into the nuances of your performances, adjusting musical phrasing, and sculpting sonic textures, you’ll breathe life into your compositions and elevate them to new heights of musical expression.
Ultimately, the process of recording from a MIDI keyboard is a gateway to boundless creativity and sonic exploration. Whether you’re capturing intricate piano compositions, crafting intricate electronic soundscapes, or layering lush orchestral arrangements, your MIDI keyboard serves as a versatile and powerful tool for realizing your musical vision.
So, as you venture into the realm of MIDI recording, remember to embrace the joy of musical discovery, the thrill of sonic experimentation, and the satisfaction of translating your creative impulses into tangible, evocative recordings. With each note, each chord, and each expressive gesture, you’re breathing life into your musical aspirations and sharing your unique voice with the world.
Now, armed with the knowledge and insight gained from this guide, it’s time to unleash your creativity, capture your musical brilliance, and embark on an inspiring journey of recording from your MIDI keyboard. The possibilities are endless, the canvas is vast, and the world eagerly awaits the sonic tapestries you’ll weave with your MIDI keyboard as your trusted companion.