Introduction
Playing the acoustic guitar is a fulfilling and rewarding journey that can provide hours of enjoyment and creativity. Whether you’ve been dreaming of strumming your favorite songs around a campfire or creating beautiful melodies in the comfort of your own home, this beginner’s guide will help you get started on your musical adventure.
Learning how to play the acoustic guitar can seem daunting at first, but with the right guidance and dedication, anyone can become a proficient player. From mastering basic chords to developing strumming and fingerstyle techniques, this guide will provide you with the essential knowledge you need to kickstart your musical journey.
Before diving into the technical aspects of playing the guitar, it’s important to remember that learning any instrument takes time and practice. Patience and perseverance are key as you embark on this exciting endeavor. Remember, even the most proficient guitarists started as beginners, so don’t be discouraged by initial obstacles.
In this comprehensive guide, we will cover everything from getting familiar with your guitar to playing your first song. Along the way, we’ll explore proper guitar posture, tuning techniques, essential chords, strumming patterns, fingerstyle techniques, and even how to read guitar tablature. By the end of this guide, you’ll have a solid foundation to build upon as you continue to explore the world of acoustic guitar playing.
While there is no shortcut to becoming a skilled guitarist, with dedication and consistent practice, you can make remarkable progress. Take your time, enjoy the process, and don’t be afraid to experiment and have fun with your instrument. Now, let’s dive into the basic principles of playing the acoustic guitar!
Basic Principles of Playing Acoustic Guitar
Before you start strumming away on your acoustic guitar, it’s important to understand the basic principles of playing. These principles will serve as a foundation for your guitar journey, allowing you to build upon them as you progress. Let’s explore the key elements:
Posture: Good posture is essential for playing the guitar comfortably and avoiding unnecessary strain. Sit upright with your back against a chair, and rest the guitar on your dominant leg. Keep your shoulders relaxed and ensure that your guitar is positioned at a comfortable height.
Finger Placement: Proper finger placement is crucial for producing clear and accurate notes. Each finger should be assigned to a specific fret, and the fingertips should press down on the strings firmly, but not too hard. Take the time to develop muscle memory and precision in your finger placements.
Strumming: Strumming is the technique of using your dominant hand to brush or strike the strings to produce sound. Use a pick or your fingers to create distinct and rhythmic patterns. Start by practicing basic up-and-down strums, gradually increasing your speed and experimenting with different techniques.
Chord Progressions: Chords are the building blocks of music. Learn and practice common open chords such as C, G, D, E, and A. Mastering chord progressions will allow you to strum along to countless songs. Practice transitioning smoothly between chords to develop fluency and accuracy.
Rhythm and Timing: Developing a sense of rhythm and timing is essential for playing the guitar. Tap your foot or count beats in your head to stay in sync with the music. Start with simple songs and gradually progress to more complex rhythms to sharpen your timing skills.
Ear Training: Train your ear to recognize different notes and intervals by listening to music and practicing ear training exercises. This skill will enable you to play songs by ear, improvise, and eventually write your own music.
Practice: Consistent practice is the key to improving your skills. Set aside dedicated practice time each day or week and focus on specific techniques or songs. Break down challenging parts and practice them slowly before gradually increasing the tempo.
These basic principles will provide a solid foundation for your journey as an acoustic guitar player. As you gain more experience and knowledge, you can explore advanced techniques, scales, and music theory. With time and dedication, you’ll be strumming your favorite songs and creating your own melodies in no time!
Getting Familiar with the Guitar
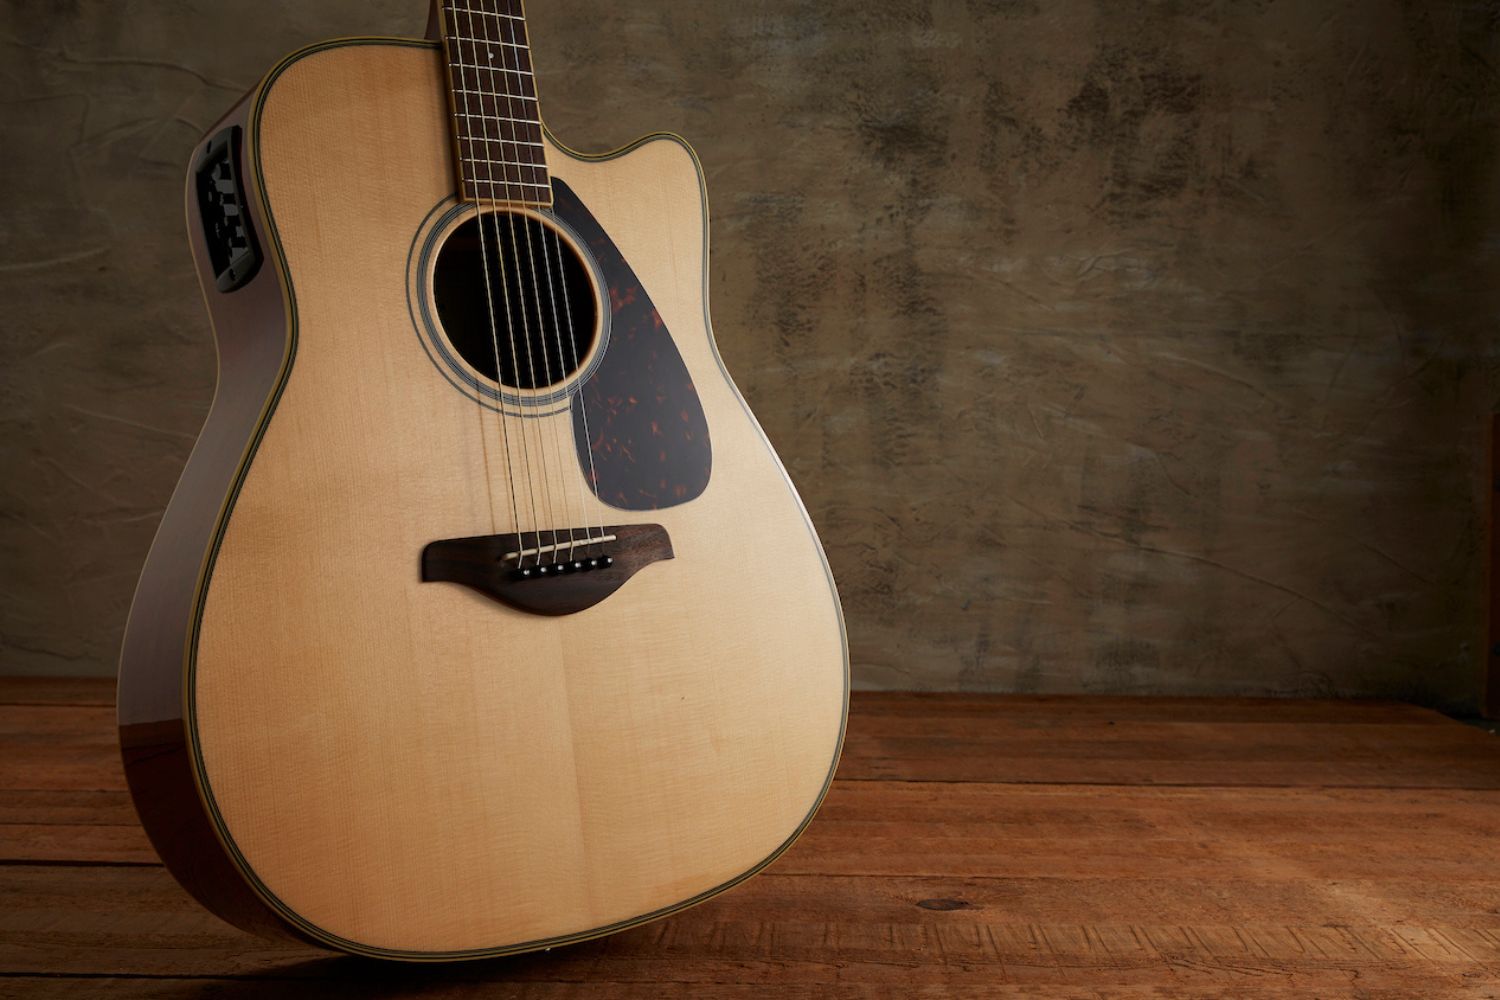
Before you dive into playing your acoustic guitar, it’s important to familiarize yourself with its different parts and functions. Understanding the anatomy of your instrument will help you navigate through the various techniques and instructions more effectively. Let’s explore the key components of a typical acoustic guitar:
Headstock: Located at the top of the guitar neck, the headstock holds the tuning pegs. Turning these pegs adjusts the tension of the strings, allowing you to tune the guitar to the desired pitch.
Tuning Pegs: The tuning pegs, also known as machine heads, are used to tighten or loosen the strings to achieve the correct pitch. Use a guitar tuner or reference pitches to ensure that each string is in tune.
Nut: The nut is a small piece located at the top of the guitar neck. It has grooves that hold the strings in place and help maintain proper string spacing and height from the fretboard.
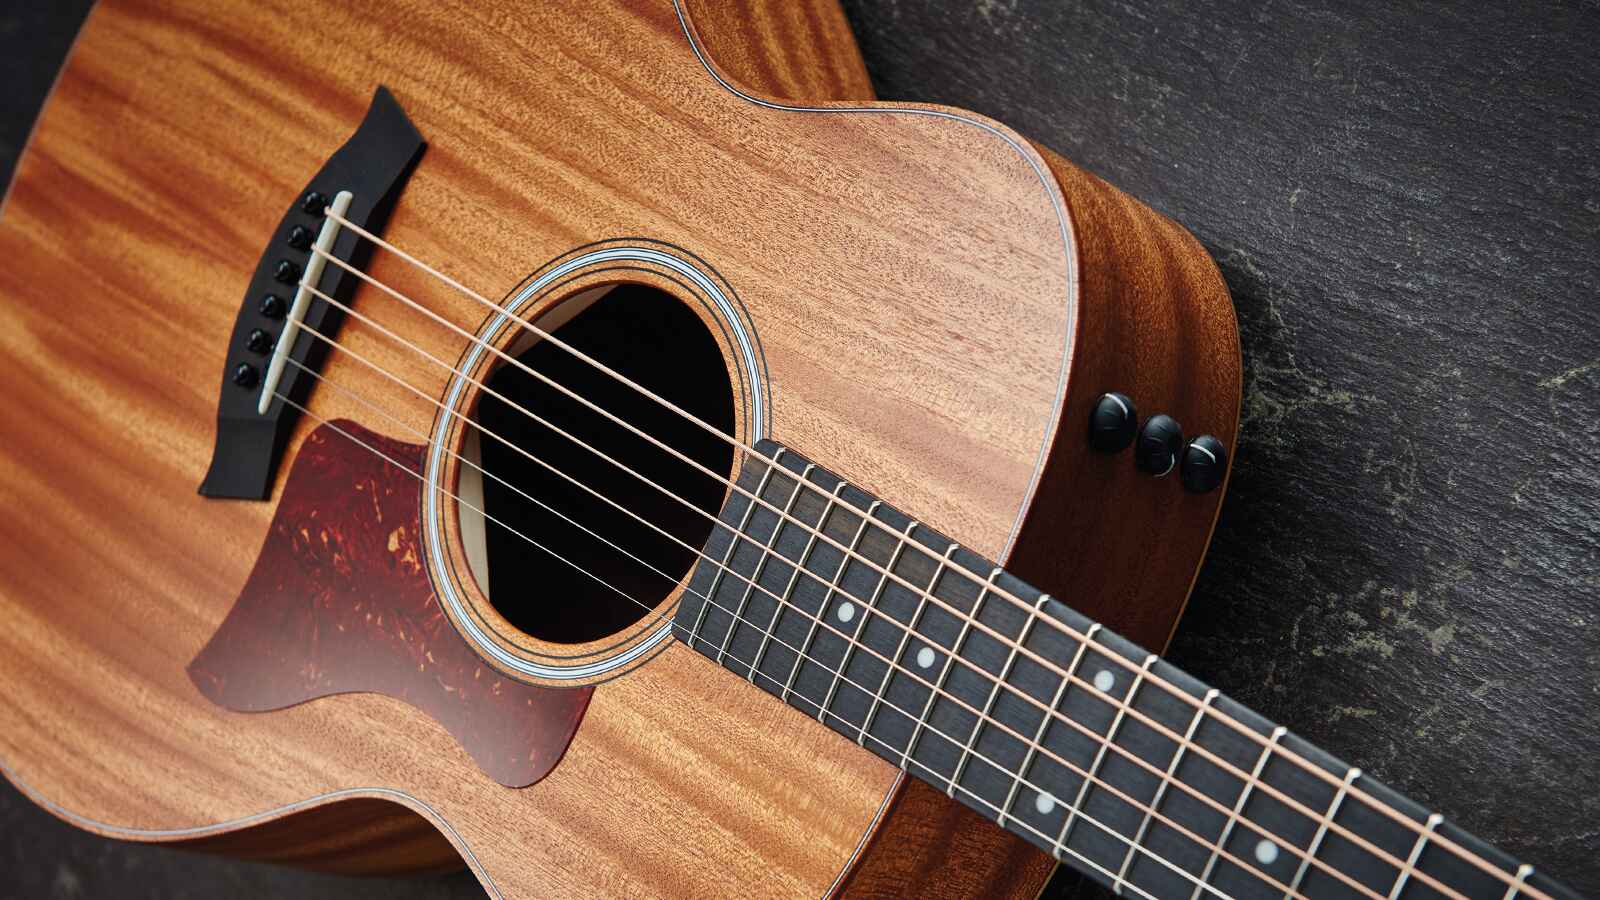
Fretboard: The fretboard is the flat, typically wooden, surface that extends from the nut to the body of the guitar. It contains metal strips called frets, which divide the fretboard into different sections. Pressing the strings against the frets creates different notes.
Frets: Frets are thin metal strips embedded into the fretboard. They divide the fretboard into spaces, enabling you to play different notes by pressing down the strings behind a specific fret.
Body: The body is the large, hollow part of the guitar. It is responsible for projecting the sound and houses the soundhole, which allows the vibrations of the strings to resonate and create sound.
Soundhole: Located on the front of the guitar’s body, the soundhole is a circular opening that allows the sound to resonate and project from the guitar. It plays a crucial role in the acoustic properties of the instrument.
Bridge: The bridge is a wooden piece on the front of the guitar body, near the soundhole. It holds the strings in place and transfers their vibrations to the guitar’s body, enhancing the sound production.
Strings: The strings are the heart of the guitar. They produce sound when plucked, strummed, or fingerpicked. The standard acoustic guitar has six strings, which are usually tuned to E, A, D, G, B, and E (from the thickest to the thinnest string).
Strap Buttons: Some acoustic guitars have strap buttons at the bottom and at the base of the neck, allowing you to attach a guitar strap for comfortable playing while standing.
By familiarizing yourself with these key components of the acoustic guitar, you’ll have a better understanding of how the instrument works. This knowledge will be valuable as you progress through your guitar playing journey and seek to experiment with different techniques and styles.
Tuning Your Acoustic Guitar
Proper tuning is essential for your acoustic guitar to sound its best. Even the most skilled player will struggle to produce pleasing music if the guitar is not in tune. Here’s a step-by-step guide on how to tune your acoustic guitar:
1. Get a tuner: There are various methods to tune a guitar, but using a dedicated tuner is the most accurate and beginner-friendly option. You can find inexpensive clip-on tuners or use smartphone apps specifically designed for tuning guitars.
2. Start with the low E string: Begin by plucking the thickest string, which is the low E string. Turn the tuning peg corresponding to the low E string to either tighten or loosen the string until the tuner indicates that it is in tune. The goal is to match the pitch of the open string with the desired E note.
3. Move to the A string: Once the low E string is in tune, move on to the next string, which is the A string. Pluck the string and adjust the tuning peg until the tuner indicates that it is in tune. Match the pitch of the open string with the desired A note.
4. Tune the remaining strings: Continue the process for the remaining strings—D, G, B, and high E. Pluck each string individually and adjust the tuning pegs until the tuner registers that the corresponding string is in tune. Refer to the desired pitch for each string (D, G, B, and high E) and adjust accordingly.
5. Recheck and fine-tune: After tuning all the strings, go back and check each string again. Gently pluck each one and compare the sound to the tuner. Make any necessary adjustments to fine-tune the strings and ensure they are accurately tuned.
6. Check for intonation: Once your guitar is in tune, play a few chords or notes up and down the neck to check for intonation. If certain notes sound off, it may indicate a need for further adjustment. Consult a professional guitar technician if you suspect intonation issues.
It’s important to tune your guitar every time you play. Environmental factors such as changes in temperature and humidity can cause the strings to go out of tune. By developing the habit of regular tuning, you’ll ensure that your guitar always produces the best possible sound.
Remember, practice makes perfect. Tuning your guitar may take some time and practice in the beginning, but with patience and consistency, it will become second nature. A well-tuned guitar is the foundation for your musical journey, so take the time to tune it properly before each session.
Holding the Guitar Correctly
Proper posture and positioning are crucial when it comes to playing the acoustic guitar comfortably and efficiently. Holding the guitar correctly not only improves your playing technique but also prevents unnecessary strain and discomfort. Follow these guidelines to ensure you are holding the guitar correctly:
1. Sit upright: When sitting, choose a chair with a straight back or use a guitar stool. Sit at the edge of the chair, keeping your back straight and shoulders relaxed. This position allows for better posture and reduces strain on your back and neck.
2. Rest the guitar on your dominant leg: If you’re right-handed, place the body of the guitar on your right thigh. Left-handed players can rest the guitar on their left thigh. The guitar should rest comfortably against your body without causing any discomfort or tension.
3. Position the guitar at a comfortable height: The guitar should be positioned at a height that allows you to reach the frets comfortably. The upper bout of the guitar body should rest against your chest, ensuring stability and control while playing.
4. Wrap your arm around the guitar: Rest your forearm lightly on the top of the guitar body. This position provides stability and control while allowing your hand to move freely along the neck and frets.
5. Support the neck with your non-dominant hand: The neck of the guitar should be supported by the palm of your non-dominant hand. Your thumb should rest comfortably on the back of the neck. This grip provides stability and allows for easy maneuvering across the fretboard.
6. Relax your hand and fingers: Keep your hand and fingers relaxed as you position them on the fretboard. Avoid gripping the neck too tightly, as it can hinder your ability to play smoothly and cause unnecessary tension in your hand.
7. Use a footstool or guitar support: Using a footstool or guitar support can help maintain proper posture and alleviate any strain on your lower back and shoulders. This is especially important for longer practice sessions or performances.
Taking the time to develop proper posture and holding techniques will greatly enhance your playing experience. It allows for better control, agility, and precision while reducing fatigue and discomfort. Remember to take breaks and stretch your muscles to avoid stiffness during longer practice sessions.
Experiment with different sitting positions and adjustments to find what feels most comfortable for you. Each person’s body is unique, so don’t be afraid to make minor adjustments to ensure your playing position suits your individual needs.
By mastering the correct way to hold the guitar, you’ll be setting yourself up for success as you progress through your guitar playing journey.
Basic Guitar Chords
Learning basic guitar chords is an essential step towards playing songs and expanding your repertoire. Chords are combinations of notes played simultaneously on the guitar, creating harmony and providing the foundation for melodies. Here are a few commonly used basic guitar chords:
1. C Major: Place your third (ring) finger on the third fret of the fifth string, second (middle) finger on the second fret of the fourth string, and first (index) finger on the first fret of the second string. Strum from the fifth string downward, avoiding the sixth string.
2. G Major: Position your second (middle) finger on the third fret of the sixth string, third (ring) finger on the third fret of the first string, and fourth (pinky) finger on the third fret of the second string. Strum from the sixth string downward, avoiding the fifth string.
3. D Major: Place your first (index) finger on the second fret of the third string, third (ring) finger on the third fret of the second string, and second (middle) finger on the second fret of the first string. Strum from the fourth string downwards, avoiding the sixth and fifth strings.
4. E Major: Use your second (middle) finger to press down the second fret of the fifth string, third (ring) finger on the second fret of the fourth string, and first (index) finger on the first fret of the third string. Strum all strings starting from the sixth string.
5. A Major: Position your second (middle) finger on the second fret of the fourth string, third (ring) finger on the second fret of the third string, and first (index) finger on the first fret of the second string. Strum from the fifth string downward, avoiding the sixth string.
These basic guitar chords are popular because they are relatively easy to play and appear in countless songs across different genres. Practice transitioning between these chords smoothly, ensuring each note is clear and distinct.
As you become more comfortable with these chords, you can progress to more advanced chords and variations, such as minor chords, seventh chords, and barre chords. These variations add depth and complexity to your playing, expanding your song options and allowing you to explore different musical styles.
Remember to press down on the strings firmly enough to produce clear tones but not so hard that it causes discomfort or mutes the strings. Take your time to get the finger placement and strumming technique right, and use a metronome or practice along with a song to work on your timing.
Learning and mastering basic guitar chords provides a solid foundation for your journey as a guitarist. Practice regularly and experiment with different chord progressions to develop your own unique style and improve your overall playing ability.
Playing Your First Song
Now that you’ve learned some basic guitar chords, it’s time to put them into practice and play your first song. Playing a song on the guitar is not only a rewarding experience but also a great way to apply the skills you’ve learned so far. Here are some steps to help you get started:
1. Choose a simple song: Select a song that uses the chords you’ve learned, preferably one that has a slow tempo and a straightforward chord progression. Look for beginner-friendly songs that are popular and familiar to you.
2. Practice the chord progression: Familiarize yourself with the chord progression of the song. Practice transitioning smoothly between the chords, ensuring that each note is clear and sounds in tune. Use a metronome or strum along to the original recording to work on your timing.
3. Start with a slow tempo: Begin playing the song at a slower tempo to build accuracy and confidence. As you become more comfortable, gradually increase the speed until you can play the song at the intended tempo.
4. Focus on one section at a time: Instead of trying to tackle the entire song at once, break it down into smaller sections. Work on mastering each section before moving on to the next. This approach allows you to focus on challenging parts and gradually build up to playing the entire song.
5. Sing along or play with a backing track: Singing along while playing the song can help you develop better coordination and musicality. Alternatively, you can play along with a backing track or the original recording to enhance your playing and get a sense of how the song fits together as a whole.
6. Don’t worry about mistakes: Mistakes are a normal part of learning. Don’t be too hard on yourself if you make errors while playing the song. Instead, use them as learning opportunities and focus on improving with each practice session.
7. Celebrate your progress: Once you’re able to play the song from start to finish, celebrate your achievement! It’s an exciting milestone in your guitar journey. Share your accomplishment with friends or family, or record yourself playing the song to capture your progress.
Remember, learning to play a song takes time and practice. Be patient and persistent, and don’t get discouraged if it doesn’t sound perfect right away. With dedication and consistent effort, you’ll continue to improve and expand your repertoire of songs.
Playing your first song on the guitar is a significant milestone and a testament to your hard work. Enjoy the process of learning and indulge in the joy of making music with your instrument. As you gain more experience and confidence, you’ll be able to tackle more challenging songs and explore new musical horizons.
Strumming Techniques
Mastering different strumming techniques is key to adding rhythm and dynamics to your guitar playing. Strumming involves using your strumming hand to brush or strike the strings in a specific pattern to produce sound. Here are some essential strumming techniques to explore:
1. Downstrokes: Start by practicing simple downstrokes. Hold your pick between your thumb and index finger and brush it downward across the strings. Focus on maintaining a steady rhythm and striking all the desired strings in one smooth motion.
2. Upstrokes: Once you’re comfortable with downstrokes, introduce upstrokes. Instead of strumming downward, brush the pick upward across the strings. Remember to keep your hand relaxed and maintain a consistent rhythm.
3. Down-Up Strumming: Combine both downstrokes and upstrokes to create a rhythmic pattern. Start with a downstroke, followed by an upstroke, and repeat. This technique is commonly used in many songs and provides a balanced and flowing sound.
4. Palm Muting: Palm muting is achieved by lightly resting the edge of your picking hand near the bridge of the guitar while strumming. This technique produces a muffled and percussive sound, adding texture to your playing. Experiment with different degrees of palm pressure to achieve the desired effect.
5. Accented Strums: Accented strums involve emphasizing specific beats or strums within a pattern. To accent a strum, apply slightly more force or intensity to that particular stroke. This technique helps create dynamics and adds emphasis to certain parts of a song.
6. Syncopation: Syncopation is the deliberate placement of accents or rhythmic variations off the main beats. It adds a sense of complexity and groove to your strumming. Experiment with syncopated rhythms by accenting off-beats or adding pauses in your strumming pattern.
7. Strumming Patterns: Strumming patterns are specific combinations of downstrokes, upstrokes, and rests that create a unique rhythm. Practice different strumming patterns by following tablature or chord charts, or by listening to songs and trying to replicate the strumming patterns you hear.
Remember, strumming takes time and practice to master. Start with slower tempos and simpler patterns, gradually increasing the speed and complexity as you become more comfortable. Experiment with different strumming techniques to find your own unique sound and style.
Listening to music and observing other guitarists can also provide inspiration and guidance for developing your strumming technique. Pay attention to the strumming patterns they use, the dynamics they incorporate, and how they adapt their strumming to different musical styles.
With dedication and practice, you’ll develop a solid foundation of strumming techniques that will allow you to accompany songs, create rhythm sections, and add flair to your playing. Keep exploring and experimenting with different strumming patterns and techniques to continuously improve your skills and enhance your musicality.
Fingerstyle Techniques
Fingerstyle guitar playing involves using your fingers to pluck the strings, creating the melody, harmony, and bass lines simultaneously. This technique allows for a rich, full sound and gives you more control over dynamics and expression. Here are some fingerstyle techniques to explore:
1. Fingerpicking: The most basic fingerstyle technique is fingerpicking, where each finger is assigned to a specific string. The thumb is typically used to pluck the bass strings (4th, 5th, and 6th), while the index, middle, and ring fingers pluck the higher strings (1st, 2nd, and 3rd).
2. Alternating Bass: Alternating bass technique involves maintaining a consistent alternating pattern between the bass strings with your thumb. This provides a steady rhythm and bass foundation while your other fingers pluck the higher strings to create the melody.
3. Arpeggios: Arpeggios involve playing the notes of a chord individually instead of strumming them all together. Use your thumb to play the bass note of the chord and the remaining fingers to pluck the higher notes sequentially, creating a flowing and melodic sound.
4. Fingerstyle Patterns: Fingerstyle patterns are repetitive sequences of plucking patterns that can be applied to different chords or melodies. They add complexity and texture to your fingerstyle playing. Experiment with patterns like Travis picking, classical patterns, or create your own unique patterns.
5. Percussive Techniques: Incorporating percussive elements into your fingerstyle playing adds rhythm and interest. Techniques like thumb slaps, finger taps, and palm hits can add percussive sounds while keeping the melody and chord progressions intact.
6. Hybrid Picking: Hybrid picking combines fingerpicking with the use of a pick. This technique allows for greater speed and accuracy while maintaining the flexibility and control that fingerpicking provides. It is commonly used in genres like country, rock, and jazz.
7. Harmonics: Harmonics are bell-like tones produced by lightly touching the string at specific points, called nodal points. Experiment with natural harmonics and artificial harmonics to add ethereal and unique sounds to your fingerstyle playing.
Mastering fingerstyle techniques requires patience and practice. Start with simple patterns and gradually progress to more complex arrangements. Focus on accuracy, clarity, and maintaining a consistent rhythm as you play. Use a metronome or drum tracks to develop precision and timing.
Listening to and studying fingerstyle guitarists can provide inspiration and insight. Observe their technique, explore the genres that feature fingerstyle guitar, and incorporate elements you like into your own playing.
Remember, fingerstyle guitar is a versatile and expressive technique. Experiment with different fingerings, patterns, and dynamics to develop your own unique style. With time and dedication, you’ll be able to create beautiful melodies, harmonies, and bass lines with just your fingers on the strings.
Understanding Guitar Tablature
Guitar tablature, or tab, is a widely used notation system that represents the strings and frets of the guitar. It is a visual representation of how to play a song or a specific guitar part. Understanding guitar tablature is essential for guitarists who want to learn songs and play music written specifically for the instrument. Here’s a breakdown of the key elements of guitar tablature:
1. Horizontal Lines: The horizontal lines in guitar tablature represent the strings of the guitar. The top line represents the thinnest string (high E string), while the bottom line corresponds to the thickest string (low E string).
2. Numbers on the Lines: The numbers on the lines indicate which fret to play on that specific string. For example, if there is a “3” on the second line from the top, it means you need to play the third fret on the B string (second string from the top).
3. Vertical Lines: Vertical lines separate the measures or bars in a piece of music. They help organize the music and indicate the rhythm and timing of the song.
4. Repeat Signs: Repeat signs, such as the double dots, indicate sections of music that should be repeated. It allows for efficient notation and avoids unnecessary repetition.
5. Chord Diagrams: In some guitar tabs, you may also find chord diagrams. Chord diagrams are simplified representations of the finger positions required to play a specific chord. The dots on the diagram indicate where to place your fingers on the fretboard.
6. Bend and Slide Notations: Guitar tabs often include symbols to indicate bends and slides. For example, an upward arrow indicates bending a note, while a diagonal line between two fret numbers indicates a slide from one fret to another.
7. Hammer-ons and Pull-offs: Hammer-ons and pull-offs are techniques where you use your fretting hand to create additional notes without striking the string again. These are indicated in tabs by curved lines connecting two fret numbers.
8. Palm Muting and Other Techniques: Tablature may also include symbols or annotations to indicate various playing techniques such as palm muting, tapping, harmonics, vibrato, and more. These notations provide additional instructions on how to achieve specific sounds or effects.
Learning to read guitar tablature opens doors to a vast library of songs and guitar music. It allows you to learn and play specific guitar parts accurately while providing a visual representation of finger positions and techniques. With practice and familiarity, reading guitar tablature becomes a valuable skill that helps you progress as a guitarist.
It’s important to note that guitar tablature does not provide information about rhythm or note duration. To develop a complete understanding of a song, it’s beneficial to listen to recordings and reference sheet music or chord charts alongside the tablature.
By combining guitar tablature with your ear training and musical intuition, you’ll be able to learn and play a wide variety of songs, riffs, and solos on the guitar.
Practicing Techniques and Tips
Practicing is essential for improving your skills as a guitarist. The more you practice, the more progress you’ll make. Here are some techniques and tips to help you maximize your practice sessions:
1. Set Goals: Start each practice session with a clear goal in mind. Whether it’s mastering a specific technique, learning a new song, or improving your speed, having a goal helps you stay focused and motivated throughout your practice session.
2. Break It Down: Break challenging songs or techniques into smaller sections. Focus on mastering each section before moving on to the next. This approach allows you to tackle difficult parts more effectively and prevents feeling overwhelmed.
3. Slow It Down: When learning something new or working on a challenging passage, start by practicing it at a slower tempo. This allows you to focus on accuracy, technique, and muscle memory. Gradually increase the tempo as you become more comfortable.
4. Practice Time Management: Allocate regular practice time in your schedule. Consistency is key to progress. Even short, focused practice sessions every day are more beneficial than infrequent longer sessions.
5. Warm Up: Before diving into more intensive playing, warm up your fingers and hands. Consider doing finger stretches, playing scales, or practicing simple exercises to increase flexibility and prevent injury.
6. Focus on Technique: Pay attention to your technique while practicing. Practice proper finger placement, hand positioning, and posture. Correcting bad habits early on will prevent issues later and improve your overall playing ability.
7. Practice Scales and Exercises: Regularly practice scales and exercises to build finger dexterity, coordination, and muscle memory. Scale exercises not only improve your technical skills but also help you understand music theory and fretboard navigation.
8. Use a Metronome: Practicing with a metronome helps develop your sense of rhythm and timing. Start at a slower tempo and gradually increase the speed as you become comfortable. Playing in time with a metronome is essential for playing with other musicians and recording.
9. Record Yourself: Recording yourself allows you to assess your playing objectively. Listen for areas that need improvement, such as timing, dynamics, or clarity. Recording also provides a way to track your progress over time.
10. Practice Mindfully: Engage fully in your practice sessions by focusing on every note, chord change, and technique. Avoid distractions and be present in the moment. Mindful practice promotes better concentration and faster progress.
11. Be Patient and Persistent: Learning the guitar takes time, so be patient with yourself. Everyone progresses at their own pace. Persevere through challenges and setbacks, and keep your passion for playing alive.
Remember, the goal of practicing is to improve your playing and have fun along the way. Enjoy the process and be proud of the progress you make, no matter how small. With consistent practice and a positive mindset, you’ll continue to grow as a guitarist.
Maintaining Your Acoustic Guitar
Maintaining your acoustic guitar is essential to keep it sounding and playing its best. Regular care and maintenance will prolong its lifespan, ensure optimal performance, and preserve its value. Here are some important tips for maintaining your acoustic guitar:
1. Cleaning: Wipe down your guitar with a soft, lint-free cloth after each use to remove any dirt, sweat, or oils that may have accumulated. Pay attention to the strings, fretboard, and body. Avoid using harsh chemicals or cleaners, as they can damage the finish. If necessary, use a slightly damp cloth.
2. String Care: Change your guitar strings regularly to maintain good tone and playability. Strings can become dull, corroded, or lose their elasticity over time. Wipe the strings with a clean cloth after each session to remove any debris, sweat, or oils that may have built up.
3. Humidity Control: Acoustic guitars are sensitive to changes in humidity, which can cause the wood to swell or shrink, affecting playability and tone. Use a humidifier or dehumidifier in the guitar case to maintain an optimal humidity level (around 45-55%). Avoid exposing your guitar to extreme temperature changes or storing it in damp or excessively dry environments.
4. Storage: Store your guitar in a protective case or on a guitar stand when not in use. This will protect it from accidental bumps, scratches, and exposure to dust or sunlight. Avoid leaning it against walls or furniture where it can be easily knocked over.
5. Neck Adjustment: Monitor the neck of your guitar for any signs of bowing or back bowing. Adjustments may be required periodically to maintain proper neck relief. If you’re not comfortable making adjustments yourself, take your guitar to a professional luthier or guitar technician.
6. Check Hardware: Regularly check the hardware of your guitar, including tuning pegs, bridges, saddle, and nut. Ensure that they are properly seated and in good condition. If any parts appear loose or damaged, have them repaired or replaced by a professional.
7. Professional Maintenance: Schedule periodic professional maintenance for your guitar, especially if you notice any issues with intonation, action, or overall playability. A professional guitar setup can optimize your guitar’s performance by adjusting the action, nut, saddle, and frets.
8. Play Your Guitar: Regularly playing your guitar is one of the best ways to keep it in good condition. The vibrations from playing help prevent the build-up of dust and maintain the guitar’s structural integrity. So, make sure to enjoy your guitar and let it be played.
By following these maintenance tips and treating your acoustic guitar with care, you can ensure that it remains in excellent condition for years to come. Remember, a well-maintained instrument will not only sound better but also be more inspiring to play. Treat your guitar as an investment, and it will reward you with beautiful sound and enjoyable playing experiences.
Conclusion
Congratulations on embarking on your journey to learn and play the acoustic guitar! As you’ve discovered, playing the guitar is a fulfilling and rewarding experience that offers endless opportunities for creativity and self-expression. By following the techniques and tips outlined in this guide, you’ll be well on your way to becoming a skilled guitarist.
Remember, learning any instrument takes time, patience, and consistent practice. Embrace the process and enjoy the moments of progress along the way. Whether you’re strumming your favorite songs around a campfire, playing intricate fingerstyle melodies, or jamming with other musicians, the joy of playing the acoustic guitar is unparalleled.
As you continue to hone your skills, explore new techniques, and expand your repertoire, it’s important to keep pushing yourself and stepping outside of your comfort zone. Seek out opportunities to learn from others, listen to different genres of music, attend workshops or classes, and incorporate your own unique style into your playing. The possibilities are endless!
Lastly, keep in mind that the journey of being a musician is a lifelong one. There will always be new techniques to learn, songs to master, and ways to grow as a guitarist. Embrace the challenges, celebrate your successes, and most importantly, have fun!
So, get your guitar, practice regularly, and let the music flow. Enjoy the incredible experience of playing the acoustic guitar, and may your guitar playing journey bring you endless joy and fulfillment.