Introduction
Welcome to the iTech Fusion 2 Charging Guide: Quick Steps. In this comprehensive guide, you'll learn how to effectively charge your iTech Fusion 2 smartwatch. Whether you're new to wearable technology or simply looking for a quick refresher, this step-by-step guide will walk you through the process, ensuring that you can power up your device with ease.
The iTech Fusion 2 is a cutting-edge smartwatch that offers a wide range of features, from fitness tracking to notifications and more. To ensure that you can make the most of its capabilities, it's crucial to understand how to charge it properly. With the help of this guide, you'll be equipped with the knowledge to keep your iTech Fusion 2 powered up and ready to accompany you throughout your day.
Charging your smartwatch doesn't have to be complicated. By following the simple steps outlined in this guide, you'll be able to seamlessly integrate the charging process into your routine. Whether you're at home, in the office, or on the go, knowing how to charge your iTech Fusion 2 will ensure that you can stay connected and informed at all times.
Now, let's dive into the quick steps for charging your iTech Fusion 2 and ensure that you can enjoy uninterrupted use of this innovative wearable device.
Step 1: Unboxing the iTech Fusion 2
Before you can begin charging your iTech Fusion 2 smartwatch, it's essential to unbox the device and familiarize yourself with its components. When you first receive your iTech Fusion 2, you'll find it neatly packaged in a compact box, ready to be unboxed and set up for use.
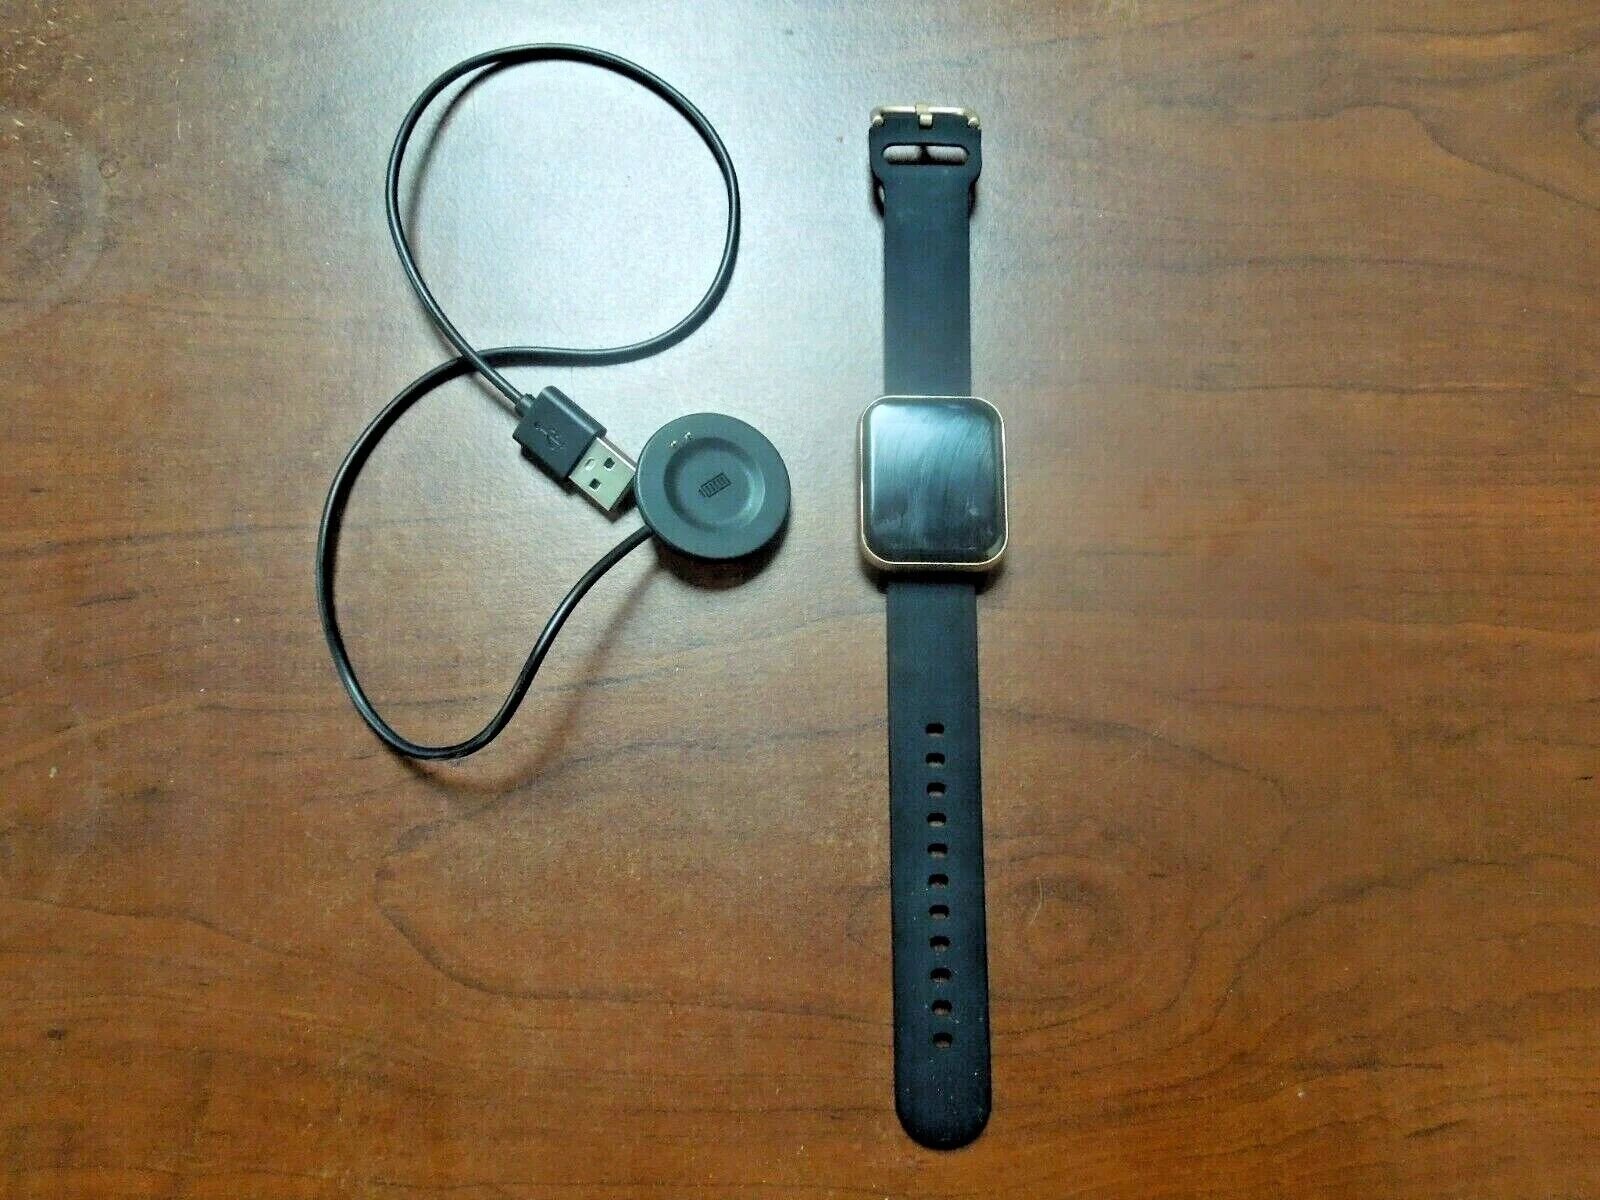
Upon opening the box, you'll be greeted by the sleek and stylish design of the iTech Fusion 2 smartwatch. Take a moment to appreciate its modern aesthetics and lightweight construction. Inside the box, you'll also find the charging cable, which is a vital component for powering up your smartwatch.
As you carefully remove the iTech Fusion 2 from its packaging, you'll notice the intuitive design of the device, featuring a vibrant display and a comfortable wristband. Take this opportunity to inspect the smartwatch for any visible damage and ensure that it's in pristine condition before proceeding with the charging process.
Additionally, you may find instructional materials, such as a quick start guide or user manual, included in the box. These resources can provide valuable insights into the features and functionality of the iTech Fusion 2, offering guidance on how to navigate its interface and make the most of its capabilities.
By unboxing the iTech Fusion 2 and taking a moment to familiarize yourself with its contents, you'll be better prepared to proceed with the charging process. This initial step sets the stage for a seamless charging experience, ensuring that you can power up your smartwatch with confidence and ease.
Step 2: Connecting the Charging Cable
Once you've unboxed your iTech Fusion 2 smartwatch, the next step in the charging process involves connecting the charging cable to the device. The charging cable is an essential accessory that facilitates the transfer of power from a power source to your smartwatch, ensuring that it can be efficiently charged for uninterrupted use.
Locate the charging cable included in the packaging of your iTech Fusion 2. This cable is specifically designed to fit the charging port of the smartwatch, featuring a secure connection that enables seamless charging. Take a moment to inspect the charging cable, ensuring that it is free from any damage or defects that may impede its functionality.
With the charging cable in hand, identify the charging port on your iTech Fusion 2 smartwatch. The charging port is typically located on the underside of the device, discreetly positioned to allow for easy access while ensuring a streamlined and elegant design. Carefully align the connector of the charging cable with the charging port on the smartwatch, taking care to insert it in the correct orientation.
Once the connector is aligned with the charging port, gently insert it until you feel a secure connection. The design of the charging cable and the charging port is engineered to ensure a snug fit, providing a reliable link for the transfer of power. As you connect the charging cable to your iTech Fusion 2, you may notice a subtle click or indication that the connection has been established.
By effectively connecting the charging cable to your iTech Fusion 2 smartwatch, you'll be one step closer to powering up the device and ensuring that it remains ready for your daily activities. This pivotal step sets the stage for the subsequent stages of the charging process, bringing you closer to enjoying the full functionality of your smartwatch.
Step 3: Plugging in the Charger
With the charging cable securely connected to your iTech Fusion 2 smartwatch, the next step in the charging process involves plugging in the charger to initiate the transfer of power. The charger serves as the conduit through which electrical energy is delivered to the smartwatch, replenishing its battery and ensuring that it remains operational throughout your day.
Locate a suitable power source for your charger, such as a wall outlet or a USB port on a computer or charging hub. Ensure that the power source is easily accessible and provides a stable supply of electricity to facilitate the charging process. Position yourself near the power source to allow for a convenient and unobstructed connection.
Take the charging adapter, which is typically included with the iTech Fusion 2, and inspect it for any signs of damage or wear. The charging adapter is designed to convert the electrical energy from the power source into a format that can be utilized by the smartwatch, enabling efficient and safe charging. Verify that the charging adapter is in good condition before proceeding.
Connect the charging cable to the charging adapter by inserting the appropriate end of the cable into the corresponding port on the adapter. Ensure that the connection is secure and that the cable is properly aligned with the adapter to facilitate the transfer of power without any interruptions. Once the cable is connected to the adapter, you’re ready to proceed to the next step.
With the charging cable now linked to the charging adapter, plug the adapter into the designated power source. Insert the adapter into the wall outlet or USB port, applying gentle pressure to ensure that it is firmly seated in place. Upon successful connection, you may notice an indicator light on the adapter, signaling that it is actively supplying power to the charging cable.
By plugging in the charger and establishing the connection between the power source and your iTech Fusion 2 smartwatch, you’re taking a significant stride toward ensuring that your device is powered up and ready to accompany you throughout your daily endeavors. This crucial step sets the stage for the subsequent phase of the charging process, bringing you closer to enjoying the full functionality of your smartwatch.
Step 4: Checking the Charging Status
After plugging in the charger, it’s essential to monitor the charging status of your iTech Fusion 2 smartwatch to ensure that the battery is replenishing effectively. Checking the charging status allows you to gauge the progress of the charging process and enables you to make informed decisions about when the smartwatch will be ready for use.
Upon plugging in the charger, your iTech Fusion 2 may display an indicator on its screen to signify that it is actively charging. This visual cue serves as a reassuring confirmation that the smartwatch is successfully receiving power from the charger and that the charging process has commenced. Take a moment to observe the screen of your smartwatch for any charging indicators or notifications.
Some smartwatches, including the iTech Fusion 2, may feature a dedicated charging status screen that provides real-time information about the battery level and the estimated time remaining until the device is fully charged. Navigate to the charging status screen on your smartwatch to access this valuable data, allowing you to stay informed about the progress of the charging process.
As the charging status screen displays the battery level and the remaining charging time, you can plan your activities accordingly, knowing when your iTech Fusion 2 will be ready for use. Whether you’re preparing for a workout, a busy day at work, or a leisurely evening, having insight into the charging status empowers you to integrate the smartwatch seamlessly into your routine.
Throughout the charging process, periodically check the charging status of your iTech Fusion 2 to track the incremental increase in the battery level. This proactive approach enables you to stay informed and ensures that you can promptly disconnect the charger once the smartwatch is fully charged, preventing overcharging and optimizing the battery’s longevity.
By actively monitoring the charging status of your iTech Fusion 2 smartwatch, you’re actively engaged in the charging process, ensuring that the device is powered up efficiently and ready to enhance your daily experiences. This step contributes to a seamless and informed charging experience, bringing you closer to enjoying the full functionality of your smartwatch.
Step 5: Unplugging the Charger
As the charging process nears completion, it’s important to know how to safely unplug the charger from your iTech Fusion 2 smartwatch, ensuring that the device is ready for use without any unnecessary delay. Unplugging the charger signifies the culmination of the charging process, allowing you to seamlessly transition to enjoying the full functionality of your smartwatch.
Before unplugging the charger, check the charging status of your iTech Fusion 2 to verify that the battery is fully replenished. Ensure that the smartwatch indicates a complete charge, either through a visual notification on the screen or by accessing the charging status screen to review the battery level and the charging duration. This confirmation ensures that your smartwatch is ready for use.
Once you’ve confirmed that the battery is fully charged, gently grasp the charging adapter that is plugged into the power source. Apply steady and even pressure to remove the adapter from the power source, ensuring that the disconnection is smooth and deliberate. Take care to avoid any abrupt movements that may cause damage to the charging cable or the power source.
After disconnecting the charging adapter from the power source, carefully detach the charging cable from the adapter, ensuring that the connection is released without causing any strain on the cable or the smartwatch. Handle the cable with care, avoiding any unnecessary bending or twisting that may compromise its integrity and functionality for future use.
With the charging cable now disconnected from the charger, gently remove the connector from the charging port of your iTech Fusion 2 smartwatch. Ensure that the disconnection is executed smoothly and without any force, allowing the cable to be removed from the smartwatch without causing any damage to the charging port or the cable itself.
By safely unplugging the charger from your iTech Fusion 2 smartwatch, you’re signaling the successful completion of the charging process, ensuring that the device is fully powered and ready to accompany you throughout your day. This final step in the charging process paves the way for a seamless transition to utilizing the full range of features and capabilities offered by your smartwatch.
Conclusion
Congratulations! You’ve successfully navigated through the quick steps for charging your iTech Fusion 2 smartwatch. By following this comprehensive guide, you’ve gained valuable insights into the seamless process of powering up your smartwatch, ensuring that it remains ready to enhance your daily experiences with its array of features and functionalities.
Unboxing the iTech Fusion 2 allowed you to familiarize yourself with the device and its components, setting the stage for a smooth and informed charging experience. Connecting the charging cable to the smartwatch established a vital link for the transfer of power, ensuring that the device can be efficiently charged. Plugging in the charger facilitated the replenishment of the smartwatch’s battery, bringing you closer to enjoying uninterrupted use of the device.
Checking the charging status empowered you to stay informed about the progress of the charging process, enabling you to plan your activities around the smartwatch’s readiness. Finally, safely unplugging the charger signifies the successful completion of the charging process, ensuring that your iTech Fusion 2 is fully powered and ready for use.
As you integrate these quick steps into your routine, charging your iTech Fusion 2 will become a seamless and effortless task, allowing you to stay connected, informed, and empowered throughout your day. Whether you’re tracking your fitness goals, receiving important notifications, or simply enjoying the convenience of wearable technology, knowing how to effectively charge your smartwatch is a valuable skill that enhances your overall experience.
With this charging guide at your disposal, you’re equipped with the knowledge and confidence to keep your iTech Fusion 2 powered up and ready to accompany you on your daily adventures. By mastering the art of charging your smartwatch, you’re poised to make the most of its capabilities, ensuring that it remains an indispensable companion in your modern lifestyle.
Now, armed with the expertise gained from this guide, you’re ready to seamlessly incorporate the charging process into your routine, ensuring that your iTech Fusion 2 remains an integral part of your daily life, keeping you connected, informed, and empowered.