Introduction
If you're experiencing issues with your Sony Noise Cancelling Headphones H900N, such as connectivity problems, sound quality issues, or unresponsive controls, performing a reset may help resolve these issues. Resetting the headphones can address software glitches and restore them to their default settings, potentially resolving the issues you're encountering.
In this guide, we'll walk you through the steps to reset your Sony Noise Cancelling Headphones H900N. We'll cover checking the battery level, performing a soft reset, executing a hard reset, and updating the firmware. By following these steps, you can troubleshoot common problems and optimize the performance of your headphones.
Whether you're a seasoned audiophile or a casual music enthusiast, having a reliable pair of noise-canceling headphones can significantly enhance your listening experience. However, even the most advanced headphones can encounter technical hiccups. Knowing how to reset and troubleshoot your Sony Noise Cancelling Headphones H900N can save you time and frustration, ensuring that you can continue enjoying your favorite music, podcasts, and audio content without interruptions.
Let's delve into the essential steps for resetting and optimizing your Sony Noise Cancelling Headphones H900N. Whether you're encountering connectivity issues, audio disturbances, or control malfunctions, these troubleshooting techniques can help restore your headphones to peak performance.
Checking the Battery Level
Before performing a reset or troubleshooting other issues with your Sony Noise Cancelling Headphones H900N, it’s essential to ensure that the battery level is adequate. Low battery levels can lead to various performance issues, and confirming the current charge status can help determine if the battery is the root cause of any problems you’re experiencing.
To check the battery level on your Sony Noise Cancelling Headphones H900N, follow these steps:
- Power On the Headphones: Press the power button to turn on the headphones.
- Voice Guidance: If the battery level is above 70%, you will hear “Battery level high” when you power on the headphones. If the battery level is between 30% and 70%, you will hear “Battery level medium.” When the battery level is below 30%, the voice guidance will indicate “Battery level low.”
- LED Indicator: The LED indicator on the headphones will also provide a visual cue of the battery level. A green light indicates a high battery level, an orange light signifies a medium battery level, and a red light indicates a low battery level.
- Using the Sony Headphones Connect App: Alternatively, you can check the battery level using the Sony Headphones Connect app on your smartphone or mobile device. The app provides detailed information about the battery status, including the remaining charge percentage.
By verifying the battery level, you can determine if the headphones’ performance issues are related to the battery. If the battery level is low, it’s advisable to recharge the headphones before proceeding with any troubleshooting steps. Additionally, if the battery level is consistently low despite recharging, it may indicate a potential battery or charging system issue that requires further attention.
Performing a Soft Reset
If you’re encountering minor issues with your Sony Noise Cancelling Headphones H900N, such as unresponsive controls or connectivity glitches, performing a soft reset can often resolve these issues. A soft reset is a simple and non-intrusive troubleshooting step that can help address software-related issues without affecting your personalized settings or stored data.
To perform a soft reset on your Sony Noise Cancelling Headphones H900N, follow these steps:
- Power Off the Headphones: If the headphones are powered on, turn them off by pressing and holding the power button until you hear “Power off” or the indicator light turns off.
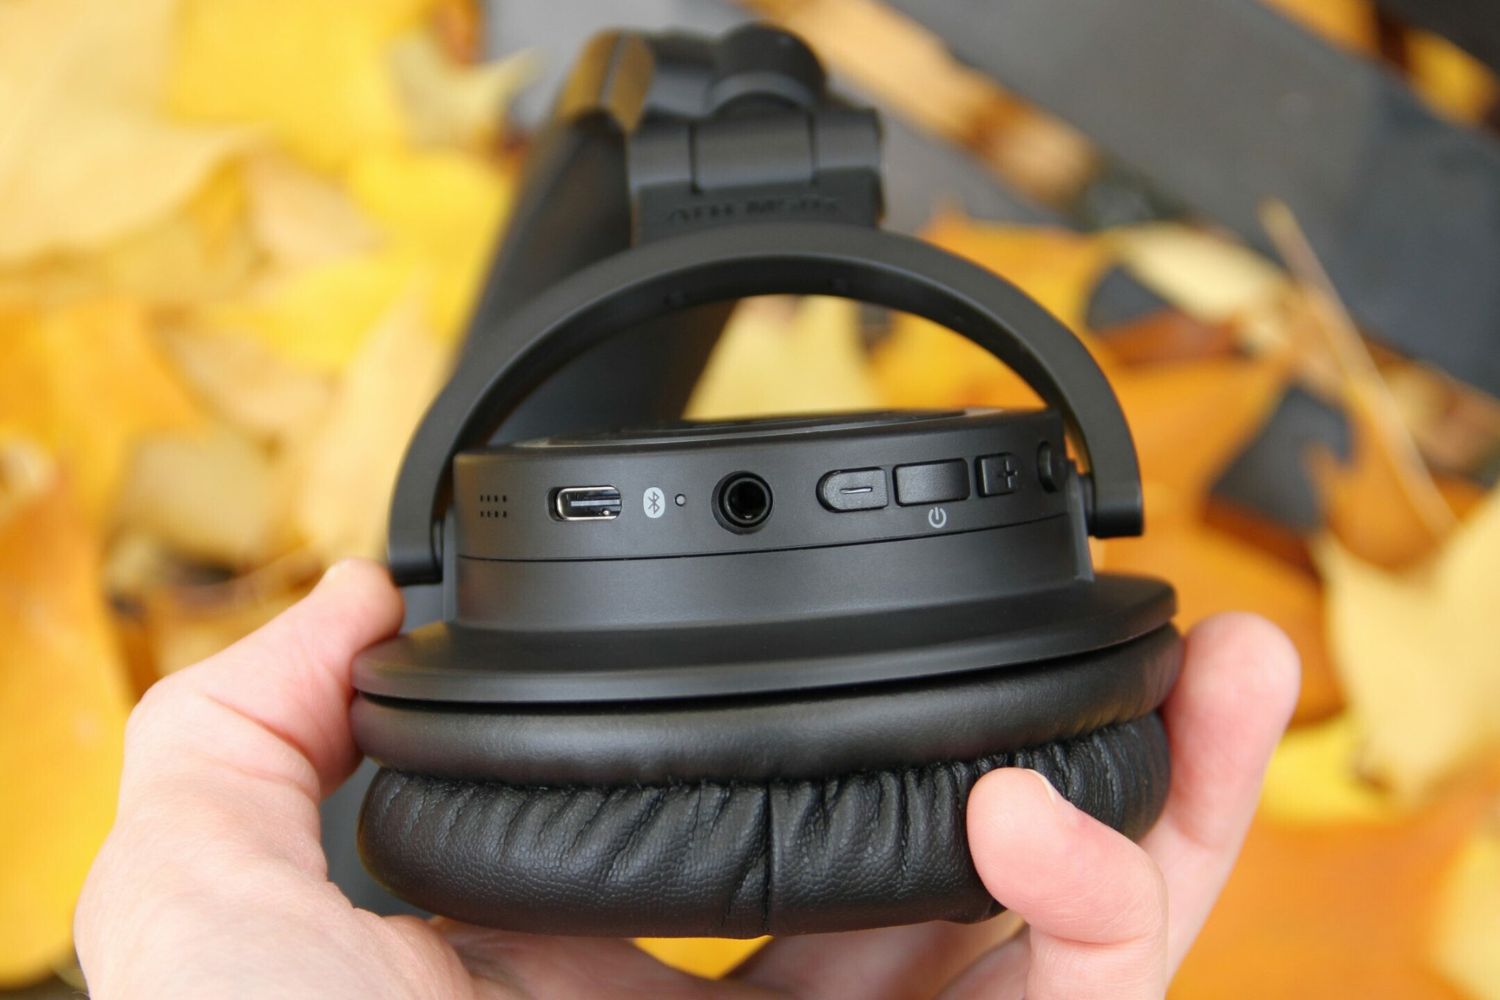
- Reset Button: Locate the reset button on the headphones. It is typically a small hole or a recessed button on the ear cups.
- Use a Pointed Object: Insert a small, pointed object, such as a paperclip or pin, into the reset button hole. Press and hold the reset button for a few seconds.
- Release the Reset Button: After holding the reset button, release it and wait for a moment.
- Power On the Headphones: After performing the soft reset, power on the headphones and check if the issues you were experiencing have been resolved.
By performing a soft reset, you can address transient software issues and restore the headphones to a responsive state. This troubleshooting step is particularly effective for addressing minor glitches and can often resolve connectivity problems, unresponsive touch controls, or erratic behavior of the headphones.
It’s important to note that a soft reset does not erase your personalized settings, saved preferences, or paired devices. Therefore, it’s a safe and convenient troubleshooting method that can be performed without concerns about data loss or reconfiguration.
If the issues persist after performing a soft reset, you may consider proceeding with a hard reset or exploring other troubleshooting options to address the specific issues you’re encountering.
Performing a Hard Reset
If you’re facing persistent and more severe issues with your Sony Noise Cancelling Headphones H900N, such as unresponsiveness to troubleshooting steps or major software malfunctions, performing a hard reset may be necessary. A hard reset restores the headphones to their factory settings, effectively clearing any customized configurations and stored data. It’s a more comprehensive troubleshooting step that can address stubborn software issues and restore the headphones to a pristine state.
To perform a hard reset on your Sony Noise Cancelling Headphones H900N, follow these steps:
- Power Off the Headphones: Ensure the headphones are powered off before proceeding with the hard reset.
- Press and Hold the Power and Noise Cancelling Buttons: Simultaneously press and hold the power and noise cancelling buttons on the headphones for about 20 seconds. The indicator light may flash or change colors during this process.
- Release the Buttons: After holding the buttons for the specified duration, release them and wait for a moment.
- Power On the Headphones: Turn on the headphones and observe if the issues you were experiencing have been resolved. The headphones are now restored to their factory settings.
It’s important to note that performing a hard reset erases all personalized settings, stored preferences, and paired devices from the headphones. As a result, you will need to reconfigure the headphones and pair them with your devices after the hard reset. Additionally, any customized equalizer settings or noise cancelling adjustments will be reset to their default values.
Before proceeding with a hard reset, it’s advisable to exhaust other troubleshooting options and ensure that the issues you’re encountering warrant a factory reset. If the problems persist despite performing a hard reset, it may indicate a more complex hardware issue that requires further attention from Sony’s support team or authorized service providers.
By performing a hard reset, you can effectively eliminate persistent software issues and restore the headphones to their original state, potentially resolving the challenges you’re facing with their performance and functionality.
Updating the Firmware
Ensuring that your Sony Noise Cancelling Headphones H900N have the latest firmware is crucial for optimal performance, as firmware updates often include bug fixes, performance enhancements, and compatibility improvements. By keeping the headphones’ firmware up to date, you can address known issues, enhance audio quality, and benefit from new features introduced by Sony.
To update the firmware of your Sony Noise Cancelling Headphones H900N, follow these general steps:
- Download the Sony Headphones Connect App: If you haven’t already done so, download and install the Sony Headphones Connect app on your smartphone or mobile device from the respective app store.
- Pair the Headphones: Ensure that your headphones are paired with the Sony Headphones Connect app on your device.
- Check for Firmware Updates: Open the Sony Headphones Connect app and navigate to the firmware update section. The app will automatically check for available firmware updates for your headphones.
- Follow the Prompts: If a firmware update is available, follow the on-screen prompts to initiate the update process. Make sure that the headphones are sufficiently charged or connected to a power source during the update.
- Allow the Update to Complete: Once the update is initiated, allow the app to complete the firmware update process. This may involve the headphones restarting or entering an update mode.
- Verify the Firmware Version: After the update is complete, verify that the headphones are running the latest firmware version by checking the firmware information in the Sony Headphones Connect app.
It’s important to stay vigilant for firmware updates released by Sony, as they can significantly enhance the performance and capabilities of your headphones. Firmware updates may address specific issues that users have encountered, introduce new audio processing algorithms, or improve the overall stability of the headphones’ software.
By regularly updating the firmware of your Sony Noise Cancelling Headphones H900N, you can ensure that they remain at the forefront of technological advancements and continue to deliver an exceptional audio experience. Additionally, staying up to date with firmware releases can help preemptively address potential issues and keep your headphones operating smoothly.
Conclusion
Resetting and troubleshooting your Sony Noise Cancelling Headphones H900N is essential for maintaining their optimal performance and addressing any technical issues that may arise during usage. By following the steps outlined in this guide, you can effectively address common issues and ensure that your headphones deliver an exceptional audio experience.
From checking the battery level to performing soft and hard resets, you have learned valuable troubleshooting techniques that can resolve connectivity problems, software glitches, and unresponsive controls. These steps empower you to take proactive measures to restore your headphones to peak performance and address any challenges you may encounter.
Additionally, staying informed about firmware updates and keeping your headphones’ firmware current is crucial for leveraging new features, addressing known issues, and optimizing audio quality. By incorporating regular firmware updates into your headphone maintenance routine, you can ensure that your Sony Noise Cancelling Headphones H900N remain at the forefront of technological advancements.
Remember that troubleshooting and resetting your headphones are effective initial steps for addressing common issues. However, if you encounter persistent problems that cannot be resolved through these methods, it’s advisable to seek assistance from Sony’s support team or authorized service providers. They can offer further guidance and technical support to address more complex issues.
By mastering the art of troubleshooting and resetting your Sony Noise Cancelling Headphones H900N, you can enjoy uninterrupted listening sessions, immersive audio experiences, and the full range of features that these advanced headphones offer. With your newfound knowledge, you are well-equipped to maintain and optimize the performance of your Sony headphones, ensuring that they continue to enrich your audio experiences for years to come.


