Introduction
Are you a proud owner of Bose noise-cancelling headphones? Have you encountered issues with their performance, such as crackling sounds, faulty wiring, or worn-out ear pads? Fret not, as this comprehensive guide will equip you with the essential knowledge and skills to repair your beloved headphones and restore them to their optimal functionality.
Bose noise-cancelling headphones are renowned for their superior sound quality and comfort, making them a popular choice among audiophiles and frequent travelers. However, like any electronic device, these headphones are susceptible to wear and tear over time. Instead of investing in a new pair, learning how to repair your Bose noise-cancelling headphones can save you money and extend the lifespan of your cherished audio accessory.
In this guide, you will discover the step-by-step process of disassembling the headphones, identifying common issues, repairing wiring malfunctions, and replacing worn-out ear pads. By understanding the inner workings of your headphones and acquiring the necessary tools and materials, you can take on the challenge of troubleshooting and fixing minor problems without the need for professional assistance.
Whether you are a tech-savvy individual seeking a DIY project or a frugal consumer aiming to prolong the longevity of your headphones, this guide will empower you to tackle headphone repairs with confidence. Embrace the opportunity to delve into the world of headphone maintenance and unleash your inner handyman as you embark on the journey to revive your Bose noise-cancelling headphones.
Tools and Materials Needed
Before delving into the repair process, it is imperative to gather the essential tools and materials to ensure a smooth and efficient experience. Here is a comprehensive list of items you will need to have on hand:
- Small Phillips Head Screwdriver: This tool is crucial for removing the screws that secure the headphone casing.
- Spudger or Nylon Pry Tool: Use this to carefully pry open the headphone casing without causing damage.
- Soldering Iron and Solder: In the event of wiring repairs, a soldering iron and solder will be necessary to re-establish electrical connections.
- Replacement Wiring: If the wiring within the headphones is damaged, having replacement wiring on hand is essential for conducting repairs.
- Replacement Ear Pads: Over time, the ear pads of the headphones may wear out, so having replacement ear pads ready for installation is crucial.
- Cotton Swabs and Isopropyl Alcohol: These items are useful for cleaning the internal components of the headphones and ensuring optimal performance.
- Tweezers: Tweezers can aid in handling small components and intricate parts during the disassembly and reassembly process.
- Clean Workspace: Set up a clean and organized workspace to prevent misplacement of components and ensure a conducive environment for repairs.
- User Manual or Online Resources: Having access to the user manual or online resources specific to your Bose noise-cancelling headphones can provide valuable insights into their internal structure and troubleshooting tips.
By acquiring these tools and materials, you will be well-prepared to tackle the repair process with confidence and precision. Additionally, maintaining a methodical approach and exercising patience throughout the repair journey will contribute to a successful outcome.
Disassembling the Headphones
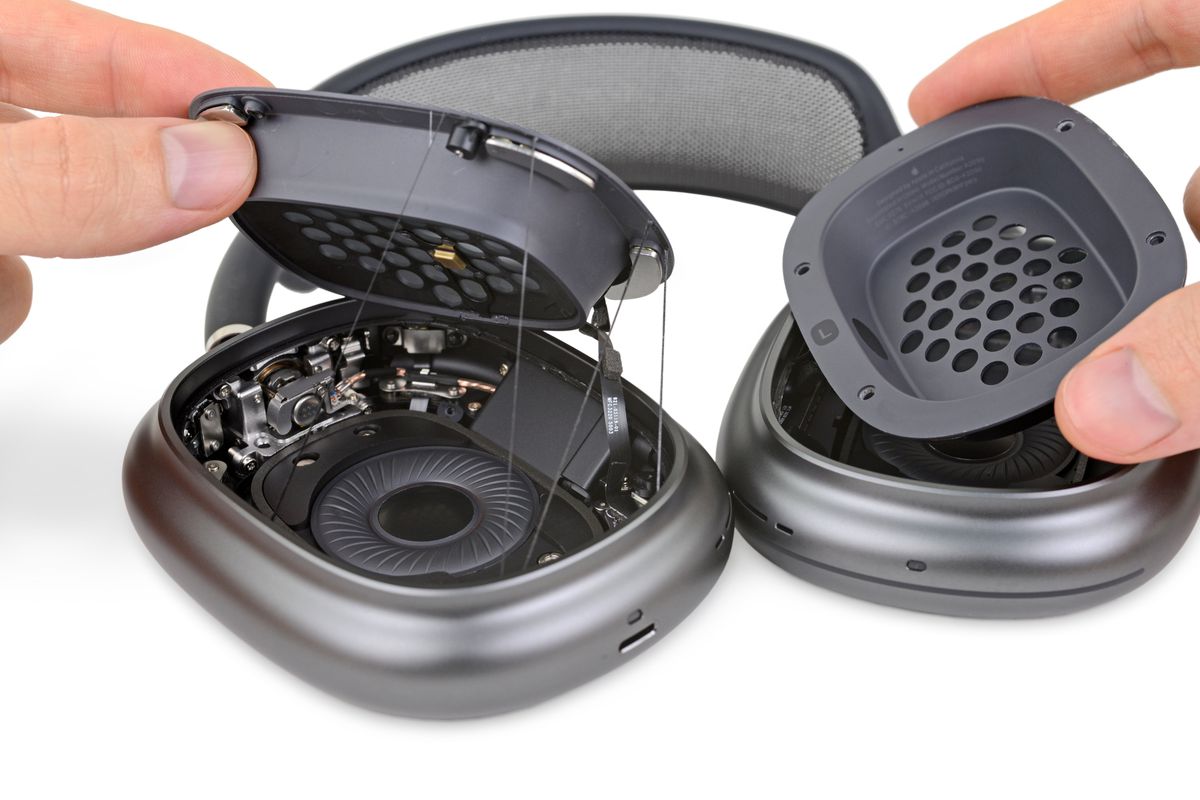
Before initiating any repair work on your Bose noise-cancelling headphones, it is crucial to carefully disassemble the device to gain access to its internal components. Follow these step-by-step instructions to disassemble the headphones:
- Prepare Your Workspace: Find a clean, well-lit area to work in and gather all the necessary tools and materials listed in the previous section.
- Locate and Remove Screws: Using a small Phillips head screwdriver, identify and remove the screws securing the outer casing of the headphones. Place the screws in a safe location to prevent misplacement.
- Pry Open the Casing: Carefully use a spudger or nylon pry tool to gently pry open the headphone casing. Exercise caution to avoid damaging the casing or the internal components.
- Document the Disassembly: As you remove components, take note of their placement and orientation. This documentation will facilitate the reassembly process and prevent confusion later on.
- Separate the Components: Once the casing is removed, carefully separate the internal components, such as the speaker drivers, wiring, and circuit boards, taking care not to strain or damage any delicate connections.
- Refer to the User Manual: If you encounter any resistance or uncertainty during the disassembly, refer to the user manual or online resources for additional guidance specific to your headphone model.
By meticulously following these steps, you will successfully disassemble your Bose noise-cancelling headphones, granting access to the internal components for troubleshooting and repair. Throughout the disassembly process, maintain a methodical approach and handle the components with care to ensure a seamless transition into the repair phase.
Identifying the Issue
Once your Bose noise-cancelling headphones are disassembled, it’s time to identify the specific issue affecting their performance. Common problems may include crackling or distorted sound, intermittent connectivity, or physical damage to the internal wiring. Here’s how to pinpoint the issue:
- Visual Inspection: Carefully examine the internal components for any visible signs of damage, such as frayed wiring, loose connections, or worn-out ear pads. Document any observed issues for reference during the repair process.
- Functional Testing: Reassemble the headphones temporarily and conduct a test to identify the precise nature of the issue. Listen for any irregularities in sound quality, test the functionality of the noise-cancelling feature, and ensure that all controls and switches are responsive.
- Use of Multimeter: If the issue pertains to electrical connectivity or wiring, a multimeter can be utilized to measure the continuity of wires and identify any breaks or irregularities in the circuit.
- Consultation of Resources: Refer to the user manual or online resources provided by Bose for troubleshooting guidelines specific to your headphone model. These resources may offer insights into common issues and their respective solutions.
- Documentation of Findings: As you identify the specific issue, document your findings to maintain a clear record of the problem and its potential solutions. This documentation will serve as a valuable reference throughout the repair process.
By systematically assessing the condition of your headphones and conducting thorough tests, you will gain a comprehensive understanding of the underlying issue. This knowledge will guide you in formulating an effective and targeted approach to address the specific problem, leading to successful repairs and restored functionality.
Repairing the Wiring
One of the most common issues encountered in Bose noise-cancelling headphones is wiring malfunctions, which can manifest as intermittent connectivity, audio distortion, or complete audio loss. Addressing wiring issues requires precision and attention to detail. Here’s a systematic approach to repairing the wiring:
- Identification of Faulty Wiring: Utilize visual inspection and functional testing to pinpoint any damaged or frayed wiring within the headphones. Pay close attention to areas where the wiring bends or experiences frequent movement, as these are common sites of wear and tear.
- Isolation of the Fault: Once the faulty wiring is identified, carefully isolate the affected sections by gently separating them from the surrounding components. This isolation prevents accidental damage to adjacent wiring during the repair process.
- Stripping and Splicing: If the wiring is frayed or severed, use a wire stripper to remove the damaged insulation and expose the conductive wire. Subsequently, carefully splice the wire and remove any damaged segments to prepare it for repair.
- Soldering the Connections: With the exposed conductive wire ready for repair, use a soldering iron and solder to re-establish the electrical connection. Apply a small amount of solder to the spliced area, ensuring a secure and conductive joint without creating excessive bulk or irregularities.
- Insulation and Protection: Once the soldered connection is complete, insulate the repaired area using heat-shrink tubing or electrical tape. This insulation shields the repaired section from external elements and prevents the risk of short circuits or exposed wiring.
- Functional Testing: After repairing the wiring, conduct a thorough functional test to ensure that the connectivity and audio quality have been restored. Listen for any abnormalities in sound and verify that the repaired wiring functions reliably under various conditions.
By meticulously following these steps, you can effectively address wiring malfunctions within your Bose noise-cancelling headphones, restoring their audio performance and ensuring prolonged functionality. Exercise patience and precision during the repair process to achieve optimal results and extend the lifespan of your cherished headphones.
Replacing the Ear Pads
Over time, the ear pads of your Bose noise-cancelling headphones may exhibit signs of wear and tear, such as flaking, deterioration, or loss of cushioning. Replacing the ear pads is a simple yet impactful maintenance task that can significantly enhance the comfort and aesthetics of your headphones. Follow these steps to seamlessly replace the ear pads:
- Identification of Compatibility: Before purchasing replacement ear pads, ensure that they are compatible with your specific headphone model. Refer to the user manual or Bose’s official website to identify the appropriate replacement ear pads for your headphones.
- Removal of Old Ear Pads: Gently peel off the old ear pads from the headphone’s ear cups, taking care not to damage the underlying components or the adhesive surface. If the ear pads are held in place by a mounting ring, carefully detach the ring from the ear cups.
- Cleaning the Ear Cup Surface: Thoroughly clean the ear cup surface to remove any adhesive residue or debris left behind by the old ear pads. Use a mild cleaning solution and a soft cloth to ensure a clean and smooth mounting surface for the new ear pads.
- Installation of New Ear Pads: Align the replacement ear pads with the ear cups and gently press them into place, ensuring a secure and uniform attachment. If the ear pads are equipped with a mounting ring, carefully reattach the ring to the ear cups, securing the new ear pads in position.
- Adhering to Adhesive Guidelines: If the replacement ear pads feature adhesive backing, follow the manufacturer’s guidelines for proper adhesion. Apply gentle pressure to the ear pads to promote adhesion and ensure a snug fit.
- Allowing for Settling Time: After installing the new ear pads, allow them to settle and conform to the ear cups over time. This settling period ensures optimal comfort and a secure fit, enhancing the overall headphone-wearing experience.
By seamlessly replacing the ear pads of your Bose noise-cancelling headphones, you can rejuvenate their appearance and comfort, prolonging the enjoyment of your audio experience. Prioritize the compatibility and quality of replacement ear pads to ensure a seamless and durable upgrade that revitalizes your headphones.
Reassembling the Headphones
After successfully addressing the specific issues and performing necessary maintenance tasks, it is time to reassemble your Bose noise-cancelling headphones. Follow these systematic steps to ensure a seamless reassembly process:
- Reference Documentation: Consult any documentation or notes you made during the disassembly process to guide the reassembly. This will help ensure that components are reintegrated correctly and in the proper orientation.
- Careful Component Placement: Place the internal components, such as the speaker drivers, wiring, and circuit boards, back into the headphone casing with precision. Take care to align the components properly and avoid forcing any connections.
- Securing Screws: Using the small Phillips head screwdriver, reinsert and tighten the screws to secure the headphone casing. Ensure that the screws are fastened snugly but not overtightened, as this may cause damage to the casing or internal components.
- Functional Verification: Before completing the reassembly, conduct a brief functional test to verify that the components are securely in place and that the headphone’s controls and features are operational.
- Final Inspection: Thoroughly inspect the reassembled headphones to confirm that all components are properly aligned, secured, and functioning as intended. Address any irregularities or loose connections before proceeding.
By methodically reassembling your Bose noise-cancelling headphones, you ensure that the internal components are reintegrated with precision and care, setting the stage for a successful repair outcome. Exercise patience and attention to detail during this phase to guarantee the optimal functionality and longevity of your revitalized headphones.
Testing the Repaired Headphones
With the reassembly of your Bose noise-cancelling headphones complete, it is essential to conduct thorough testing to validate the effectiveness of the repairs and ensure that the headphones are functioning optimally. Follow these steps to perform comprehensive testing:
- Audio Playback Test: Connect the headphones to an audio source and play a variety of audio tracks to assess the sound quality. Listen for any distortions, crackling, or irregularities in the audio output.
- Noise-Cancelling Functionality: Activate the noise-cancelling feature and evaluate its effectiveness in reducing ambient noise. Verify that the feature operates smoothly without introducing any additional noise or interference.
- Control and Switch Testing: Test the functionality of all controls and switches on the headphones, including volume adjustments, power controls, and any additional features specific to your headphone model.
- Comfort and Fit: Wear the headphones for an extended period to assess the comfort and fit of the new ear pads. Ensure that the ear cups provide a secure and comfortable seal without causing discomfort or pressure points.
- Long-Term Performance Evaluation: Monitor the headphones’ performance over an extended period to assess their reliability and functionality under real-world usage conditions. Pay attention to any recurring issues or anomalies that may indicate underlying problems.
By conducting comprehensive testing, you can ascertain the success of the repairs and confirm that your Bose noise-cancelling headphones have been restored to their optimal performance. Address any lingering issues or inconsistencies promptly to ensure a satisfying and enduring audio experience with your revitalized headphones.
Conclusion
Embarking on the journey to repair your Bose noise-cancelling headphones has empowered you to delve into the inner workings of these sophisticated audio devices, fostering a deeper understanding of their components and functionality. By following the systematic process of disassembling, identifying issues, and performing targeted repairs, you have demonstrated resourcefulness and skill in maintaining and revitalizing your cherished headphones.
Throughout this repair endeavor, you have honed your problem-solving abilities, meticulous attention to detail, and technical proficiency, elevating your confidence in handling intricate electronic devices. The successful replacement of ear pads, repair of wiring malfunctions, and thorough testing of the headphones have culminated in a gratifying outcome, breathing new life into your audio accessory.
As you reflect on this repair experience, consider the valuable skills and knowledge you have acquired, empowering you to address future maintenance needs and contribute to the longevity of your electronic devices. Embrace the satisfaction of reviving your headphones through your own efforts, and carry forward the expertise gained from this endeavor into future DIY projects and technical pursuits.
In the realm of headphone maintenance, your newfound proficiency positions you as a capable guardian of your audio equipment, equipped to overcome challenges and preserve the performance and comfort of your Bose noise-cancelling headphones for years to come.
With your headphones restored to their optimal functionality and comfort, you can now immerse yourself in an unparalleled audio experience, appreciating the rich sound quality and immersive noise-cancelling features that define the Bose brand. Your commitment to maintenance and repair has not only saved you the expense of purchasing new headphones but has also cultivated a sense of pride and accomplishment in your ability to breathe new life into your beloved audio companion.


