Introduction
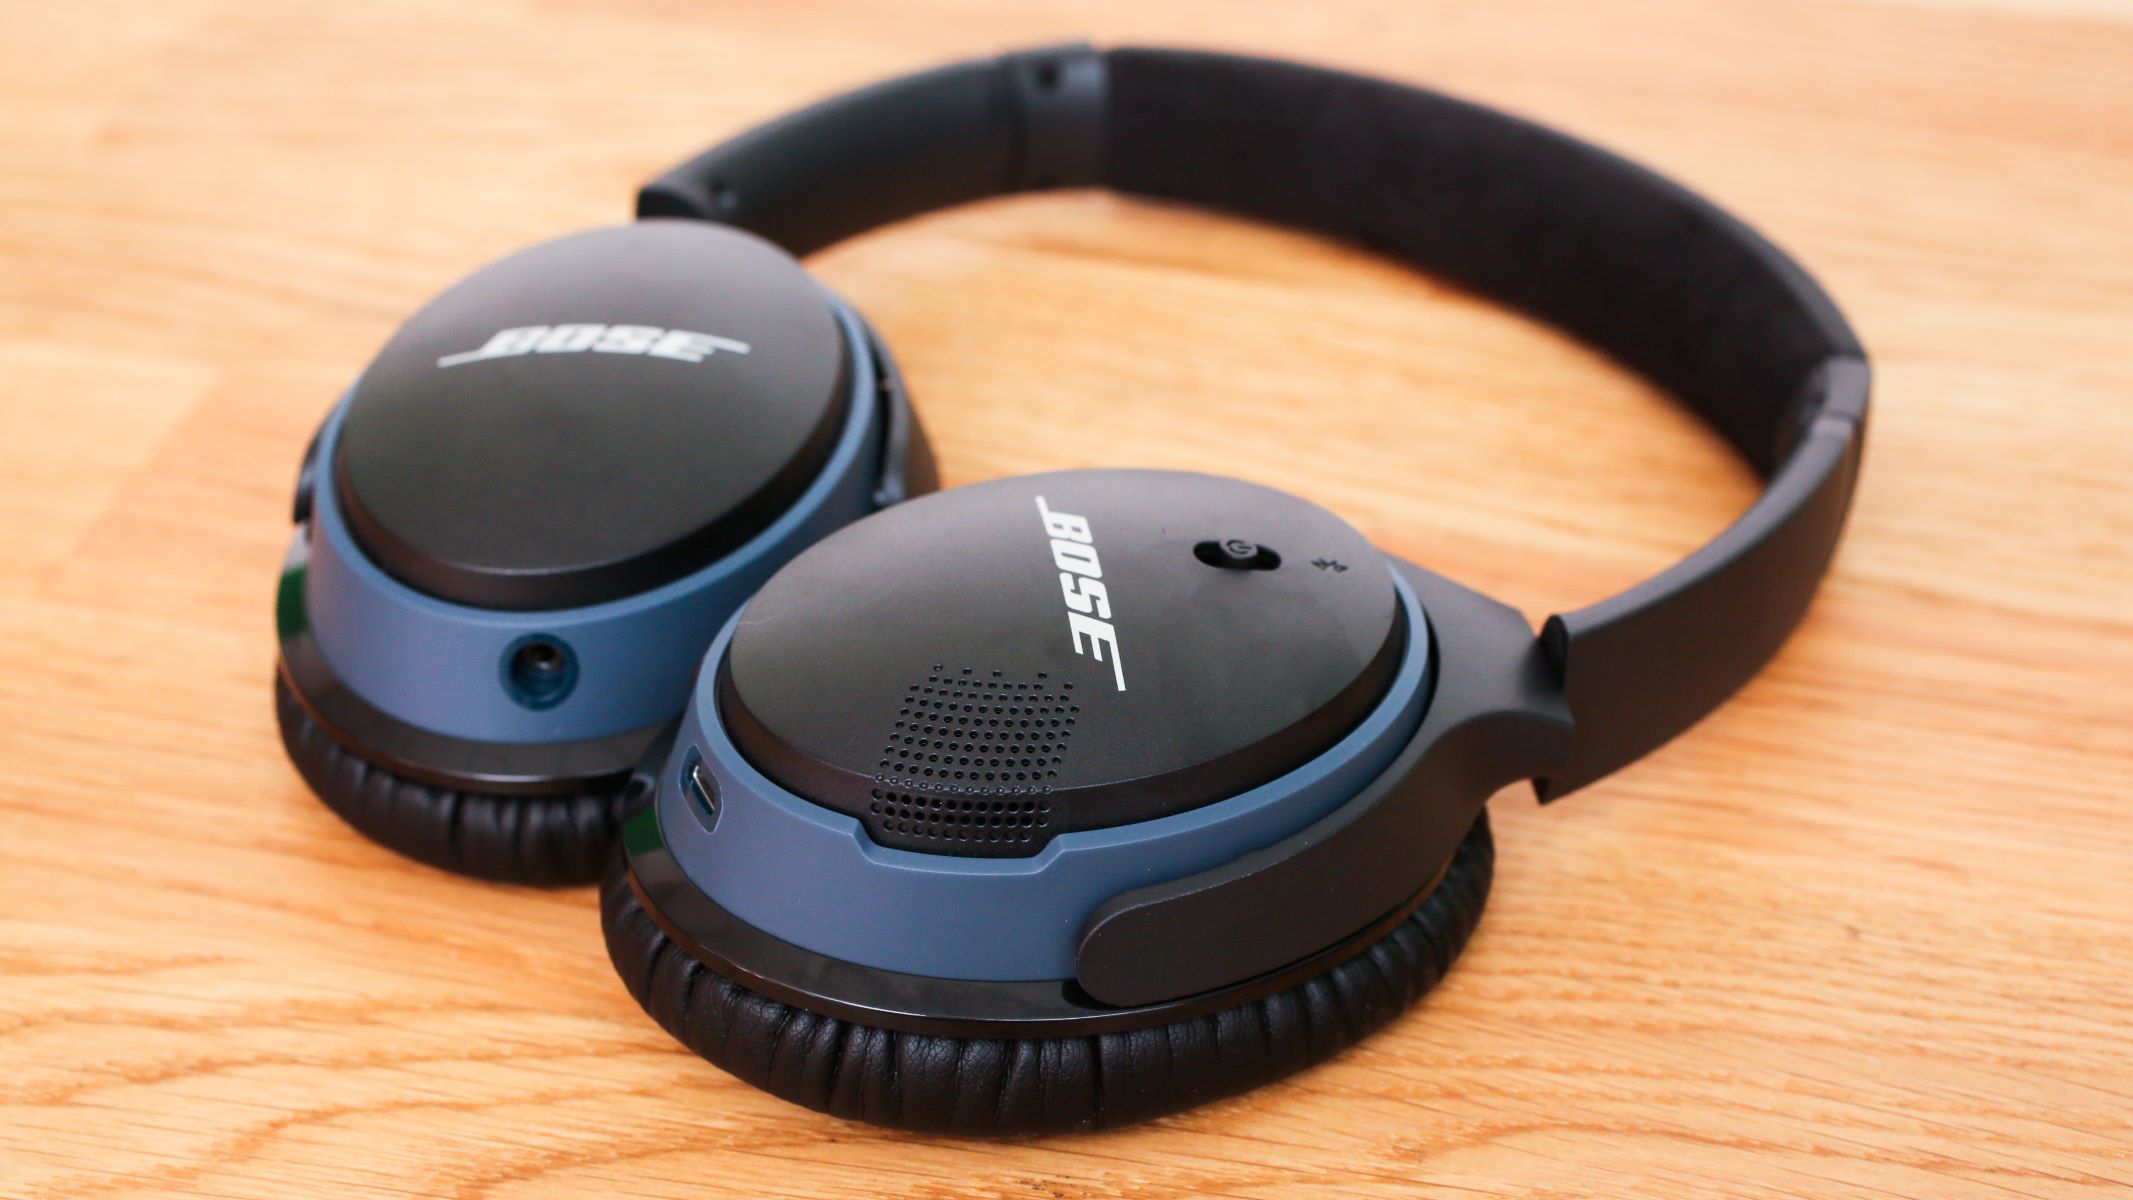
Repairing Bose over-ear headphones can be a rewarding and cost-effective endeavor, allowing you to restore your favorite audio accessory to its former glory. Whether the ear cushions have worn out, the headband is damaged, or the audio cable needs replacement, taking the time to repair your headphones can save you money and reduce electronic waste. This guide will walk you through the process of repairing Bose over-ear headphones, providing step-by-step instructions and valuable tips to help you get the job done.
By following this comprehensive repair guide, you can extend the lifespan of your beloved headphones and continue enjoying high-quality audio for years to come. Not only does repairing your headphones promote sustainability by reducing the need for new purchases, but it also empowers you to take control of the maintenance and longevity of your electronic devices. With a few simple tools and a bit of patience, you can tackle common headphone issues and restore your Bose over-ear headphones to optimal working condition.
Whether you're a seasoned DIY enthusiast or a novice looking to learn a new skill, repairing your headphones can be a fulfilling and educational experience. Throughout this guide, you'll learn how to disassemble the headphones, identify and address various issues, and test the repaired headphones to ensure they're functioning perfectly. So, roll up your sleeves, gather your tools, and let's dive into the world of headphone repair to breathe new life into your Bose over-ear headphones.
Tools and Materials Needed
Before embarking on the journey of repairing your Bose over-ear headphones, it’s essential to gather the necessary tools and materials to ensure a smooth and successful repair process. Here’s a comprehensive list of items you’ll need:
- Small screwdriver set: Phillips and flathead screwdrivers of various sizes
- Replacement ear cushions: Compatible with your specific Bose headphone model
- Replacement headband padding: If the existing padding is worn or damaged
- Replacement audio cable: Ensure compatibility with your Bose headphones
- Tweezers: For handling small components and wires
- Small pliers: Useful for gripping and manipulating small parts
- Replacement ear cup covers: If the current covers are damaged
- Clean cloth and mild cleaning solution: For cleaning the headphone components
- Electrical tape: For securing wires and providing insulation
- Heat-shrink tubing: If heat shrinkage is needed for cable repair
- Scissors: To cut and trim materials as necessary
- Electrical soldering iron and solder: For repairing electrical connections
- Replacement speaker units: If the speakers are malfunctioning
- Multi-meter: For testing electrical connections and continuity
It’s important to ensure that the replacement parts and materials are compatible with your specific Bose headphone model to guarantee a proper fit and optimal performance. Additionally, having a clean and well-lit workspace will facilitate the repair process and help prevent the loss of small components.
By having these tools and materials at your disposal, you’ll be well-equipped to address a variety of issues that may arise during the headphone repair process. With everything in hand, you can proceed with confidence, knowing that you have the necessary resources to restore your Bose over-ear headphones to their former functionality.
Disassembling the Headphones
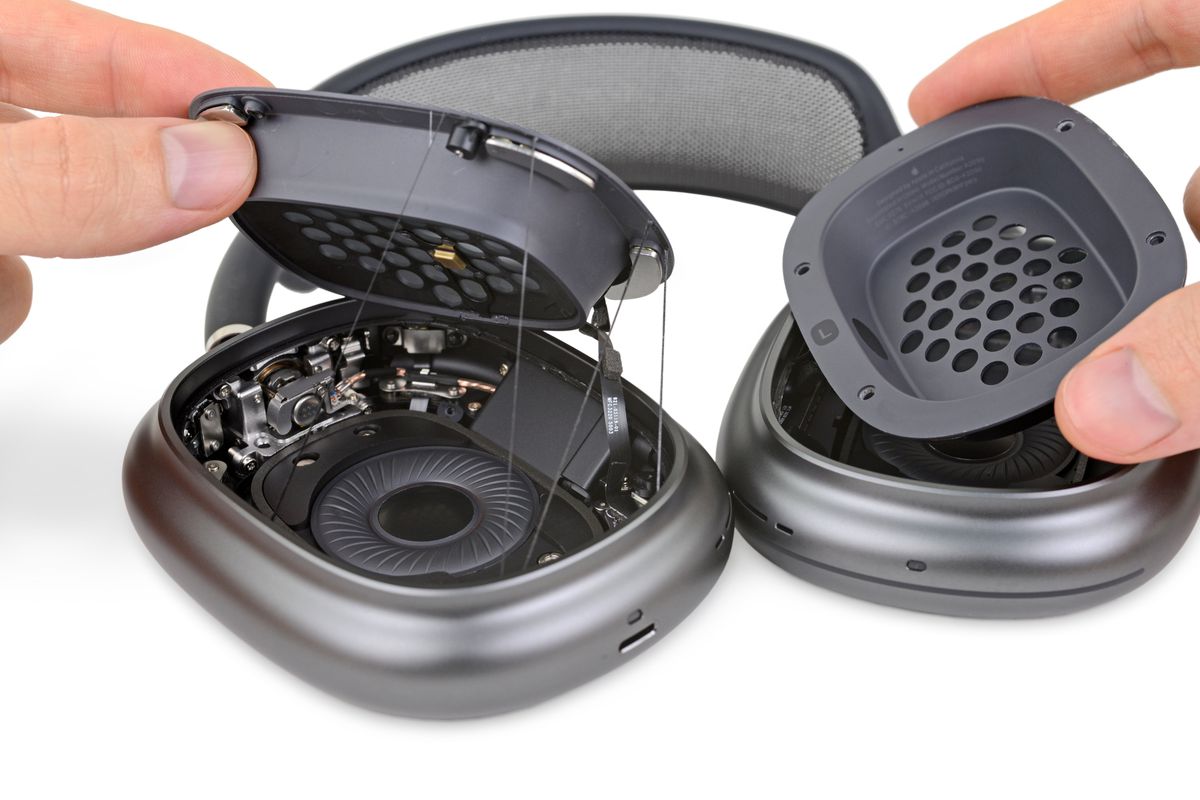
Before delving into the intricate process of repairing your Bose over-ear headphones, it’s crucial to master the art of disassembling the device without causing any damage. This initial step sets the stage for identifying and addressing the specific issues affecting your headphones. Here’s a step-by-step guide to disassembling your Bose over-ear headphones:
- Prepare Your Workspace: Find a clean, well-lit area to work in and gather all the necessary tools and materials listed in the previous section.
- Remove the Ear Cushions: Carefully peel off the existing ear cushions, taking note of the method used to secure them in place. Some models may have cushions that twist and lock into position, while others may feature adhesive backing.
- Unscrew the Ear Cup Covers: Using the appropriate screwdriver, carefully remove the screws that secure the ear cup covers in place. Keep the screws in a safe place to prevent loss.
- Detach the Ear Cup Covers: Gently pry off the ear cup covers, taking care not to damage the delicate components inside. Set the covers aside for reassembly later.
- Locate and Remove Additional Screws: Look for any additional screws or fasteners securing the headphone components. These may be hidden beneath stickers or labels, so inspect the entire surface for any hidden fastenings.
- Separate the Headband: If necessary, detach the headband from the ear cup assembly by carefully releasing any clips or connectors that hold it in place.
- Handle Components with Care: Throughout the disassembly process, handle the headphone components with the utmost care to avoid causing any accidental damage.
By following these steps, you can safely disassemble your Bose over-ear headphones, preparing them for thorough inspection and targeted repairs. Taking your time and exercising patience during this stage will set the foundation for a successful repair outcome, ensuring that the headphones can be reassembled without any complications.
Identifying the Issue
Once the Bose over-ear headphones are disassembled, it’s time to closely examine the internal components to pinpoint the specific issue affecting their functionality. Here are the key steps to identify and understand the problem:
- Inspect the Ear Cushions: Check the condition of the ear cushions for wear, tear, or disintegration. If they are worn out or damaged, replacement may be necessary to restore comfort and acoustics.
- Examine the Headband: Assess the headband for any signs of damage, such as cracks, tears, or deformation. Damaged headband padding can lead to discomfort during prolonged use and may require replacement.
- Check the Audio Cable: Carefully examine the audio cable for any visible damage, such as fraying or exposed wires. If the cable is compromised, it can result in audio issues and may need to be replaced.
- Test the Speaker Units: Use a multi-meter to test the continuity of the speaker units and ensure that they are functioning correctly. If there are issues with the speakers, replacement may be necessary to restore audio quality.
- Inspect Internal Connections: Examine the internal wiring and connections for any loose or damaged components. A secure and intact electrical connection is crucial for optimal headphone performance.
- Check for Other Issues: Look for any additional issues, such as worn ear cup covers, damaged hinges, or loose components that may affect the overall functionality and comfort of the headphones.
By carefully assessing each potential issue, you can gain a clear understanding of the specific problems plaguing your Bose over-ear headphones. This thorough examination sets the stage for targeted repairs, ensuring that the necessary steps are taken to address each issue effectively. Once the issues are identified, you can proceed with confidence, armed with the knowledge needed to restore your headphones to peak performance.
Repairing the Ear Cushions
The ear cushions of Bose over-ear headphones are vital for comfort and sound isolation, and over time, they may wear out or become damaged. Repairing or replacing the ear cushions can breathe new life into your headphones. Here’s a step-by-step guide to repairing the ear cushions:
- Remove the Old Ear Cushions: Carefully detach the worn or damaged ear cushions from the ear cup assembly. Take note of the method used to secure the cushions, as it may vary based on the headphone model.
- Clean the Ear Cup Surface: Use a clean cloth and mild cleaning solution to gently wipe the ear cup surface, removing any debris or adhesive residue left behind by the old cushions.
- Prepare the Replacement Cushions: If you have new replacement cushions, ensure they are compatible with your specific Bose headphone model. Verify that the shape, size, and attachment mechanism match the original cushions.
- Install the New Cushions: Carefully align the replacement cushions with the ear cup assembly and follow the manufacturer’s instructions for secure attachment. This may involve twisting and locking the cushions into place or using adhesive backing for a firm bond.
- Ensure Proper Alignment: Double-check that the replacement cushions are aligned correctly and sit flush against the ear cup surface, providing a comfortable and secure seal for optimal sound performance.
By following these steps, you can effectively repair the ear cushions of your Bose over-ear headphones, enhancing both comfort and audio quality. If the cushions are beyond repair, replacing them with high-quality, compatible replacements can revitalize your headphones and provide a renewed listening experience.
Fixing the Headband
The headband of Bose over-ear headphones plays a crucial role in providing comfort and stability during extended wear. If the headband padding is worn out or damaged, addressing this issue is essential to ensure a comfortable and secure fit. Here’s a detailed guide to fixing the headband of your headphones:
- Assess the Headband Damage: Carefully examine the headband padding for signs of wear, tear, or deformation. Common issues include flattened padding, cracks, or peeling of the outer material.
- Obtain Replacement Padding: If the headband padding is beyond repair, acquire compatible replacement padding designed for your specific Bose headphone model. Ensure that the replacement padding matches the original in size and design.
- Remove the Old Padding: Gently detach the worn or damaged headband padding from the headphone frame, taking care not to damage any underlying components or the headband structure.
- Install the Replacement Padding: Align the replacement padding with the headband frame and carefully secure it in place according to the manufacturer’s instructions. This may involve snapping the padding into position or using adhesive backing for a firm attachment.
- Ensure Proper Alignment: Verify that the replacement padding is aligned evenly and securely along the headband, providing consistent comfort and support across the entire length of the headband.
- Test the Fit: Put the headphones on and assess the comfort and stability of the newly fixed headband. Ensure that the padding provides adequate cushioning and maintains a secure fit without causing discomfort.
By following these steps, you can effectively address headband issues and restore the comfort and functionality of your Bose over-ear headphones. A well-maintained headband ensures that you can enjoy extended listening sessions without discomfort, allowing you to fully immerse yourself in your favorite music or audio content.
Replacing the Audio Cable
The audio cable of Bose over-ear headphones is a critical component that facilitates the transmission of audio signals from the device to the speakers. Over time, the cable may become damaged or develop faults, impacting the overall audio experience. Here’s a comprehensive guide to replacing the audio cable of your headphones:
- Identify the Cable Type: Determine the specific type of audio cable used by your Bose headphones, ensuring that the replacement cable is compatible in terms of connector size and configuration.
- Acquire a Replacement Cable: Obtain a high-quality replacement audio cable designed for your specific Bose headphone model. Ensure that the cable length and connector type match the original cable for seamless integration.
- Prepare for Disconnection: If the cable is detachable, carefully disconnect it from the headphone housing, taking note of any locking mechanisms or securing clips that may be present.
- Remove the Old Cable: If the cable is integrated into the headphone structure, carefully remove any retaining clips or adhesive to release the cable without causing damage to the internal components.
- Install the Replacement Cable: Align the new audio cable with the designated port or connection point on the headphone housing, ensuring a secure and snug fit. Follow any specific instructions provided by the manufacturer for proper installation.
- Test the Audio Connection: Once the replacement cable is installed, test the audio connection by playing audio through the headphones and verifying that the sound is clear and consistent. Ensure that both audio channels are functioning correctly.
By following these steps, you can effectively replace the audio cable of your Bose over-ear headphones, restoring seamless audio transmission and ensuring a reliable connection between the device and the speakers. A high-quality replacement cable can rejuvenate your headphones, allowing you to enjoy uninterrupted audio playback with enhanced clarity and fidelity.
Testing the Headphones
After completing the necessary repairs and replacements, it’s essential to thoroughly test your Bose over-ear headphones to ensure that they are functioning optimally. The testing phase allows you to confirm that the repairs have been successful and that the audio quality, comfort, and overall performance meet your expectations. Here’s a detailed guide to testing your headphones:
- Audio Playback Test: Connect your headphones to a reliable audio source and play a variety of audio tracks, including music, podcasts, and spoken-word content. Pay close attention to the clarity, balance, and richness of the audio output.
- Channel Balance Check: Verify that both the left and right audio channels are functioning correctly. Listen for any discrepancies in volume or sound quality between the two channels.
- Comfort Assessment: Wear the headphones for an extended period to evaluate the comfort of the ear cushions and headband padding. Ensure that the fit is secure and comfortable without causing undue pressure or discomfort.
- Audio Cable Stability: Test the stability of the newly replaced audio cable by gently adjusting and flexing it while listening to audio. Verify that the cable maintains a reliable connection without causing audio interruptions.
- External Sound Isolation: Assess the headphones’ ability to isolate external sounds, providing a focused and immersive listening experience. Verify that the ear cushions create a secure seal, minimizing ambient noise.
- Functional Controls Test: If your headphones feature built-in controls or additional functionalities, such as noise cancellation or volume adjustments, test these features to ensure they are working as intended.
By conducting a comprehensive testing process, you can confirm that your Bose over-ear headphones have been successfully repaired and restored to their optimal functionality. Any issues identified during testing can be promptly addressed, ensuring that you can enjoy a satisfying and immersive audio experience with your rejuvenated headphones.
Conclusion
Embarking on the journey to repair and rejuvenate your Bose over-ear headphones has allowed you to gain valuable insights into the inner workings of these audio devices. By carefully disassembling the headphones, identifying issues, and performing targeted repairs, you’ve not only extended the lifespan of your headphones but also honed your skills in electronic maintenance and repair.
Throughout the repair process, you’ve demonstrated patience, precision, and a commitment to preserving and enhancing your electronic devices. By addressing common issues such as worn ear cushions, damaged headband padding, and faulty audio cables, you’ve taken proactive steps to ensure that your headphones deliver exceptional audio quality and comfort for years to come.
Furthermore, the successful testing of your repaired headphones has provided the assurance that the repairs and replacements have been effective, resulting in a renewed listening experience that meets and exceeds your expectations. The thorough testing process has allowed you to appreciate the culmination of your efforts and expertise, reaffirming the value of maintaining and repairing electronic devices rather than simply replacing them.
By embracing the art of headphone repair, you’ve not only saved money and reduced electronic waste but also gained a sense of empowerment and accomplishment. The ability to diagnose, repair, and test your Bose over-ear headphones represents a significant achievement, underscoring the importance of sustainable practices and self-sufficiency in maintaining your cherished electronic devices.
As you continue to enjoy the enhanced performance and comfort of your rejuvenated headphones, remember that the skills and knowledge you’ve acquired can be applied to future maintenance and repair endeavors, further enriching your experience as a conscientious and capable electronics enthusiast.


