Introduction
Welcome to the guide on replacing the battery for your Honeywell Smart Thermostat! Your Honeywell Smart Thermostat plays a crucial role in maintaining a comfortable and energy-efficient environment in your home. However, like all electronic devices, it relies on a power source to function effectively. Over time, the batteries in your thermostat will need to be replaced to ensure uninterrupted operation and accurate temperature control.
In this comprehensive guide, you will learn the step-by-step process of replacing the batteries in your Honeywell Smart Thermostat. Whether you have a busy household or you're a tech-savvy individual looking to take control of your home's climate, understanding how to replace the batteries in your thermostat is essential knowledge. By following these simple instructions, you can ensure that your thermostat continues to operate smoothly and efficiently, providing you with the comfort and control you need.
So, if you've noticed a decrease in performance or if your thermostat display is dimming, it may be time to replace the batteries. Don't worry; it's a straightforward process that you can easily accomplish with just a few basic tools and a little bit of your time. Let's dive into the step-by-step instructions for replacing the battery on your Honeywell Smart Thermostat and ensure that your home remains at the perfect temperature, day in and day out.
Step 1: Turn off the Thermostat
Before you begin the battery replacement process, it’s essential to turn off your Honeywell Smart Thermostat to ensure safety and prevent any potential electrical issues. Follow these simple steps to power down your thermostat:
- Access the Main Menu: Locate the main menu button on your thermostat. It is usually represented by an icon such as three horizontal lines or a gear symbol. Press the button to access the main menu.
- Navigate to Settings: Once in the main menu, navigate to the “Settings” option. This will allow you to access the necessary controls to power off the thermostat.
- Turn Off the Thermostat: Within the settings, look for the “Power” or “System” option. Select this option and then choose “Turn Off” to power down the thermostat.
- Verify the Display: After following these steps, ensure that the display on the thermostat has turned off completely. This confirms that the thermostat is no longer receiving power.
By turning off the thermostat, you eliminate the risk of electrical shock and ensure a safe environment for replacing the batteries. Additionally, powering down the thermostat allows for a smooth transition during the battery replacement process, preventing any potential malfunctions or errors.
Now that your Honeywell Smart Thermostat is safely powered off, you’re ready to proceed to the next step in the battery replacement process. Let’s move on to removing the cover to access the internal components of the thermostat.
Step 2: Remove the Cover
With the thermostat safely powered off, the next step in replacing the battery is to remove the cover to access the internal components. Follow these straightforward instructions to remove the cover of your Honeywell Smart Thermostat:
- Locate the Release Latch: Depending on the model of your Honeywell Smart Thermostat, the release latch may be located at the bottom, top, or sides of the device. Carefully inspect the thermostat to identify the release latch.
- Press the Release Latch: Gently press the release latch to disengage the cover. You may need to use a small amount of force, but be cautious not to apply excessive pressure to avoid damaging the thermostat.
- Remove the Cover: Once the release latch is disengaged, carefully lift the cover away from the thermostat. Take your time to ensure that the cover is removed smoothly without causing any strain on the internal components.
- Set Aside the Cover: Place the cover in a safe and easily accessible location. This will prevent any misplacement and allow for easy reassembly once the battery replacement is complete.
By following these steps, you can successfully remove the cover of your Honeywell Smart Thermostat and gain access to the battery compartment. It’s important to handle the cover with care to avoid any damage and ensure that the internal components remain intact.
With the cover removed, you are now ready to proceed to the next crucial step: replacing the batteries in your Honeywell Smart Thermostat. Let’s move on to the battery replacement process and ensure that your thermostat continues to operate at its best.
Step 3: Replace the Batteries
Now that you have successfully removed the cover of your Honeywell Smart Thermostat, it’s time to replace the batteries. Follow these simple steps to ensure a smooth and efficient battery replacement process:
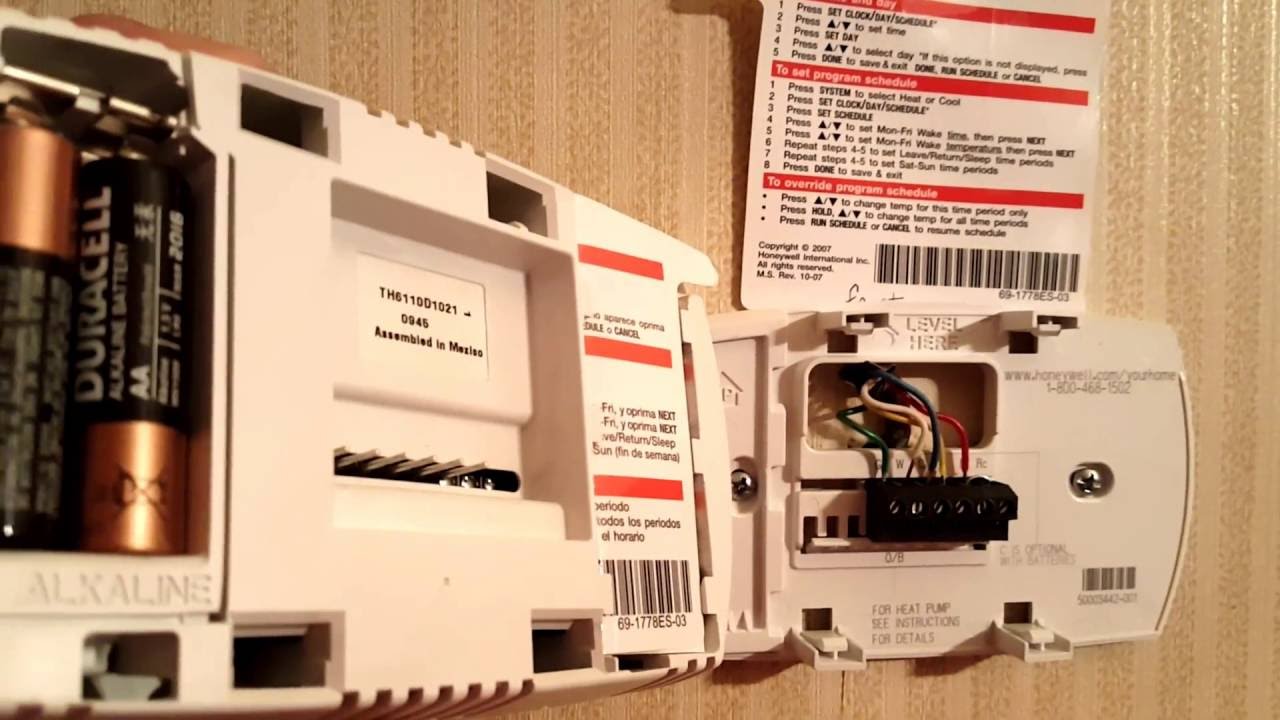
- Identify the Battery Compartment: Locate the battery compartment within the thermostat. It is usually situated near the bottom of the device and may be marked with a battery icon or a label indicating its location.
- Remove the Old Batteries: Carefully remove the existing batteries from the compartment. Pay close attention to the orientation of the batteries and take note of how they are positioned to ensure proper installation of the new ones.
- Dispose of Old Batteries Responsibly: If the old batteries are no longer functional, ensure that you dispose of them in an environmentally friendly manner. Many communities offer recycling programs for used batteries to minimize environmental impact.
- Insert New Batteries: Take the new batteries and insert them into the compartment, ensuring that they are positioned according to the markings or polarity indicators within the compartment. Double-check the orientation to avoid any installation errors.
- Secure the Battery Compartment: After inserting the new batteries, securely close the battery compartment to ensure a snug fit. This will prevent any accidental dislodging of the batteries during normal operation.
By following these steps, you can seamlessly replace the batteries in your Honeywell Smart Thermostat, ensuring that it continues to function optimally. Properly installed and functional batteries are essential for maintaining the performance and accuracy of your thermostat.
With the new batteries in place, you are now ready to reassemble the thermostat and complete the battery replacement process. Let’s move on to the next step and ensure that your Honeywell Smart Thermostat is back in action with renewed power.
Step 4: Reassemble the Thermostat
With the batteries successfully replaced, it’s time to reassemble your Honeywell Smart Thermostat. Follow these straightforward steps to ensure that the thermostat is securely reassembled and ready to resume its essential function in your home:
- Retrieve the Cover: Take the cover that you set aside after removing it from the thermostat. Ensure that it is free from any dust or debris that may have accumulated during the battery replacement process.
- Align the Cover: Carefully position the cover over the thermostat, ensuring that it aligns correctly with the body of the device. Take your time to align the cover accurately to avoid any misalignment or potential damage during reassembly.
- Engage the Cover: Once aligned, gently press the cover back into place, taking care to engage any latches or locking mechanisms present on the thermostat. Ensure that the cover is securely attached to the thermostat body.
- Power On the Thermostat: After reassembling the thermostat, follow the manufacturer’s instructions to power on the device. This may involve navigating the menu and selecting the “Power On” option to restore functionality.
- Verify Display and Functionality: Once the thermostat is powered on, verify that the display is fully functional and that the device responds to input. Check for any error messages or unusual behavior to ensure that the thermostat is operating as expected.
By following these steps, you can successfully reassemble your Honeywell Smart Thermostat after replacing the batteries. It’s crucial to ensure that the thermostat is securely reassembled to maintain its structural integrity and prevent any potential issues during operation.
With the thermostat reassembled and powered on, you have completed the battery replacement process. Your Honeywell Smart Thermostat is now equipped with fresh batteries, ready to provide precise temperature control and enhance the comfort of your home.
Conclusion
Congratulations! You have successfully replaced the batteries in your Honeywell Smart Thermostat, ensuring that it continues to function optimally and provide reliable temperature control in your home. By following the step-by-step process outlined in this guide, you have taken a proactive approach to maintaining the performance of your thermostat and ensuring uninterrupted comfort for you and your family.
Regular maintenance, such as battery replacement, is essential for the longevity and efficiency of your thermostat. By staying proactive and addressing the battery replacement when needed, you can avoid potential disruptions in your home’s climate control system and enjoy consistent comfort year-round.
Remember, the battery replacement process for your Honeywell Smart Thermostat is a simple yet crucial task that contributes to the overall functionality of the device. By turning off the thermostat, removing the cover, replacing the batteries, and reassembling the device, you have demonstrated a commitment to maintaining a comfortable and efficient home environment.
As you enjoy the renewed performance of your thermostat, consider setting a reminder to check the batteries periodically to ensure that they remain in good condition. This proactive approach will help you stay ahead of any potential issues and maintain the seamless operation of your thermostat.
Thank you for taking the time to follow this guide. Your proactive approach to thermostat maintenance will undoubtedly contribute to a comfortable and energy-efficient home environment. With the battery replacement process successfully completed, you can now relax and enjoy the consistent comfort provided by your Honeywell Smart Thermostat.