Introduction
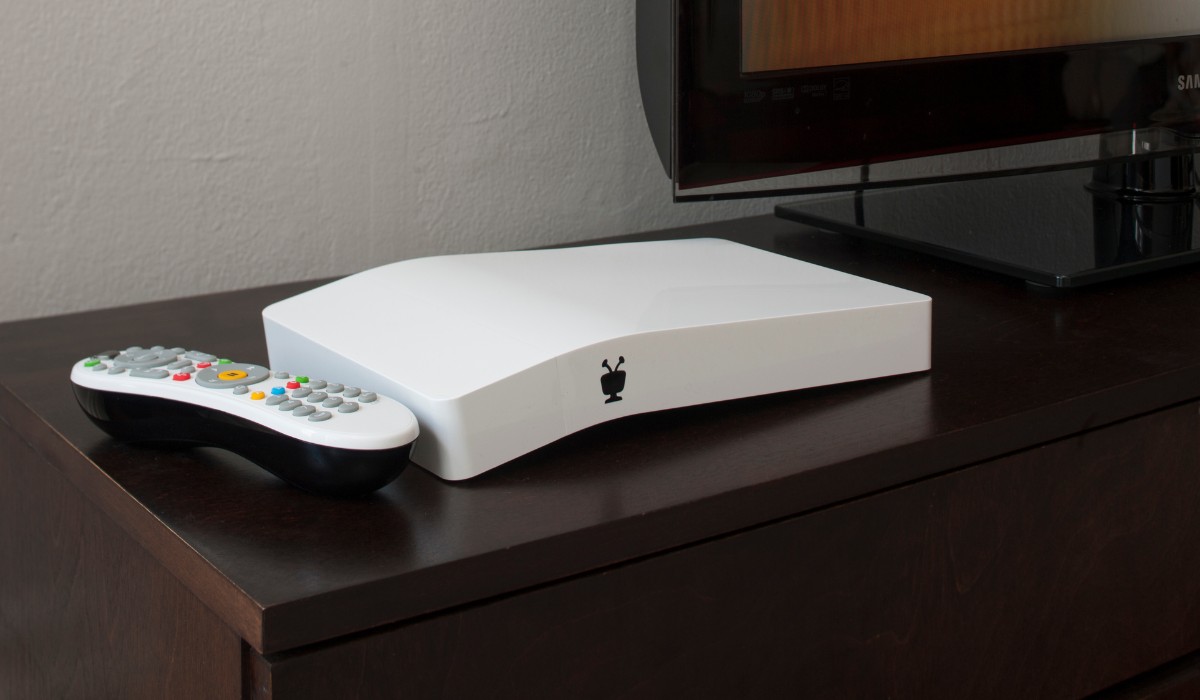
Connecting your TiVo Bolt to an AV receiver can significantly enhance your home entertainment experience by delivering high-quality audio and video performance. By integrating these two devices, you can enjoy immersive surround sound, improved audio clarity, and seamless control over your home theater system. Whether you're a movie enthusiast, a gaming aficionado, or a music lover, this setup can elevate your entertainment to new heights.
In this comprehensive guide, you will learn how to seamlessly connect your TiVo Bolt to an AV receiver, ensuring that you make the most of your home theater setup. By following these step-by-step instructions, you'll be able to enjoy an enhanced audio-visual experience and unlock the full potential of your entertainment system.
The process of connecting your TiVo Bolt to an AV receiver may seem daunting at first, especially if you're new to home theater setups. However, with the right guidance and a clear understanding of the necessary steps, you can accomplish this task with ease. This guide will walk you through the process, providing detailed instructions and valuable tips to ensure a smooth and successful connection.
By the end of this guide, you will have the knowledge and confidence to set up your TiVo Bolt with an AV receiver, allowing you to immerse yourself in a captivating audio-visual journey. So, let's dive in and explore the steps required to connect these two essential components of your home entertainment system.
Step 1: Gather the necessary cables and equipment
Before you begin the process of connecting your TiVo Bolt to an AV receiver, it’s essential to gather all the required cables and equipment. Ensuring that you have the necessary components at hand will streamline the setup process and minimize any potential delays or interruptions. Here’s a detailed overview of the cables and equipment you’ll need:
- HDMI Cable: The HDMI cable serves as the primary connection between your TiVo Bolt and the AV receiver. It transmits high-definition audio and video signals, enabling a seamless and high-quality connection between the two devices. Ensure that you have an HDMI cable of sufficient length to comfortably reach from the TiVo Bolt to the AV receiver.
- Power Cables: You’ll need the power cables for both the TiVo Bolt and the AV receiver. Ensure that both devices are plugged into power outlets and ready to be powered on during the setup process.
- Remote Control: The remote control for the AV receiver will be essential for configuring the device’s settings and ensuring that it recognizes the TiVo Bolt as an input source. Make sure the remote control is easily accessible and has functioning batteries.
- User Manuals: Keep the user manuals for both the TiVo Bolt and the AV receiver handy. These manuals can provide valuable guidance on the setup process, troubleshooting steps, and specific configurations that may be required.
- Internet Connection: Ensure that your TiVo Bolt and AV receiver have access to a stable internet connection. This is crucial for software updates, accessing streaming services, and maximizing the functionality of both devices.
By gathering these essential cables and equipment, you’ll be well-prepared to proceed with the connection process. Having everything at your fingertips will streamline the setup and ensure that you can address any potential challenges promptly.
Step 2: Connect the TiVo Bolt to the AV receiver
Once you’ve gathered the necessary cables and equipment, you can proceed to connect your TiVo Bolt to the AV receiver. This crucial step forms the foundation of your home theater setup, enabling the seamless transmission of audio and video signals between the two devices. Follow these detailed instructions to establish a solid connection:
- Locate the HDMI Ports: Identify the HDMI output port on the TiVo Bolt and the HDMI input port on the AV receiver. These ports are typically labeled for easy identification.
- Connect the HDMI Cable: Take the HDMI cable and securely plug one end into the HDMI output port of the TiVo Bolt. Then, connect the other end of the HDMI cable to the HDMI input port of the AV receiver. Ensure a firm and secure connection to prevent signal interference.
- Power On the Devices: Once the HDMI cable is in place, power on both the TiVo Bolt and the AV receiver. Allow the devices to initialize and establish the HDMI connection.
- Select the Input Source: Using the remote control for the AV receiver, select the corresponding input source that is connected to the TiVo Bolt. This step ensures that the AV receiver recognizes the TiVo Bolt as an active input device.
- Check for Signal Output: Verify that the audio and video signals from the TiVo Bolt are successfully transmitting to the AV receiver. You can do this by accessing the TiVo Bolt’s menu and playing a video or audio file to test the output on your connected display and speakers.
By meticulously following these steps, you’ll establish a robust connection between your TiVo Bolt and the AV receiver, laying the groundwork for an immersive home theater experience. This seamless integration allows you to experience the full potential of your audio-visual content, whether you’re watching movies, gaming, or enjoying your favorite music.
Step 3: Configure the AV receiver settings
After successfully connecting your TiVo Bolt to the AV receiver, the next crucial step is to configure the settings on the AV receiver to optimize the audio-visual output and ensure seamless integration with your home entertainment system. By fine-tuning the AV receiver settings, you can tailor the audio performance to your preferences and maximize the immersive experience. Follow these essential steps to configure the AV receiver settings:
- Access the AV Receiver Menu: Using the remote control, navigate to the menu or settings interface on the AV receiver. This may involve pressing a dedicated button on the remote or accessing the menu through the on-screen display.
- Audio Output Configuration: Within the AV receiver settings, locate the audio output configuration options. Here, you can specify the audio format, speaker setup, and other audio-related parameters. Ensure that the settings align with your home theater speaker configuration and the capabilities of your audio equipment.
- HDMI Control and CEC Settings: If your AV receiver supports HDMI control and Consumer Electronics Control (CEC), consider enabling these features. HDMI control allows the AV receiver to communicate with the TiVo Bolt and other connected devices, streamlining the overall operation and control of your home theater system.
- Network and Streaming Settings: If your AV receiver offers network connectivity and streaming capabilities, configure the network settings to ensure seamless access to online content, firmware updates, and streaming services. This step may involve connecting the AV receiver to your home network and entering relevant login credentials.
- Room Calibration and EQ: Many modern AV receivers feature room calibration and equalization (EQ) functions. Utilize these tools to optimize the audio performance based on your room’s acoustics and speaker placement. Follow the on-screen prompts or refer to the user manual for detailed instructions on room calibration and EQ setup.
By meticulously configuring the settings on your AV receiver, you can tailor the audio-visual experience to your preferences and ensure seamless compatibility with your TiVo Bolt and other connected devices. This step is pivotal in unlocking the full potential of your home theater system, delivering captivating audio and stunning visuals for all your entertainment needs.
Step 4: Test the connection and troubleshoot any issues
Once you’ve completed the setup process for connecting your TiVo Bolt to the AV receiver and configured the necessary settings, it’s crucial to test the connection and address any potential issues that may arise. Testing the connection allows you to ensure that both devices are functioning harmoniously and that the audio-visual output meets your expectations. Follow these steps to test the connection and troubleshoot any issues:
- Playback Test: Play a variety of audio and video content through your TiVo Bolt to assess the audio-visual output. This can include streaming content, Blu-ray discs, gaming sessions, and music playback. Pay attention to the clarity of the audio, the synchronization of audio and video, and the overall performance of your home theater system.
- Speaker Configuration Test: If you have a multi-channel speaker setup, ensure that each speaker is functioning correctly and positioned in the designated locations. Test the individual speakers to confirm that they are producing sound as intended, and troubleshoot any issues related to speaker connectivity or performance.
- Network and Streaming Test: If your TiVo Bolt and AV receiver utilize network connectivity for streaming content or accessing online services, verify that the network connection is stable. Test the streaming capabilities by accessing streaming platforms or online content to ensure seamless playback and connectivity.
- Audio Calibration Verification: If you’ve utilized room calibration and EQ features on your AV receiver, verify that the audio calibration settings have optimized the audio performance based on your room’s acoustics. Make adjustments if necessary to achieve the desired audio quality.
- Troubleshooting: In the event of any issues or discrepancies in the audio-visual output, refer to the user manuals for the TiVo Bolt and the AV receiver to troubleshoot specific issues. This may involve checking cable connections, updating firmware, adjusting audio settings, or seeking technical support from the respective manufacturers.
By thoroughly testing the connection and addressing any potential issues, you can ensure that your TiVo Bolt and AV receiver are seamlessly integrated, delivering an exceptional audio-visual experience for your home entertainment needs. This proactive approach allows you to identify and resolve any challenges, ultimately optimizing the performance of your home theater system.


