Introduction
Are you ready to unlock the full potential of your Redmi Note 3? With the power of custom ROMs, you can breathe new life into your device, enjoying enhanced performance, features, and customization options. One popular custom ROM for the Redmi Note 3 is Lineage OS, known for its stability, speed, and user-friendly interface. In this guide, we will walk you through the process of downloading and installing Lineage OS on your Redmi Note 3, empowering you to take control of your device and experience Android in a whole new way.
Whether you're a tech enthusiast looking to explore the world of custom ROMs or a user seeking to revitalize your aging device, this guide is designed to make the process as straightforward as possible. By following the steps outlined in this article, you'll be able to unleash the full potential of your Redmi Note 3, enjoying the benefits of Lineage OS and the freedom to personalize your device to suit your preferences.
Now, let's embark on this exciting journey to elevate your Redmi Note 3 to new heights. Get ready to delve into the world of custom ROMs and experience the thrill of customizing your device to reflect your unique style and needs. It's time to unlock the true potential of your Redmi Note 3 with Lineage OS!
Step 1: Unlocking Bootloader
Unlocking the bootloader is the first step towards liberating your Redmi Note 3 and paving the way for the installation of Lineage OS. The bootloader acts as a gatekeeper, restricting the installation of custom software on your device. By unlocking it, you gain the freedom to customize and optimize your device to your heart's content. However, it's important to note that unlocking the bootloader will erase all data on your device, so be sure to back up any important files before proceeding.
Preparing Your Device
Before delving into the unlocking process, ensure that your Redmi Note 3 is adequately charged to avoid any interruptions during the procedure. Additionally, enable USB debugging on your device by navigating to Settings > About Phone and tapping the Build Number seven times to enable Developer Options. Then, go to Developer Options and enable USB Debugging.
Obtaining Unlock Permission
Xiaomi, the manufacturer of the Redmi Note 3, requires users to obtain official permission to unlock the bootloader. To do this, visit the Xiaomi Mi Unlock page and apply for bootloader unlocking permission. Once your application is approved, you will receive a confirmation SMS on your registered mobile number.
Unlocking the Bootloader
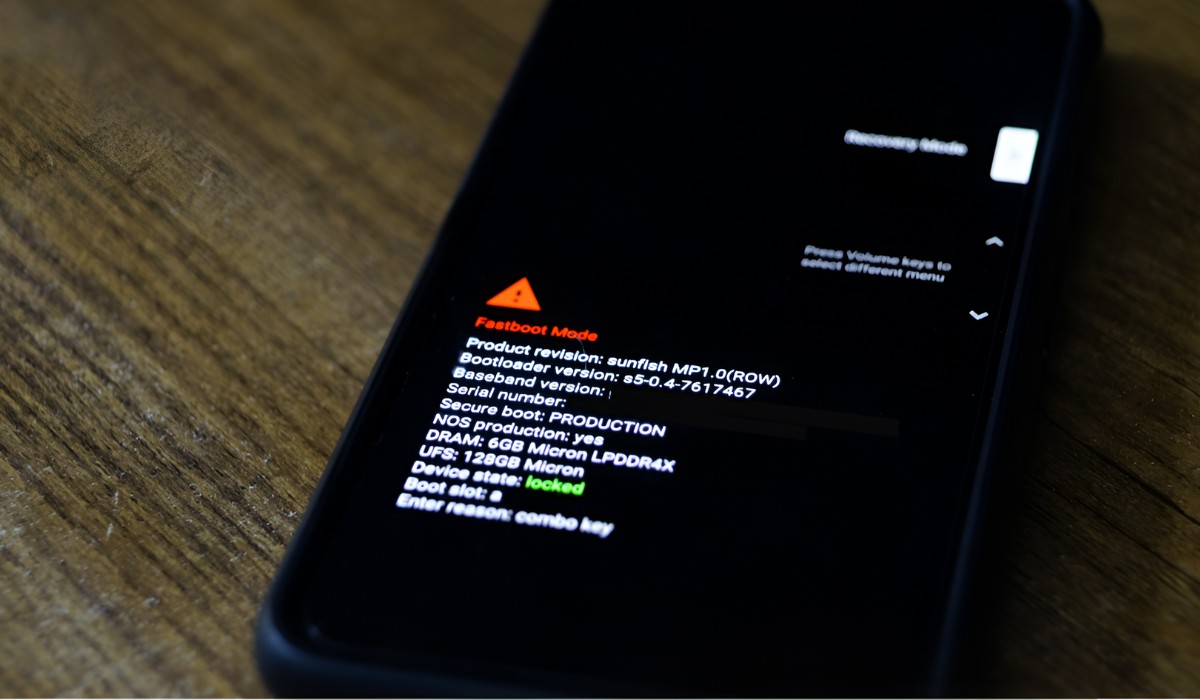
With the permission granted, you can proceed to unlock the bootloader of your Redmi Note 3. Start by downloading the Mi Unlock Tool on your computer and sign in with your Mi account. Power off your device, then boot it into Fastboot mode by holding the Power and Volume Down buttons simultaneously. Connect your device to the computer using a USB cable, and launch the Mi Unlock Tool. Follow the on-screen instructions to initiate the unlocking process.
Completing the Process
After the unlocking process is initiated, your device will reboot automatically. It's important to note that the first boot after unlocking the bootloader may take longer than usual. Once your device has rebooted, the bootloader will be successfully unlocked, granting you the freedom to explore custom ROMs such as Lineage OS.
By successfully unlocking the bootloader of your Redmi Note 3, you've taken the crucial first step towards embracing the world of custom ROMs. With the bootloader now unlocked, you're ready to embark on the next stage of the journey: installing TWRP recovery, which will pave the way for the installation of Lineage OS. Get ready to elevate your Redmi Note 3 to new heights as you delve deeper into the realm of custom ROMs and customization options.
Step 2: Installing TWRP Recovery
Now that you've successfully unlocked the bootloader of your Redmi Note 3, the next crucial step in the journey towards installing Lineage OS involves setting up TWRP (Team Win Recovery Project) recovery on your device. TWRP is a custom recovery that offers a range of advanced features, allowing you to create and restore device backups, flash custom ROMs, and perform system maintenance tasks with ease. By installing TWRP recovery, you'll gain a powerful tool that serves as a gateway to the world of custom ROMs and device customization.
Preparing for Installation
Before proceeding with the installation of TWRP recovery, it's essential to ensure that your Redmi Note 3 is adequately charged to prevent any interruptions during the process. Additionally, make sure that USB debugging is enabled on your device by navigating to Settings > About Phone and tapping the Build Number seven times to enable Developer Options. Then, go to Developer Options and enable USB Debugging.
Downloading TWRP Image
To begin the installation process, you'll need to download the TWRP image file specifically designed for the Redmi Note 3. Visit the official TWRP website or a trusted source to obtain the appropriate TWRP image file for your device model. Ensure that you download the correct TWRP image to avoid compatibility issues.
Booting into Fastboot Mode
With the TWRP image file downloaded, it's time to boot your Redmi Note 3 into Fastboot mode. Power off your device, then press and hold the Power and Volume Down buttons simultaneously to enter Fastboot mode. Once in Fastboot mode, connect your device to the computer using a USB cable.
Installing TWRP Recovery
Next, navigate to the directory where the TWRP image file is located on your computer. Open a command prompt in this directory and enter the following command to flash TWRP recovery onto your device:
bash
fastboot flash recovery twrp.img
Replace "twrp.img" with the actual filename of the TWRP image file you downloaded. Press Enter to execute the command and install TWRP recovery on your Redmi Note 3.
Verifying the Installation
Once the installation process is complete, disconnect your device from the computer and use the hardware keys to boot into recovery mode. If TWRP recovery is successfully installed, you will be greeted by the TWRP interface, indicating that the installation was a success.
By successfully installing TWRP recovery on your Redmi Note 3, you've laid the groundwork for the next phase of the process: downloading Lineage OS. With TWRP recovery in place, you're now equipped with a powerful tool that will facilitate the seamless installation of Lineage OS, bringing you one step closer to unlocking the full potential of your device. Get ready to embark on the next stage of this exciting journey as you prepare to download and flash Lineage OS onto your Redmi Note 3.
Step 3: Downloading Lineage OS
With TWRP recovery successfully installed on your Redmi Note 3, you're now poised to embark on the pivotal stage of this journey: downloading Lineage OS. Lineage OS, a popular custom ROM known for its stability, performance, and extensive device support, offers a compelling alternative to the stock Android experience. By downloading and installing Lineage OS, you'll gain access to a host of customization options, performance enhancements, and the latest Android features, breathing new life into your Redmi Note 3.
Navigating to the Lineage OS Website
To begin the process, navigate to the official Lineage OS website, where you'll find a comprehensive list of supported devices and the corresponding builds available for download. Locate the section dedicated to the Redmi Note 3 and identify the latest stable build of Lineage OS compatible with your device model.
Selecting the Correct Build
It's crucial to ensure that you select the correct build of Lineage OS for your specific variant of the Redmi Note 3. Take note of your device's codename and match it with the corresponding build listed on the Lineage OS website. This step is essential to avoid compatibility issues and ensure a smooth installation process.
Downloading the Lineage OS Build
Once you've identified the appropriate build for your device, proceed to download the Lineage OS ROM file to your computer. Ensure that you download the file to a location where it can be easily accessed later in the process. The download time may vary depending on your internet connection speed and the size of the ROM file.
Verifying the Download
After the download is complete, it's advisable to verify the integrity of the Lineage OS ROM file to ensure that it hasn't been corrupted during the download process. You can do this by comparing the file's checksum with the checksum provided on the Lineage OS website. This step adds an extra layer of security and ensures that the ROM file is authentic and free from errors.
Ready for the Next Stage
With the Lineage OS ROM file securely downloaded and verified, you're now prepared to proceed to the final stage of this journey: flashing Lineage OS onto your Redmi Note 3. The successful completion of this step will mark the culmination of your efforts to unlock the full potential of your device, ushering in a new era of customization and performance enhancements.
By meticulously following the steps outlined in this guide, you've laid the groundwork for a seamless and rewarding experience with Lineage OS on your Redmi Note 3. Get ready to take the next leap as you prepare to flash Lineage OS onto your device, unlocking a world of possibilities and personalization options.
Step 4: Flashing Lineage OS
Now that you have successfully unlocked the bootloader, installed TWRP recovery, and downloaded the Lineage OS ROM file, you are ready to embark on the final and most crucial step: flashing Lineage OS onto your Redmi Note 3. This process will replace the stock Android operating system on your device with Lineage OS, granting you access to a plethora of customization options, performance enhancements, and the latest features offered by this popular custom ROM.
Preparing for the Flashing Process
Before proceeding with the flashing process, it is imperative to ensure that your Redmi Note 3 is adequately charged to prevent any interruptions during the installation. Additionally, it is recommended to back up any important data on your device to safeguard against potential data loss during the flashing process.
Transferring Lineage OS ROM to Your Device
Connect your Redmi Note 3 to your computer using a USB cable and transfer the downloaded Lineage OS ROM file to the internal storage or SD card of your device. Ensure that the ROM file is placed in a location where it can be easily accessed from TWRP recovery during the installation process.
Booting into TWRP Recovery
Power off your device and boot it into TWRP recovery mode by simultaneously pressing the Power and Volume Up buttons. Once in TWRP recovery, you will be presented with a touch-based interface that allows you to perform various actions such as flashing custom ROMs, creating backups, and managing system partitions.
Flashing Lineage OS ROM
Within TWRP recovery, navigate to the location where the Lineage OS ROM file is stored on your device. Select the ROM file and swipe to confirm the flash, initiating the installation process. TWRP will begin flashing Lineage OS onto your Redmi Note 3, replacing the existing operating system with the custom ROM.
Completing the Installation
Once the flashing process is complete, you can reboot your device into the newly installed Lineage OS. The first boot into Lineage OS may take slightly longer than usual as the system initializes and optimizes the newly installed ROM. Upon successful booting, you will be greeted by the Lineage OS setup wizard, allowing you to customize your device and explore the myriad of features offered by this custom ROM.
By meticulously following the steps outlined in this guide, you have successfully flashed Lineage OS onto your Redmi Note 3, unlocking a world of possibilities and customization options. Congratulations on completing this transformative journey, and may your experience with Lineage OS be filled with enhanced performance, personalized features, and a renewed sense of excitement for your Redmi Note 3.
Conclusion
Congratulations on successfully navigating through the intricate process of unlocking the bootloader, installing TWRP recovery, downloading Lineage OS, and flashing it onto your Redmi Note 3. By following this comprehensive guide, you have embarked on a transformative journey that has empowered you to unleash the full potential of your device.
With Lineage OS now running on your Redmi Note 3, you have gained access to a myriad of customization options, performance enhancements, and the latest features offered by this popular custom ROM. The seamless integration of Lineage OS into your device marks the beginning of a new era, where you have the freedom to tailor your device to suit your unique preferences and requirements.
As you explore the features and capabilities of Lineage OS, you'll discover a wealth of customization options, including theme customization, advanced privacy controls, and performance optimizations. The stability and speed of Lineage OS will breathe new life into your Redmi Note 3, ensuring a smooth and responsive user experience.
Furthermore, the installation of Lineage OS opens the door to a vibrant community of developers and enthusiasts who continuously contribute to the evolution of this custom ROM. You can look forward to regular updates, security patches, and feature enhancements that will keep your device up to date and in sync with the latest developments in the Android ecosystem.
By embracing Lineage OS, you have not only revitalized your Redmi Note 3 but also joined a community of like-minded individuals who share a passion for device customization and optimization. Your journey with Lineage OS is just beginning, and the possibilities for personalization and exploration are virtually limitless.
As you navigate through the intuitive interface of Lineage OS and delve into its extensive feature set, remember that you are in control of your device's destiny. Whether it's tweaking the user interface, optimizing performance, or exploring new functionalities, Lineage OS empowers you to make your Redmi Note 3 truly your own.
In conclusion, the installation of Lineage OS on your Redmi Note 3 represents a significant milestone in your journey as a tech enthusiast and device customizer. Embrace the freedom, flexibility, and endless possibilities that Lineage OS offers, and let your Redmi Note 3 reflect your unique style and preferences. Enjoy the exhilarating experience of a fully customized device, and may Lineage OS bring you countless moments of delight and satisfaction as you explore its rich array of features and enhancements.