Introduction
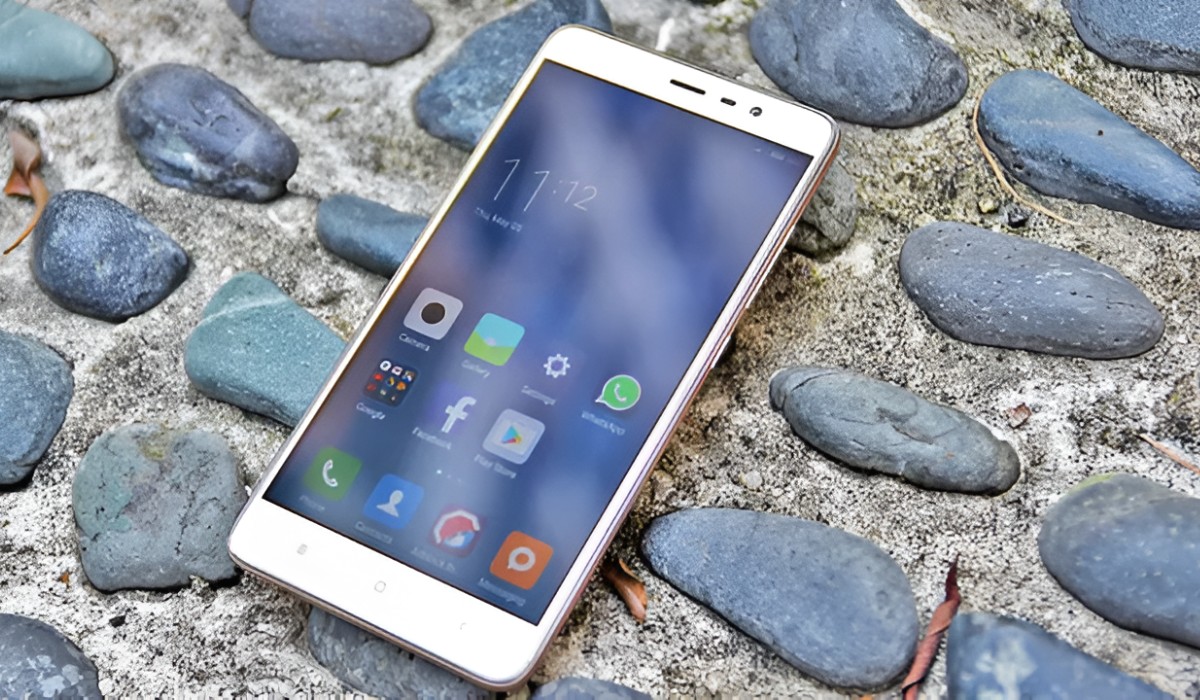
The Redmi Note 3 is a popular Android smartphone known for its impressive performance and user-friendly interface. One of the key advantages of this device is the ability to customize and enhance its functionality by installing a custom recovery. By doing so, users can unlock a whole new world of possibilities, including the ability to install custom ROMs, perform system backups, and tweak various settings to their preference.
In this comprehensive guide, we will walk you through the step-by-step process of installing a custom recovery on your Redmi Note 3. Whether you are a seasoned Android enthusiast or a novice user looking to explore the full potential of your device, this guide will equip you with the knowledge and tools needed to successfully install a custom recovery.
With the installation of a custom recovery, you can take full control of your Redmi Note 3, allowing you to personalize your device according to your preferences and needs. Whether you are looking to optimize performance, enhance security, or simply explore the endless possibilities of the Android ecosystem, a custom recovery is the gateway to unlocking the true potential of your device.
Now, let's embark on this exciting journey together as we delve into the intricacies of unlocking the bootloader, downloading the recovery image, installing ADB and Fastboot, and flashing the recovery image onto your Redmi Note 3. By the end of this guide, you will have the knowledge and confidence to navigate through the process seamlessly, empowering you to harness the full capabilities of your Redmi Note 3.
So, without further ado, let's dive into the first step: unlocking the bootloader of your Redmi Note 3.
Step 1: Unlocking Bootloader
Unlocking the bootloader is the initial step in the process of installing a custom recovery on your Redmi Note 3. The bootloader serves as the security checkpoint that ensures only verified software is allowed to run on your device. By unlocking the bootloader, you gain the freedom to install custom software and modifications, thereby expanding the capabilities of your device.
To begin, it's essential to understand that unlocking the bootloader will erase all data on your device. Therefore, it's crucial to back up any important files, photos, and data before proceeding. Once you've backed up your data, follow the steps below to unlock the bootloader of your Redmi Note 3:
-
Enable Developer Options: Go to the "Settings" menu on your Redmi Note 3. Scroll down and tap on "About Phone." Locate the "Build Number" and tap on it seven times. You will see a message indicating that you are now a developer.
-
Enable OEM Unlocking: After enabling Developer Options, go back to the main "Settings" menu. Scroll down to "Additional Settings" and tap on it. Then, select "Developer Options" and enable "OEM unlocking."
-
Enable USB Debugging: While still in the "Developer Options" menu, enable "USB Debugging." This will allow your computer to communicate with your Redmi Note 3 when connected via USB.
-
Power Off Your Device: Once you have enabled Developer Options, OEM unlocking, and USB debugging, power off your Redmi Note 3.
-
Boot into Fastboot Mode: Press and hold the "Volume Down" and "Power" buttons simultaneously until the Fastboot logo appears on the screen.
-
Connect Your Device to Your Computer: Use a USB cable to connect your Redmi Note 3 to your computer.
-
Open Command Prompt or Terminal: On your computer, open Command Prompt (Windows) or Terminal (Mac or Linux) and navigate to the directory where ADB and Fastboot are installed.
-
Unlock the Bootloader: In the Command Prompt or Terminal, enter the command "fastboot oem unlock" and press Enter. Follow the on-screen instructions to confirm the bootloader unlocking process.
Once the process is complete, your Redmi Note 3's bootloader will be successfully unlocked, allowing you to proceed with the next steps of installing a custom recovery. This pivotal step sets the stage for the exciting journey ahead, where you will unleash the full potential of your device through the installation of a custom recovery.
Step 2: Downloading Recovery Image
Downloading the recovery image is a crucial step in the process of installing a custom recovery on your Redmi Note 3. The recovery image, often referred to as a custom recovery or TWRP (Team Win Recovery Project), is a specialized software that provides a range of powerful tools for managing and customizing your Android device. This includes the ability to flash custom ROMs, create and restore backups, and perform advanced system modifications.
To download the recovery image for your Redmi Note 3, you will need to ensure that you obtain the correct version that is compatible with your device model. It's important to download the recovery image from a trusted source to ensure its authenticity and integrity. Here's a detailed guide on how to download the recovery image for your Redmi Note 3:
-
Identify Your Device Model: Before proceeding with the download, it's essential to confirm the specific model of your Redmi Note 3. This information can usually be found in the device settings or by checking the original packaging or documentation.
-
Visit the Official TWRP Website: TWRP is a popular custom recovery that is widely used by the Android community. Visit the official TWRP website (twrp.me) and navigate to the "Devices" section. Locate and select your Redmi Note 3 model from the list of supported devices.
-
Download the Recovery Image: Once you have selected your device model, you will be presented with the available TWRP recovery images for your device. Ensure that you download the latest stable version of the recovery image to benefit from the latest features and improvements.
-
Verify the MD5 Checksum: After downloading the recovery image, it's a good practice to verify the MD5 checksum to ensure the file's integrity. This can be done using various MD5 checksum verification tools available online.
-
Transfer the Recovery Image to Your Device: Once the recovery image is downloaded and verified, transfer it to your Redmi Note 3. You can do this by connecting your device to your computer via USB and copying the recovery image to the internal storage or SD card.
By following these steps, you will successfully download the recovery image for your Redmi Note 3, setting the stage for the subsequent steps of installing ADB and Fastboot, booting into Fastboot mode, and flashing the recovery image onto your device. This pivotal stage brings you one step closer to unlocking the full potential of your Redmi Note 3 through the installation of a custom recovery.
Step 3: Installing ADB and Fastboot
Installing ADB (Android Debug Bridge) and Fastboot is an essential prerequisite for performing advanced operations on your Redmi Note 3, such as installing a custom recovery. ADB is a versatile command-line tool that allows you to communicate with your Android device from a computer, while Fastboot is a protocol used for flashing partitions on the device. By installing ADB and Fastboot, you gain the ability to execute commands and perform tasks that are not accessible through the standard user interface.
Here's a detailed guide on how to install ADB and Fastboot on your computer:
-
Download the Android SDK Platform Tools: The Android SDK Platform Tools package includes ADB and Fastboot, making it a convenient option for obtaining these essential tools. Visit the official Android Developers website and download the SDK Platform Tools package suitable for your operating system (Windows, macOS, or Linux).
-
Extract the Platform Tools Package: Once the download is complete, extract the contents of the Platform Tools package to a location on your computer. It's recommended to choose a location that is easily accessible, such as the desktop or a dedicated folder.
-
Add Platform Tools to System Path (Optional): To simplify the usage of ADB and Fastboot commands, you can add the Platform Tools directory to your system's PATH environment variable. This allows you to execute ADB and Fastboot commands from any location in the command prompt or terminal without specifying the full path to the tools.
-
Enable USB Debugging on Your Redmi Note 3: Before using ADB and Fastboot, ensure that USB debugging is enabled on your Redmi Note 3. This can be done by navigating to the Developer Options menu in the device settings and enabling USB debugging.
-
Connect Your Redmi Note 3 to Your Computer: Use a USB cable to connect your Redmi Note 3 to your computer. If prompted on your device, authorize the connection by allowing USB debugging.
-
Open Command Prompt or Terminal: On your computer, open Command Prompt (Windows) or Terminal (macOS or Linux) and navigate to the directory where the Platform Tools are located.
-
Verify ADB Connectivity: In the Command Prompt or Terminal, enter the command "adb devices" and press Enter. This command verifies that your computer recognizes your Redmi Note 3 and that ADB is functioning correctly.
By following these steps, you will successfully install ADB and Fastboot on your computer, paving the way for the subsequent stages of booting into Fastboot mode and flashing the recovery image onto your Redmi Note 3. These foundational tools are instrumental in facilitating the installation of a custom recovery, empowering you to explore the full potential of your device.
Step 4: Booting into Fastboot Mode
Booting into Fastboot mode is a pivotal step in the process of installing a custom recovery on your Redmi Note 3. Fastboot mode, also known as bootloader mode, is a special diagnostic and engineering mode that allows you to modify the flash file system over a USB connection. This mode provides a direct channel for communication between your computer and the bootloader of your device, enabling you to execute commands and perform critical operations such as flashing custom recovery images.
To boot your Redmi Note 3 into Fastboot mode, follow the steps below:
-
Power Off Your Device: Begin by powering off your Redmi Note 3. Ensure that the device is completely powered down before proceeding to the next step.
-
Press and Hold the Correct Buttons: Once your device is powered off, press and hold the "Volume Down" button and the "Power" button simultaneously. Continue holding both buttons until the Fastboot logo appears on the screen. This logo signifies that your Redmi Note 3 has successfully entered Fastboot mode.
-
Connect Your Device to Your Computer: With your Redmi Note 3 in Fastboot mode, use a USB cable to connect your device to your computer. This establishes a direct connection between your computer and the bootloader of your device, enabling you to execute Fastboot commands.
-
Verify Fastboot Connectivity: On your computer, open Command Prompt (Windows) or Terminal (macOS or Linux) and navigate to the directory where ADB and Fastboot are installed. Once in the appropriate directory, enter the command "fastboot devices" and press Enter. This command verifies that your computer recognizes your Redmi Note 3 in Fastboot mode, confirming that the connection is established and functional.
Booting into Fastboot mode sets the stage for the subsequent step of flashing the recovery image onto your Redmi Note 3. This critical stage in the process empowers you to establish a direct channel for executing Fastboot commands, enabling you to modify the flash file system and install the custom recovery with precision and efficiency.
Step 5: Flashing Recovery Image
Flashing the recovery image onto your Redmi Note 3 is a pivotal step in the process of installing a custom recovery. This step empowers you to replace the stock recovery with a custom recovery, such as TWRP (Team Win Recovery Project), which offers advanced features and customization options not available in the stock recovery.
To flash the recovery image onto your Redmi Note 3, follow the detailed steps below:
-
Navigate to the Directory: On your computer, open Command Prompt (Windows) or Terminal (macOS or Linux) and navigate to the directory where the recovery image file is located. This ensures that you can execute the necessary commands from the location where the recovery image is stored.
-
Boot into Fastboot Mode: Ensure that your Redmi Note 3 is in Fastboot mode by following the steps outlined in the previous section. This mode is essential for establishing the connection between your computer and the bootloader of your device, enabling you to execute Fastboot commands.
-
Verify Fastboot Connectivity: Once your device is in Fastboot mode, enter the command "fastboot devices" in the Command Prompt or Terminal and press Enter. This command verifies that your computer recognizes your Redmi Note 3 in Fastboot mode, confirming that the connection is established and functional.
-
Flash the Recovery Image: To flash the recovery image, enter the command "fastboot flash recovery <recovery_image_filename.img>" in the Command Prompt or Terminal, replacing "<recovery_image_filename.img>" with the actual filename of the recovery image. Press Enter to execute the command.
-
Wait for the Flashing Process: Allow the flashing process to complete. This involves transferring the custom recovery image from your computer to the bootloader of your Redmi Note 3. Once the process is complete, you will receive a confirmation message in the Command Prompt or Terminal.
-
Reboot Your Device: After successfully flashing the recovery image, reboot your Redmi Note 3 by entering the command "fastboot reboot" in the Command Prompt or Terminal. This will restart your device and finalize the installation of the custom recovery.
By following these steps, you will successfully flash the custom recovery image onto your Redmi Note 3, unlocking a new realm of possibilities for customizing and optimizing your device. This critical stage in the process sets the stage for the subsequent step of rebooting into recovery mode, where you can explore the full potential of the custom recovery and embark on a journey of personalized customization and advanced system modifications.
Step 6: Rebooting into Recovery Mode
Rebooting into recovery mode is the final step in the process of installing a custom recovery on your Redmi Note 3. Once the custom recovery image has been successfully flashed onto your device, rebooting into recovery mode allows you to access the powerful features and tools offered by the custom recovery, such as TWRP (Team Win Recovery Project). In recovery mode, you can perform a wide range of advanced operations, including creating and restoring backups, flashing custom ROMs, and executing system maintenance tasks.
To reboot your Redmi Note 3 into recovery mode, follow the detailed steps below:
-
Power Off Your Device: Begin by powering off your Redmi Note 3. Ensure that the device is completely powered down before proceeding to the next step.
-
Press and Hold the Correct Buttons: Once your device is powered off, press and hold the "Volume Up" button and the "Power" button simultaneously. Continue holding both buttons until the device enters recovery mode. The specific key combination may vary depending on the custom recovery installed, so it's important to ensure that you use the correct combination for your device.
-
Navigate the Recovery Menu: Upon entering recovery mode, you will be presented with the custom recovery's user interface. This interface provides a touch-friendly environment with various options and features. Using the volume buttons to navigate and the power button to select, you can explore the different functions offered by the custom recovery.
-
Perform Advanced Operations: Within the recovery mode interface, you can perform a multitude of advanced operations to customize and optimize your Redmi Note 3. This includes creating full system backups, restoring previous backups, flashing custom ROMs or kernels, wiping cache and data partitions, and executing system maintenance tasks to ensure the smooth operation of your device.
-
Explore Additional Features: Custom recoveries often offer additional features such as a file manager, terminal/command-line access, and the ability to mount external storage. These features provide a comprehensive toolkit for managing and customizing your device beyond the capabilities of the standard Android system.
By following these steps, you will successfully reboot your Redmi Note 3 into recovery mode, unlocking the full potential of the custom recovery and empowering yourself with a suite of powerful tools and features. This critical stage in the process marks the culmination of the installation journey, opening the door to a world of advanced customization and system management capabilities for your Redmi Note 3.
Conclusion
Congratulations! You have successfully navigated through the intricate process of installing a custom recovery on your Redmi Note 3. By unlocking the bootloader, downloading the recovery image, installing ADB and Fastboot, booting into Fastboot mode, flashing the recovery image, and rebooting into recovery mode, you have embarked on a transformative journey that empowers you to harness the full potential of your device.
The installation of a custom recovery opens a gateway to a realm of possibilities, allowing you to personalize and optimize your Redmi Note 3 according to your preferences and needs. With the custom recovery in place, you gain the ability to explore advanced system modifications, create and restore backups, flash custom ROMs, and fine-tune various settings to elevate your Android experience.
As you venture into the realm of custom recoveries, it's essential to approach the process with a sense of curiosity and a willingness to experiment. The custom recovery serves as a powerful toolset that empowers you to push the boundaries of traditional Android functionality, enabling you to tailor your device to align with your unique vision.
Furthermore, the installation of a custom recovery fosters a sense of community and collaboration within the Android enthusiast ecosystem. You are now part of a vibrant community of users who share a passion for customization, optimization, and innovation. By leveraging the capabilities of the custom recovery, you can contribute to this community by exploring new features, sharing insights, and embracing the spirit of continuous improvement.
It's important to approach the use of custom recoveries with a sense of responsibility and mindfulness. While the custom recovery empowers you to explore advanced modifications, it's crucial to exercise caution and thoroughly understand the implications of each action. By approaching customization with a balanced mindset, you can maximize the benefits of the custom recovery while maintaining the stability and security of your device.
In conclusion, the installation of a custom recovery on your Redmi Note 3 marks the beginning of an exciting chapter in your Android journey. Embrace the opportunities for exploration, creativity, and personalization that the custom recovery affords, and let your newfound knowledge and skills propel you towards a deeper understanding of the Android ecosystem. With the custom recovery as your ally, you are poised to embark on a dynamic and enriching experience that transcends the boundaries of conventional smartphone usage.


