Introduction
Welcome to the guide on locating the SIM card slot on the iPhone 4. If you've recently acquired an iPhone 4 or are simply curious about its inner workings, you've come to the right place. The SIM card slot is a crucial component of the iPhone 4, as it allows you to connect to your cellular network and access a wide range of features and services. Whether you're preparing to insert a new SIM card or simply want to familiarize yourself with the device's hardware, understanding how to locate and access the SIM card slot is essential.
In the following steps, we'll walk you through the process of finding the SIM card slot on your iPhone 4 and inserting a SIM card. By the end of this guide, you'll have a clear understanding of the location and function of the SIM card slot, empowering you to confidently manage your device's connectivity. Let's dive in and explore the simple yet vital procedure of accessing the SIM card slot on your iPhone 4.
Step 1: Turn off the iPhone
Before embarking on the task of locating and accessing the SIM card slot on your iPhone 4, it's imperative to ensure that the device is powered off. This preliminary step is essential for the safety of both the user and the device itself.
To power off your iPhone 4, follow these simple steps:
-
Press and hold the power button, which is located on the top right-hand side of the device. This button is typically used to lock the screen or wake the device from sleep mode.
-
After holding the power button for a few seconds, a slider will appear on the screen, prompting you to "slide to power off." This slider is accompanied by the "cancel" option, allowing you to abort the shutdown process if necessary.
-
Gently swipe the slider from left to right to initiate the shutdown sequence. As you do so, the iPhone 4 will begin the power-off process, and the screen will gradually dim until it turns off completely.
-
Once the screen is dark and the device is no longer displaying any content, the iPhone 4 is successfully powered off.
By following these steps, you have effectively powered off your iPhone 4, preparing it for the subsequent actions of locating the SIM card slot and inserting a SIM card. This precautionary measure ensures that the device is in a safe and stable state for handling and manipulation.
With the iPhone 4 powered off, you are now ready to proceed to the next step of locating the SIM card slot, which will be covered in the following section.
Stay tuned as we delve into the next phase of this guide, where we will uncover the exact location of the SIM card slot on your iPhone 4 and guide you through the process of accessing it.
Step 2: Locate the SIM card slot
Now that your iPhone 4 is safely powered off, it's time to uncover the whereabouts of the SIM card slot. The SIM card slot on the iPhone 4 is a crucial component that facilitates your device's connection to the cellular network, enabling you to make calls, send messages, and access mobile data. Understanding its location is vital for various reasons, whether you need to insert a new SIM card, troubleshoot connectivity issues, or simply gain a deeper understanding of your device's hardware.
The SIM card slot on the iPhone 4 is ingeniously integrated into the device's design, ensuring a seamless and unobtrusive user experience. To locate the SIM card slot, follow these steps:
-
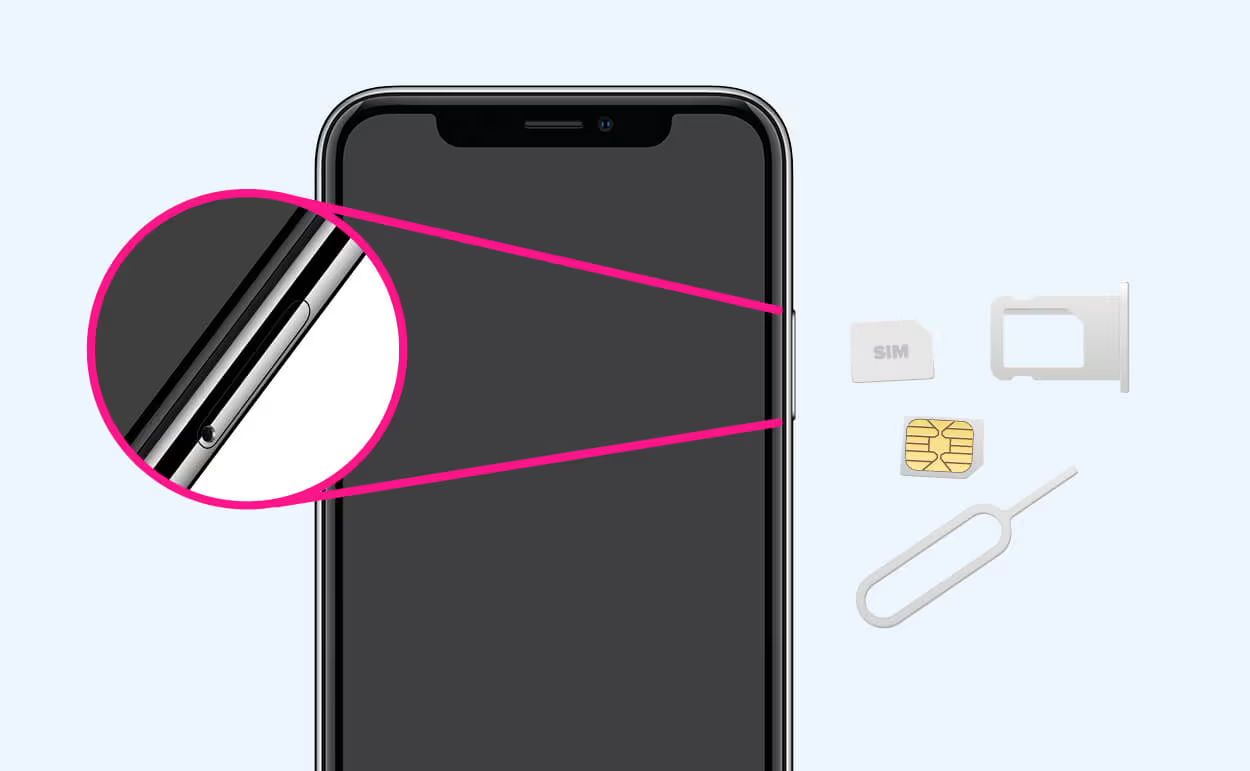
Position of the SIM Card Slot: The SIM card slot on the iPhone 4 is situated on the device's exterior, specifically on the right-hand side. It is important to note that the iPhone 4 features a micro-SIM card slot, which is a smaller variant of the traditional SIM card slot found in earlier mobile devices.
-
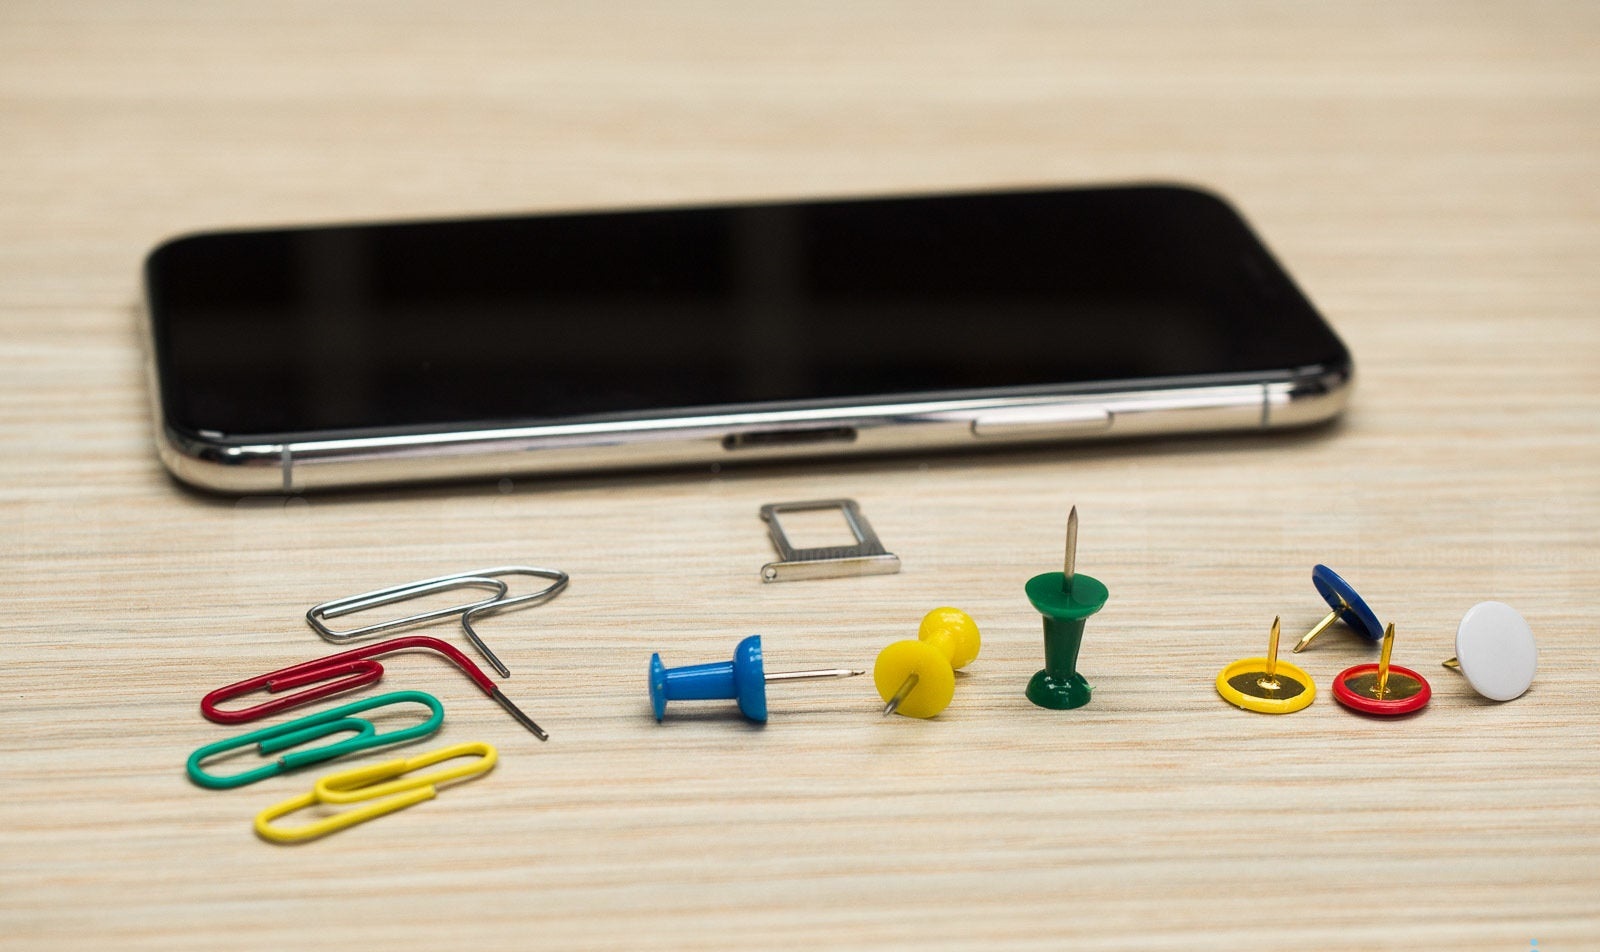
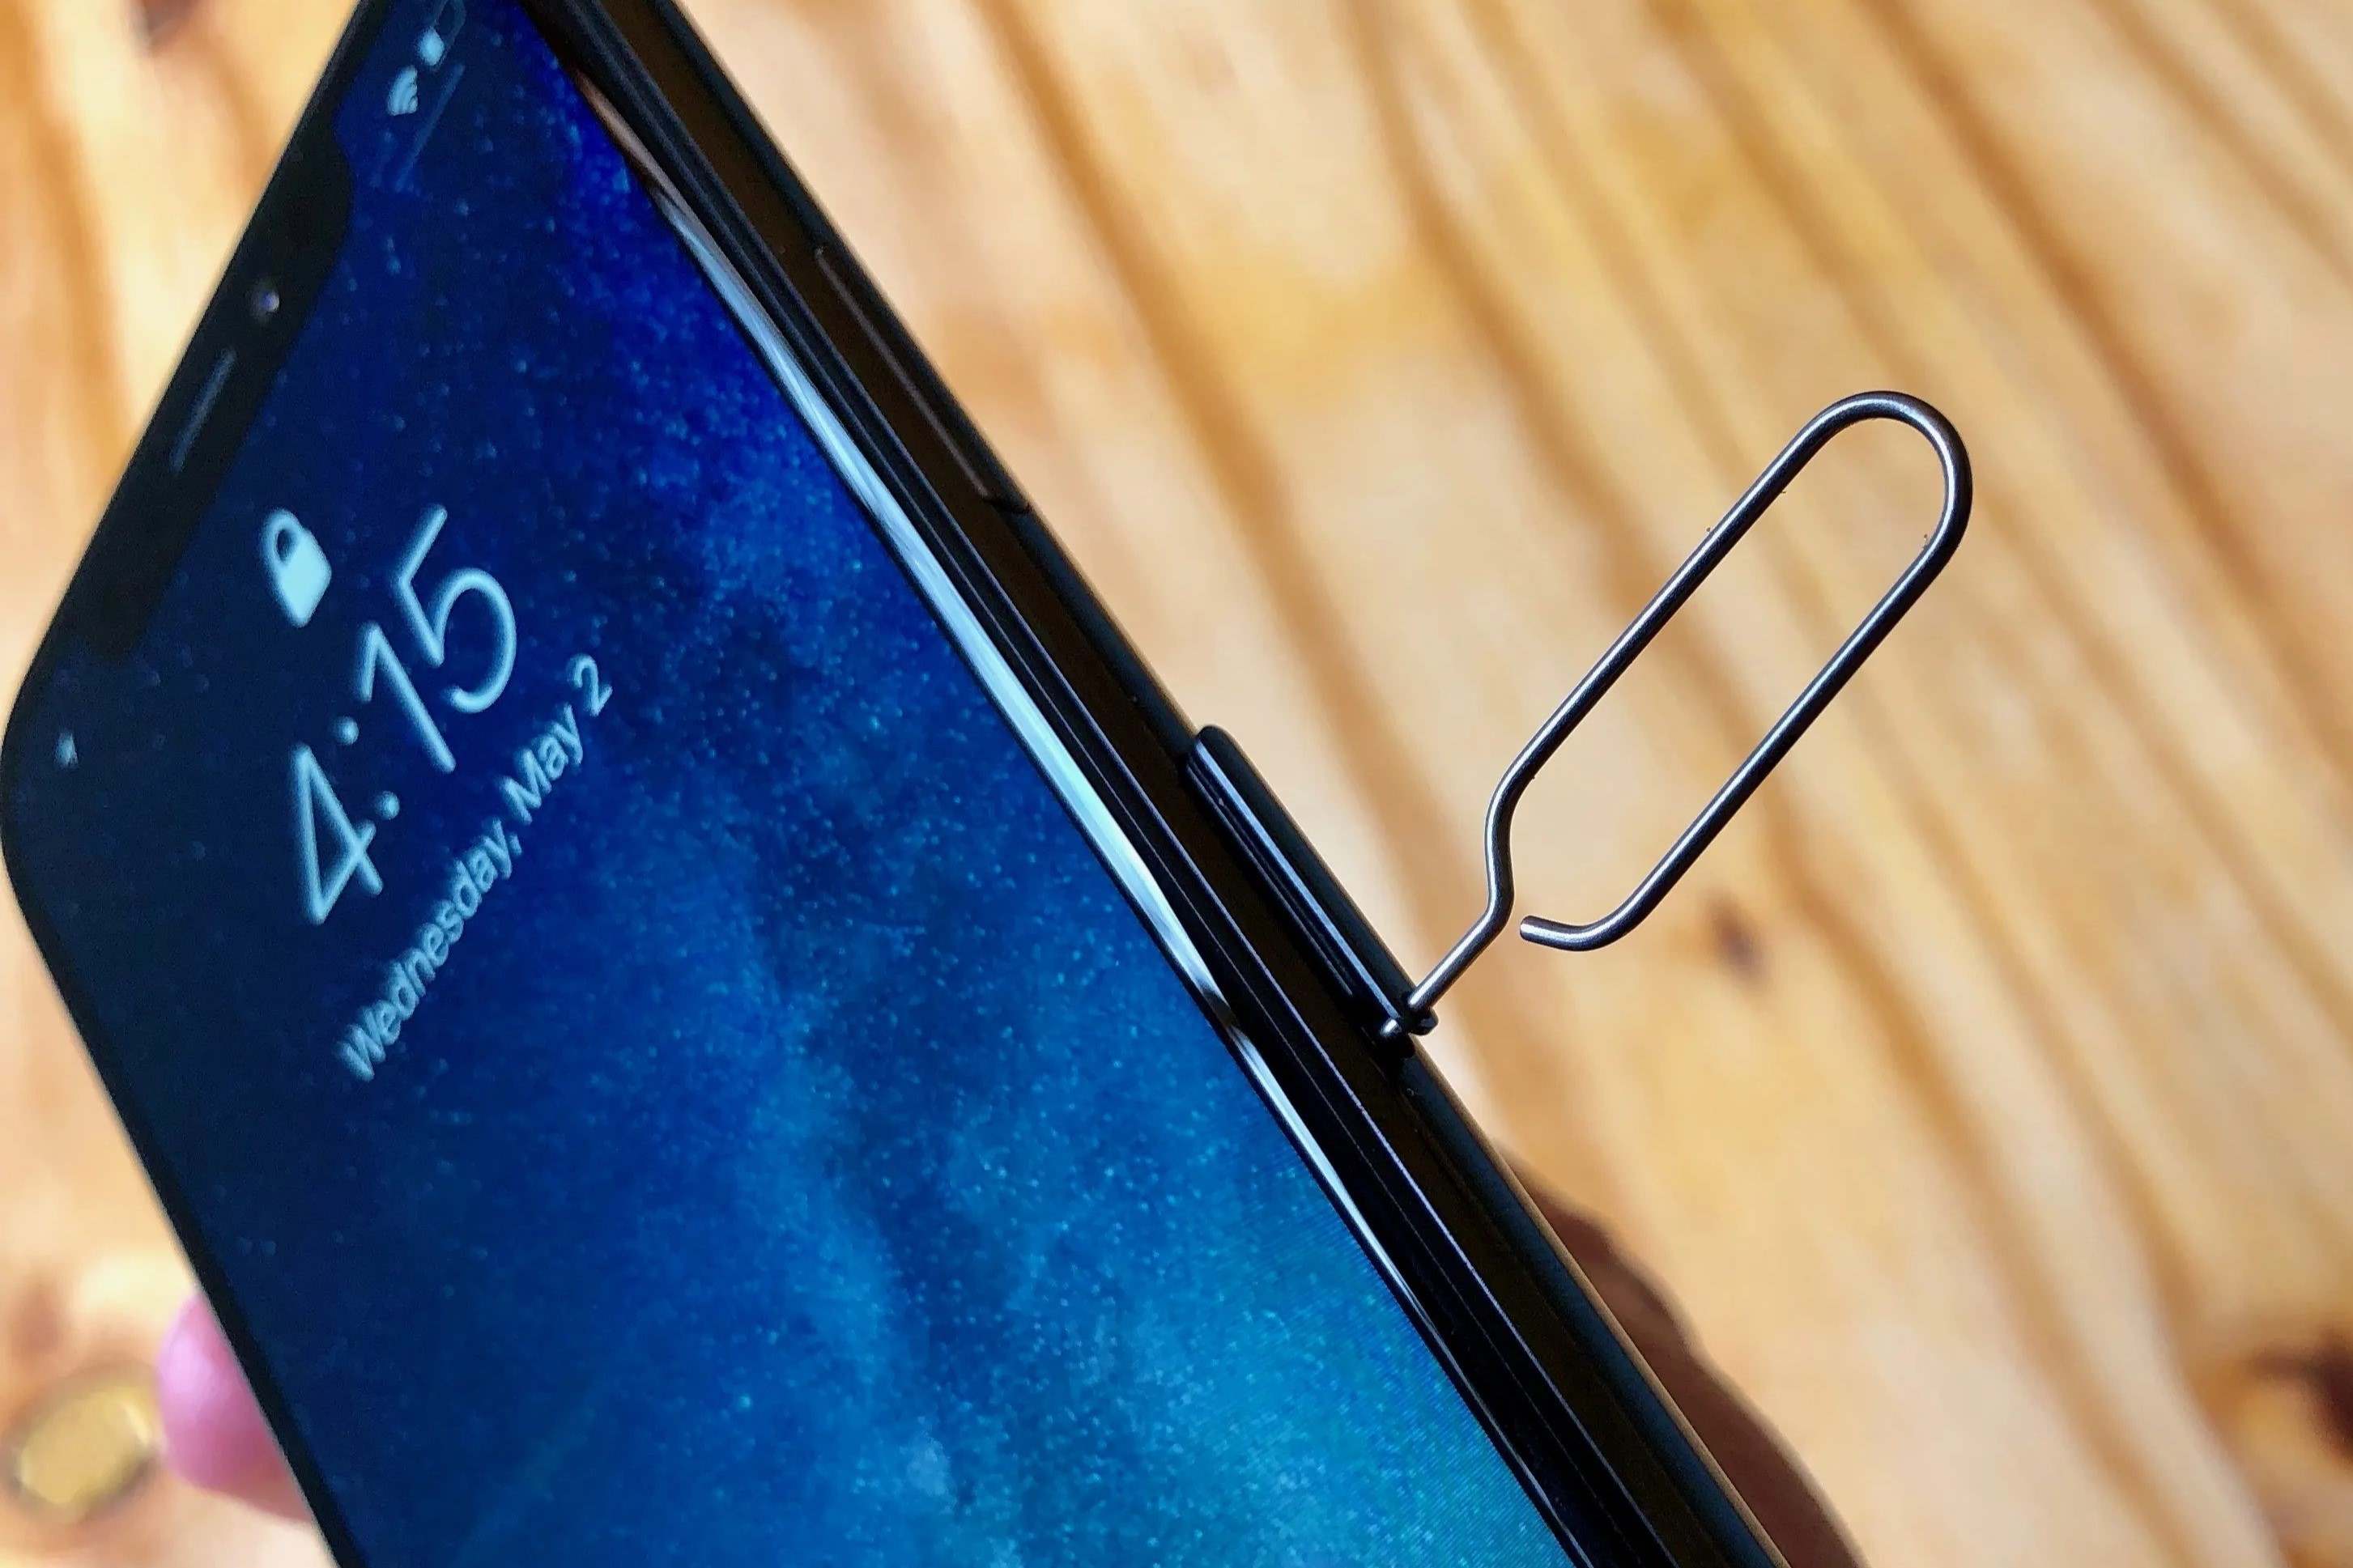
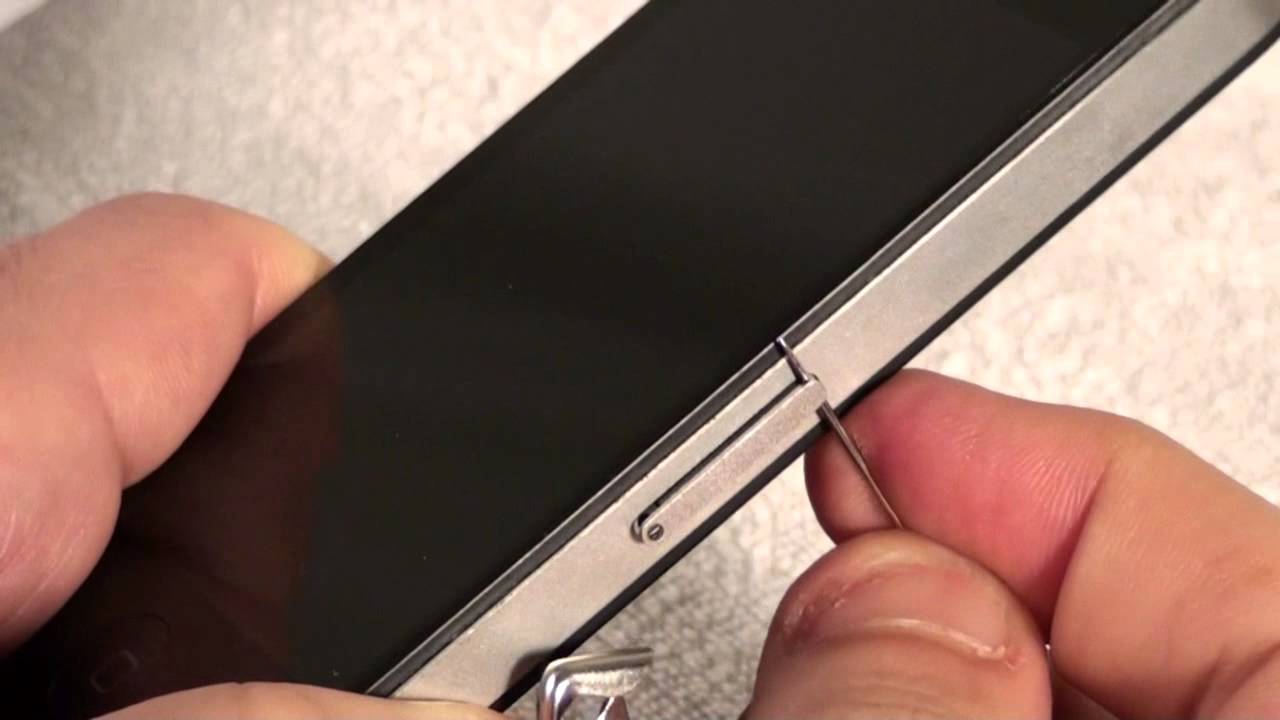
Identifying the SIM Tray: The SIM card slot is concealed within a small tray, which is designed to securely hold the micro-SIM card. To access the SIM card slot, you will need a SIM eject tool or a paperclip, which can be inserted into the pinhole located next to the tray.
-
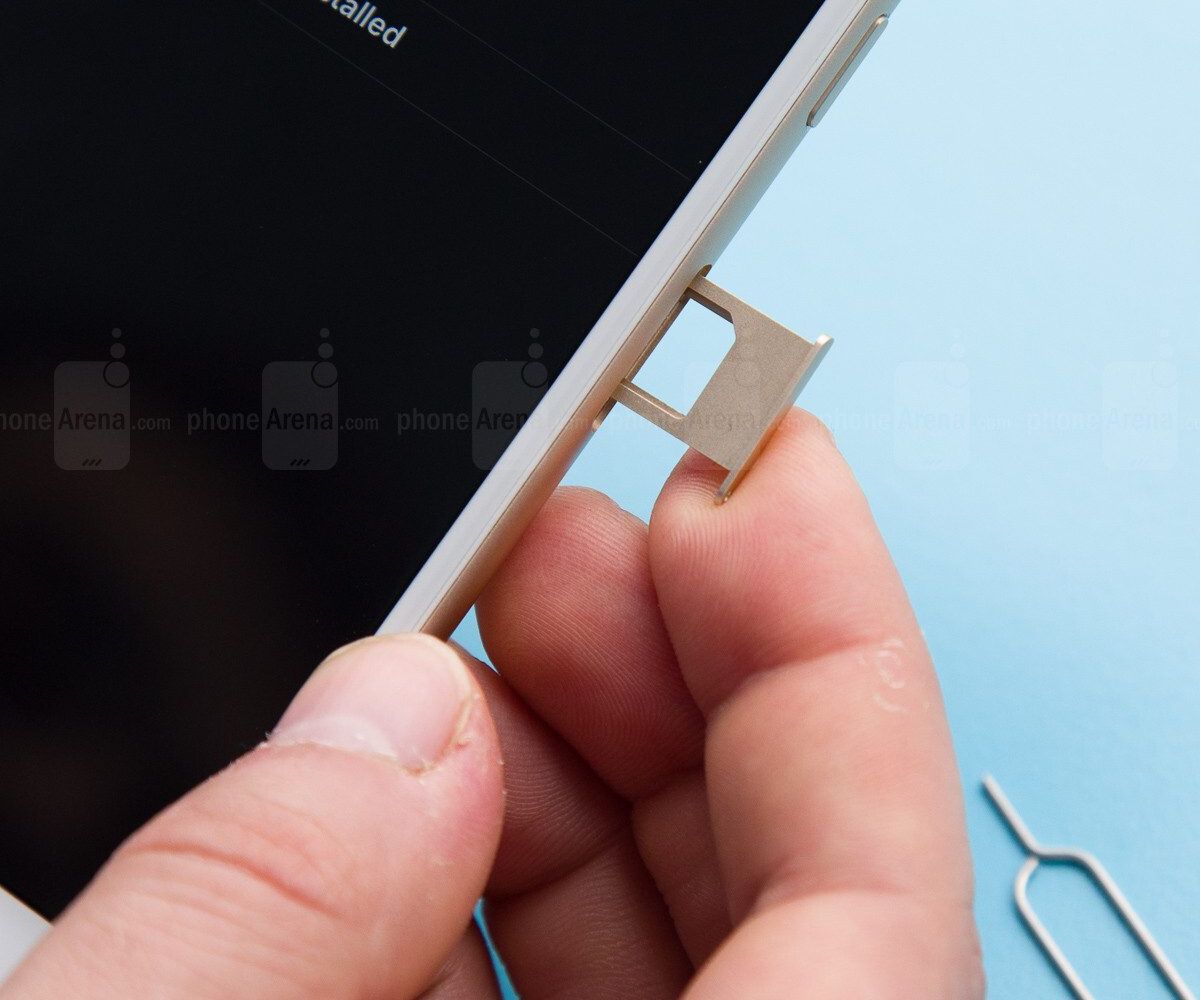
Ejecting the SIM Tray: Gently insert the SIM eject tool or unfolded paperclip into the pinhole next to the SIM tray. Apply light pressure to engage the internal mechanism, causing the SIM tray to protrude slightly from the device.
-
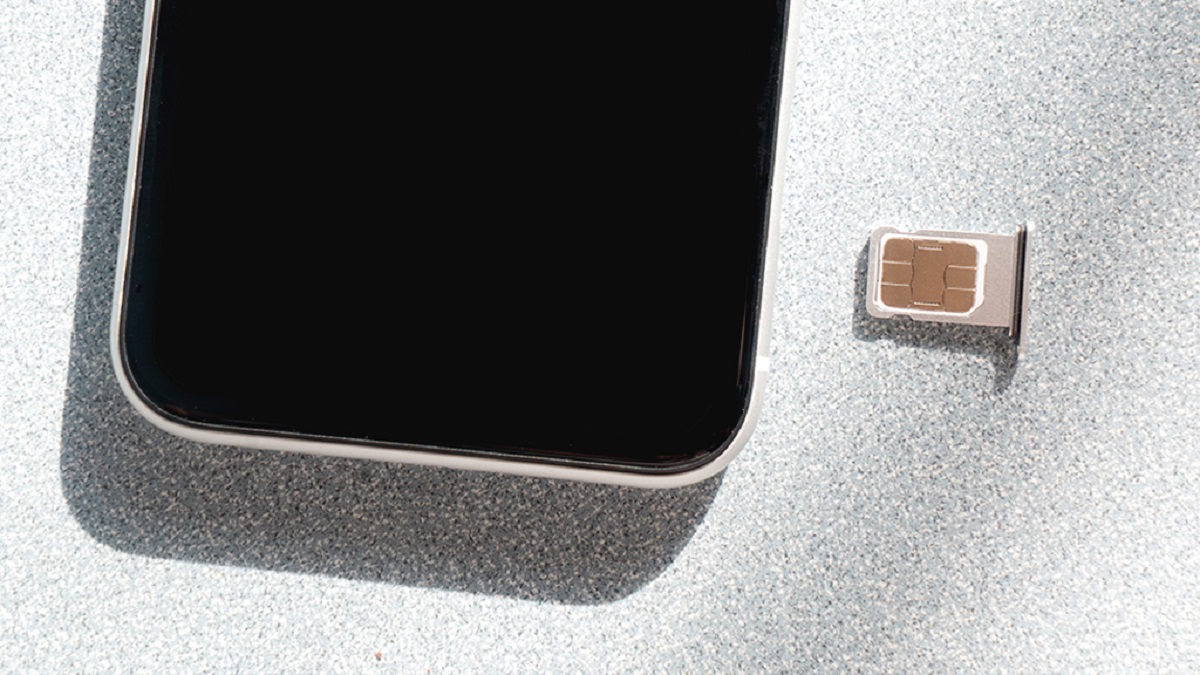
Removing the SIM Tray: Once the SIM tray is partially ejected, carefully pull it out from the iPhone 4. The SIM tray will slide out smoothly, revealing the slot where the micro-SIM card is inserted.
By following these steps, you can successfully locate the SIM card slot on your iPhone 4. This knowledge equips you with the ability to access the SIM card slot whenever necessary, whether for the purpose of inserting a new SIM card or inspecting the hardware. With the SIM card slot identified, you are now prepared to proceed to the next phase of this guide, which will cover the process of inserting a SIM card into the iPhone 4.
Stay tuned as we delve into the subsequent step, where we will guide you through the seamless process of inserting a SIM card into your iPhone 4, empowering you to manage your device's connectivity with confidence.
Step 3: Insert the SIM card
With the SIM card slot on your iPhone 4 successfully located, the next step is to insert a SIM card into the device. Whether you are activating a new SIM card or replacing an existing one, the process of inserting the SIM card is straightforward and essential for establishing connectivity to your cellular network. Here's a detailed guide on how to insert a SIM card into your iPhone 4:
-
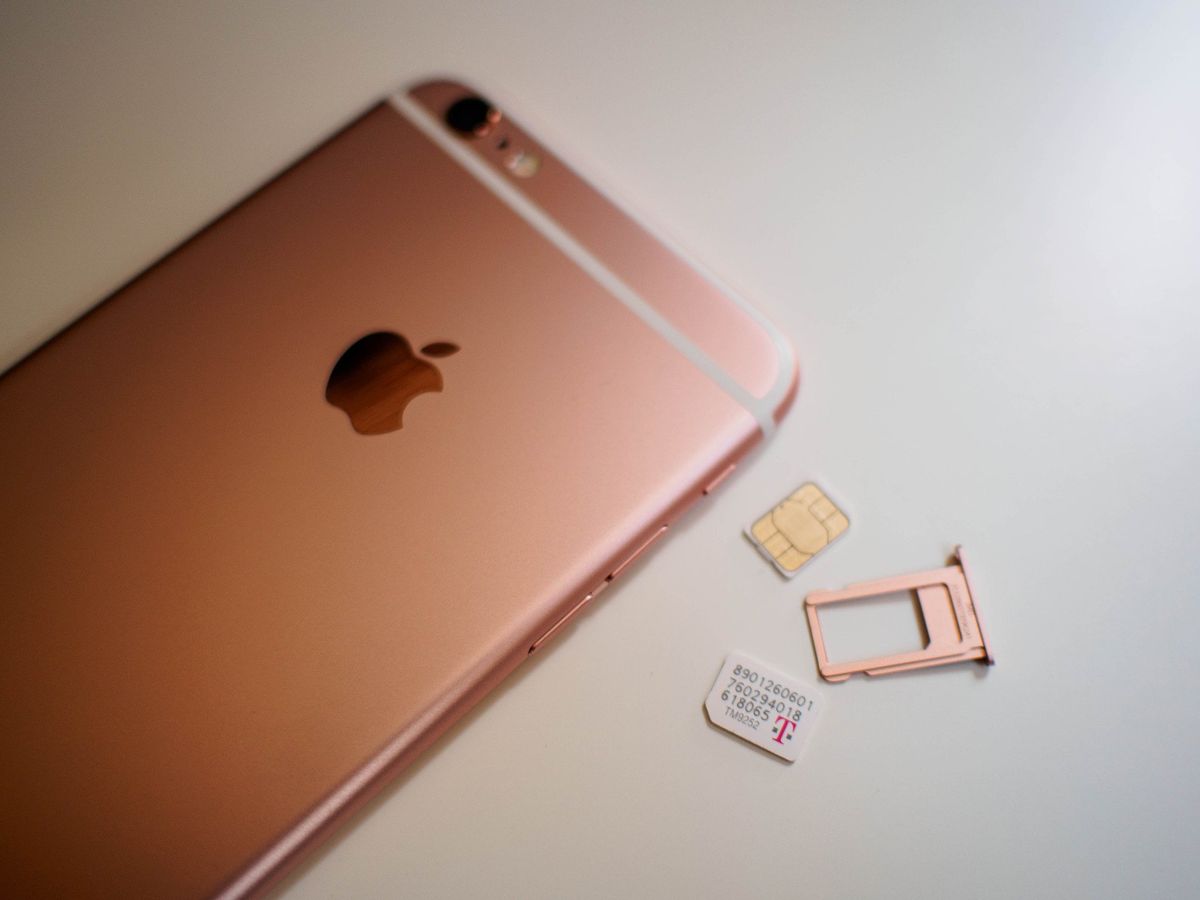
Prepare the SIM Card: Before inserting the SIM card, ensure that it is compatible with the iPhone 4. The iPhone 4 utilizes a micro-SIM card, which is smaller than the standard SIM card used in earlier mobile devices. If your SIM card is not a micro-SIM, you may need to contact your mobile service provider to obtain a compatible card.
-
Position the SIM Tray: Hold your iPhone 4 securely and identify the SIM tray, which you previously located during the process of finding the SIM card slot. The SIM tray is designed to securely hold the micro-SIM card and is located on the right-hand side of the device.
-
Insert the SIM Card: Carefully place the micro-SIM card onto the SIM tray, ensuring that it aligns with the designated area and fits smoothly within the tray's contours. Take note of the orientation of the SIM card, as it should match the shape of the tray to ensure proper insertion.
-
Reinsert the SIM Tray: Once the micro-SIM card is securely positioned on the SIM tray, gently slide the tray back into the SIM card slot on the iPhone 4. Apply light pressure to ensure that the tray is fully inserted, allowing it to sit flush with the device's exterior.
-
Power On the iPhone: With the SIM card successfully inserted, power on your iPhone 4 by pressing and holding the power button until the Apple logo appears on the screen. Once the device has powered on, it will begin searching for the cellular network, and you will soon regain access to your mobile connectivity.
By following these steps, you have effectively inserted a SIM card into your iPhone 4, enabling seamless connectivity to your cellular network. Whether you are activating a new SIM card or replacing an existing one, mastering the process of inserting a SIM card empowers you to manage your device's connectivity with confidence. With the SIM card securely in place, your iPhone 4 is ready to deliver a wide range of communication and mobile data services, ensuring that you stay connected wherever you go.
Step 4: Turn on the iPhone
With the SIM card securely inserted into the iPhone 4, the final step is to power on the device and initiate the process of reconnecting to the cellular network. Turning on your iPhone 4 is a simple yet pivotal action that sets the stage for accessing a multitude of features and services, including calls, messages, and mobile data. Here's a detailed guide on how to power on your iPhone 4 and resume its functionality:
-
Press and Hold the Power Button: Located on the top right-hand side of the iPhone 4, the power button serves as the primary control for turning the device on and off. To power on your iPhone 4, press and hold the power button until the screen displays the iconic Apple logo. This signifies that the device is booting up and initializing its operating system.
-
Wait for the Boot-Up Sequence: As the iPhone 4 powers on, the Apple logo will be prominently displayed on the screen, indicating that the device is undergoing its boot-up sequence. During this process, the iPhone 4's internal components are initialized, and the operating system is loaded, preparing the device for user interaction.
-
Unlock the Screen: Once the boot-up sequence is complete, the iPhone 4 will prompt you to unlock the screen by swiping your finger across the display. This action grants access to the device's home screen, where you can seamlessly navigate through various apps, settings, and features.
-
Connect to the Cellular Network: Upon powering on, the iPhone 4 will automatically begin searching for the cellular network associated with the inserted SIM card. Once a connection is established, the device will display the signal strength and network name, indicating that you are successfully connected to the cellular network.
-
Access Mobile Services: With the iPhone 4 powered on and connected to the cellular network, you can now access a wide range of mobile services, including making calls, sending messages, and using mobile data. The device is now fully operational, empowering you to stay connected and engaged with the digital world.
By following these steps, you have effectively powered on your iPhone 4, allowing it to reconnect to the cellular network and resume its functionality. With the device back online, you can enjoy the seamless experience of utilizing its communication and mobile data services, ensuring that you stay connected and informed in today's dynamic digital landscape.
Conclusion
Congratulations! You have successfully navigated the process of locating the SIM card slot on your iPhone 4 and inserting a SIM card, ultimately restoring connectivity to your device. By following the step-by-step instructions outlined in this guide, you have gained valuable insights into the essential procedure of managing the SIM card slot and ensuring seamless access to the cellular network.
Understanding the precise location of the SIM card slot empowers you to confidently access and manipulate this vital component of your iPhone 4. Whether you are activating a new SIM card, troubleshooting connectivity issues, or simply exploring the device's hardware, the knowledge acquired from this guide equips you with the necessary skills to handle the SIM card slot with ease and precision.
As you power on your iPhone 4 and witness the device reconnecting to the cellular network, you can appreciate the seamless integration of hardware and software that enables modern mobile communication. The ability to insert and manage the SIM card exemplifies the user-friendly design and functionality of the iPhone 4, offering a seamless experience for accessing a wide range of communication and mobile data services.
Moving forward, you can leverage your newfound proficiency in managing the SIM card slot to adapt to various connectivity needs, such as switching between SIM cards for international travel, upgrading to a new mobile service provider, or troubleshooting network connectivity issues. The knowledge and skills acquired from this guide serve as a valuable asset in navigating the dynamic landscape of mobile connectivity, ensuring that you remain empowered to manage your device's connectivity with confidence and ease.
By mastering the process of locating the SIM card slot, inserting a SIM card, and powering on your iPhone 4, you have unlocked the gateway to a world of seamless communication and mobile services. Whether you are making calls, sending messages, or accessing mobile data, your iPhone 4 stands ready to serve as a reliable companion in your daily endeavors, keeping you connected and engaged with the digital world.
With this guide, you have embarked on a journey of understanding and mastery, gaining valuable insights into the intricate yet accessible components of your iPhone 4. As you continue to explore and utilize the capabilities of your device, the knowledge and skills acquired from this guide will serve as a solid foundation for confidently managing the essential elements of mobile connectivity.
As you embark on your continued journey with the iPhone 4, may the insights and proficiency gained from this guide enhance your experience and empower you to embrace the full potential of your device's connectivity capabilities. Stay connected, stay informed, and continue to explore the ever-evolving landscape of mobile communication with confidence and enthusiasm!