Introduction
Welcome to this step-by-step guide on how to delete a Venmo transaction. Venmo is a popular mobile payment service that allows you to send and receive money from friends, family, and merchants with just a few taps. However, there may be times when you need to remove a transaction from your history, whether it’s due to an error, privacy concerns, or simply wanting to clean up your records.
Deleting a transaction on Venmo is a quick and straightforward process that can be done directly from the app. In this guide, we will walk you through the steps to delete a transaction, ensuring that your account remains accurate and up to date.
Before we begin, it’s important to note that once a transaction is deleted, it cannot be undone. All associated comments and likes will also be permanently removed. Therefore, it’s essential to consider your decision carefully before proceeding.
Whether you accidentally sent money to the wrong person, or you want to remove an old transaction from your history, we’ve got you covered. So let’s dive in and learn how to delete a Venmo transaction.
Step 1: Open the Venmo app
To begin the process of deleting a Venmo transaction, the first step is to open the Venmo app on your mobile device. Venmo is available for both Android and iOS devices, so make sure you have the app installed on your phone or tablet.
If you haven’t downloaded the Venmo app yet, you can find it in the App Store for iOS devices or the Google Play Store for Android devices. Go to the respective store, search for “Venmo,” and click on the download button to install the app on your device.
Once you have the Venmo app installed, locate the app icon on your device’s home screen or app drawer and tap on it to open the app. The Venmo app has a distinct orange icon with a white silhouette of a person in it, making it easily recognizable.
If you already have the Venmo app installed but haven’t logged in yet, you will be prompted to sign in to your Venmo account. Enter your email address or username and password to log in. If you don’t have a Venmo account, you can easily create one by following the on-screen instructions.
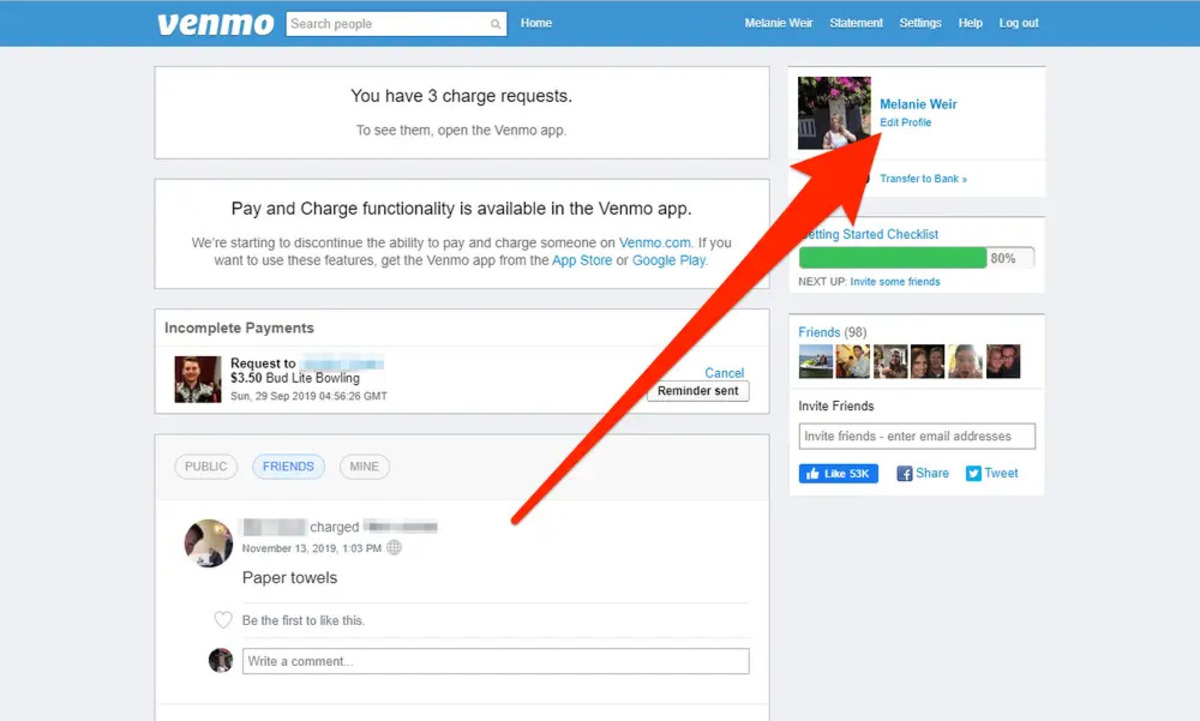
After logging in, you will be greeted with the Venmo home screen, which displays your recent transactions and other account information. The app provides a user-friendly interface that makes managing your transactions a breeze.
Now that you have successfully opened the Venmo app and logged in to your account, you are ready to proceed to the next step: finding the transaction you want to delete.
Step 2: Sign in to your Venmo account
In order to delete a Venmo transaction, you need to be signed in to your Venmo account. If you have already signed in, skip to the next step. If not, follow these simple instructions to log in to your account.
Open the Venmo app on your mobile device. If you don’t have the app installed yet, you can download it from the App Store for iOS devices or the Google Play Store for Android devices.
On the Venmo login screen, you will see two options: “Email or User” and “Password.” If you have previously linked your Venmo account to an email address, enter your email address. Otherwise, enter your Venmo username. Type in your password in the “Password” field.
Once you have entered your login credentials, tap on the “Sign In” button to access your Venmo account. If the information you entered is correct, you will be redirected to your Venmo home screen.
If you are having trouble remembering your password or are unable to sign in, you can choose the “Forgot?” option located below the “Sign In” button. Venmo will guide you through the process of recovering your account or resetting your password.
Note that Venmo takes the security of your account seriously. If you are signing in from a new device or location, you may need to verify your identity through a security code sent to your registered email address or phone number.
Once you have successfully signed in to your Venmo account, you can proceed to the next step to locate the specific transaction you wish to delete.
Step 3: Locate the transaction you want to delete
Now that you have signed in to your Venmo account, it’s time to locate the transaction that you want to delete. Venmo makes it easy to search for specific transactions in your payment history.
To begin, navigate to the Venmo home screen. You can do this by tapping on the home icon, which is typically located at the bottom of the app’s main menu.
Once you are on the home screen, you will see a list of your most recent transactions. Scroll through this list to see if the transaction you want to delete is already visible. If it’s not, don’t worry – Venmo allows you to search for specific transactions.
To search for a transaction, locate the search bar at the top of the Venmo app. It is typically labeled “Search” or indicated by a magnifying glass icon. Tap on the search bar to activate it.
Now you can enter relevant information to narrow down your search. You can type in the name of the recipient or sender, the amount of the transaction, or any keywords related to the transaction details.
As you begin typing, Venmo will dynamically update the search results to match your input. You can tap on any of the suggested search results to view the corresponding transactions.
If you have a long payment history or are having trouble finding the specific transaction, you can use the time filter option provided by Venmo. This allows you to narrow down your search by specifying a date range for the transaction.
Once you have found the transaction you want to delete, it’s time to proceed to the next step: tapping on the transaction for further options.
Step 4: Tap on the transaction
After locating the transaction you want to delete in your Venmo payment history, the next step is to tap on the specific transaction to access its details and options.
On the Venmo home screen or in the search results, you will see a list of transactions. Look for the transaction you want to delete and tap on it to open it.
When you tap on the transaction, a new screen will appear, displaying detailed information about the transaction. Here you can see the recipient or sender, the amount, the date and time, and any associated comments or likes.
This screen also provides additional options related to the transaction, such as splitting the cost, requesting additional funds, or in our case, deleting the transaction entirely.
If you tap on the recipient or sender’s name, you will be redirected to their profile page, where you can view their transaction history and other details if needed.
At this stage, make sure you double-check the transaction details to ensure that you have selected the correct one. Deleting a transaction is irreversible, so it’s important to be certain before proceeding.
Once you have confirmed that you have selected the correct transaction, it’s time to proceed to the next step: accessing the options menu for that transaction.
Step 5: Select the “…” option
After tapping on the transaction you want to delete, you will see a screen that displays detailed information about the transaction. To delete the transaction, you need to access the options menu for that specific transaction.
On the transaction details screen, look for an icon or button that resembles three dots in a vertical or horizontal line. This icon represents the options menu and is usually located in the upper-right corner of the screen.
Tap on the three dots icon to access the options menu for the transaction. This menu contains various actions that you can perform on the transaction, such as editing the transaction details, sharing the transaction, or deleting the transaction.
By selecting the options menu, you are one step closer to deleting the transaction from your Venmo history. It’s important to note that once a transaction is deleted, it cannot be undone, so make sure you are certain about deleting it before proceeding.
Now that you have selected the “…” option and accessed the transaction’s options menu, you are ready to move on to the next step: choosing the “Remove this transaction” option.
Step 6: Choose “Remove this transaction”
After accessing the options menu for the transaction, it’s time to proceed with deleting the transaction from your Venmo history. To do this, you need to select the “Remove this transaction” option from the available choices.
In the options menu, carefully review the available actions that can be performed on the transaction. Look for the specific option that is labeled “Remove this transaction” or similar wording. It’s essential to choose this option to delete the transaction.
Once you have located the “Remove this transaction” option, tap on it to proceed with the deletion. A confirmation prompt may appear, asking you to confirm your decision to delete the transaction.
Confirm the deletion by selecting “Yes” or “Delete” on the confirmation prompt. Keep in mind that once the transaction is deleted, it is irreversible, and all associated comments and likes will also be permanently removed.
Be absolutely certain about deleting the transaction before confirming your decision. If you have any doubts, you may want to double-check the transaction details or take a moment to reconsider.
By choosing the “Remove this transaction” option and confirming the deletion, you have successfully initiated the removal process for the selected transaction.
Now let’s move on to the next step to ensure that the transaction has been successfully deleted from your Venmo account.
Step 7: Confirm the deletion
After selecting the “Remove this transaction” option, a confirmation step is required to ensure that you intentionally want to delete the transaction from your Venmo history.
Once you tap on the option to remove the transaction, a confirmation dialogue box will appear on the screen. This dialogue box will typically ask you to confirm your decision to delete the transaction.
Take a moment to carefully review the details of the transaction and double-check that you have selected the correct one. Deleting a transaction is irreversible, so it’s crucial to be certain before moving forward.
If you are confident about deleting the transaction, proceed by selecting “Confirm,” “Yes,” or a similar option on the confirmation dialogue box. This confirms your intention to delete the transaction.
On the other hand, if you have changed your mind or realize that you have selected the wrong transaction, you can select “Cancel” or “No” to abort the deletion process.
Once you have confirmed the deletion, Venmo will proceed to delete the transaction from your account. The time it takes for the transaction to be completely removed may vary, but generally, it should be removed instantly from your transaction history.
Now that you have successfully confirmed the deletion of the transaction, let’s move on to the final step to verify that the transaction has indeed been deleted from your Venmo account.
Step 8: Verify the transaction has been deleted
Once you have gone through the process of deleting a transaction from your Venmo history, it’s important to verify that the transaction has been successfully removed. This final step ensures that your account reflects the changes you made.
To verify that the transaction has been deleted, navigate back to the Venmo home screen. You can do this by tapping the home icon at the bottom of the app’s main menu.
On the home screen, review your recent transactions or search for the specific transaction you deleted. If the transaction no longer appears in your payment history, congratulations! You have successfully deleted the transaction.
In some cases, it may take a few moments for the transaction to disappear from your history. If the transaction is still visible, wait for a short while and refresh the screen to see if the deletion has taken effect.
If the transaction you deleted still shows up in your payment history, double-check that you followed all the steps correctly. You may want to repeat the process from the beginning to ensure that the transaction is properly deleted.
Remember that deleted transactions cannot be undone, so it’s crucial to double-check the deletion to avoid any misunderstandings or inconvenience.
By verifying that the transaction has been successfully deleted, you can rest assured that your Venmo account is accurate and up to date.
Congratulations! You have now completed the process of deleting a Venmo transaction. You can use these steps whenever you need to remove a transaction from your Venmo history in the future.
Thank you for following this guide, and we hope it has been helpful in assisting you with deleting Venmo transactions.
Conclusion
In this guide, we have explored the step-by-step process of deleting a Venmo transaction. Deleting a transaction on Venmo is a simple and convenient way to ensure that your payment history is accurate and up to date.
We started by opening the Venmo app and signing in to our Venmo account. Then, we located the transaction we wanted to delete by either scrolling through the payment history or using the search function.
Once we found the transaction, we tapped on it to access its detailed information. From there, we selected the “…” option to open the transaction’s options menu. We then chose the “Remove this transaction” option to initiate the deletion.
After confirming the deletion, we verified that the transaction had been successfully removed from our Venmo account by checking our payment history. This ensured that the transaction was no longer visible and that our account reflected the changes made.
Remember, before deleting a transaction, take a moment to double-check that you have selected the correct one. Once a transaction is deleted, it cannot be undone.
By following these steps, you can easily delete any unwanted or erroneous transactions from your Venmo history, keeping your account organized and accurate.
We hope this guide has been helpful to you in understanding how to delete a Venmo transaction. If you have any further questions or need additional assistance, Venmo’s customer support is always there to help.
Thank you for reading, and happy deleting!