Setting Up Venmo Account
Venmo is a popular peer-to-peer payment service that allows users to send and receive money easily through their smartphones. Setting up a Venmo account is a quick and simple process. Here’s a step-by-step guide to get you started:
1. Download the Venmo app: First, download the Venmo app from the App Store (for iPhone users) or the Google Play Store (for Android users). Once downloaded, open the app and tap on “Sign up” to create your account.
2. Sign up with your phone number and email: Venmo requires a valid phone number and email address to set up your account. Enter the requested information and tap “Next” to proceed.
3. Link your bank account or debit card: To receive money on Venmo, you’ll need to link either your bank account or a debit card. This step is crucial as it enables you to transfer funds to your bank account later. Venmo ensures the security of your financial information through encryption and other security measures.
4. Verify your account: Once you’ve linked your bank account or debit card, Venmo will send you a verification code to confirm your identity. Enter the code to complete the verification process.
5. Customize your profile: Personalize your Venmo profile by adding a profile picture, a username, and a short bio. You can also connect with friends by syncing your contacts with Venmo or by linking your Facebook account.
6. Set your privacy preferences: Venmo gives you control over your privacy settings. You can choose to keep your transactions private or share them with your Venmo friends or the public. It’s important to review and adjust these settings based on your comfort level.
7. Enable payment notifications: To stay updated on incoming payments, enable notifications on your Venmo app. This way, you’ll receive instant alerts whenever someone sends you money.
That’s it! You’re all set to start receiving money on Venmo. Make sure to share your Venmo username with friends and family so they can easily send money to your account. In the next sections, we’ll explore different ways to receive money on Venmo and how to manage your funds efficiently.
Linking Your Bank Account or Debit Card
To receive money on Venmo, you need to link either your bank account or a debit card to your Venmo account. This allows you to easily transfer funds from Venmo to your bank account or use your debit card to make purchases. Here’s a step-by-step guide on how to link your bank account or debit card:
1. Open the Venmo app: Launch the Venmo app on your smartphone and log in to your account using your credentials.
2. Access the menu: Tap on the three horizontal lines at the top-left corner of the app to open the menu.
3. Go to Settings: In the menu, scroll down and select “Settings” to access your account settings.
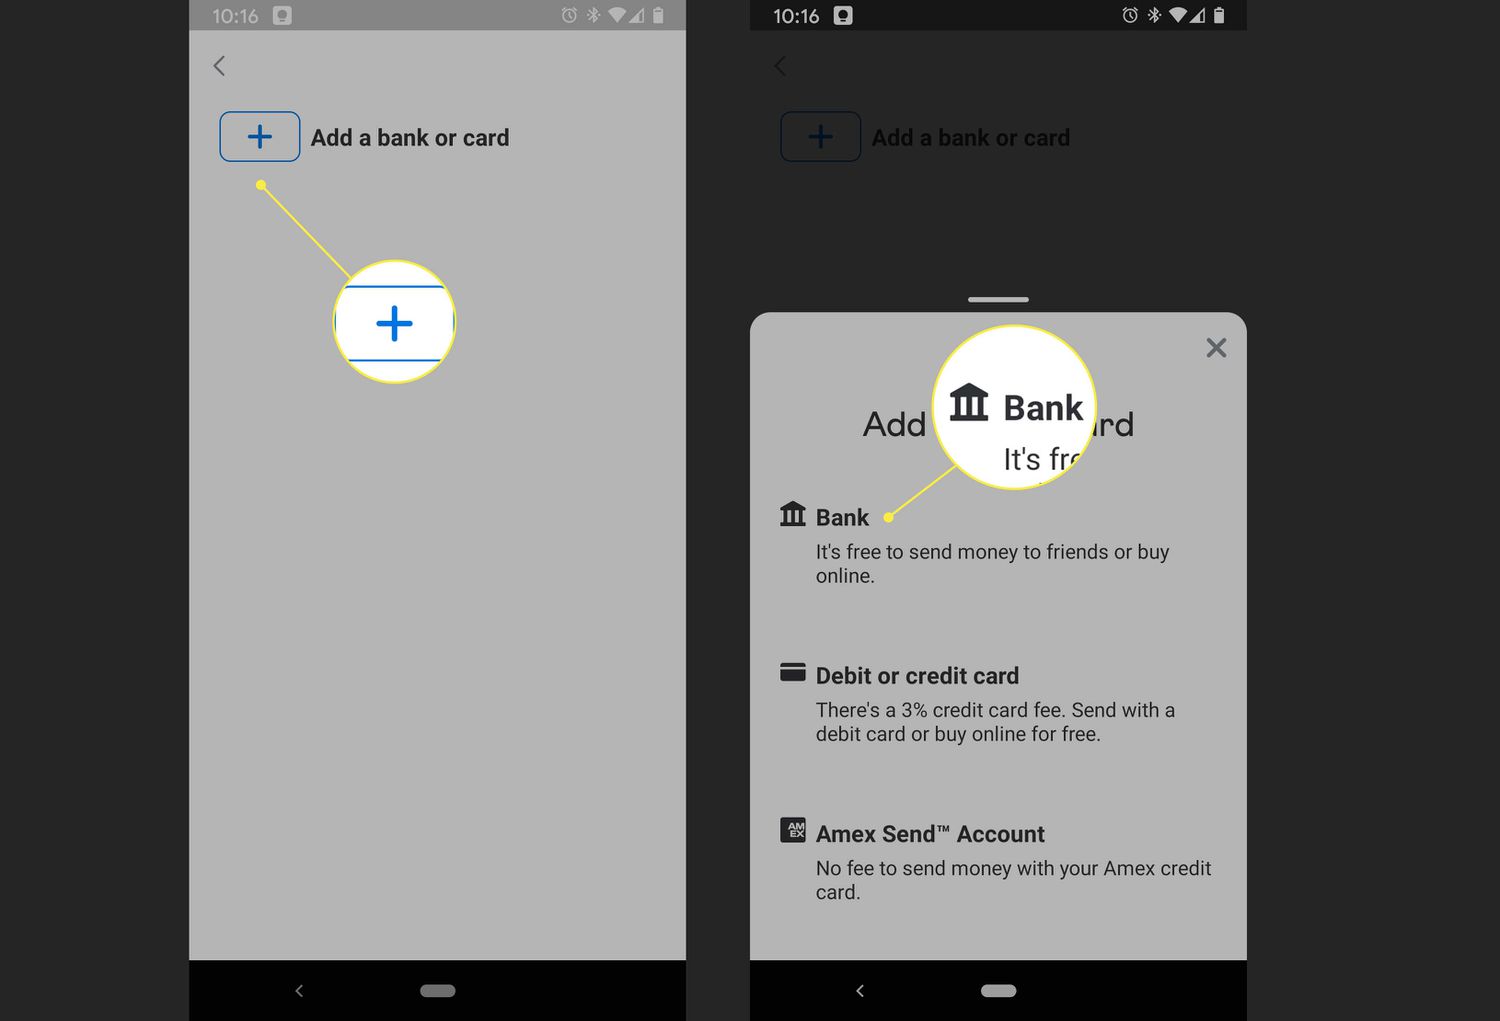
4. Add a bank account or debit card: In the settings menu, you’ll see the option to “Payment Methods.” Tap on it and then select “Add a bank account or card.”
5. Choose your bank account: If you want to link your bank account, select the relevant option and follow the prompts to enter your account details, including your account number and routing number. Venmo will then verify and confirm the account.
6. Link your debit card: If you prefer linking a debit card, choose the appropriate option and enter your card information, including the card number, expiration date, and CVV code. Venmo will validate the details to ensure a successful link.
7. Verification process: Once you’ve entered the required information, Venmo may initiate a verification process for your bank account or debit card. This can vary depending on your financial institution. Follow the instructions provided to complete the verification.
8. Set your primary payment method: After successfully linking your bank account or debit card, you have the option to set your primary payment method. This is the default method that will be used for receiving money on Venmo.
Remember to keep your bank account or debit card information updated if there are any changes. This ensures seamless transactions and avoids any potential hiccups when receiving money on Venmo. It’s also worth noting that Venmo takes security seriously and employs encryption and other safety measures to protect your financial information.
In the next section, we’ll explore various ways to receive money through Venmo, whether it’s from friends or family, or even for goods and services.
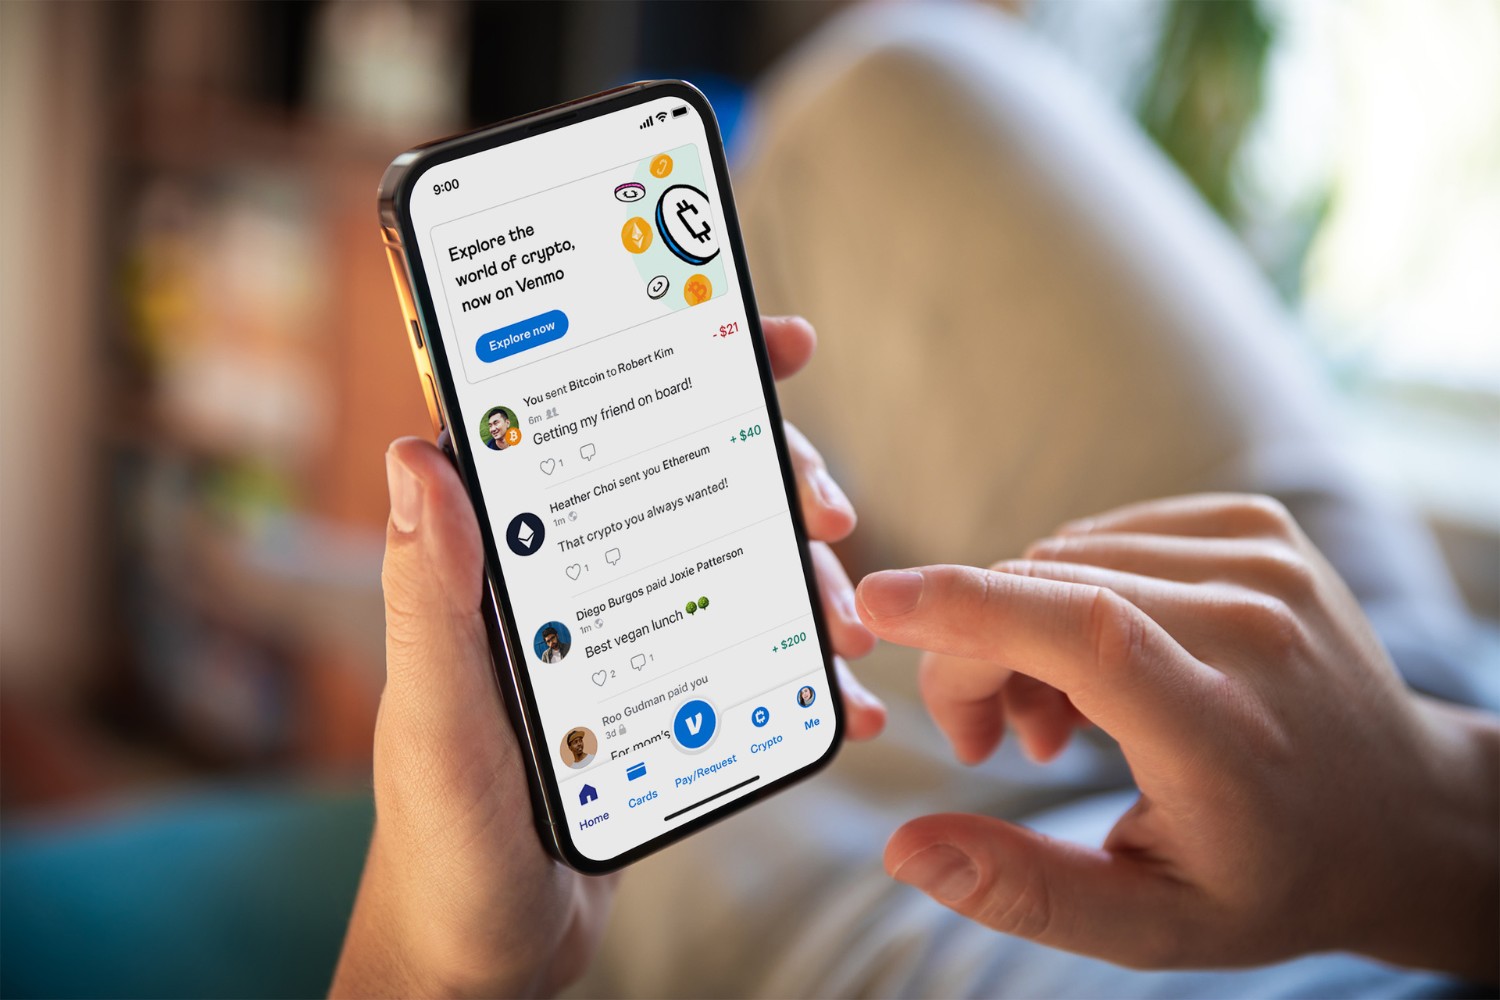
Receiving Money through Venmo
Venmo provides a convenient and hassle-free way to receive money from friends, family, or even customers if you’re using Venmo for business transactions. Here’s how you can easily receive money through Venmo:
1. Share your Venmo username: To receive money on Venmo, you need to let people know your Venmo username. You can share it with them through messaging apps, social media platforms, or by simply telling them in person. Your Venmo username is unique to your account and is preceded by the ‘@’ symbol.
2. Request a payment: If someone owes you money, you can send them a payment request using Venmo. Simply tap on the “Request” button on the main screen of the Venmo app, enter the amount owed, and select the person you want to request payment from. You can add a note to provide context or a reminder. Once sent, the person will receive a notification and can easily pay you back through Venmo.
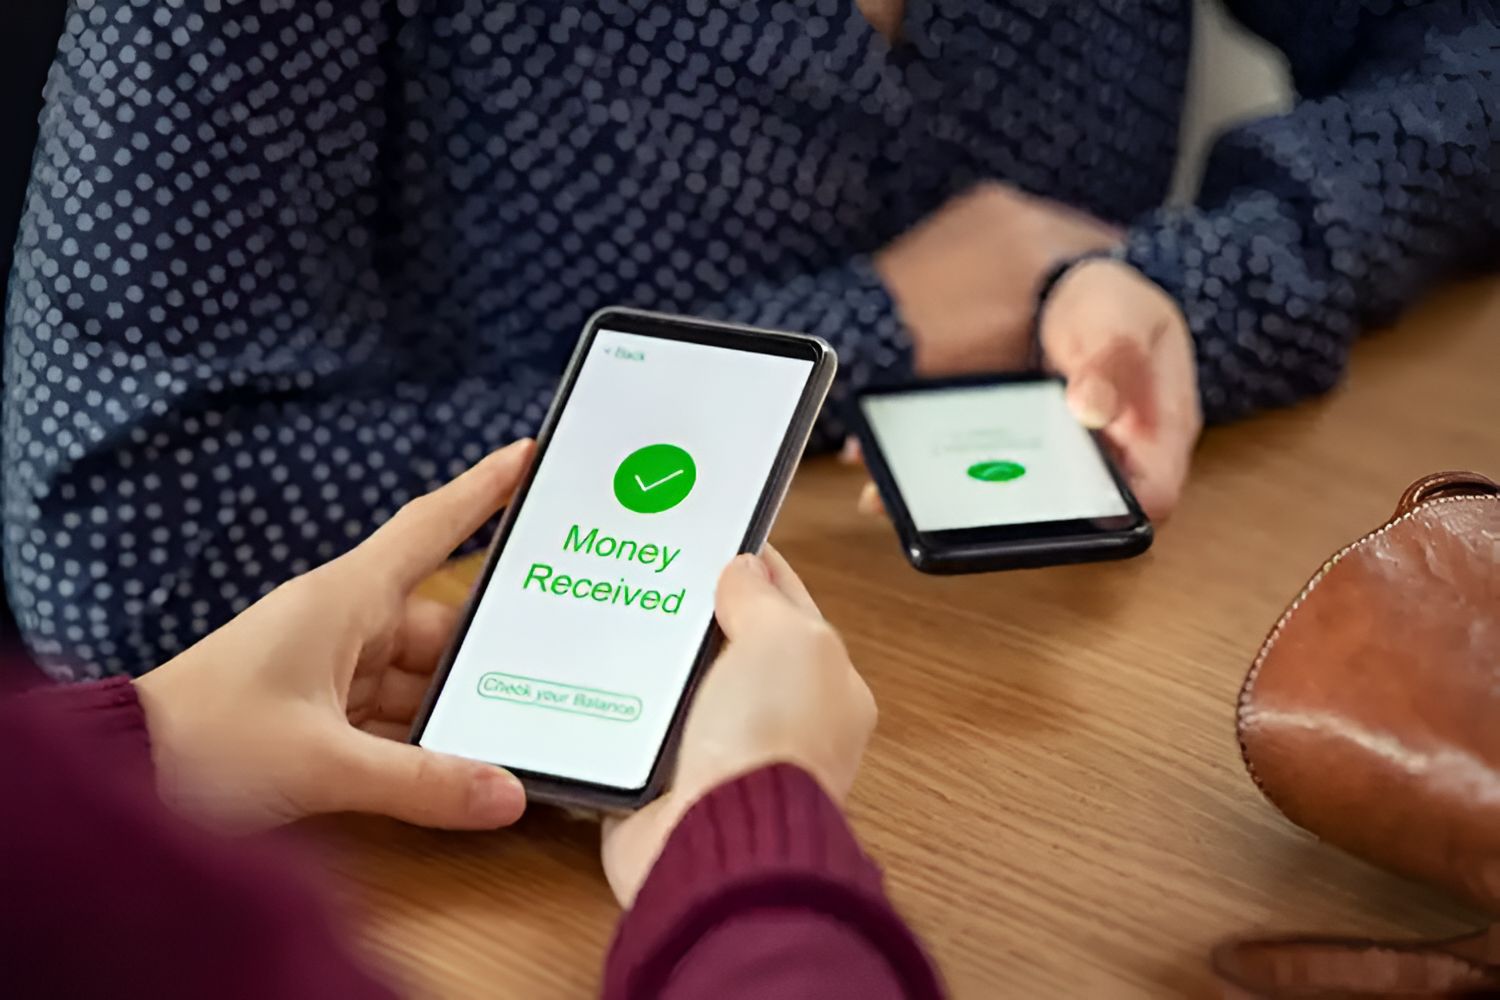
3. Receive direct payments: Another way to receive money on Venmo is by receiving direct payments from others. When someone wants to send you money, they can use the “Pay or Request” option on the Venmo app and enter your username. After they confirm the payment, you will receive a notification indicating that the money has been successfully transferred to your Venmo account.
4. Monitor your Venmo balance: When you receive money through Venmo, it will be reflected as a balance within your Venmo account. You can easily check your balance by opening the Venmo app and viewing the main screen. This balance can be used for future transactions or transferred to your linked bank account.
5. Keep track of transactions: Venmo provides a detailed transaction history, allowing you to easily track and review the payments you have received. You can access this transaction history by tapping on the “Activity” tab on the Venmo app. It displays the date, amount, and sender of each payment, helping you stay organized and manage your finances effectively.
Venmo offers a convenient way to receive money securely and quickly. Whether you’re collecting contributions from friends, receiving payment for goods or services, or simply splitting expenses, Venmo simplifies the process with its user-friendly interface and seamless integration.
In the next section, we’ll explore how to request payment from friends or family using the Venmo app.
Requesting Payment from Friends or Family
Venmo makes it effortless to request payment from friends or family members who owe you money. Whether it’s for splitting a bill, reimbursing you for a loan, or any other reason, Venmo provides a convenient way to request payments. Here’s how you can request payment using Venmo:
1. Open the Venmo app: Launch the Venmo app on your smartphone and log in to your account using your credentials.
2. Tap on the “Request” button: On the main screen of the Venmo app, you’ll find a “Request” button located at the bottom center. Tap on it to initiate the payment request.
3. Enter the payment details: In the payment request interface, enter the amount you’re requesting from your friend or family member. You can also add a note to provide context or remind them about the purpose of the payment. For example, you could mention the restaurant name and the date of the shared meal.
4. Select the recipient: There are multiple ways to select the recipient of the payment request. You can either search for their username by typing it in or choose from your Venmo contacts. Additionally, you can manually enter their phone number or email address if they’re not on Venmo yet.
5. Send the payment request: Once you’ve entered the amount and selected the recipient, tap on the “Request” button to send the payment request. The recipient will receive a notification indicating that you have requested payment from them.
6. Monitor your payment requests: You can easily keep track of your payment requests on the “Activity” tab of the Venmo app. This will show you the status of each request, whether it’s pending, completed, or declined. You can also send reminders to the recipient if needed.
7. Receive the payment: When your friend or family member receives the payment request, they can simply tap on it to proceed with the payment. They will have the option to pay the requested amount in full or enter a different amount if needed. Once they confirm the payment, the requested amount will be transferred to your Venmo account.
Venmo’s request feature enables seamless and transparent transactions between individuals. It simplifies the process of collecting money owed to you, eliminating the need for awkward conversations about debts.
In the next section, we’ll explore how Venmo can be used for accepting payments for goods or services, particularly for those who use Venmo for business transactions.
Accepting Payments for Goods or Services
Venmo offers a convenient solution for individuals and businesses to accept payments for goods or services. Whether you’re a freelancer, a small business owner, or selling items online, accepting payments through Venmo is quick and straightforward. Here’s how you can use Venmo to accept payments:
1. Communicate your payment preferences: Make it clear to your customers or clients that you accept payments through Venmo. You can include your Venmo username on your website, social media profiles, or product listings. Additionally, let your customers know the types of goods or services you offer and the associated pricing.
2. Invoice your customers: If you’re conducting business transactions or offering services, you can send invoices to your customers through Venmo. Simply create an invoice by entering the details of the product or service provided, along with the associated cost. You can also add a due date and any additional notes or terms.
3. Set up payment reminders: Venmo allows you to send payment reminders to your customers when an invoice is overdue. This helps ensure prompt payment and minimizes any delays in receiving funds for your goods or services. Prompt communication and follow-ups let your customers know that you value their business.
4. Track your payments: Venmo provides a detailed transaction history that allows you to keep track of all the payments you’ve received. This includes the date, amount, and sender’s information. You can access this information by navigating to the “Activity” tab on the Venmo app. This feature helps you reconcile your accounts and maintain accurate financial records.
5. Transfer funds to your bank account: Once you’ve received funds for your goods or services on Venmo, you can easily transfer them to your linked bank account. This ensures that you have the flexibility to use the funds wherever needed and simplifies the process of managing your finances.
It’s important to note that Venmo is primarily designed for personal use and small-scale transactions. If you’re running a larger business or have extensive payment needs, you may want to consider using a dedicated payment processor or merchant service provider that is more tailored to your requirements.
Venmo offers a user-friendly and efficient way to accept payments from your customers or clients. It simplifies the payment process for both parties and provides transparency and convenience in managing your transactions.
In the next section, we’ll explore how to transfer money from your Venmo balance to your linked bank account.
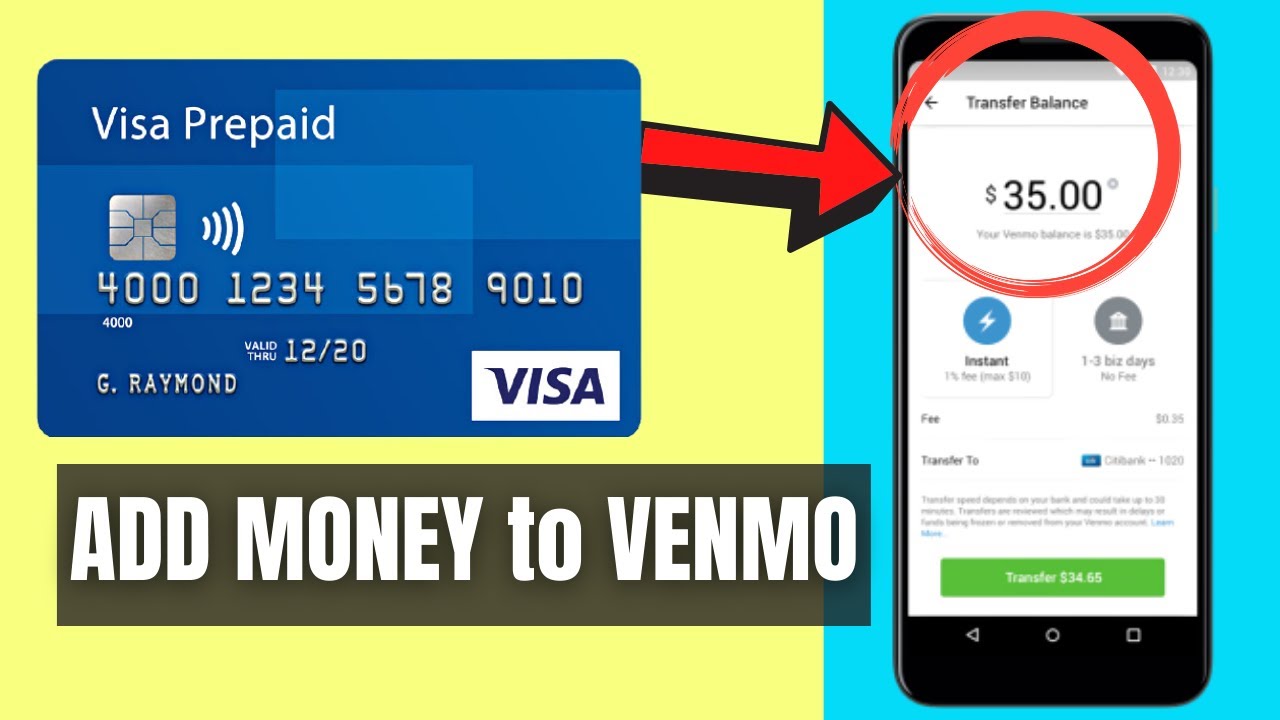
Transferring Money from Venmo Balance to Bank Account
One of the key advantages of using Venmo is the ability to transfer funds from your Venmo balance to your linked bank account. This allows you to access and use the money you’ve received through Venmo for your everyday expenses or other financial obligations. Here’s how you can transfer money from your Venmo balance to your bank account:
1. Open the Venmo app: Launch the Venmo app on your smartphone and log in to your account using your credentials.
2. Access the menu: Tap on the three horizontal lines at the top-left corner of the app to open the menu.
3. Go to “Transfer Money”: In the menu, scroll down and select “Transfer Money” to initiate the transfer process.
4. Choose your bank account: Venmo will display the bank account(s) linked to your Venmo account. Select the desired bank account to which you want to transfer your Venmo balance.
5. Enter the transfer amount: Enter the amount you wish to transfer from your Venmo balance to your bank account. Ensure that the entered amount is within your available Venmo balance.
6. Review and confirm: Double-check the transfer details, including the transfer amount and the selected bank account. If everything looks correct, tap on the “Transfer” button to initiate the transfer.
7. Wait for the transfer: The transfer process may take some time to complete. Venmo typically processes the transfer within 1-3 business days. You can check the status of the transfer on the Venmo app. Once the transfer is complete, the funds will be available in your bank account for use.
It’s important to note that Venmo may have limits on the amount of money you can transfer within a specific timeframe. These limits can vary depending on factors such as your account age, verification status, and transaction history. Make sure to review Venmo’s policies and guidelines regarding transfer limits.
Transferring money from your Venmo balance to your bank account provides you with the flexibility to use your funds however you need. Whether it’s paying bills, making purchases, or saving for the future, accessing your Venmo balance in your bank account gives you greater financial control.
In the next section, we’ll explore how to withdraw money from your Venmo balance using a debit card.
Withdrawing Money from Venmo Balance with a Debit Card
In addition to transferring funds to your bank account, Venmo also provides the option to withdraw money directly from your Venmo balance using a linked debit card. This allows for quick access to your funds without the need to wait for a bank transfer. Here’s how you can withdraw money from your Venmo balance with a debit card:
1. Open the Venmo app: Launch the Venmo app on your smartphone and log in to your account using your credentials.
2. Access the menu: Tap on the three horizontal lines at the top-left corner of the app to open the menu.
3. Go to “Transfer Money”: In the menu, scroll down and select “Transfer Money” to initiate a transfer.
4. Choose the debit card option: Venmo will display the available transfer options. Select the “Instant” option, which allows you to withdraw money from your Venmo balance instantly to your linked debit card. Please note that there may be a fee associated with this instant transfer.
5. Enter the withdrawal amount: Enter the amount you wish to withdraw from your Venmo balance using your linked debit card. Ensure that the entered amount is within your available Venmo balance.
6. Review and confirm: Double-check the withdrawal details, including the withdrawal amount and the selected debit card. If everything looks correct, tap on the “Transfer” button to initiate the withdrawal.
7. Verify the transfer: Venmo may prompt you to go through an additional verification process to ensure the security of your transaction. Follow the instructions provided by Venmo to complete the verification if required.
8. Receive the withdrawal: Once the transfer is complete, the funds will be instantly available on your linked debit card. You can then use the withdrawn funds for purchases or withdraw cash from ATMs, depending on the terms set by your debit card issuer.
It’s essential to keep in mind that there may be limitations on the amount you can withdraw using a debit card. These limits may vary depending on various factors, such as your account history and verification status. Be sure to review Venmo’s policies and guidelines on withdrawal limits and any associated fees.
Withdrawing money from your Venmo balance using a linked debit card offers convenience and immediate access to your funds. It’s a great option for situations where you need quick access to cash or for making purchases directly from your Venmo balance.
In the next section, we’ll explore important information regarding Venmo transaction limits and fees to keep in mind.
Understanding Venmo Transaction Limits and Fees
When using Venmo, it’s essential to familiarize yourself with the transaction limits and fees associated with the platform. Understanding these details will help you plan your transactions effectively and avoid any surprises. Here’s what you need to know:
Transaction Limits:
Venmo has certain limits in place to ensure the security and reliability of its service. These limits can vary depending on various factors, including your account verification status and transaction history. Here are some common Venmo transaction limits:
1. Sending and receiving limits: Venmo sets limits on the amount you can send and receive within a specific timeframe. These limits can vary and may increase over time as you build a transaction history. It’s important to review your specific limits on the Venmo app or website.
2. Instant transfer limits: If you choose to withdraw money from Venmo instantly to your linked debit card, there may be limitations on the amount you can withdraw in a single transaction. Again, it’s crucial to check your specific instant transfer limits through the Venmo app or website.
Fees:
Venmo charges fees for certain transactions and services. While sending money through Venmo is generally free, there are some cases where fees may apply. Here are a few instances where fees may be incurred:
1. Instant transfer fee: If you choose to withdraw your funds instantly to a linked debit card rather than waiting for a bank transfer, Venmo charges a fee for the convenience of immediate access to your funds. The specific fee amount will be displayed before confirming the withdrawal.
2. Business transactions: If you use Venmo for conducting business transactions, such as selling goods or services, there may be additional fees involved. Venmo provides a separate service called Venmo for Business that caters to businesses and may have associated fees. It’s important to review the details specific to Venmo for Business if you’re using Venmo for commercial purposes.
It’s essential to stay informed about the transaction limits and fees associated with Venmo to avoid any unexpected charges or limitations. Be sure to review Venmo’s terms of service and fee schedule on their website for the most up-to-date information.
By understanding the transaction limits and fees, you can effectively plan and manage your finances while using Venmo. It’s always a good practice to review the terms and conditions periodically to stay informed about any updates or changes that may occur.
In the next section, we’ll explore some troubleshooting tips for common issues related to receiving money on Venmo.
Troubleshooting Common Issues with Receiving Money on Venmo
While Venmo provides a seamless and efficient platform for receiving money, it’s possible to encounter some common issues along the way. Here are a few troubleshooting tips to help you resolve them:
1. Ensure your account is verified: One common issue with receiving money on Venmo is when your account is not fully verified. Make sure that you have completed the verification process by confirming your email address, phone number, and linking your bank account or debit card. This will ensure smooth transactions and eliminate any potential obstacles.
2. Check your privacy settings: Review your privacy settings on Venmo to ensure that you have enabled the necessary visibility options to receive payments. If your privacy settings are set to “Private” or “Friends Only,” it may restrict others from sending you money. Adjust your settings accordingly to facilitate payments from desired senders.
3. Confirm the payment details: If someone is having trouble sending you money, ask them to double-check the payment details. Ensure that they have entered your correct Venmo username, phone number, or email address. Any error in these details can prevent successful transactions.
4. Update the Venmo app: If you’re experiencing issues with receiving money, make sure that you’re using the latest version of the Venmo app. Updates often include bug fixes and improvements to enhance the functionality of the app.
5. Contact Venmo support: If you have tried the above troubleshooting steps and still encounter issues, reach out to Venmo support for assistance. They have a dedicated support team available to help resolve any problems you may be facing.
Remember to exercise caution when sharing your Venmo username or any financial information. Protect your account and personal details by keeping them confidential and only conducting transactions with trusted individuals or businesses.
Venmo strives to provide a seamless user experience when it comes to receiving money, and most issues can be resolved with simple troubleshooting steps. By following these tips, you should be able to overcome common obstacles and successfully receive payments on Venmo.
In the next section, we’ll provide some helpful tips for a smooth money receiving experience on Venmo.
Tips for a Smooth Money Receiving Experience on Venmo
To ensure a seamless and enjoyable money receiving experience on Venmo, consider the following tips:
1. Communication is key: Clearly communicate your Venmo username to friends, family, or customers who will be sending you money. Provide the necessary details through messaging apps, social media platforms, or direct conversations. This simplifies the process and ensures that payments are sent to the correct account.
2. Double-check payment details: Before confirming any payments, double-check the payment details to ensure accuracy. Verify the recipient’s username, review the payment amount, and confirm the purpose of the payment if necessary. This helps prevent any mistakes or misunderstandings.
3. Request payments when needed: If someone owes you money, don’t hesitate to use Venmo’s “Request” feature. Sending a polite request simplifies the payment process and avoids any potential mix-ups or delays.
4. Set reminders for overdue payments: If a payment is overdue, Venmo allows you to send payment reminders to the recipient. Utilize this feature to gently nudge individuals who may have forgotten to pay. It helps maintain transparent communication and ensures timely payments.
5. Monitor your activity and transactions: Regularly review your transaction history and activity on Venmo. This allows you to keep track of incoming payments, identify any discrepancies, and maintain a clear record of your financial transactions.
6. Stay informed about Venmo’s policies and updates: Stay up to date with Venmo’s policies, terms of service, and any updates or changes that may affect your money receiving experience. Reviewing the information provided by Venmo helps you understand any limitations, fees, or new features that may have been introduced.
7. Protect your account: Safeguard your Venmo account by setting a strong and unique password. Enable two-factor authentication for an extra layer of security. Be cautious when using public Wi-Fi networks, and ensure that you log out of Venmo when using shared devices.
8. Seek assistance when needed: If you encounter any issues or have questions regarding payments or your Venmo account, reach out to Venmo’s customer support. They have a dedicated support team available to assist you with any concerns or queries you may have.
By following these tips, you can ensure a smooth and convenient money receiving experience on Venmo. Effective communication, attention to detail, and staying informed are key to maximizing the benefits of this popular peer-to-peer payment service.
Remember to always review and comply with any regulations related to financial transactions and adhere to ethical practices when using Venmo.
Do you need any more assistance?