Introduction
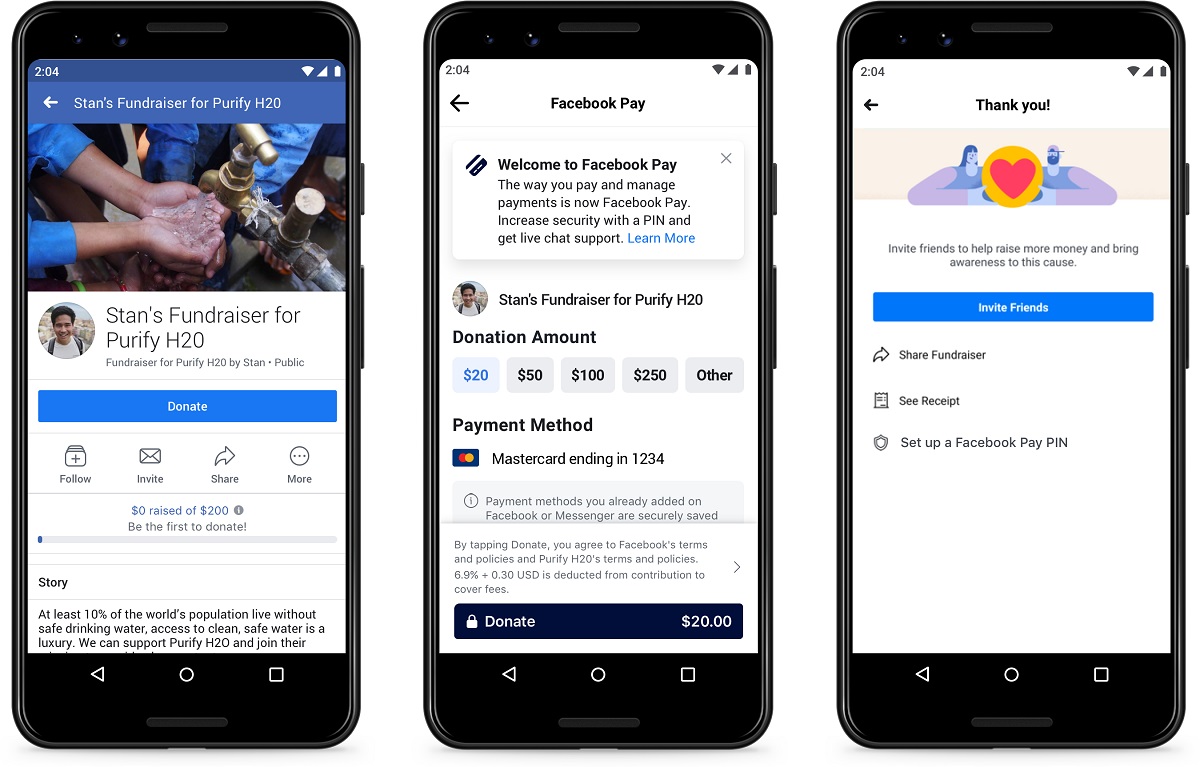
Welcome to our comprehensive guide on how to cancel a payment on Facebook Pay. Facebook Pay is a convenient and easy-to-use payment service that allows users to send and receive money securely through various Facebook apps and platforms.
While sending payments through Facebook Pay is a seamless process, there may be instances when you need to cancel a payment. This could be due to a variety of reasons, such as sending the wrong amount, accidental payments, or any other unforeseen circumstances.
In this article, we will walk you through the step-by-step process of canceling a payment on Facebook Pay. Whether you have made a payment through the Messenger app, the Facebook website, or have linked your Facebook Pay account to other apps, we have you covered. We will also address some common issues that may arise during the cancellation process and provide troubleshooting tips.
It’s important to note that once a payment is successfully processed, it cannot be canceled or reversed by Facebook Pay alone. In such cases, we will guide you on how to reach out to the recipient and request a refund. However, if the transaction is still pending or processing, you can cancel it directly through Facebook Pay.
Please note that Facebook Pay is available in select countries and is subject to the terms and conditions set by Facebook. Before canceling a payment, make sure to review the specific guidelines provided by Facebook Pay in your region.
So, whether you’ve sent a payment to the wrong person or simply changed your mind, let’s explore the different methods for canceling a payment on Facebook Pay and ensure a smooth and hassle-free experience.
Reasons for Canceling a Payment on Facebook Pay
There are several reasons why you may need to cancel a payment on Facebook Pay. Here are some common situations where you may find yourself wanting to initiate a payment cancellation:
- Wrong recipient: One of the most common reasons for canceling a payment is sending money to the wrong person. Perhaps you mistyped a contact’s name in the Messenger app or accidentally selected the wrong profile on the Facebook website.
- Incorrect amount: It’s also possible to send an incorrect amount when making a payment. Whether it’s a simple typo or a miscalculation, you may want to cancel the payment and resend the correct amount.
- Unsuccessful transaction: In some cases, a payment may not go through successfully due to technical issues or insufficient funds. Canceling the payment allows you to rectify the issue and try again.
- Change of plans: Sometimes, circumstances change, and you may no longer need to make a payment that you previously initiated. Canceling the payment ensures that the transaction does not go through unnecessarily.
- Security concerns: If you suspect any fraudulent activity or unauthorized access to your Facebook Pay account, it is essential to cancel any pending payments to safeguard your funds.
Regardless of the reason, it’s crucial to act quickly to cancel a payment on Facebook Pay. Once a payment has been processed successfully, it cannot be reversed solely through Facebook Pay. Instead, you will need to contact the recipient and request a refund, which can be more complicated and time-consuming.
Now that you understand why you may need to cancel a payment on Facebook Pay, let’s explore the step-by-step methods of canceling a payment, depending on the platform you are using.
Steps to Cancel a Payment on Facebook Pay
Cancelling a payment on Facebook Pay is relatively straightforward, but the exact steps may vary depending on the app or platform you’re using. We will guide you through the three main options for cancelling a payment, so you can choose the method that suits your needs.
Option 1: Cancel within the Messenger App
If you initiated the payment through the Messenger app, follow these steps to cancel the payment:
- Open the Messenger app on your mobile device and log in to your account.
- Go to the conversation where you sent the payment.
- Locate the payment message and tap on it to open the payment details.
- On the payment details screen, you will see an option to “Cancel Payment.” Tap on it.
- Confirm your decision to cancel the payment when prompted.
Once you’ve completed these steps, the payment will be cancelled, and you will receive a notification confirming the cancellation.
Option 2: Cancel within the Facebook Website
If you made the payment through the Facebook website, here’s how you can cancel it:
- Open a web browser on your computer and log in to your Facebook account.
- Navigate to the Facebook website’s top menu and click on the small arrow at the far right to open a drop-down menu.
- In the drop-down menu, click on “Settings & Privacy” and select “Settings.”
- In the left-hand menu, click on “Payments.”
- Under “Payment History,” locate the payment you want to cancel and click on the three-dot menu icon next to it.
- From the options that appear, select “Cancel Payment.”
- Confirm the cancellation when prompted.
Following these steps will cancel the payment and display a notification confirming the cancellation on the Facebook website.
Option 3: Cancel through Facebook Pay’s Settings
If you have linked your Facebook Pay account to other apps, you can cancel a payment through Facebook Pay’s settings. Here’s how:
- Open the app on your mobile device that is connected to your Facebook Pay account.
- Go to the settings or account section of the app.
- Find the payment or transaction history and locate the specific payment you wish to cancel.
- Tap on the payment and look for the option to cancel or request a refund.
- Follow the on-screen prompts to cancel the payment.
By following these steps, you will successfully cancel the payment through the connected app.
Now that you’re familiar with the various methods to cancel a payment on Facebook Pay, it’s essential to understand what happens when you cancel a payment and be aware of any potential issues or troubleshooting steps. Let’s explore these aspects in the next sections.
Option 1: Cancel within the Messenger App
If you initiated a payment through the Messenger app and need to cancel it, follow these steps:
- Open the Messenger app on your mobile device and log in to your account.
- Locate the conversation where you sent the payment.
- Find the payment message within the conversation and tap on it to open the payment details.
- Within the payment details screen, you will see an option to “Cancel Payment.” Tap on it.
- Confirm your decision to cancel the payment when prompted.
Once you’ve completed these steps, the payment will be canceled, and you will receive a notification confirming the cancellation. It’s important to note that you can only cancel payments that are still pending or processing. If the payment has already been completed, you will need to contact the recipient to request a refund.
By canceling the payment within the Messenger app, you can quickly rectify any errors or change your mind about the transaction. This ensures that the money remains in your account and does not go to the intended recipient.
If you’re unable to find the “Cancel Payment” option or face any difficulties in the process, make sure you have the latest version of the Messenger app installed on your device. Additionally, check for any updates to the app that might address the issue you’re encountering.
Now that you know how to cancel a payment within the Messenger app, let’s move on to the next option: canceling payments through the Facebook website.
Option 2: Cancel within the Facebook Website
If you made a payment through the Facebook website and need to cancel it, follow these steps:
- Open a web browser on your computer and log in to your Facebook account.
- On the Facebook website, locate the top menu and click on the small arrow at the far right. This will open a drop-down menu.
- In the drop-down menu, click on “Settings & Privacy” and select “Settings.”
- In the left-hand menu on the Settings page, click on “Payments.”
- Under the “Payment History” section, locate the specific payment that you wish to cancel.
- Once you’ve found the payment, click on the three-dot menu icon next to it.
- From the options that appear, select “Cancel Payment.”
- Confirm the cancellation when prompted.
Following these steps will cancel the payment and display a notification confirming the cancellation on the Facebook website.
Canceling a payment within the Facebook website provides an alternative method for managing your transactions and ensuring that your payments are accurate. It gives you the flexibility to review and cancel payments directly from your account settings.
If you encounter any issues or cannot find the “Cancel Payment” option within the Facebook website, try refreshing the page or clearing your browser cache. Additionally, ensure that you are using a supported browser and have the latest updates installed.
Now that you know how to cancel a payment within the Facebook website, let’s explore the third option: canceling payments through Facebook Pay’s settings.
Option 3: Cancel through Facebook Pay’s Settings
If you have linked your Facebook Pay account to other apps and need to cancel a payment, you can do so through Facebook Pay’s settings. Here’s how:
- Open the app on your mobile device that is connected to your Facebook Pay account.
- Navigate to the settings or account section of the app.
- Look for the payment or transaction history within the app.
- Locate the specific payment you wish to cancel.
- Tap on the payment to view its details.
- Within the payment details, you should find an option to cancel the payment or request a refund.
- Follow the on-screen prompts to cancel the payment.
By following these steps, you will successfully cancel the payment through the connected app. It’s important to note that the exact process and terminology may vary depending on the app you are using. However, most apps will provide a clear option to cancel or refund a payment made through Facebook Pay.
Canceling a payment through Facebook Pay’s settings gives you the convenience of managing your transactions directly within the app you use regularly. Whether it’s a shopping app, a ride-sharing service, or any other app integrated with Facebook Pay, you can cancel payments easily without switching platforms.
If you encounter any difficulties cancelling a payment through the connected app, refer to the app’s support documentation or reach out to their customer support for assistance. They will be able to provide you with the specific steps to cancel a payment within their app.
Now that you know how to cancel a payment through Facebook Pay’s settings, let’s move on to the next section to understand what happens when you cancel a payment on Facebook Pay.
What happens when you cancel a payment on Facebook Pay?
When you cancel a payment on Facebook Pay, the specific outcome will depend on the status of the payment and the actions taken by the recipient. Here are a few scenarios that may occur:
- Pending or processing payments: If the payment is still in the pending or processing stage when you cancel it, the transaction will be reversed, and the funds will not be transferred to the recipient. You will receive a notification confirming the cancellation, and the payment will be removed from your transaction history.
- Completed payments: If the payment has already been completed and the funds have been transferred to the recipient’s account, canceling the payment through Facebook Pay alone will not reverse the transaction. In such cases, you will need to contact the recipient directly and request a refund. It’s important to note that Facebook Pay does not have control over the refund process as it varies depending on the recipient’s willingness to refund the payment.
- Refunds from recipients: If you successfully cancel a payment and request a refund from the recipient, it’s up to them to decide whether to initiate the refund. While most recipients may comply, there is no guarantee that they will refund the amount. It’s recommended to communicate with the recipient politely and provide any necessary details to facilitate the refund process.
Please keep in mind that timely action is crucial when canceling a payment. Once a payment has been completed and the funds have been transferred, it becomes more challenging to resolve any disputes or issues. Therefore, it’s recommended to double-check the recipient’s details before initiating a payment and promptly cancel any incorrect or unnecessary transactions.
If you encounter any complications or the intended recipient refuses to refund the payment, you may need to seek additional assistance. In such cases, you can consider reaching out to Facebook Pay’s customer support or contacting your financial institution for further guidance.
Now that you understand what happens when you cancel a payment on Facebook Pay, let’s address some common issues that you may encounter during the cancellation process and provide troubleshooting tips to help you resolve them effectively.
Common Issues and Troubleshooting
While canceling a payment on Facebook Pay is usually a straightforward process, you may encounter some common issues along the way. Here are a few common scenarios and troubleshooting tips:
- Can’t find the payment: If you’re having trouble locating the payment you want to cancel, verify that you’re checking the correct app or platform where the payment was made. Double-check your transaction history, payment messages, or account settings within the specific app or website. If you still can’t find the payment, consider reaching out to the app’s customer support for guidance.
- No option to cancel: In some cases, you may not find a “Cancel Payment” option in the app or website. Make sure your app is up to date, as the option to cancel a payment may be added in newer versions. Additionally, check if the payment has already been processed or completed, as these payments cannot be canceled through Facebook Pay alone. You will need to contact the recipient directly in such cases.
- Technical issues: If you encounter any technical glitches or errors while attempting to cancel a payment, try closing and reopening the app or website. If the problem persists, clear your cache and cookies, or try using a different browser or device. Sometimes, a temporary issue with the app or website can prevent you from canceling a payment.
- No response from the recipient: If you have canceled a payment and requested a refund from the recipient, but they are not responding or refusing to refund the amount, you may need to consider other options. Contact the app or platform’s customer support and provide them with all necessary details and evidence of the canceled payment and your refund request. They may be able to intervene and assist in resolving the issue.
If you continue to face difficulties or encounter unique problems while canceling a payment on Facebook Pay, it’s advisable to reach out to Facebook Pay’s customer support for assistance. They can provide further troubleshooting steps or advice tailored to your specific situation.
Remember to keep a record of all communication and transactions related to the canceled payment. This can include screenshots, messages, or any other evidence that may be useful in case of disputes or further escalation.
With these common issues and troubleshooting tips in mind, you can navigate the payment cancellation process more effectively and resolve any potential obstacles that arise.
In the next section, we will conclude our guide on canceling a payment on Facebook Pay and summarize the key takeaways.
Conclusion
In conclusion, canceling a payment on Facebook Pay is a relatively straightforward process, provided that you take action before the payment is completed. Whether you initiated the payment through the Messenger app, the Facebook website, or other connected apps, you have multiple options to cancel the payment and rectify any errors or changes in your transaction.
Throughout this guide, we have discussed the three main options for canceling a payment on Facebook Pay: within the Messenger app, through the Facebook website, and within the settings of connected apps. By following the step-by-step instructions for each option, you can cancel pending or processing payments and avoid unnecessary complications.
However, it’s essential to remember that once a payment is completed and the funds are transferred, canceling the payment through Facebook Pay alone will not reverse the transaction. In such cases, you will need to reach out to the recipient directly and request a refund. While most recipients may cooperate, there is no guarantee of a refund, and you may need to explore other courses of action, such as contacting customer support or your financial institution.
Additionally, we have covered common issues that may arise during the cancellation process and provided troubleshooting tips to resolve them effectively. From not being able to find the payment to encountering technical glitches or uncooperative recipients, these tips can help you navigate potential obstacles and find solutions.
Lastly, it’s crucial to act quickly when canceling payments and to verify the details before initiating a transaction. This helps minimize the risk of errors or unwanted payments. By keeping a record of all communication and transactions related to canceled payments, you can support your case in case of disputes or further escalation.
Remember to consult the specific guidelines and terms and conditions provided by Facebook Pay in your region, as they may vary. If you require further assistance or encounter unique situations not covered in this guide, don’t hesitate to reach out to Facebook Pay’s customer support for guidance.
We hope this comprehensive guide has equipped you with the knowledge and steps needed to cancel a payment on Facebook Pay confidently. By understanding the options available and being proactive, you can ensure a smooth and hassle-free experience with Facebook Pay.