Introduction
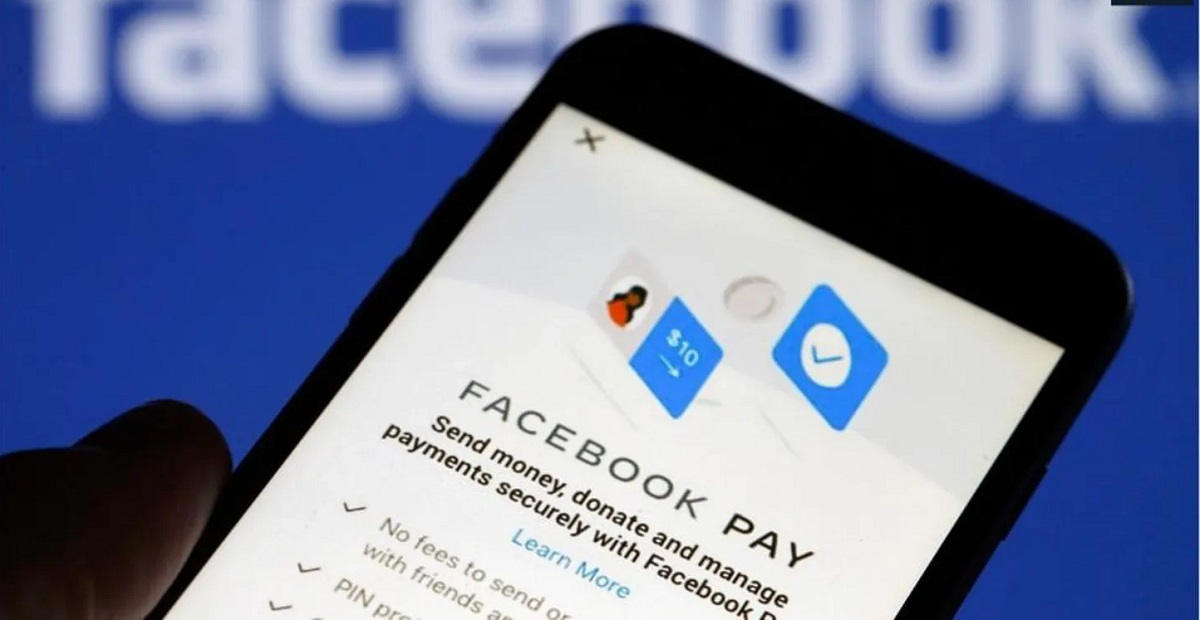
Welcome to the world of Facebook Pay, where convenience and security are combined to make your online purchases easier than ever before. Whether you’re buying a new gadget, subscribing to your favorite streaming service, or donating to a charitable cause, Facebook Pay provides a seamless payment experience across various Facebook platforms and apps.
With the advent of technology, online transactions have become an integral part of our lives. However, navigating through different websites and payment gateways can often be time-consuming and overwhelming. That’s where Facebook Pay steps in, simplifying the payment process and streamlining your online shopping experience.
Setting up Facebook Pay is a breeze. By connecting your preferred payment methods, you can securely make purchases on Facebook, Messenger, Instagram, and WhatsApp. Furthermore, you can easily manage your payment methods, review your transaction history, and set up payment notifications to stay up-to-date with your purchases.
In this article, we will guide you through the process of setting up Facebook Pay, adding payment methods, making purchases, managing your payment methods, reviewing your transaction history, and troubleshooting any common issues that may arise along the way. So, let’s delve into the world of Facebook Pay and discover how it can revolutionize your online shopping experience.
Setting up Facebook Pay
Getting started with Facebook Pay is a simple process that only requires a few steps. To set up Facebook Pay, follow these instructions:
- Open the Facebook app or website and log into your account.
- Go to the settings menu by clicking on the menu icon (three horizontal lines) on the top right corner.
- Scroll down and click on “Facebook Pay” under the “Settings & Privacy” section.
- Click on the “Add Payment Method” button to link your preferred payment method to Facebook Pay.
- Choose your payment method from the available options, such as credit/debit card or PayPal.
- Enter your payment details and click on “Save” to securely store your payment information.
- To add additional payment methods, click on the “Add Payment Method” button again and follow the same process.
Once you have successfully set up Facebook Pay and linked your payment methods, you’re ready to make purchases on various Facebook platforms and apps hassle-free.
It is worth noting that Facebook Pay ensures the utmost security and privacy of your payment information. Your card details or financial information are not shared with the recipients or other Facebook users when you make a purchase. Facebook Pay uses advanced encryption technology to protect your data and offers additional security measures, such as using a PIN or biometric authentication for added verification.
With Facebook Pay, you no longer have to re-enter your payment details every time you make a purchase on Facebook, Messenger, Instagram, or WhatsApp. It saves your payment information securely, allowing for seamless transactions with just a few clicks.
Now that you have set up Facebook Pay, let’s explore how you can add payment methods to enhance your shopping experience even more.
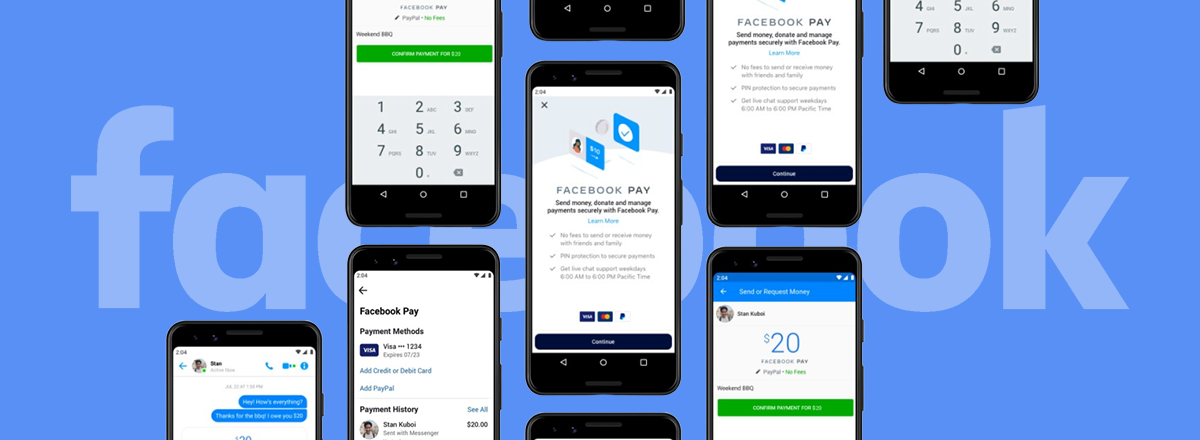
Adding Payment Methods to Facebook Pay
Facebook Pay offers a variety of payment methods to choose from, ensuring convenience and flexibility for users. Here’s how you can add payment methods to your Facebook Pay account:
- Open the Facebook app or website and log into your account.
- Go to the settings menu and select “Facebook Pay” under the “Settings & Privacy” section.
- Click on the “Add Payment Method” button.
- Choose your preferred payment method from the options provided. Facebook Pay supports credit/debit cards, PayPal, and other local payment methods depending on your location.
- If you select a credit/debit card, enter the card details, including the card number, expiration date, and security code.
- If you choose PayPal, log into your PayPal account and authorize Facebook to link your PayPal account to Facebook Pay.
- Once you’ve entered the required information, click on “Save” to add the payment method to your Facebook Pay account.
- You can add multiple payment methods by repeating the steps above or selecting “Add Payment Method” again.
When adding payment methods, it’s essential to ensure that the information you provide is accurate and up to date. This ensures smooth transactions and avoids any issues when making purchases through Facebook Pay.
Facebook Pay allows you to set a default payment method, which is automatically used for transactions unless you select a different payment method during the purchase process. To set a default payment method:
- Go to the Facebook Pay settings.
- Under the “Payment Methods” section, select the payment method you want to set as default.
- Click on the “Set as Default” option.
By setting a default payment method, you can expedite the checkout process and reduce the steps required for each transaction.
Now that you’ve added your preferred payment methods to your Facebook Pay account, let’s move on to the next step – making purchases with Facebook Pay.
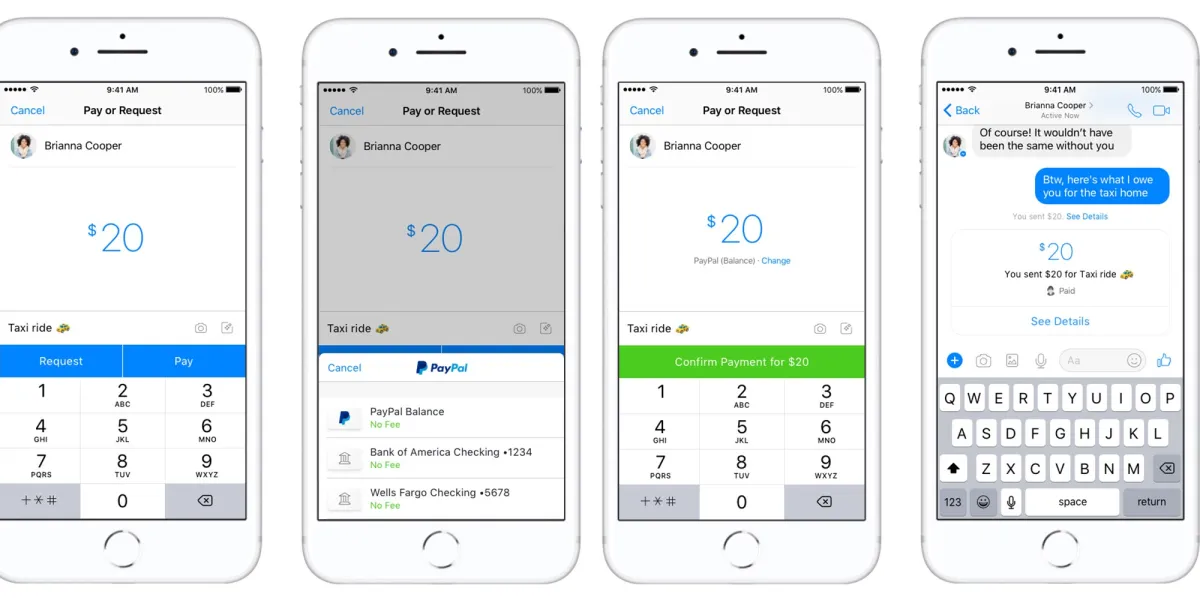
Making Purchases with Facebook Pay
Now that you have set up Facebook Pay and added your payment methods, you’re ready to start making purchases on Facebook, Messenger, Instagram, and WhatsApp effortlessly. Here’s how you can use Facebook Pay to complete your transactions:
- Find the item or service you wish to purchase on the platform or app.
- Click on the “Buy Now” or “Add to Cart” button, depending on the specific platform or app you are using.
- Review your order details, including the item, quantity, and price.
- Choose your desired shipping method and provide the necessary shipping information if applicable.
- Select your preferred payment method from the available options.
- If necessary, enter any discount codes or promotional offers you may have.
- Review the final order summary and click on the “Confirm Purchase” or “Place Order” button.
- Depending on your payment method, you may be required to provide additional verification, such as a PIN or biometric authentication, to complete the transaction.
- Once the payment is processed, you will receive a confirmation of your purchase.
Facebook Pay simplifies the checkout process by securely storing your payment information, allowing for quick and hassle-free transactions. It also offers the convenience of making purchases across multiple Facebook platforms and apps without the need to re-enter your payment details each time.
When making purchases with Facebook Pay, it’s important to keep an eye out for any available buyer protection policies or refund options provided by the seller. This ensures that you have a recourse in case of any issues with your purchase.
With the ease and convenience of Facebook Pay, you can explore various products, services, and experiences within the Facebook ecosystem and make secure transactions with just a few clicks.
Now that you’re familiar with making purchases using Facebook Pay, let’s move on to the next section, where we’ll explore how to manage your payment methods within the Facebook Pay system.
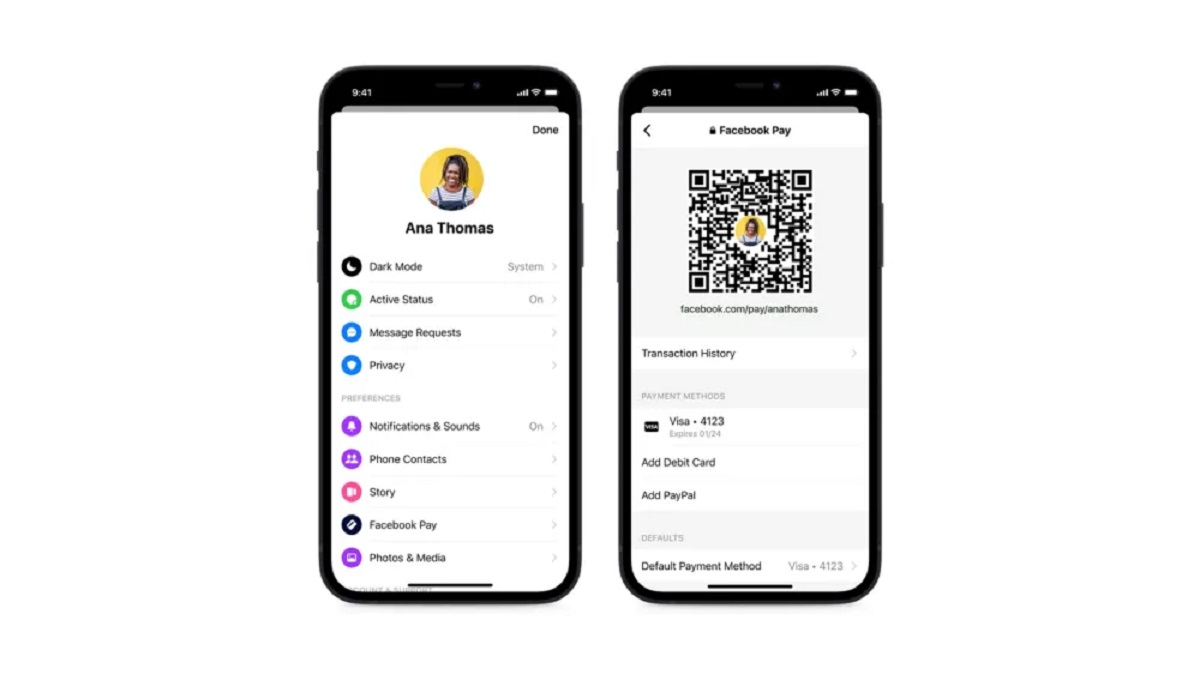
Managing Your Payment Methods in Facebook Pay
Facebook Pay provides you with the flexibility to easily manage and update your payment methods based on your preferences and needs. Here’s how you can manage your payment methods within the Facebook Pay system:
- Open the Facebook app or website and log into your account.
- Go to the settings menu and select “Facebook Pay” under the “Settings & Privacy” section.
- Under the “Payment Methods” section, you will see a list of the payment methods you have added to your Facebook Pay account.
- To remove a payment method, click on the “Remove” button next to the respective payment method. Confirm your action when prompted.
- If you want to add a new payment method, click on the “Add Payment Method” button and follow the instructions provided in the previous section.
- You can also set a default payment method by selecting the payment method from the list and clicking on the “Set as Default” option.
- Additionally, you have the option to edit the details of your payment methods. Click on the “Edit” button next to the payment method you wish to modify and make the necessary changes. Click on “Save” to update the information.
By regularly managing your payment methods within Facebook Pay, you can ensure that your information is up to date and accurate. You can add or remove payment methods based on your current preference or changes in your financial situation.
It’s important to note that when you remove a payment method from Facebook Pay, it only removes it from your Facebook Pay account. It does not delete the payment method from the provider’s system. If you need to completely remove a payment method, you will have to do so through the respective provider’s website or app.
By managing your payment methods in Facebook Pay, you can maintain control over your financial information, update your preferences as needed, and tailor your payment options to suit your requirements.
Now that you understand how to manage your payment methods within Facebook Pay, let’s explore how you can review your transaction history.
Reviewing Your Facebook Pay Transaction History
Keeping track of your transactions is essential for budgeting, expense tracking, and ensuring the accuracy of your purchases. Luckily, Facebook Pay provides a feature that allows you to easily review your transaction history. Here’s how you can access and review your Facebook Pay transaction history:
- Open the Facebook app or website and log into your account.
- Go to the settings menu and select “Facebook Pay” under the “Settings & Privacy” section.
- Scroll down to the “Transaction History” section.
- You will see a list of your recent transactions, including the date, time, and details of each purchase.
- To view more details about a specific transaction, click on it.
- Within the transaction details, you can find information such as the purchase amount, the seller’s name, and any shipping or tracking information if applicable.
- If you need to search for a specific transaction, you can use the search bar provided within the transaction history section.
- To filter your transactions by date, click on the calendar icon and select the desired date range.
Reviewing your Facebook Pay transaction history helps you stay informed about your financial activities and provides a record that can be useful for tracking expenses, reconciling receipts, or resolving any discrepancies that may arise.
Additionally, Facebook Pay allows you to download a copy of your transaction history in a CSV (comma-separated values) format. To download your transaction history:
- Go to the Facebook Pay settings.
- Scroll down to the “Transaction History” section.
- Click on the “Download” button.
A CSV file containing your transaction history will be downloaded to your device, which you can view and analyze using spreadsheet software such as Microsoft Excel or Google Sheets.
By regularly reviewing and downloading your Facebook Pay transaction history, you can maintain financial transparency, monitor your spending habits, and ensure the accuracy of your purchases.
Now that you know how to review your transaction history, let’s move on to setting up payment notifications with Facebook Pay.
Setting Up Payment Notifications with Facebook Pay
Facebook Pay offers a convenient way to stay updated on your purchases and transactions through payment notifications. By setting up payment notifications, you can receive real-time alerts and stay informed about the status of your payments. Here’s how you can enable payment notifications with Facebook Pay:
- Open the Facebook app or website and log into your account.
- Go to the settings menu and select “Facebook Pay” under the “Settings & Privacy” section.
- Scroll down to the “Payment Notifications” section.
- You will find options to customize your payment notifications.
- Toggle the switch next to “Payment Notifications” to enable or disable the notifications.
- Choose the types of payments you want to receive notifications for, such as purchases, refunds, or failed transactions.
- Depending on your preference, you can also choose to receive notifications via email, push notifications on your device, or both.
Enabling payment notifications with Facebook Pay ensures that you are promptly notified about any significant changes or updates related to your transactions. You can stay informed about successful purchases, shipment information, payment confirmation, and refund updates.
Receiving notifications also provides an added layer of security, as it allows you to quickly identify any unauthorized transactions or unusual activities associated with your Facebook Pay account.
By customizing your payment notifications, you can streamline your communication and receive relevant updates based on your preferences and needs.
Now that you’ve set up payment notifications with Facebook Pay, you’re all set to make secure transactions while staying informed of every step along the way.
In the next section, we’ll briefly discuss common troubleshooting issues you may encounter while using Facebook Pay and how to resolve them.
Troubleshooting and Common Issues with Facebook Pay
While Facebook Pay aims to provide a seamless and secure payment experience, there may be times when you encounter some common issues or challenges. Here are a few troubleshooting tips to help you resolve them:
1. Payment Declined: If your payment is declined, double-check that your payment method has sufficient funds, is still valid, and is correctly entered. You may also want to contact your bank or payment provider to ensure that there are no issues on their end.
2. Incorrect Charges: If you notice an incorrect charge on your Facebook Pay transaction history, reach out to the seller or merchant first to address the issue. They may be able to offer a refund or help resolve the error. If needed, you can also report the problem to Facebook’s support team for further assistance.
3. Failed Transactions: If you experience a failed transaction, make sure you have a stable internet connection. Refresh the page or app and try the transaction again. If the issue persists, contact Facebook’s support team for further assistance.
4. Payment Method Not Accepted: Some sellers or merchants may have specific payment methods that they accept. If your preferred payment method is not accepted, consider using an alternative payment method or reaching out to the seller or merchant to discuss available options.
5. Privacy and Security Concerns: If you have concerns about the privacy and security of your payment information, ensure that you have taken necessary precautions such as setting strong passwords, enabling two-factor authentication, and reviewing your privacy settings within Facebook and your chosen payment method provider.
If you encounter any other issues or need further assistance with Facebook Pay, the best course of action is to reach out to Facebook’s support team or consult their dedicated help center for comprehensive troubleshooting guides and resources.
Remember, technology can sometimes have glitches or errors, so being patient and following the recommended steps for resolving common issues will help ensure a smooth experience with Facebook Pay.
With the troubleshooting tips mentioned above, you can overcome any obstacles that may arise and make the most of Facebook Pay’s convenient and secure payment capabilities.
Now that we’ve addressed some common troubleshooting issues, let’s wrap up this article with a quick recap of the key points discussed.
Conclusion
Facebook Pay offers a seamless and secure payment experience, simplifying online transactions across various Facebook platforms and apps. By following the steps outlined in this article, you can set up Facebook Pay, add payment methods, make purchases, manage your payment methods, review transaction history, and troubleshoot common issues that may arise along the way.
Setting up Facebook Pay is a straightforward process that involves linking your preferred payment methods to your Facebook account. Once set up, you can easily make purchases with just a few clicks, without the need to re-enter your payment details each time.
Managing your payment methods within Facebook Pay gives you the flexibility to add, remove, or edit your payment options, while reviewing your transaction history allows you to keep track of your purchases and download a copy for your records.
Enabling payment notifications keeps you updated on the status of your payments, ensuring that you stay informed about successful purchases, refunds, and any potential issues that may arise.
While using Facebook Pay, it’s important to be aware of and troubleshoot common issues such as declined payments, incorrect charges, or failed transactions. By following the recommended troubleshooting tips and reaching out to Facebook’s support team when necessary, you can overcome these challenges and continue enjoying a smooth payment experience.
Overall, Facebook Pay offers a convenient and secure way to make purchases online, eliminating the need for multiple payment methods and providing a streamlined checkout process. With its user-friendly interface and extensive features, Facebook Pay is sure to enhance your online shopping experience within the Facebook ecosystem.
So go ahead, set up Facebook Pay, and enjoy the ease and convenience it offers for all your online purchases!