Introduction
Installing a new operating system on your solid-state drive (SSD) can be an exciting experience, as it promises faster boot times and improved performance. However, encountering obstacles during the installation process can be frustrating. If you find yourself unable to install Windows on your SSD, there may be several factors contributing to this issue. In this article, we will explore the potential reasons why Windows won’t install on your SSD and provide troubleshooting steps to help you overcome this obstacle.
An SSD is a storage device that uses flash memory to store and retrieve data, offering faster read and write speeds compared to traditional hard drives. While SSDs offer numerous advantages, they can also present unique challenges during the installation of an operating system. Some common issues that may prevent Windows from installing on an SSD include insufficient power supply, incorrect BIOS settings, compatibility issues, a damaged SSD, and inadequate storage space or RAM.
In order to successfully install Windows on your SSD, it is crucial to identify and address these potential issues. Troubleshooting the installation process requires a combination of technical knowledge and problem-solving skills. By following the steps outlined in this article, you can increase the chances of a successful Windows installation on your SSD and enjoy the benefits of a faster and more efficient system.
Potential Issues with SSD
When attempting to install Windows on your SSD, you may encounter various potential issues that can hinder the installation process. Understanding these issues will help you troubleshoot and resolve the problem effectively. Let’s delve into some of the common reasons why Windows won’t install on your SSD.
One possible issue is an inadequate power supply to your SSD. SSDs require a stable power source to function properly, and insufficient power can cause installation errors. Ensure that your power supply unit (PSU) has enough capacity to handle all your hardware components, including the SSD. Consider upgrading your PSU if it is not providing adequate power to your system.
Incorrect BIOS settings can also prevent Windows from installing on your SSD. Access the BIOS settings of your computer and check if the SATA or storage configuration is properly set. Ensure that the SSD is recognized and set as the primary boot device. Additionally, make sure that the AHCI (Advanced Host Controller Interface) mode is enabled, as this is essential for optimal SSD performance.
Compatibility issues may arise between your SSD and the motherboard or other hardware components. Different generations of SSDs and motherboards may not be fully compatible, leading to installation problems. Check the specifications of both the SSD and the motherboard to ensure compatibility. Updating the BIOS and SSD firmware to the latest versions can sometimes resolve compatibility issues.
A damaged SSD can also be a culprit. Physical damage or logical errors on the SSD can prevent proper installation. Perform a thorough check on your SSD for any physical signs of damage, such as loose connections or visible defects. Additionally, run diagnostic tools to check for logical errors and bad sectors on the SSD. If a damaged SSD is identified, consider replacing it with a new one.
Another factor to consider is insufficient storage space on your SSD. Windows requires a certain amount of free space to install and function properly. Ensure that your SSD has enough free space for the Windows installation. If it is running low on storage, consider deleting unnecessary files or upgrading to a larger capacity SSD.
Finally, insufficient RAM (Random Access Memory) can hinder the installation process. Windows 10, for example, requires a minimum of 2GB of RAM for the 64-bit version. If your system has less than the required amount of RAM, upgrading it can resolve installation issues and ensure optimal performance.
By familiarizing yourself with these potential issues, you can better diagnose and troubleshoot the installation problems you may encounter when attempting to install Windows on your SSD. In the next section, we will explore the troubleshooting steps you can take to resolve these issues and successfully install Windows on your SSD.
Insufficient Power Supply
One potential issue that could prevent Windows from installing on your SSD is an inadequate power supply. SSDs require a stable and sufficient power source to function properly. If your power supply unit (PSU) is not providing enough power to the system, it may lead to installation errors and failures.
To resolve this issue, you should ensure that your PSU has enough capacity to support all your hardware components, including the SSD. Check the wattage rating of your PSU and compare it to the power requirements of your system. Ideally, you should have a PSU that provides more power than what your system needs, as it ensures a stable power supply.
If you suspect that the PSU is the cause of the installation problem, consider upgrading to a higher wattage PSU. This will provide enough power to support your entire system, including the SSD, and prevent any power-related issues during the installation process.
It’s worth mentioning that the power supply cables also play a crucial role in delivering power to the SSD. Ensure that all power connectors between the PSU and the SSD are securely plugged in. Sometimes, loose connections can cause intermittent power supply, which could lead to installation issues. Checking and reseating the power cables can help ensure a stable power connection.
Furthermore, it is essential to make sure that your power outlet is functioning correctly. Faulty outlets, power surges, or inadequate grounding can also impact the stability of your power supply. Consider plugging your system into a different power outlet or using a surge protector to protect against voltage fluctuations and electrical issues.
In some cases, if you have additional hardware components such as a graphics card or multiple hard drives, the power draw from these devices may overload your PSU. Removing any unnecessary components or upgrading your PSU to a higher wattage can help alleviate this problem.
By addressing and resolving any issues with the power supply, you can ensure that your SSD receives sufficient power during the Windows installation process. This will help prevent installation errors and create a stable foundation for your operating system to function optimally on the SSD.
Incorrect BIOS Settings
Incorrect BIOS settings can be another potential reason why Windows won’t install on your SSD. The BIOS (Basic Input/Output System) is responsible for the initialization and configuration of your computer’s hardware components, including the storage devices. If the BIOS settings related to storage are not properly configured, it can prevent the installation of Windows on your SSD.
To address this issue, you will need to access the BIOS settings of your computer. The process of entering the BIOS may vary depending on your motherboard manufacturer, but it often involves pressing a specific key (such as Del, F2, or F10) during the system boot-up process.
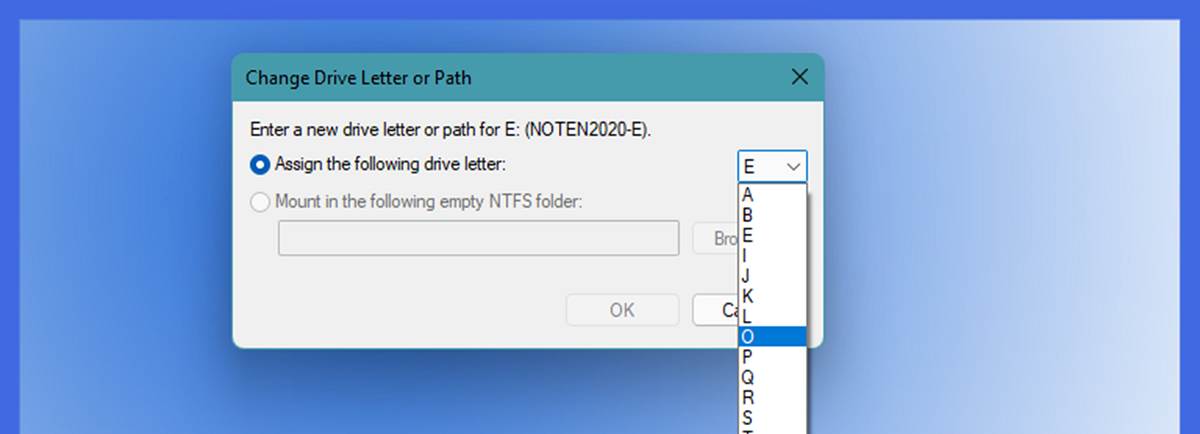
Once you are in the BIOS, navigate to the storage configuration settings. Look for an option related to SATA or storage devices. Ensure that the SSD is properly recognized and set as the primary boot device. If it is not listed or detected, there may be a loose connection or compatibility issue with the SSD and the motherboard. In such cases, you can try reseating the connections or updating the BIOS firmware to the latest version to resolve any compatibility issues.
Additionally, check if the AHCI (Advanced Host Controller Interface) mode is enabled in the BIOS settings. AHCI is a modern storage interface that allows for improved performance and features, especially for SSDs. Enabling AHCI mode is necessary for the optimal operation of an SSD. If it is currently disabled, enable it and save the changes in the BIOS before attempting to install Windows again.
It is important to note that making changes to the BIOS settings can have unintended consequences if not done correctly. Therefore, exercise caution and refer to the documentation or support resources provided by your motherboard manufacturer for guidance.
After making the necessary changes in the BIOS, save the settings and exit. Your computer will then restart, and you can proceed with the Windows installation process. By ensuring that the BIOS settings related to storage are configured correctly, you can overcome any installation issues caused by incorrect BIOS settings and successfully install Windows on your SSD.
Compatibility Issues
Compatibility issues between your SSD and other hardware components can also hinder the installation of Windows on your SSD. Different generations of SSDs and motherboards may not always be fully compatible, which can result in installation problems.
To address compatibility issues, the first step is to check the specifications of your SSD and motherboard. Ensure that they are compatible in terms of the form factor, interface type (such as SATA or NVMe), and connector type. If there are any mismatches, you may need to consider replacing either the SSD or the motherboard to ensure compatibility.
Updating the BIOS firmware and SSD firmware to the latest versions can sometimes resolve compatibility issues. Motherboard manufacturers often release BIOS updates that improve compatibility and add support for newer hardware. Similarly, SSD manufacturers release firmware updates that address compatibility and stability issues. Visit the manufacturer’s website and download the latest firmware updates for both the motherboard and SSD, and follow the instructions provided to update the firmware.
In some cases, compatibility issues may arise due to older motherboard chipsets that lack compatibility with newer SSDs. If this is the case, consider upgrading your motherboard to a model that supports your SSD. Consult the motherboard manufacturer’s documentation or support resources to verify compatibility before making any purchasing decisions.
Another consideration is the operating system itself. Older versions of Windows may not have full support for newer SSDs. Ensure that you are using a compatible version of Windows that supports your particular SSD model. If necessary, consider upgrading to a newer version of Windows to ensure optimal compatibility and performance.
It is essential to research and verify compatibility before purchasing and installing an SSD. Checking the compatibility list provided by the manufacturer or seeking advice from experts can help you avoid compatibility issues. Compatibility testing with your specific hardware setup can also be beneficial to ensure a smooth installation process.
By addressing compatibility issues and ensuring that your SSD is compatible with your other hardware components and operating system, you can overcome any installation problems caused by compatibility conflicts. This will enable you to install Windows on your SSD and take advantage of its improved performance and storage capabilities.
Damaged SSD
A damaged SSD can be a significant obstacle when trying to install Windows on your system. Physical damage or logical errors on the SSD can prevent proper installation and operation. If you suspect that your SSD is damaged, it’s essential to diagnose and address the issue promptly.
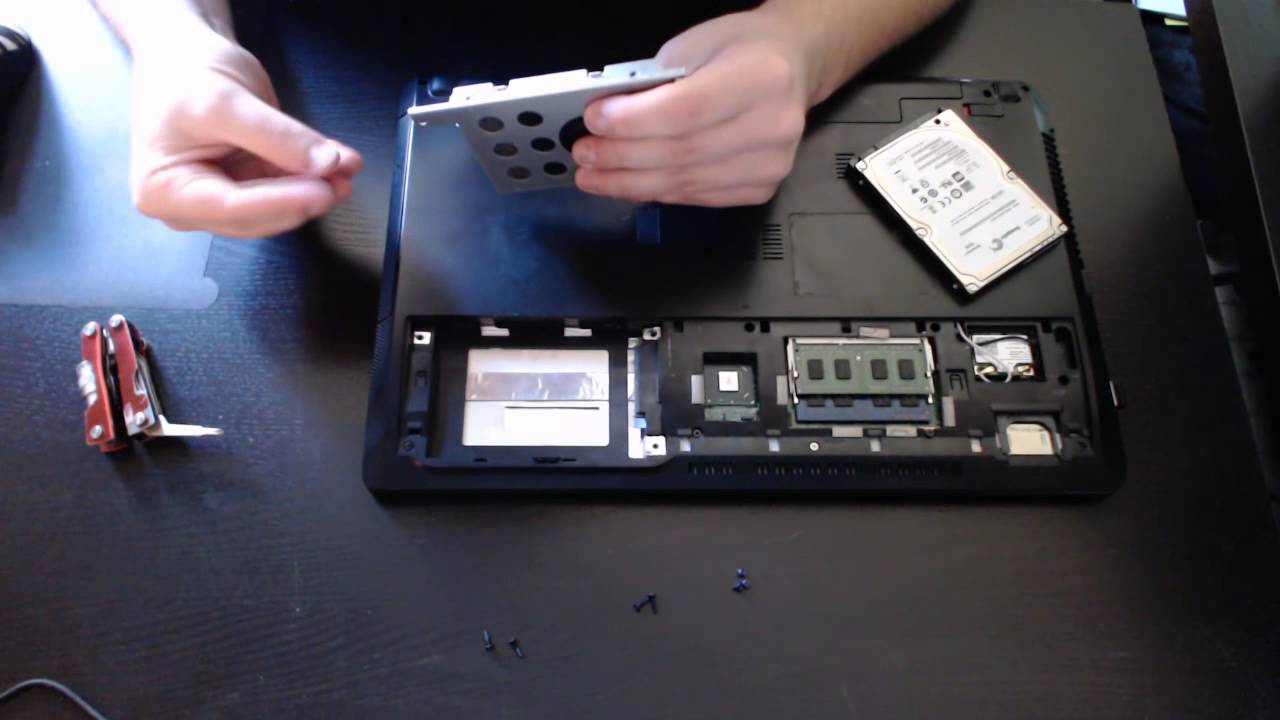
The first step in troubleshooting a damaged SSD is to check for any physical signs of damage. Inspect the SSD for loose connections, bent pins, or visible defects. If you find any physical damage, it may be necessary to replace the SSD with a new one.
In addition to physical damage, logical errors and bad sectors on the SSD can also cause installation problems. Running diagnostic tools specific to your SSD model can help identify and repair any logical errors. Many SSD manufacturers provide software tools for diagnosing and repairing their SSDs. These tools can help you determine the health of your SSD and attempt to repair any issues detected.
Another approach is to connect the SSD to a different computer and test if it works properly. By connecting it as a secondary drive on a different system, you can determine if the SSD is functional or if the installation problem lies elsewhere in your original system.
If your SSD is still under warranty, contacting the manufacturer’s support team is recommended. They can provide guidance on troubleshooting and may offer a replacement if the SSD is found to be faulty. Be prepared to provide them with detailed information about the issue and any diagnostic results.
Keep in mind that attempting to repair a damaged SSD can be risky and could potentially cause further damage. If you are not experienced in SSD repair, it is generally advised to seek professional assistance or contact the manufacturer for guidance.
In some cases, it may be necessary to replace the damaged SSD with a new one. When purchasing a replacement, ensure that it is compatible with your system and meets your storage requirements. Consult the specifications and compatibility lists provided by the SSD manufacturer to make an informed decision.
By diagnosing and addressing any issues with a damaged SSD, you can resolve installation problems and ensure a smooth Windows installation process. Whether it involves repairing the SSD or replacing it, taking the necessary steps will allow you to utilize the benefits of a reliable and functional SSD for your computer system.
Insufficient Storage Space
Insufficient storage space on your SSD can be a common reason why Windows won’t install successfully. When installing an operating system like Windows, there is a minimum requirement for free space to ensure smooth installation and proper functioning of the system.
To address this issue, you need to ensure that your SSD has enough free space for the Windows installation. The exact amount of required space can vary depending on the version of Windows you are installing, but as a general guideline, it is recommended to have at least 20-30 GB of free space on your SSD.
If you are running low on storage space, there are several steps you can take to free up space on your SSD. Start by removing any unnecessary files and programs that are taking up valuable space. Use the built-in Disk Cleanup tool in Windows to delete temporary files, cache, and other unnecessary system files. You can access this tool by searching for “Disk Cleanup” in the Start menu.
Another effective method is to move large files such as videos, music, or documents to an external storage device or cloud storage. Consider using file compression tools to reduce the size of large files without losing data quality. This can help free up substantial space on your SSD.
If you have already performed these steps and still do not have sufficient free space, you may need to consider upgrading your SSD to one with a larger capacity. SSD prices have become more affordable, and upgrading to a higher-capacity SSD will not only resolve the installation issue but also provide you with additional storage for your files and applications.
Before purchasing a new SSD, ensure that it is compatible with your system and meets your needs. Verify the form factor, interface type (such as SATA or NVMe), and connector type to ensure a seamless installation process. Consult the specifications and compatibility lists provided by the SSD manufacturer to make an informed decision.
By addressing the issue of insufficient storage space, you can overcome the installation problem and successfully install Windows on your SSD. Whether it involves freeing up space or upgrading to a larger capacity SSD, taking the necessary steps will ensure that your system has enough storage for a smooth and efficient Windows installation.
Insufficient RAM
Insufficient RAM (Random Access Memory) can lead to installation issues when trying to install Windows on your SSD. RAM plays a crucial role in the performance of your computer, including the installation process of an operating system. If your system does not have enough RAM, you may encounter errors or experience sluggish performance during the installation.
To ensure a smooth installation process, it is recommended to have the minimum required amount of RAM for the version of Windows you are installing. For example, Windows 10 64-bit requires a minimum of 2GB of RAM, but it is advisable to have at least 4GB or more for optimal performance.
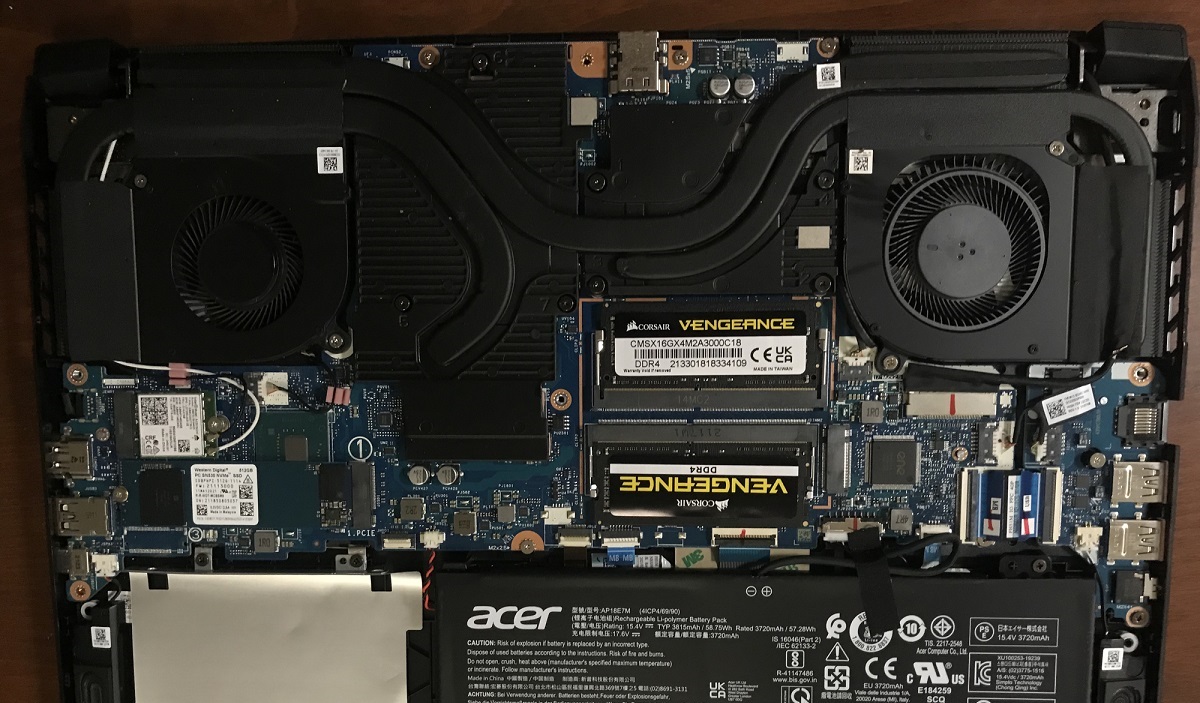
If your system has insufficient RAM, there are a few steps you can take to address this issue. The most straightforward solution is to upgrade your RAM by adding more memory modules to your system. Consult your computer’s documentation or motherboard specifications to determine the type and maximum capacity of RAM that your system supports. Purchase compatible RAM modules and install them according to the manufacturer’s instructions.
Before upgrading your RAM, it is also important to consider the limitations of your system. Some older systems may have a maximum limit on the amount of RAM they can support. Verify the maximum RAM capacity of your motherboard or computer to ensure that your upgrade will be compatible.
In cases where upgrading the RAM is not feasible or does not resolve the issue, you can try optimizing your system’s performance by closing unnecessary background applications and processes before starting the installation. This can help free up some memory resources for the installation process.
Another option is to consider using a lightweight or stripped-down version of Windows that requires less RAM. There are specialized versions of Windows, such as Windows 10 LTSC (Long-Term Servicing Channel) or Windows 10 IoT (Internet of Things), designed to run on devices with limited resources. However, keep in mind that these versions may have certain limitations and may not offer the full range of features found in mainstream versions of Windows.
By addressing insufficient RAM in your system, you will ensure that the installation of Windows on your SSD goes smoothly and without compatibility issues. Whether it involves upgrading your RAM or optimizing your system’s performance, taking the necessary steps to address insufficient RAM will result in a better overall computing experience.
Troubleshooting Steps
If you are encountering issues with installing Windows on your SSD, there are several troubleshooting steps you can take to resolve the problem. These steps will help you identify and address any potential issues that may be preventing a successful installation.
1. Double-check hardware connections: Ensure that all connections between the SSD and the motherboard are secure. Verify that the SATA or NVMe cable is properly connected to both the SSD and the motherboard.
2. Verify BIOS settings: Access the BIOS and confirm that the SSD is recognized and correctly set as the primary boot device. Check if the AHCI mode is enabled for optimal SSD performance.
3. Update firmware and drivers: Check for any available firmware updates for your SSD and motherboard. Similarly, update any necessary drivers, especially storage-related drivers, to ensure compatibility and optimal performance.
4. Run hardware diagnostics: Use diagnostic software provided by the SSD manufacturer to test the health and functionality of your SSD. This can help identify any potential issues or errors.
5. Check for BIOS and Windows updates: Ensure that your BIOS and Windows operating system are up to date. Manufacturers often release updates to improve compatibility and address known issues.
6. Test with a different SSD or computer: If possible, try installing Windows on a different SSD or testing your SSD on another computer. This can help determine if the issue is specific to the SSD or the computer system.
7. Clear CMOS: Resetting the BIOS to its default settings can sometimes resolve compatibility or configuration-related issues. Follow the instructions provided by your motherboard manufacturer to clear the CMOS.
8. Disable unnecessary hardware: Temporarily disconnect any unnecessary hardware devices, such as secondary hard drives or peripherals. Sometimes, conflicts between hardware components can interfere with the installation process.
9. Seek professional help: If you have exhausted all troubleshooting steps and are still unable to resolve the issue, consider seeking professional assistance from a computer technician or contacting the manufacturer’s support team for further guidance.
By following these troubleshooting steps, you can identify and address the underlying issues preventing a successful Windows installation on your SSD. Remember to take proper precautions and document any changes or modifications made to your system for future reference.
Conclusion
Installing Windows on your SSD can provide significant performance improvements, but you may encounter various issues that can hinder the installation process. In this article, we explored some potential reasons why Windows won’t install on your SSD, including insufficient power supply, incorrect BIOS settings, compatibility issues, a damaged SSD, insufficient storage space, and insufficient RAM.
By understanding these factors, you can take appropriate troubleshooting steps to overcome these obstacles and successfully install Windows on your SSD. It is crucial to ensure that your power supply provides enough power, your BIOS settings are correctly configured, your SSD is compatible with your system, your SSD is not damaged, you have enough storage space, and you have sufficient RAM for the installation.
Throughout the troubleshooting process, it is essential to follow best practices, such as checking hardware connections, updating firmware and drivers, running diagnostic tests, and seeking professional help if needed. Carefully document any changes made to your system to make future troubleshooting easier.
Remember that troubleshooting may require a combination of technical knowledge and problem-solving skills. If you are unsure or uncomfortable with performing certain troubleshooting steps, it is recommended to seek assistance from a professional technician or contact the manufacturer’s support team.
By successfully addressing these potential issues and troubleshooting the installation process, you can enjoy the benefits of a smooth and successful Windows installation on your SSD. Embrace the improved performance and faster boot times that an SSD can provide, and optimize your overall computing experience.