The Basics
If you’re facing issues with your Chromecast not working, it’s important to start with the basics before diving into more advanced troubleshooting. Here are a few fundamental steps you can take to get your Chromecast back up and running:
- Check the physical connections: Ensure that your Chromecast device is properly connected to your TV’s HDMI port and powered on. Double-check the HDMI cable connection and make sure it’s securely plugged in on both ends.
- Verify the power source: Ensure that your Chromecast device is receiving power. Use the provided power adapter and connect it to a reliable power outlet. If you’re using a USB port on your TV for power, make sure the TV is turned on.
- Ensure the TV input is set correctly: Switch your TV to the correct input source—usually the one associated with the HDMI port your Chromecast is connected to. Use your TV’s remote or on-screen menu to navigate to the correct input.
- Check your Wi-Fi connection: Ensure that your mobile device or computer, which you use to control Chromecast, is connected to the same Wi-Fi network as your Chromecast. A stable internet connection is crucial for proper Chromecast functionality.
By going through these basic steps, you can eliminate any simple issues that may be causing your Chromecast not to work properly. If you’ve followed these steps and are still experiencing problems, don’t worry. There are additional troubleshooting steps we can explore to resolve the issue.
Troubleshooting Internet Connection
One of the common reasons for Chromecast not working is an unstable or weak internet connection. Here are some steps to troubleshoot your internet connection:
- Restart your router: Begin by restarting your router. Unplug the power cable from the router, wait for 30 seconds, and then plug it back in. Give it a few minutes to reboot, and then check if the connection improves.
- Move your router closer to Chromecast: If your Chromecast and router are too far apart, Wi-Fi signal strength may be affected. Try moving your router closer to the Chromecast device or vice versa to improve the connection quality.
- Reduce interference: Electronic devices like cordless phones, microwave ovens, and Bluetooth devices can interfere with Wi-Fi signals. Keep them away from your router and Chromecast to minimize interference and improve connectivity.
- Connect to a different Wi-Fi network: Verify if the issue lies with your Wi-Fi network by connecting your Chromecast to a different Wi-Fi network, such as a hotspot on your mobile device. If it works fine on another network, the problem may be related to your home Wi-Fi setup.
- Check internet speed: Ensure that your internet connection provides sufficient speed for streaming. You can use online speed testing tools or check with your internet service provider (ISP) to confirm if your connection meets the recommended speed for streaming.
By following these troubleshooting steps, you can identify and address any internet connection issues that could be affecting the performance of your Chromecast. If the problem persists, continue to the next troubleshooting step.
Checking Power Source
When your Chromecast is not working, it’s worth checking the power source to ensure that it’s receiving adequate power. Here are some steps to verify the power source:
- Use the provided power adapter: Make sure you’re using the power adapter that came with your Chromecast. Using a different power adapter may not provide the correct voltage and can lead to power-related issues.
- Double-check the power outlet: Ensure that the power outlet you’re using is functioning properly. You can try plugging in a different device to confirm if the outlet is working as expected.
- Consider the USB port power: If you’re using a USB port on your TV to power your Chromecast, make sure the TV is turned on. Some TVs may not provide sufficient power through the USB port, resulting in unstable Chromecast performance.
- Use a dedicated power source: For optimal performance, it’s recommended to use a dedicated power outlet instead of relying on the USB port of your TV. This ensures a consistent power supply to your Chromecast.
- Check the power cable connection: Ensure that the power cable is securely plugged into your Chromecast and the power adapter or USB port. A loose or faulty connection can lead to intermittent power issues.
By following these steps, you can confirm that your Chromecast is receiving the power it needs to function properly. If the power source is not the cause of the problem, let’s move on to the next troubleshooting step.
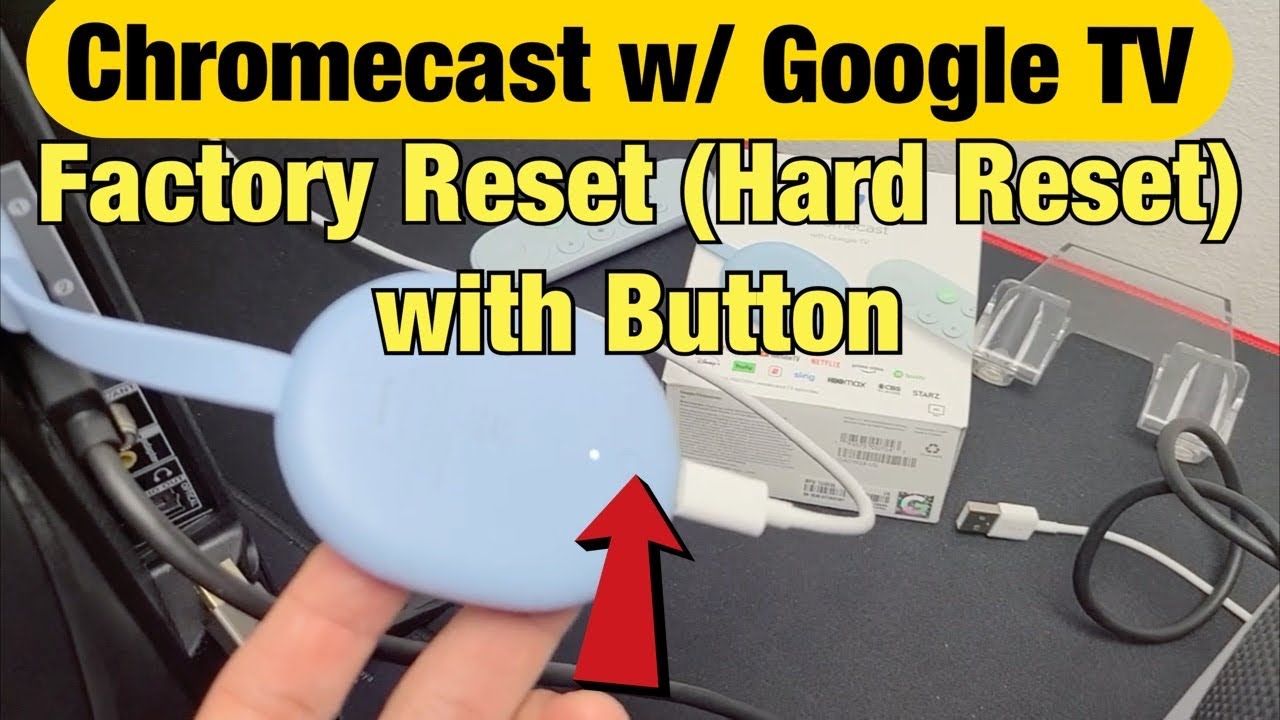
Resetting Chromecast
If your Chromecast is still not working after checking the basics, it may be helpful to reset the device. Here’s how to reset your Chromecast:
- Factory Reset: On your Chromecast device, locate the small reset button or the reset pinhole. Press and hold the reset button for about 25 seconds or until the LED indicator on the device starts flashing. Release the button, and your Chromecast will begin the factory reset process.
- Using the Google Home app: If you prefer, you can also reset your Chromecast using the Google Home app on your mobile device. Open the app, tap on the Chromecast device you want to reset, go to Device Settings, and look for the option to Factory Reset or Reset Device.
- Follow on-screen instructions: While resetting, make sure to follow any on-screen instructions that may appear to complete the process. This may include connecting to a new Wi-Fi network or downloading and installing any required updates.
Resetting your Chromecast will erase any stored data and settings, restoring it to its default state. Once the reset is complete, you can set it up again following the initial setup process.
Resetting your Chromecast is a useful troubleshooting step that can help resolve various issues. If resetting the device doesn’t solve the problem, move on to the next troubleshooting step.
Casting from Different Apps
If you’re having trouble casting content from specific apps to your Chromecast, there might be an issue with the app itself. Here are a few steps to troubleshoot casting from different apps:
- Update the app: Ensure that you have the latest version of the app installed on your mobile device or computer. Developers often release updates to address bugs and improve compatibility with Chromecast.
- Restart the app: Close the app completely and then reopen it. Sometimes, all it takes is a simple restart to fix any temporary glitches that may be preventing the app from casting correctly.
- Check app permissions: Verify that the app has permission to access the network and connect to Chromecast. You can review app permissions in the settings of your mobile device or computer.
- Try a different app: Test casting from a different app to see if the issue persists. If you’re able to cast content from other apps without any problems, it’s more likely that the issue lies with the problematic app itself.
- Contact app support: If you continue to experience difficulties casting from a specific app, reach out to the app developer’s support team for assistance. They may be able to provide further guidance or updates related to the issue.
By following these steps, you can identify and address any issues specific to casting from certain apps. If the problem persists across multiple apps or you encounter other casting issues, proceed to the next troubleshooting step.
Wi-Fi Interference
Wi-Fi interference can contribute to connectivity issues with your Chromecast. Interference from other electronic devices or neighboring Wi-Fi networks can weaken the signal and disrupt the casting process. Here are some steps to minimize Wi-Fi interference:
- Change Wi-Fi channel: Access your router’s settings and try changing the Wi-Fi channel to a less congested one. This can help reduce interference from other nearby networks that might be operating on the same channel.
- Move your router: Position your Wi-Fi router away from other electronic devices that emit strong signals, such as cordless phones, microwave ovens, and baby monitors. Also, avoid placing it near walls or other obstructions that may block the signal.
- Use the 5 GHz band: If your router supports it, switch to the 5 GHz frequency instead of the 2.4 GHz frequency. The 5 GHz band typically experiences less interference and offers faster and more stable connections.
- Reduce distance between Chromecast and router: Try to minimize the distance between your Chromecast device and your Wi-Fi router. A shorter distance can help improve signal strength and reduce the effects of any interference.
- Use Wi-Fi extenders or repeaters: Consider using Wi-Fi extenders or repeaters to extend the reach and coverage of your Wi-Fi network. These devices can help strengthen the signal in areas where the Wi-Fi signal is weaker.
By addressing Wi-Fi interference issues, you can enhance the stability and performance of your Chromecast. If you’re still encountering problems, proceed to the next troubleshooting step.
Updating Chromecast
Keeping your Chromecast updated with the latest firmware and software is important to ensure optimal performance and compatibility with various apps and devices. Here’s how to update your Chromecast:
- Automatic updates: Chromecast devices are designed to update automatically whenever new firmware or software updates are available. Make sure your Chromecast is connected to the internet and powered on to receive these updates automatically.
- Check for updates manually: If you suspect that your Chromecast is not up to date, you can manually check for updates. Open the Google Home app on your mobile device, tap on the Chromecast device, and go to Device Settings. Look for the option to check for updates and follow the on-screen instructions.
- Restart after updates: After your Chromecast completes an update, it’s a good practice to restart both your Chromecast and the device you’re using to control it. This helps ensure that the updates take effect and any lingering issues are resolved.
Regularly updating your Chromecast will not only improve its performance but also address any known bugs or compatibility issues. If you’re experiencing persistent issues even after updating, continue to the next troubleshooting step.
Checking for Firmware Updates
Regularly checking for firmware updates is important to ensure that your Chromecast has the latest software and security enhancements. Here’s how you can check for firmware updates:
- Open the Google Home app: Launch the Google Home app on your mobile device, which is used to manage and control your Chromecast.
- Select your Chromecast device: Tap on the Chromecast device you want to check for firmware updates. Ensure that your mobile device is connected to the same Wi-Fi network as your Chromecast.
- Go to Device Settings: Look for the settings icon or menu within the Google Home app. It is typically located in the top-right corner of the screen. Tap on it to access the device settings for your Chromecast.
- Check for updates: Within the device settings, there should be an option to check for firmware updates. Tap on this option to initiate the process.
- Follow on-screen instructions: Depending on your specific device and firmware version, you may be prompted to download and install any available updates. Follow the instructions provided on the screen to complete the update process.
It’s crucial to keep your Chromecast firmware up to date to ensure smooth performance and compatibility with the latest apps and features. By checking for and installing firmware updates, you can ensure that your Chromecast is operating with the most recent improvements and bug fixes.
If you have successfully updated your Chromecast and are still experiencing issues, proceed to the next troubleshooting step.
Connectivity Issues with Mobile Devices
If you’re encountering connectivity issues specifically with your mobile device and Chromecast, there are a few troubleshooting steps you can take to address the problem. Here are some possible solutions:
- Restart your mobile device: Begin by restarting your mobile device. Sometimes, a simple reboot can resolve temporary issues and restore proper connectivity.
- Ensure Wi-Fi is enabled: Make sure that Wi-Fi is enabled on your mobile device and that it is connected to the same Wi-Fi network as your Chromecast. Check your device’s Wi-Fi settings to confirm the connection.
- Forget and reconnect to Wi-Fi: If you’re having trouble connecting your mobile device to your Wi-Fi network, try forgetting the network and then reconnecting to it. This can help resolve any connection-related issues.
- Clear cache and data: If you’re using the Google Home app to control your Chromecast, clearing the app’s cache and data can help resolve any software-related issues. Go to your device’s settings, find the app in the application manager, and clear its cache and data.
- Update your mobile device: Ensure that your mobile device’s operating system is up to date. Updates can include bug fixes and improvements that may help address connectivity issues with Chromecast.
By following these steps, you can troubleshoot and potentially resolve any connectivity issues between your mobile device and Chromecast. If the problem persists, continue to the next troubleshooting step.
Audio or Video Playback Problems
If you’re experiencing audio or video playback problems with your Chromecast, there are several troubleshooting steps you can take to address the issue. Here are some potential solutions:
- Check the HDMI connection: Ensure that the HDMI cable is securely connected to both your Chromecast and your TV. A loose or faulty connection can result in audio or video playback issues. You may also try using a different HDMI port on your TV.
- Restart your Chromecast and the casting device: Sometimes, a simple restart of both the Chromecast device and the device you’re using to cast can help resolve playback issues. Power off both devices, wait for a few seconds, and then power them back on.
- Verify app compatibility: Confirm that the app you’re using to cast content is compatible with Chromecast. Not all apps support casting, so check if the app provides casting functionality and ensure it’s up to date.
- Check your internet connection: A stable internet connection is essential for smooth audio and video playback. Ensure that your Wi-Fi connection is strong and that there are no network issues impacting the streaming quality.
- Try casting from a different device: If you’re experiencing playback issues with one device, try casting from a different device to see if the problem persists. This can help determine if the issue is specific to the casting device or the Chromecast.
- Adjust TV settings: Check your TV’s audio and video settings to ensure they are correctly configured. Adjust the audio output settings and video display settings as needed to match your TV’s capabilities.
By following these troubleshooting steps, you can address common audio or video playback problems with your Chromecast. If the issue still persists, proceed to the next troubleshooting step.
Audio Sync Issues
If you’re experiencing audio sync issues with your Chromecast, where the audio and video are not properly aligned, there are a few steps you can take to resolve the problem. Here are some methods to address audio sync issues:
- Restart your Chromecast: Begin by restarting your Chromecast device. Power off the Chromecast, wait for a few seconds, and then power it back on. This can help reset the audio sync settings and resolve any temporary glitches.
- Check TV settings: Verify that your TV’s audio settings are properly configured. Some TVs have an audio delay or synchronization setting that allows you to manually adjust the audio to match the video. Refer to your TV’s user manual to locate and adjust these settings if necessary.
- Adjust audio delay on the casting device: Some casting apps provide an option to manually adjust the audio delay. Look for settings or preferences within the app that allow you to modify the audio synchronization. Experiment with small adjustments to find the optimal setting for your setup.
- Use an audio delay tool: If the issue persists, you can use an external audio delay tool or device. These devices allow you to manually adjust the audio delay and sync it with the video. Connect the audio output from your Chromecast to the audio delay tool, and then connect the tool to your speakers or sound system.
- Update firmware and apps: Ensure that both your Chromecast device and the casting app you’re using are up to date. Firmware and app updates often include bug fixes and improvements that can help resolve audio sync issues.
By following these steps, you can troubleshoot and resolve audio sync problems with your Chromecast. If the issue persists, continue to the next troubleshooting step.
Using the Chromecast Ethernet Adapter
If you’re experiencing connectivity issues with your Chromecast over Wi-Fi, using the Chromecast Ethernet Adapter can be a viable solution. The Ethernet Adapter allows you to connect your Chromecast directly to your router using an Ethernet cable. Here’s how you can use the Chromecast Ethernet Adapter:
- Purchase the Chromecast Ethernet Adapter: Obtain the Chromecast Ethernet Adapter, which is sold separately from the Chromecast device. You can find it online or at electronics retailers.
- Connect the Ethernet Adapter to your Chromecast: Plug one end of the Ethernet cable into the Ethernet Adapter, and the other end into the Chromecast device’s power port. This port is specially designed to accommodate the Ethernet Adapter.
- Connect the Ethernet Adapter to your router: Use a separate Ethernet cable to connect the Ethernet Adapter to an available Ethernet port on your router. Make sure the connection is secure on both ends.
- Power on your Chromecast: Connect your Chromecast to a power source, either using the USB port on your TV or the provided power adapter. Ensure that the Chromecast is turned on and connected to your TV.
- Configure network settings: On your casting device (mobile device or computer), open the Google Home app or the casting app of your choice. Follow the on-screen instructions to configure the network settings for your Chromecast, selecting the wired connection option.
By using the Chromecast Ethernet Adapter, you can bypass potential Wi-Fi connectivity issues and establish a more stable and reliable wired connection for your Chromecast. This can enhance the overall performance and streaming experience, particularly in situations where the Wi-Fi signal is unstable or limited.
If you have successfully set up the Ethernet Adapter and are still experiencing issues, proceed to the next troubleshooting step.
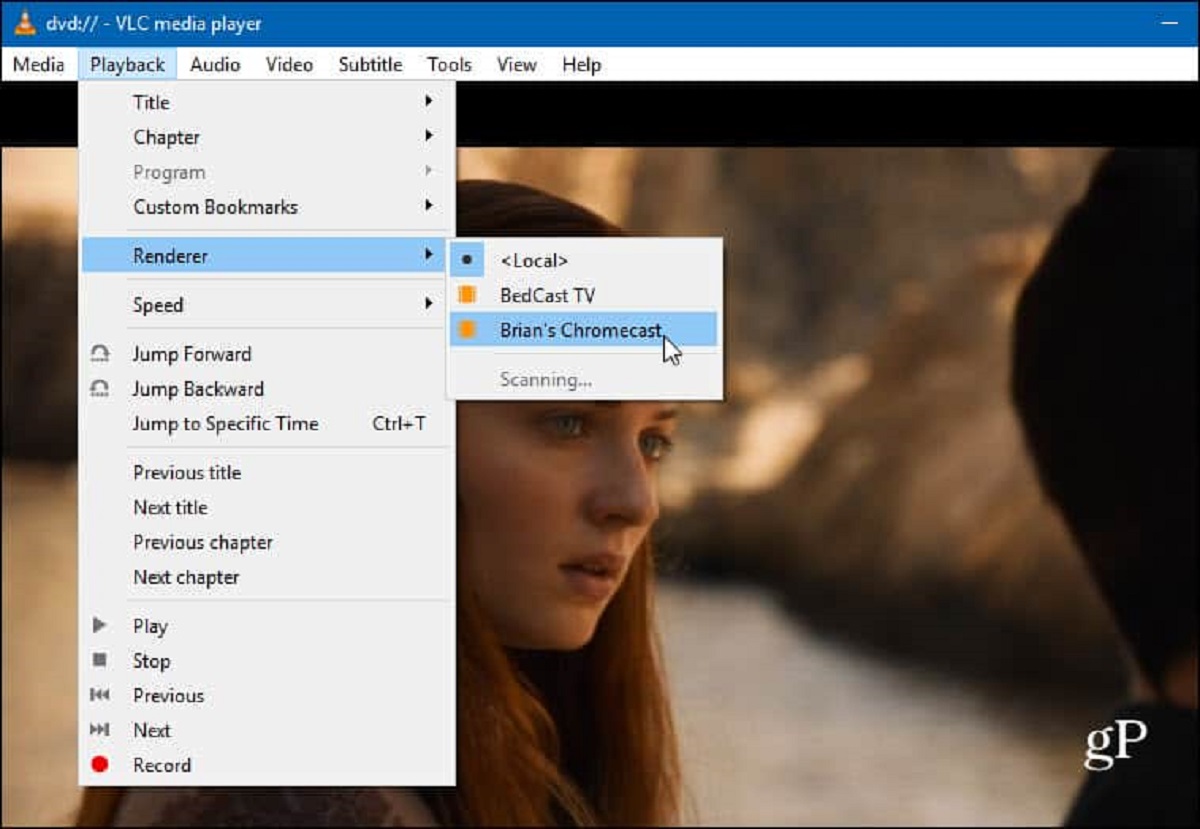
Casting from Chrome Browser
In addition to casting from mobile devices and apps, you can also cast content directly from the Chrome browser on your computer. Casting from the Chrome browser allows you to stream web pages, videos, and even your entire desktop. Here’s how to cast from the Chrome browser:
- Ensure you have the Google Cast extension: Install the Google Cast extension in your Chrome browser. You can find it in the Chrome Web Store. This extension enables the casting functionality.
- Connect your Chromecast and computer to the same Wi-Fi network: Make sure your Chromecast device and your computer are connected to the same Wi-Fi network to enable communication between them.
- Open the content you want to cast: Navigate to the web page or video you want to cast on your Chrome browser. Ensure that the content is compatible with casting.
- Click on the cast icon: Look for the cast icon in the Chrome browser toolbar. It usually appears as a rectangle with three waves emanating from the corner. Click on the cast icon to initiate the casting process.
- Select your Chromecast device: A pop-up window will appear, showing the available casting devices on your network. Choose your Chromecast device from the list.
- Start casting: After selecting your Chromecast device, the content will start casting on your TV or display. You can control the playback from the Chrome browser on your computer or from your mobile device.
Casting from the Chrome browser gives you the flexibility to stream a wide range of content from your computer to your TV or display. Whether it’s web pages, videos, or presentations, casting from the Chrome browser provides a convenient and seamless way to enjoy content on a larger screen.
If you encounter any issues while casting from the Chrome browser, continue to the next troubleshooting step.
Physical Connections
When troubleshooting issues with your Chromecast, it’s essential to check the physical connections to ensure they are properly set up. Here are some steps to verify and troubleshoot physical connections:
- Check the HDMI connection: Ensure that the HDMI cable is securely connected to both your Chromecast device and your TV or display. Confirm that the HDMI cable is inserted into the correct HDMI port on your TV or display.
- Use the provided power adapter: Make sure you’re using the power adapter that comes with your Chromecast. Using a different power adapter may not provide the necessary voltage for the device to function correctly.
- Connect the power adapter: Plug the power adapter into a functioning power outlet and connect it to your Chromecast. Confirm that the LED indicator on the Chromecast lights up to indicate it is receiving power.
- Confirm the TV input: Switch your TV or display to the correct input source associated with the HDMI port your Chromecast is connected to. Use the TV remote or on-screen menu to select the appropriate input source.
- Ensure Wi-Fi connectivity: Verify that your Chromecast device is connected to the same Wi-Fi network as your casting device. A stable internet connection is necessary for proper functionality. If there are connection issues, try restarting your router or reconnecting your Chromecast to the Wi-Fi network.
- Inspect the cables: Check the HDMI cable and power cable for any signs of damage or wear. If there are visible issues, try using a different cable to see if that resolves the problem.
By checking and ensuring all physical connections are secure and functional, you can eliminate potential issues caused by loose connections or faulty cables. If the problem persists, additional troubleshooting steps may be necessary.