Introduction
Welcome to the world of Chromebooks! These lightweight and versatile laptops are powered by Google’s Chrome OS and offer a streamlined and user-friendly experience. While Chromebooks come with a simplified keyboard layout, you may find yourself wondering where the delete key is located. In this article, we will guide you through the Chromebook keyboard and help you find the elusive delete key. Whether you need to delete a single character or erase an entire word, we’ve got you covered.
Understanding the layout and functionality of the Chromebook keyboard is essential to navigate and get the most out of your device. Chromebooks typically have a compact design, which may seem different from traditional laptop keyboards. However, once you become familiar with it, you’ll discover that the Chromebook keyboard is intuitive and efficient.
So, let’s dive in and explore the nuances of the Chromebook keyboard, including the elusive delete key, alternative methods to delete text, and how to modify keyboard settings to suit your preferences.
Understanding the Chromebook Keyboard
Before we embark on our quest to find the elusive delete key, let’s familiarize ourselves with the layout and functionality of the Chromebook keyboard. While the Chromebook keyboard may look different from traditional laptop keyboards, it is designed to be intuitive and user-friendly.
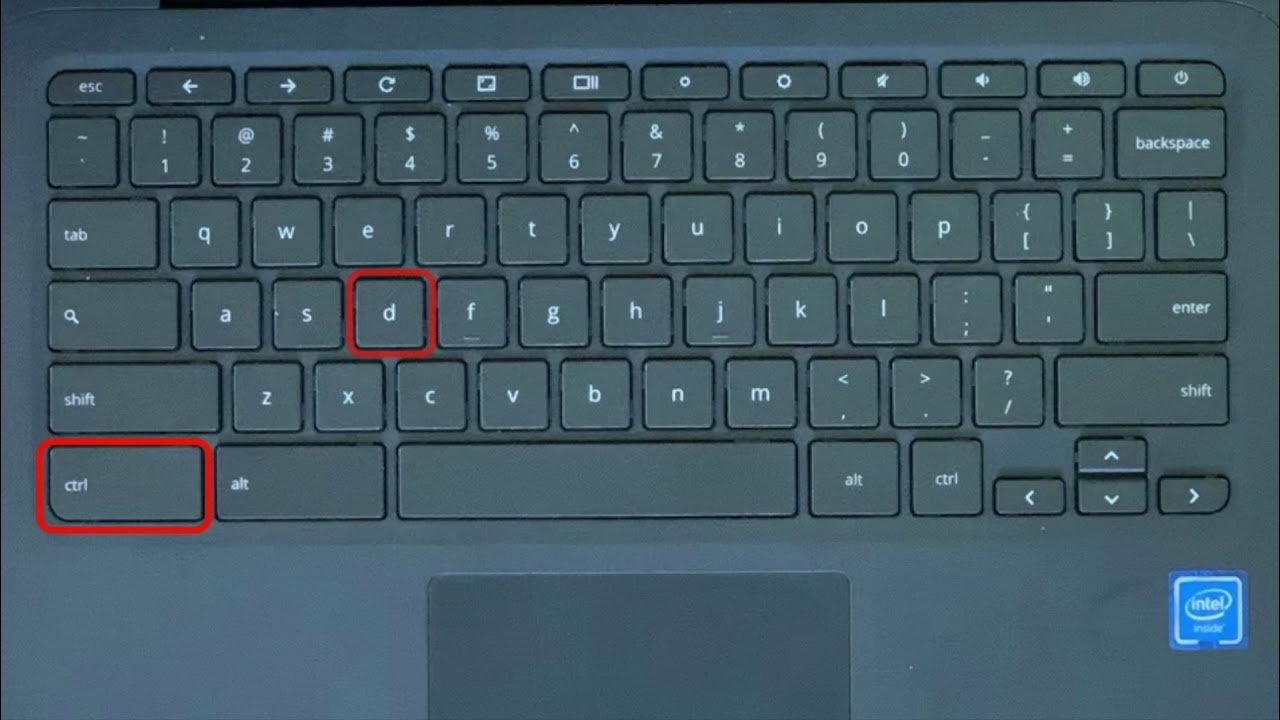
One notable difference you’ll notice is the absence of certain keys typically found on other keyboards. Chromebooks often do not have a dedicated delete key, function keys, or a caps lock key. Instead, the keyboard layout is simplified to provide a seamless and efficient experience.
To accommodate the compact design, Chromebook keyboards incorporate a variety of multi-function keys. The primary function of these keys can be accessed by pressing the key alone, while accessing the secondary function often requires pressing the key in combination with the “Search” or “Ctrl” key.
The “Search” key, which is denoted by an icon resembling a magnifying glass or a small circle with a line through it, is a unique feature of Chromebooks. It acts as a combination of the Windows key and the function key found on other keyboards. By pressing the “Search” key along with another key, you can access various shortcuts and functions.
Another feature to be aware of is the presence of dedicated browser keys on the Chromebook keyboard. These keys, typically located at the top row, allow you to control various browser functions such as navigation, refreshing the page, and adjusting the volume of media playback.
Now that you have a basic understanding of the Chromebook keyboard layout, let’s move on to the main question on your mind: where is the delete key? Don’t worry; we’ll reveal its secret hiding spot and explore alternative methods to delete text on your Chromebook in the next section.
Finding the Delete Key
So, you’re ready to uncover the mystery of the delete key on your Chromebook. Contrary to traditional keyboards, Chromebooks don’t have a dedicated delete key. However, fear not, as there are alternative methods to achieve the same outcome.
To delete characters to the right of the cursor, you can simply press the “Backspace” key. This key is located at the top right corner of the keyboard and is marked with an arrow pointing to the left. By pressing the “Backspace” key, you can delete characters one at a time, starting from the cursor’s position and moving towards the left.
Now, what if you want to delete characters to the left of the cursor? Here comes the ingenious function of the “Alt” key. By holding down the “Alt” key and pressing the “Backspace” key, you can delete characters to the left of the cursor. This key combination essentially functions as the traditional delete key found on other keyboards.
If you’re used to using the delete key frequently and prefer having a dedicated delete button, you can remap the keyboard settings on your Chromebook. This feature allows you to customize the keyboard to your liking and assign specific functions to certain keys.
To remap the keyboard settings, follow these steps:
- Click on the clock icon in the bottom-right corner of the screen.
- Select the gear icon to access the settings menu.
- In the settings menu, click on “Keyboard.”
- Under the “Keyboard” settings, select “Customize layout.”
- Here, you can assign the delete function to a specific key or create a shortcut to mimic a traditional delete key.
- Once you’ve made your desired changes, click “Done” to save the new keyboard layout.
By following these steps, you can personalize your Chromebook keyboard and have a dedicated delete key that suits your needs and preferences.
Now that you know how to delete characters on your Chromebook using alternative methods or by remapping the keyboard settings, you’re well-equipped to navigate and edit text seamlessly. In the next section, we’ll explore additional methods to delete text on your Chromebook, including deleting entire words and using external keyboards.
Alternative Methods to Delete Text
While we’ve covered the primary methods to delete characters on a Chromebook, there are additional techniques that can further enhance your editing efficiency. These alternative methods allow you to delete larger chunks of text or provide faster ways to delete without navigating across individual characters.
To delete an entire word, you can use the “Ctrl” key in combination with the “Backspace” or “Delete” key. Pressing “Ctrl” and “Backspace” simultaneously will delete the entire word to the left of the cursor, while pressing “Ctrl” and “Delete” will delete the entire word to the right of the cursor. This shortcut is particularly useful when you need to quickly remove a word or phrase without selecting it manually.
Another handy method is the use of keyboard shortcuts. For instance, you can highlight the text you want to delete and press “Ctrl” + “Backspace” to erase it in one swift action. This shortcut eliminates the need to use the backspace or delete keys multiple times to clear the selected text.
Furthermore, if you are using an external keyboard with your Chromebook, you may find that it has a dedicated delete key. This can be particularly helpful if you prefer the traditional method of deleting text or if you frequently perform extensive editing tasks.
Remember to experiment with these different methods and find the one that suits your workflow best. Whether you prefer the compact and efficient Chromebook keyboard or you opt for remapping the keys or utilizing external keyboards, the goal is to find a comfortable and convenient solution for your text editing needs.
Now that you have a range of techniques at your disposal, you can confidently delete text on your Chromebook using different methods tailored to your preferences and editing requirements. In the next section, we’ll explore how you can modify your Chromebook’s keyboard settings to optimize your typing experience.
Modifying Keyboard Settings
If you find that the default keyboard layout on your Chromebook doesn’t fully meet your needs, don’t worry! Chrome OS allows you to modify the keyboard settings to better suit your preferences and typing style.
To access the keyboard settings on your Chromebook, follow these steps:
- Click on the clock icon in the bottom-right corner of the screen.
- Select the gear icon to access the settings menu.
- In the settings menu, click on “Keyboard.”
Under the keyboard settings, you’ll find various options to customize your typing experience. Here are a few key settings you can modify:
- Layout: You can choose a different keyboard layout based on your language or preference. Chrome OS supports a wide range of international layouts.
- Customize layout: This option allows you to remap specific keys or create shortcuts for various functions. For example, you can assign the delete function to a specific key or recreate a traditional delete key using a combination of keys.
- Enable on-screen keyboard: If you prefer an on-screen keyboard, you can toggle this option on. This is particularly useful when using a touchscreen or if the physical keyboard is not accessible.
- Auto-repeat rate: Adjust the speed at which a key repeats when held down. This allows you to customize the typing experience to match your speed and comfort level.
- Sticky keys: If you have difficulty pressing multiple keys simultaneously, you can enable sticky keys. This feature allows you to press one key at a time for keyboard shortcuts that require multiple key combinations.
By modifying these keyboard settings, you can personalize your Chromebook to cater to your specific typing needs. Whether it’s changing the layout, remapping keys, or adjusting the repeating rate, these settings give you greater control over your typing experience.
Now that you know how to modify the keyboard settings on your Chromebook, you can optimize it to your liking. Experiment with the different options and find the keyboard configuration that enhances your productivity and comfort.
With the knowledge of the Chromebook keyboard layout, alternative methods to delete text, and the ability to modify keyboard settings, you’re well-equipped to navigate and edit text effortlessly. Harness the power of your Chromebook’s keyboard and unleash your creativity and productivity in every keystroke.
Conclusion
In this article, we’ve explored the ins and outs of the Chromebook keyboard, particularly focusing on the elusive delete key. While Chromebooks do not have a dedicated delete key like traditional keyboards, we’ve discussed alternative methods to delete text efficiently.
By using the “Backspace” key, “Alt” key, or keyboard shortcuts, you can easily delete characters or entire words on your Chromebook. Additionally, we’ve learned how to modify the keyboard settings to personalize the layout and functionality of the keyboard according to your preferences.
Remember, the compact and streamlined design of the Chromebook keyboard is designed to provide a user-friendly typing experience. By familiarizing yourself with the keyboard layout and exploring alternative methods, you can navigate and edit text with ease.
Whether you’re a student, professional, or casual user, understanding how to delete text efficiently on your Chromebook is essential for your productivity. Experiment with the different methods discussed in this article to find the approach that suits your workflow best.
So, the next time you find yourself wondering where the delete key is on your Chromebook, just remember the various alternatives available. Embrace the versatility of your Chromebook keyboard and make the most out of your text editing tasks.
With practice and familiarity, you’ll become a master of the Chromebook keyboard, effortlessly deleting text and typing away to achieve your goals. Happy typing!


