Introduction
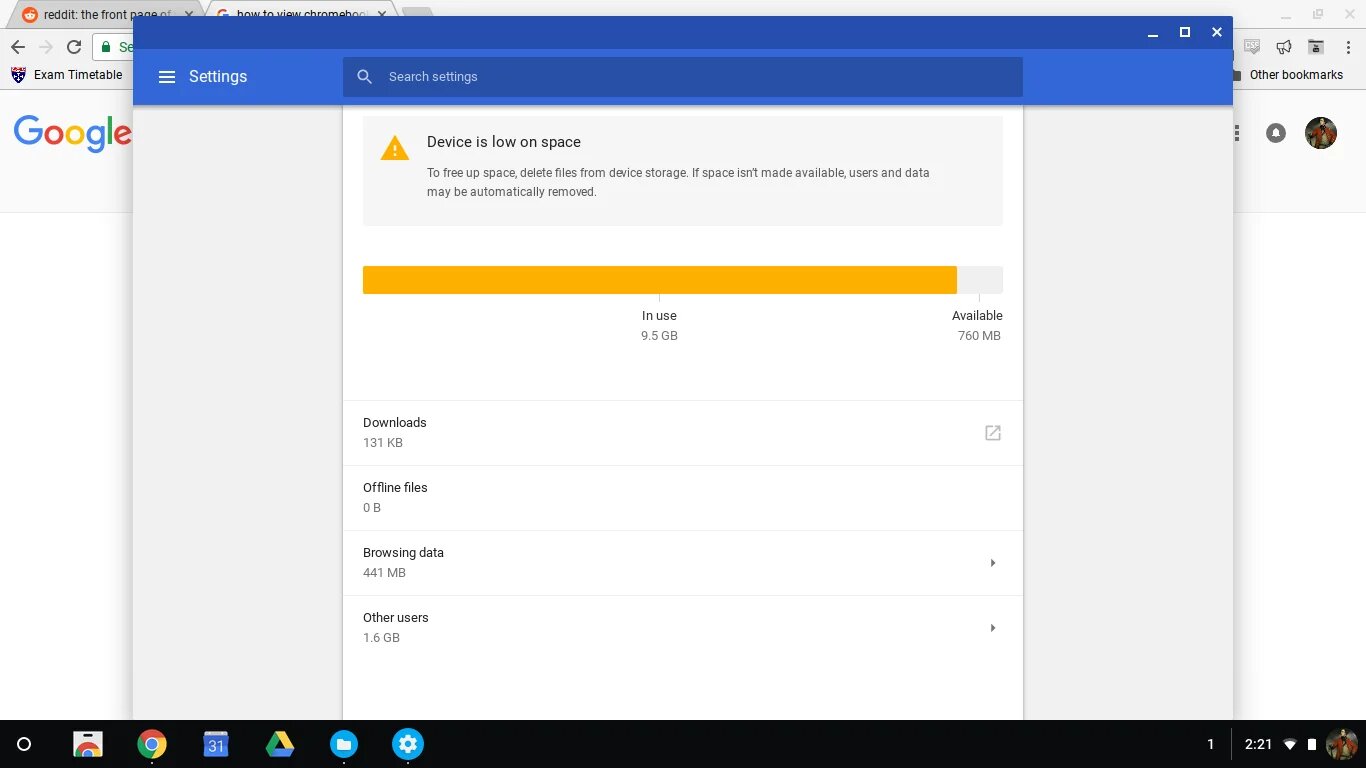
Chromebooks are popular devices known for their simplicity, speed, and security. However, over time, the Downloads folder on your Chromebook can become cluttered with files you no longer need. This accumulation of unnecessary downloads can not only consume valuable storage space but also make it difficult to find important files when you need them.
In this guide, we will walk you through the process of deleting downloads on your Chromebook. We will explore different methods, including accessing the Downloads folder, selecting and deleting files, emptying the folder, using the Chrome Cleanup Tool, and managing downloads through the Chrome browser settings. By following these steps, you can keep your Chromebook organized and free up storage space for more important files.
Whether it’s old documents, duplicate images, or outdated software installers, we will help you navigate the process of managing your downloads effectively. So let’s dive in and learn how to delete downloads on your Chromebook!
Step 1: Accessing the Downloads Folder
To begin deleting downloads on your Chromebook, you first need to locate and access the Downloads folder. Here’s how you can do it:
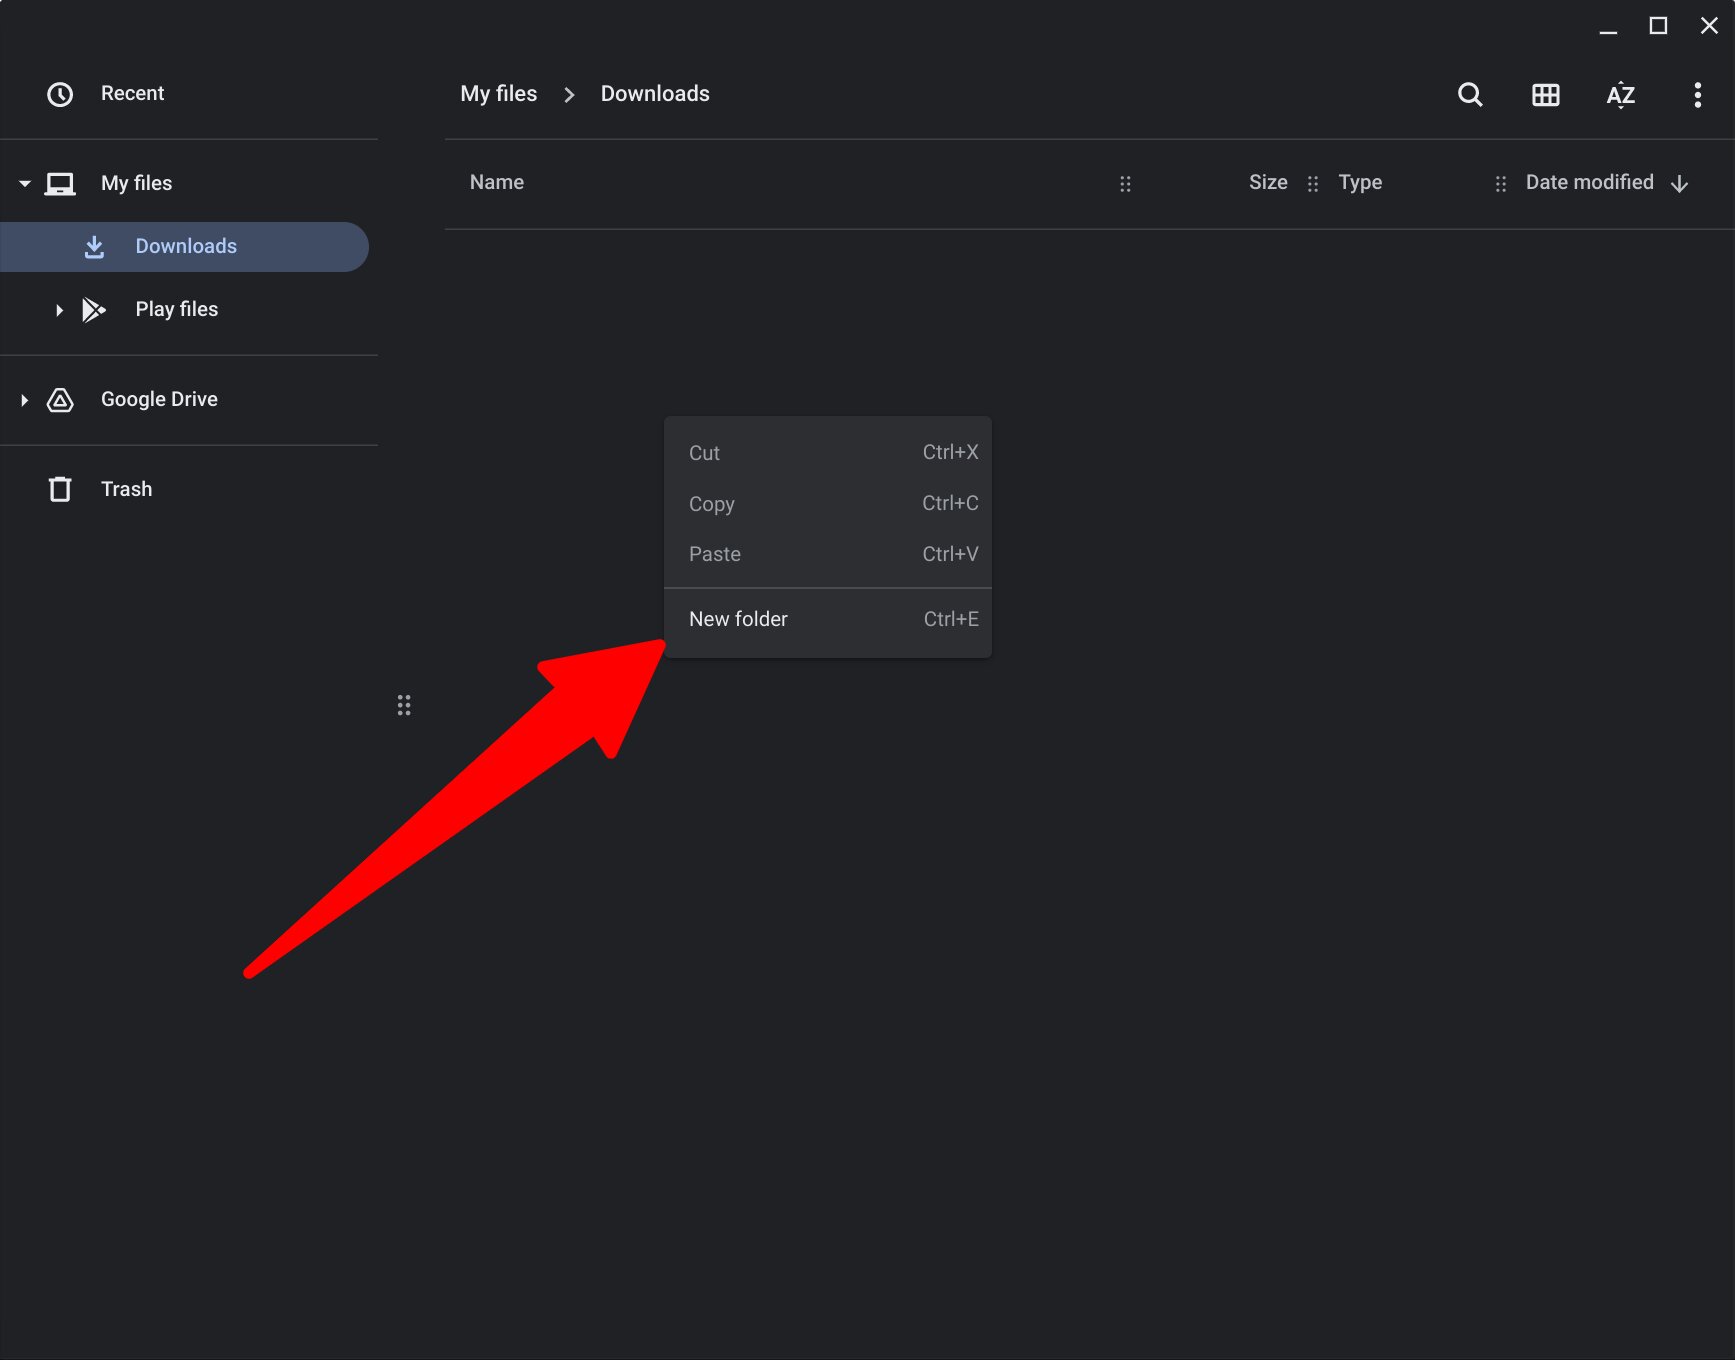
- Start by opening the Files app on your Chromebook. You can find this app in the app launcher or by clicking on the launcher button (typically located in the bottom left corner of the screen) and searching for “Files.”
- Once you have the Files app open, you will see various locations listed in the left-hand sidebar. Click on “Downloads.”
- A new window will open, displaying the contents of your Downloads folder. Here, you will find all the files you have downloaded using the Chrome browser or any other apps on your Chromebook.
You can now see all the files stored in your Downloads folder, including documents, images, videos, and more. Take a moment to familiarize yourself with the files in the folder before proceeding to the next step.
Note: If you are unable to find the Files app or the Downloads folder in the sidebar, make sure your Chromebook is up to date with the latest software updates. If you still encounter issues, you may need to reach out to the Chromebook support team for further assistance.
Step 2: Selecting and Deleting Files
Now that you have accessed the Downloads folder on your Chromebook, it’s time to select and delete the files you no longer need. Here’s how you can do it:
- Scan through the list of files in the Downloads folder and identify the ones you want to delete. You can identify files by their names, file types, or the date they were downloaded.
- To select a single file, simply click on it. To select multiple files, hold down the “Ctrl” key (or the “Command” key on a Mac) and click on each file you want to delete.
- Once you have selected the files you want to delete, right-click anywhere in the selected area or use the two-finger tap if you are using a touchpad. This will display a context menu.
- From the context menu, click on the “Delete” option. Alternatively, you can also press the “Delete” key on your keyboard.
- A confirmation dialog box will appear, asking if you are sure you want to delete the selected files. Review the files to ensure you have selected the correct ones, then click on the “Delete” button to proceed.
The selected files will be moved to the trash folder on your Chromebook. However, please note that this action does not permanently delete the files. They will still take up storage space until you empty the trash folder.
Repeat these steps for any additional files you wish to delete from your Downloads folder. Remember to only delete files that you no longer need or have backups of, as deleted files cannot be recovered from the trash folder.
Your Downloads folder will now be cleaner and more organized, with unnecessary files removed. In the next step, we will guide you on how to empty the trash folder to free up storage space on your Chromebook.
Step 3: Emptying the Downloads Folder
After selecting and deleting the files that you no longer need from the Downloads folder, it’s essential to empty the trash folder to reclaim the storage space on your Chromebook. Follow these steps to empty the Downloads folder:
- Start by opening the Files app on your Chromebook.
- In the left-hand sidebar, click on “Trash” to access the contents of the trash folder.
- You will now see a list of files that have been moved to the trash folder, including the files you deleted from the Downloads folder.
- To empty the trash folder, click on the “Empty Trash” button located at the top-right corner of the Files app window.
- A confirmation dialog box will appear, informing you that deleting these files will permanently remove them from your Chromebook. Review the files once more to ensure you don’t need any of them, as they cannot be recovered after emptying the trash.
- If you are certain you want to proceed, click on the “Delete” button to empty the trash folder and free up storage space on your Chromebook.
Once the trash folder is emptied, the files will be permanently deleted, freeing up space on your Chromebook’s storage drive. This step is crucial to fully remove all the unwanted files and maximize the available storage capacity.
It’s important to note that once the files are deleted from the trash folder, they cannot be restored. Therefore, double-check the contents of the trash folder before emptying it to avoid accidentally deleting any important files.
With the Downloads folder emptied and the trash folder cleared, you have successfully cleared out unnecessary files from your Chromebook. In the next step, we will explore how to use the Chrome Cleanup Tool to further optimize your device’s performance.
Step 4: Using the Chrome Cleanup Tool
In addition to manually deleting files, Chromebook offers a built-in tool called the Chrome Cleanup Tool that can help you optimize your device’s performance by removing potentially harmful software and unwanted extensions. Follow these steps to use the Chrome Cleanup Tool:
- Open the Chrome browser on your Chromebook.
- In the top-right corner of the browser window, click on the three-dot menu icon to open the Chrome menu.
- From the dropdown menu, select “Settings”.
- Scroll down and click on “Advanced” to access additional settings.
- Under the “Reset and clean up” section, click on “Clean up computer”.
- Chrome will now scan your Chromebook for harmful software and unwanted extensions. This process may take a few minutes.
- If any harmful software or unwanted extensions are detected, Chrome will display a list of them. Review the list and ensure that you want to remove them from your device.
- Click on the “Remove” button to delete the identified harmful software or unwanted extensions from your Chromebook.
The Chrome Cleanup Tool helps keep your Chromebook secure and ensures that your device is running smoothly by removing potentially harmful software and unnecessary extensions. Running this tool periodically can help maintain the performance of your Chromebook.
By utilizing the Chrome Cleanup Tool in addition to deleting files manually, you can optimize your Chromebook’s performance and maintain a clutter-free system.
In the next step, we will explore how to manage downloads in the Chrome browser settings to have more control over your downloading experience.
Step 5: Managing Downloads in the Chrome Browser Settings
In addition to cleaning up your Downloads folder and utilizing the Chrome Cleanup Tool, you can manage your downloads more efficiently by customizing the settings in the Chrome browser. Here’s how:
- Open the Chrome browser on your Chromebook.
- In the top-right corner of the browser window, click on the three-dot menu icon to open the Chrome menu.
- From the dropdown menu, select “Settings”.
- Scroll down and click on “Advanced” to access additional settings.
- Under the “Downloads” section, you will find various options to manage your downloads.
- Here are some key settings you can customize:
- Ask where to save each file before downloading: When enabled, this setting prompts you to choose the location to save each downloaded file.
- Download location: Click on “Change” to specify a different default download location for your Chromebook. This can help you easily organize downloads to a specific folder or external storage device.
- Automatic file downloads: You can toggle this setting to control whether files should be downloaded automatically or require manual confirmation each time.
- Clear auto-opening settings: If you want to prevent specific file types from automatically opening after downloading, you can click on this option to clear any previous settings.
- Customize these settings according to your preferences, and remember to click on “Save” to apply the changes.
By managing your downloads through the Chrome browser settings, you can have more control over where your files are saved, prevent unwanted file types from automatically opening, and ensure a more personalized downloading experience.
With these steps, you now have the knowledge to effectively delete downloads on your Chromebook, empty the Downloads folder, use the Chrome Cleanup Tool, and manage downloads in the Chrome browser settings. By following these methods, you can keep your Chromebook organized, optimize its performance, and have a seamless downloading experience.
Now, go ahead and apply these steps to keep your Downloads folder clutter-free and your Chromebook running smoothly!
Conclusion
Managing and deleting downloads on your Chromebook is an essential task to keep your device organized and maintain optimal performance. By following the steps outlined in this guide, you can effectively delete unnecessary files, free up storage space, and customize your downloading experience.
Starting with accessing the Downloads folder, you can easily locate and select the files you want to delete. Remember to review the files before deleting them and be cautious to avoid deleting any important files accidentally. After deleting files, emptying the trash folder ensures that the deleted files are permanently removed from your Chromebook, freeing up valuable storage space.
In addition to manual deletion, utilizing the Chrome Cleanup Tool can help optimize your device’s performance by removing potentially harmful software and unwanted extensions. Running the tool periodically is a good practice to ensure your Chromebook remains secure and runs smoothly.
Furthermore, by managing your downloads through the Chrome browser settings, you can customize options such as the download location, automatic file downloads, and the prompt to choose the download location for each file. These settings give you more control over your downloads and help keep your Chromebook organized.
Now that you have learned how to delete downloads on your Chromebook, empty the Downloads folder, use the Chrome Cleanup Tool, and customize download settings, you can maintain a clutter-free and efficient device.
Remember to regularly review and delete unnecessary files to optimize your Chromebook’s performance and make the most of its storage capacity. By keeping your device organized, you can enjoy a seamless and productive experience on your Chromebook.
So, put these steps into practice and keep your Chromebook tidy, secure, and running smoothly!