Introduction
Lenovo Ultrabooks are sleek and powerful devices that offer a convenient computing experience. However, you may encounter a frustrating issue where your Lenovo Ultrabook starts blinking when it is not plugged in. This persistent blinking can disrupt your workflow and cause inconvenience.
There can be several reasons for this problem, ranging from battery issues to power management settings. In this article, we will explore the possible causes of the blinking issue and provide effective solutions to resolve it.
Whether you are a student, professional, or casual user, a blinking Lenovo Ultrabook can be a major annoyance. Not only does it distract you, but it also raises concerns about the device’s functionality and performance. Understanding the underlying reasons behind this issue is key to finding an appropriate solution.
It is important to note that the blinking issue may vary from one model to another. Therefore, it is recommended to perform the troubleshooting steps mentioned in this article in conjunction with the exact make and model of your Lenovo Ultrabook.
By following the instructions provided in this article, you will be able to diagnose and fix the blinking issue on your Lenovo Ultrabook, restoring it to its normal working condition. So, let’s dive into the reasons behind the blinking problem and the solutions to overcome it.
Reasons why the Lenovo Ultrabook blinks when not plugged in
The blinking issue on your Lenovo Ultrabook can be caused by various factors. Understanding these reasons will help you properly diagnose and resolve the problem. Here are the most common reasons why your Lenovo Ultrabook blinks when not plugged in:
- Faulty battery: If your Lenovo Ultrabook’s battery is faulty or nearing the end of its lifespan, it can cause the device to blink when not plugged in. The battery may not be able to hold a charge, resulting in power fluctuations and the blinking issue.
- Power adapter issues: A damaged or incompatible power adapter can also lead to the blinking problem. If the power adapter does not supply consistent and sufficient power to the Ultrabook, it may cause it to blink when running on battery power.
- Power management settings: Your Lenovo Ultrabook’s power management settings can affect its behavior when running on battery. Incorrectly configured power settings, such as aggressive power-saving modes or misconfigured sleep settings, can cause the device to blink when not plugged in.
- Outdated BIOS or drivers: Outdated firmware (BIOS) or device drivers can sometimes result in compatibility issues and erratic behavior, including the blinking problem. It is essential to keep your Ultrabook’s BIOS and drivers up to date to ensure smooth functioning.
- Overheating: If your Lenovo Ultrabook experiences overheating when running on battery power, it may trigger the blinking issue. Overheating can occur due to dust accumulation, inadequate airflow, or a malfunctioning cooling system.
- Software conflicts: Certain software applications or processes running in the background can conflict with the power management system of the Ultrabook. These conflicts can lead to the blinking issue when running on battery power.
These are the primary reasons why your Lenovo Ultrabook may be blinking when it is not plugged in. By investigating these potential causes, you can narrow down the issue and implement the appropriate solutions. In the next sections, we will explore the steps you can take to resolve the blinking problem and restore your Ultrabook’s normal functioning.
Solution 1: Check the battery and power adapter
The first step in resolving the blinking issue on your Lenovo Ultrabook is to ensure that both the battery and power adapter are functioning correctly. Here’s what you can do:
- Inspect the battery: Check for any visible physical damage, such as bulges, leaks, or corrosion, on the battery. If you notice any signs of damage, it may be necessary to replace the battery. Additionally, make sure the battery is properly seated in its compartment.
- Test the battery health: You can use the built-in battery diagnostic tool or third-party software to assess the health of your Lenovo Ultrabook’s battery. If the tool indicates that the battery is in poor health or has degraded significantly, consider getting a new battery.
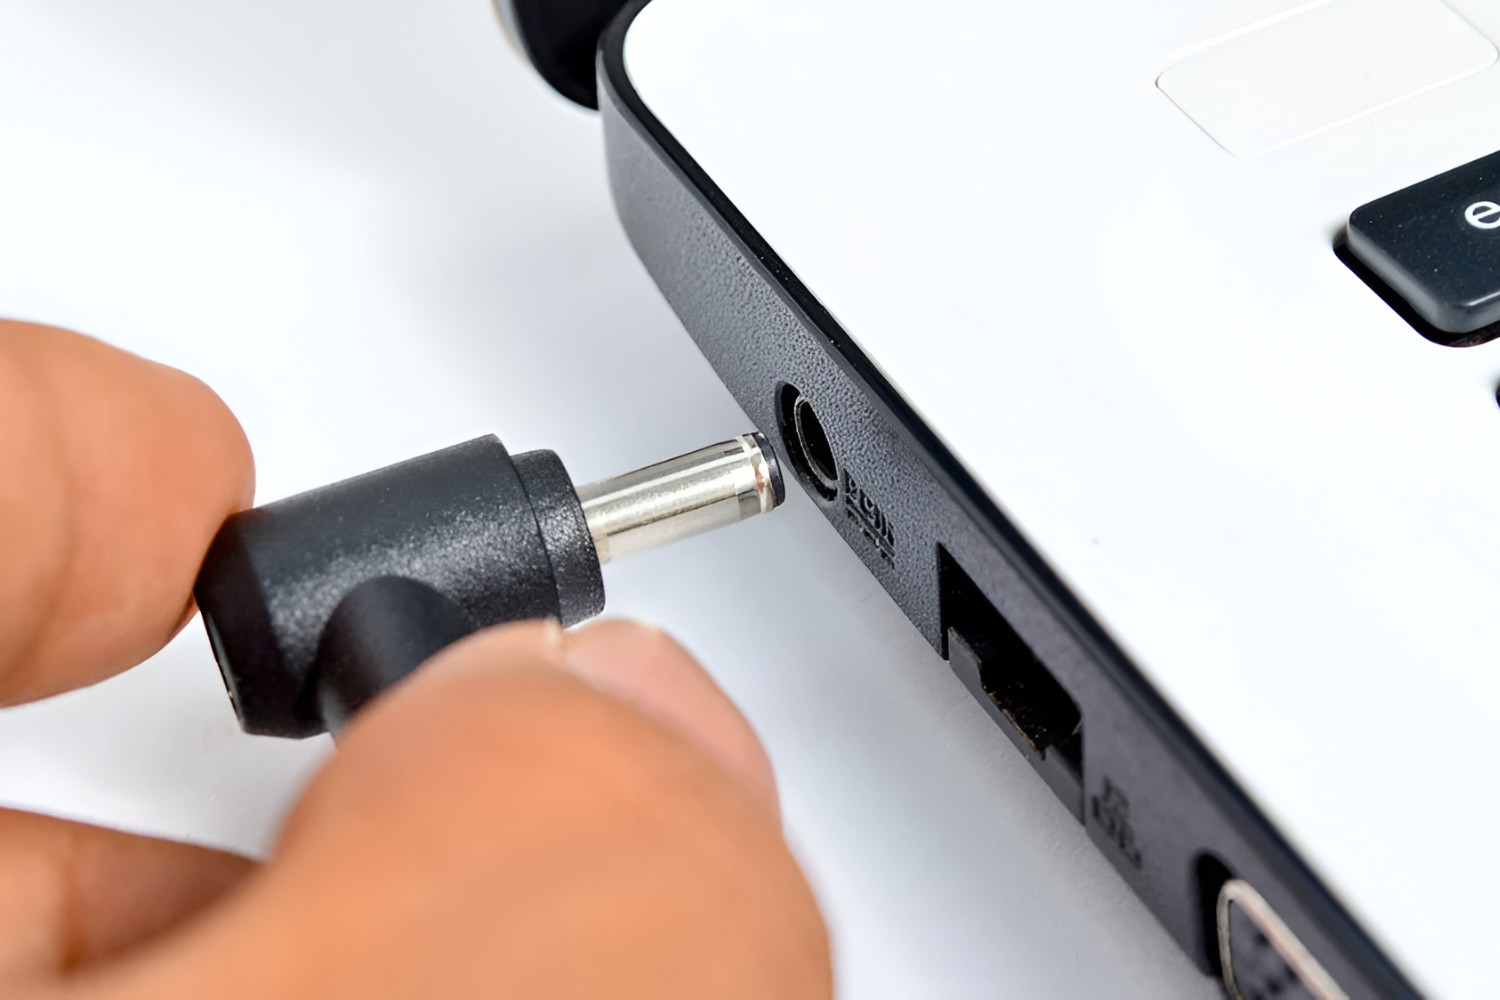
- Check the power adapter: Inspect the power adapter for any visible damage, such as frayed wires or bent connectors. If you find any issues, replace the power adapter with a compatible one from Lenovo or a reputable third-party vendor.
- Verify compatibility: Ensure that the power adapter you are using is specifically designed for your Lenovo Ultrabook model. Using an incompatible or low-quality power adapter can result in power fluctuations and the blinking problem.
- Check the power outlet: Plug the power adapter into a different power outlet to eliminate the possibility of a faulty power source. Sometimes, the blinking issue may be caused by an unstable power supply from the outlet.
- Test without the battery: Remove the battery from your Lenovo Ultrabook and connect it directly to the power adapter. If the blinking issue disappears, it suggests that the battery may be the root cause. In such cases, a replacement battery is recommended.
By thoroughly checking the battery and power adapter, you can identify any potential issues and take the necessary steps to resolve them. If the blinking problem persists despite these checks, proceed to the next solution.
Solution 2: Update BIOS and drivers
Updating the BIOS (Basic Input/Output System) and device drivers is an essential step in troubleshooting the blinking issue on your Lenovo Ultrabook. Outdated firmware and drivers can cause compatibility issues and affect the device’s performance. Here’s how you can update them:
- Check for BIOS updates: Visit the official Lenovo website and navigate to the support section. Look for the BIOS updates available for your specific Ultrabook model. Download the latest BIOS update and follow the provided instructions to install it.
- Update device drivers: Similarly, check for any device driver updates available for your Lenovo Ultrabook. Download the updated drivers from the official Lenovo website or use a reliable driver update tool. Install the drivers following the provided instructions.
- Automate driver updates: To ensure that your device drivers are always up to date, consider installing driver update software. These tools automatically scan your system for outdated drivers and provide a convenient way to update them with just a few clicks.
- Restart your Ultrabook: After updating the BIOS and drivers, restart your Lenovo Ultrabook. This allows the system to apply the changes and ensures that the new firmware and drivers are functioning correctly.
- Monitor for improvements: Once the updates are installed and the Ultrabook is restarted, observe if the blinking issue persists. In most cases, updating the BIOS and drivers resolves compatibility issues and improves the overall performance of the device.
Regularly updating the BIOS and device drivers is crucial to maintaining the stability and functionality of your Lenovo Ultrabook. It is recommended to check for updates periodically to ensure that you have the latest firmware and drivers installed. If the blinking problem persists after updating the BIOS and drivers, proceed to the next solution.
Solution 3: Adjust power settings
Incorrectly configured power settings can contribute to the blinking issue on your Lenovo Ultrabook. By adjusting the power settings, you can optimize the device’s power management and potentially resolve the problem. Here’s how you can do it:
- Access the power settings: Open the Control Panel on your Lenovo Ultrabook and navigate to the Power Options. Alternatively, you can right-click on the battery icon in the system tray and select Power Options.
- Select a power plan: Choose the power plan that best suits your needs. If you are experiencing the blinking issue, consider selecting the Balanced or Recommended power plan. Avoid selecting power plans that prioritize power-saving measures, as they may cause the Ultrabook to blink frequently.
- Customize the power plan: Click on the Change plan settings link next to the selected power plan. Adjust the sleep settings, display brightness, and other options according to your preferences. Ensure that the power-saving options are not set too aggressively, as this can lead to the blinking problem.
- Change advanced power settings: In the Power Options window, click on the Change advanced power settings link. This opens the Advanced Power Options dialog box. Here, you can fine-tune various power-related settings, such as USB power settings and processor power management. Make sure these settings are configured to provide optimal performance without compromising stability.
- Apply the changes: Once you have adjusted the power settings to your liking, click on the Apply or OK button to save the changes. Restart your Lenovo Ultrabook to apply the new power settings.
- Check for improvements: After adjusting the power settings and restarting the Ultrabook, monitor if the blinking issue persists. In many cases, modifying the power settings can help alleviate power-related problems and resolve the blinking issue.
By customizing the power settings on your Lenovo Ultrabook, you can optimize its power management and potentially eliminate the blinking problem. If the issue persists even after adjusting the power settings, proceed to the next solution.
Solution 4: Reset the power management settings
Resetting the power management settings can help resolve the blinking issue on your Lenovo Ultrabook. Over time, power management settings can become corrupted or misconfigured, leading to erratic behavior. Here’s how you can reset the power management settings:
- Open the Device Manager: Press the Windows key + X on your keyboard and select Device Manager from the menu. Alternatively, you can search for “Device Manager” in the Start menu search bar and click on it.
- Expand the “Batteries” category: In the Device Manager window, locate and click on the arrow next to the “Batteries” category to expand it. This reveals the list of battery-related devices installed on your Lenovo Ultrabook.
- Uninstall the ACPI battery driver: Right-click on the ACPI battery driver and select Uninstall from the context menu. Confirm the uninstallation if prompted.
- Restart your Ultrabook: After uninstalling the ACPI battery driver, restart your Lenovo Ultrabook. The system will automatically reinstall the battery driver using default settings when it boots up.
- Check for improvements: Once your Ultrabook has restarted, observe if the blinking issue persists. Resetting the power management settings can often resolve power-related problems and restore the normal functioning of the device.
If the blinking problem continues after resetting the power management settings, proceed to the next solution for further troubleshooting. It is important to note that resetting the power management settings should be done cautiously, as it may affect other power-related functionalities. If you have any doubts or concerns, it is recommended to seek professional assistance or contact Lenovo support.
Solution 5: Disable Power Manager
If you are still experiencing the blinking issue on your Lenovo Ultrabook, disabling the Power Manager software can be a potential solution. The Power Manager software, although intended to provide advanced power management features, can sometimes conflict with the system and cause unexpected behavior. Here’s how you can disable it:
- Open the Power Manager software: Locate the Power Manager icon in the system tray on your Ultrabook’s taskbar. Right-click on the icon to access the Power Manager menu.
- Select “Disable Power Manager”: In the Power Manager context menu, look for the option that says “Disable Power Manager” or something similar. Click on it to disable the Power Manager software.
- Confirm the action: A prompt may appear asking for confirmation to disable the Power Manager. Follow any on-screen instructions and prompts to complete the process.
- Restart your Ultrabook: After disabling the Power Manager, restart your Lenovo Ultrabook to ensure that the changes take effect.
- Check for improvements: Once your Ultrabook has restarted, observe if the blinking issue still persists. Disabling the Power Manager software can sometimes resolve conflicts and eliminate undesired behavior.
If disabling the Power Manager software does not resolve the blinking problem, continue to the next solution for further troubleshooting. It is worth noting that disabling the Power Manager software may limit your ability to control power management settings and access certain power-related features. If you require advanced power management functionality, consider seeking professional assistance or contacting Lenovo support for further guidance.
Solution 6: Perform a hard reset
If none of the previous solutions have resolved the blinking issue on your Lenovo Ultrabook, performing a hard reset can help reset the device’s hardware and potentially fix any underlying problems. Here’s how you can perform a hard reset:
- Disconnect the power source: Unplug the power adapter from your Lenovo Ultrabook and remove any external peripherals or accessories connected to it.
- Turn off the Ultrabook: Shut down your Ultrabook by selecting the “Shut down” option from the Start menu or by pressing and holding the power button until the device powers off completely.
- Remove the battery: If your Lenovo Ultrabook has a removable battery, carefully remove it from its compartment. If the battery is not removable, skip this step.
- Press and hold the power button: While the battery is removed (or even if it is non-removable), press and hold the power button for at least 10-15 seconds. This dissipates any residual power and clears the device’s hardware configuration.
- Reconnect the battery and power adapter: If you removed the battery, reinsert it into the Ultrabook’s battery compartment. Then, plug in the power adapter to provide power to the device.
- Power on the Ultrabook: Press the power button to turn on your Lenovo Ultrabook. It should boot up normally without the blinking issue.
- Check for improvements: After performing a hard reset, monitor if the blinking problem persists. Performing a hard reset can sometimes resolve hardware-related issues and restore the Ultrabook to its normal functioning.
If the blinking issue persists even after performing a hard reset, it is recommended to seek professional assistance or contact Lenovo support for further troubleshooting and guidance. They can provide specialized help to diagnose and resolve complex hardware issues that may be causing the problem.
Conclusion
The blinking issue on your Lenovo Ultrabook can be frustrating and disruptive. However, by following the troubleshooting steps provided in this article, you can significantly improve your chances of resolving the problem. Let’s recap the solutions we have discussed:
- Check the battery and power adapter.
- Update BIOS and drivers.
- Adjust power settings.
- Reset the power management settings.
- Disable Power Manager software.
- Perform a hard reset.
By inspecting the battery and power adapter, updating firmware and drivers, adjusting power settings, resetting power management settings, disabling Power Manager software, and performing a hard reset, you have covered a range of potential causes and solutions for the blinking issue on your Lenovo Ultrabook.
It is important to note that every situation may be unique, and the specific solution that works for one person may not work for another. Therefore, it is advisable to try these solutions in the order provided and check for improvements after each step.
If you have tried all these solutions and are still experiencing the blinking issue, it may be necessary to seek professional assistance or contact Lenovo support for further guidance. Their technical expertise can help diagnose and resolve more complex issues that may be causing the problem.
Remember, troubleshooting and resolving technical issues require patience and careful execution. It is always recommended to take proper precautions and follow the manufacturer’s guidelines when performing any hardware or software modifications to your Lenovo Ultrabook.
We hope that these solutions have helped you resolve the blinking issue and restore your Lenovo Ultrabook to its normal functioning. Enjoy your uninterrupted computing experience!