Introduction
Welcome to the immersive world of virtual reality (VR) where your iPhone can transport you to incredible virtual landscapes, fascinating adventures, and engaging experiences. By using a VR headset with your iPhone, you can dive into a whole new reality right from the palm of your hand.
With the advancements in technology, VR headsets have become more affordable and accessible, enabling users to enjoy immersive VR experiences without breaking the bank. Whether you’re a gaming enthusiast, a movie lover, or simply curious about exploring virtual environments, using a VR headset with your iPhone opens up a world of possibilities.
In this guide, we will walk you through the process of using a VR headset with your iPhone. We will cover everything from choosing the right VR headset for your specific needs to setting it up with your iPhone and optimizing the VR experience for maximum enjoyment.
Not only will we show you how to install VR apps on your iPhone, but we will also guide you through adjusting VR settings, calibrating your headset, and navigating VR menus and controls using your iPhone. Additionally, we’ll provide you with some helpful tips and tricks to enhance your VR experience.
So, whether you’re a VR beginner or looking to enhance your VR experience with your iPhone, this guide is here to help you take the plunge into the exciting world of virtual reality.
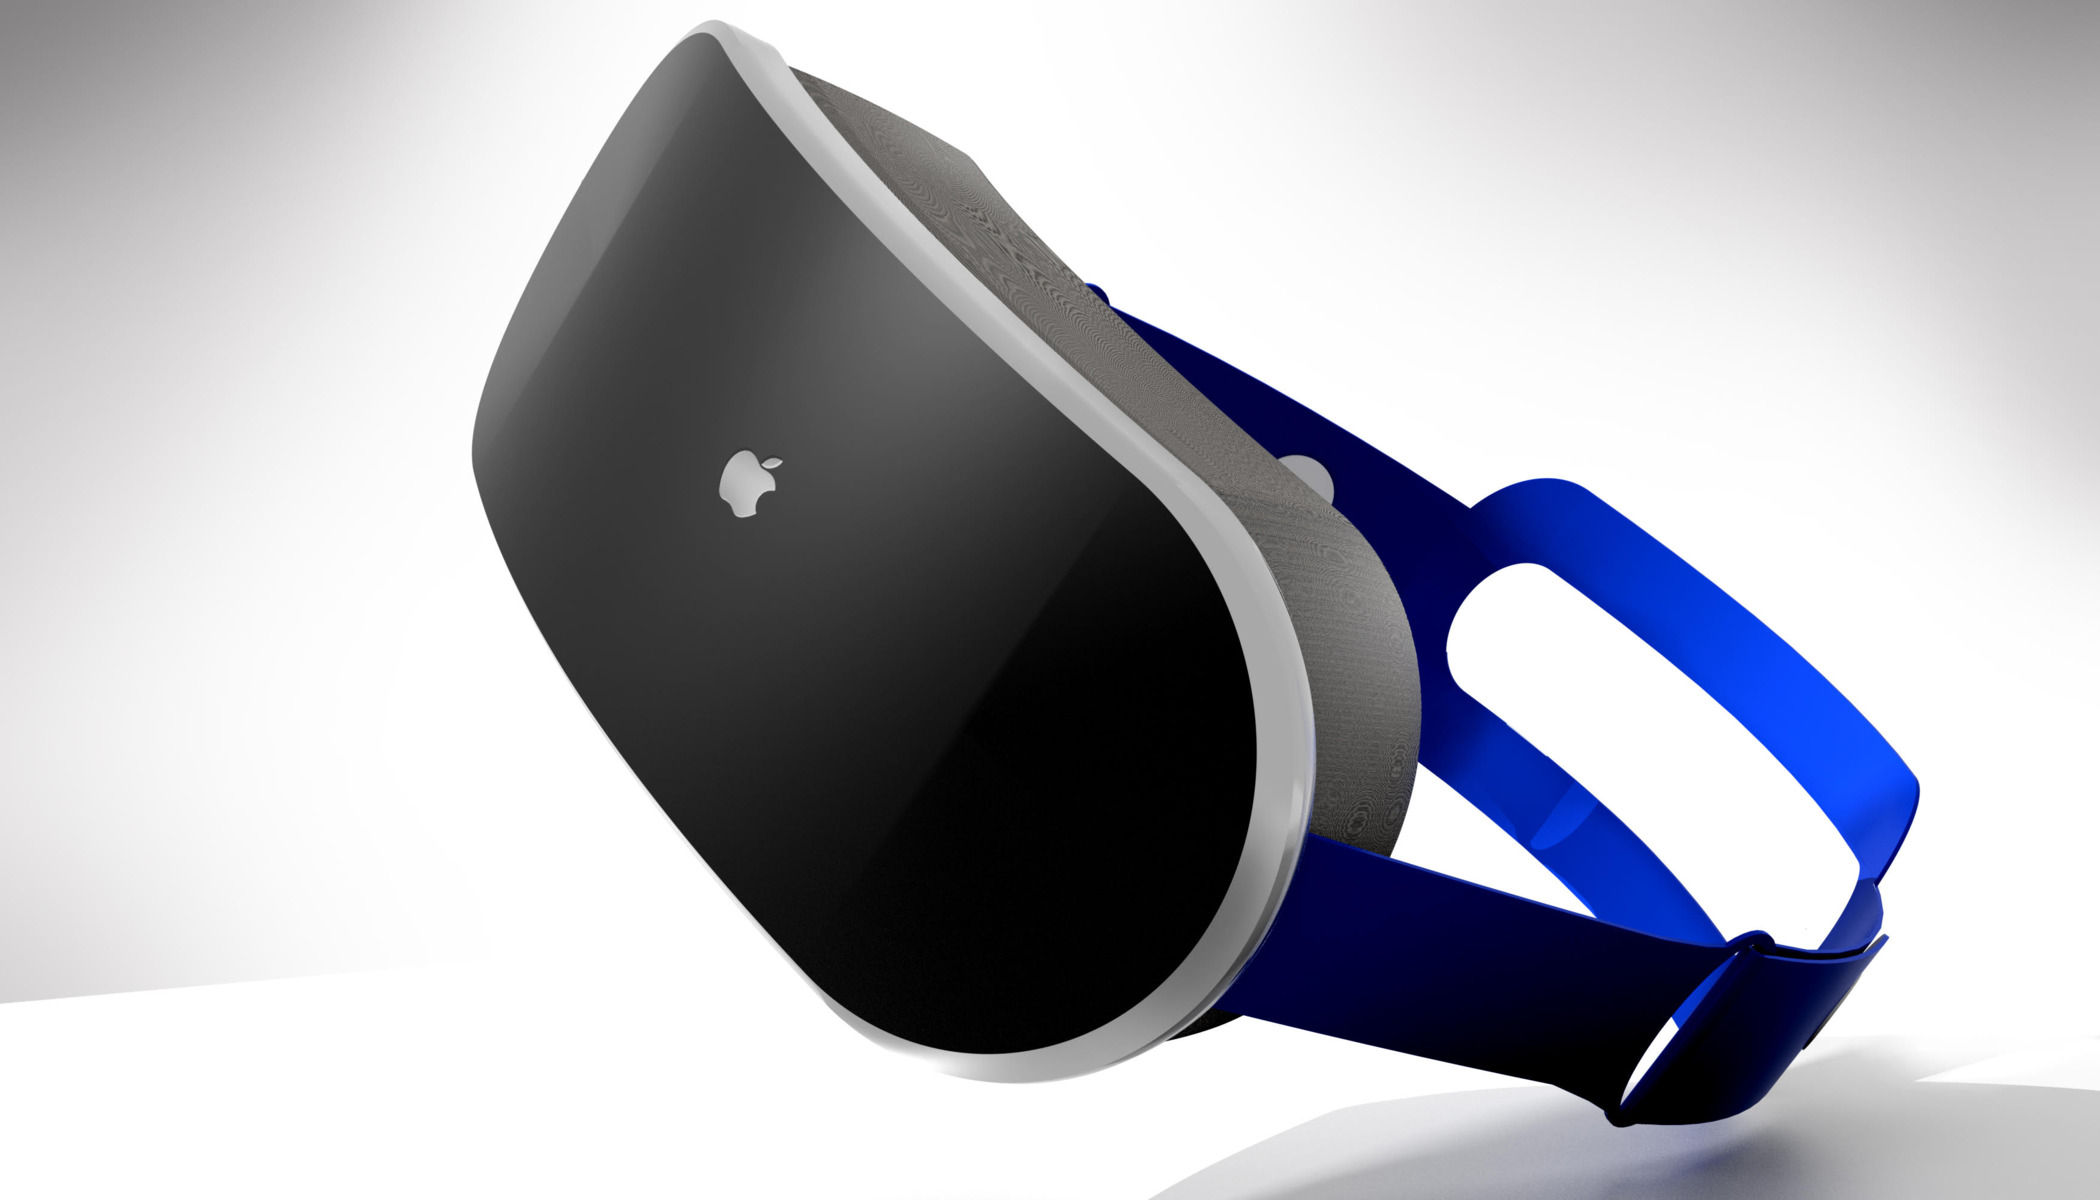
Choosing the right VR headset for your iPhone
When it comes to selecting a VR headset for your iPhone, there are several factors to consider that will ensure you have a comfortable and immersive experience. Here are some key considerations to keep in mind:
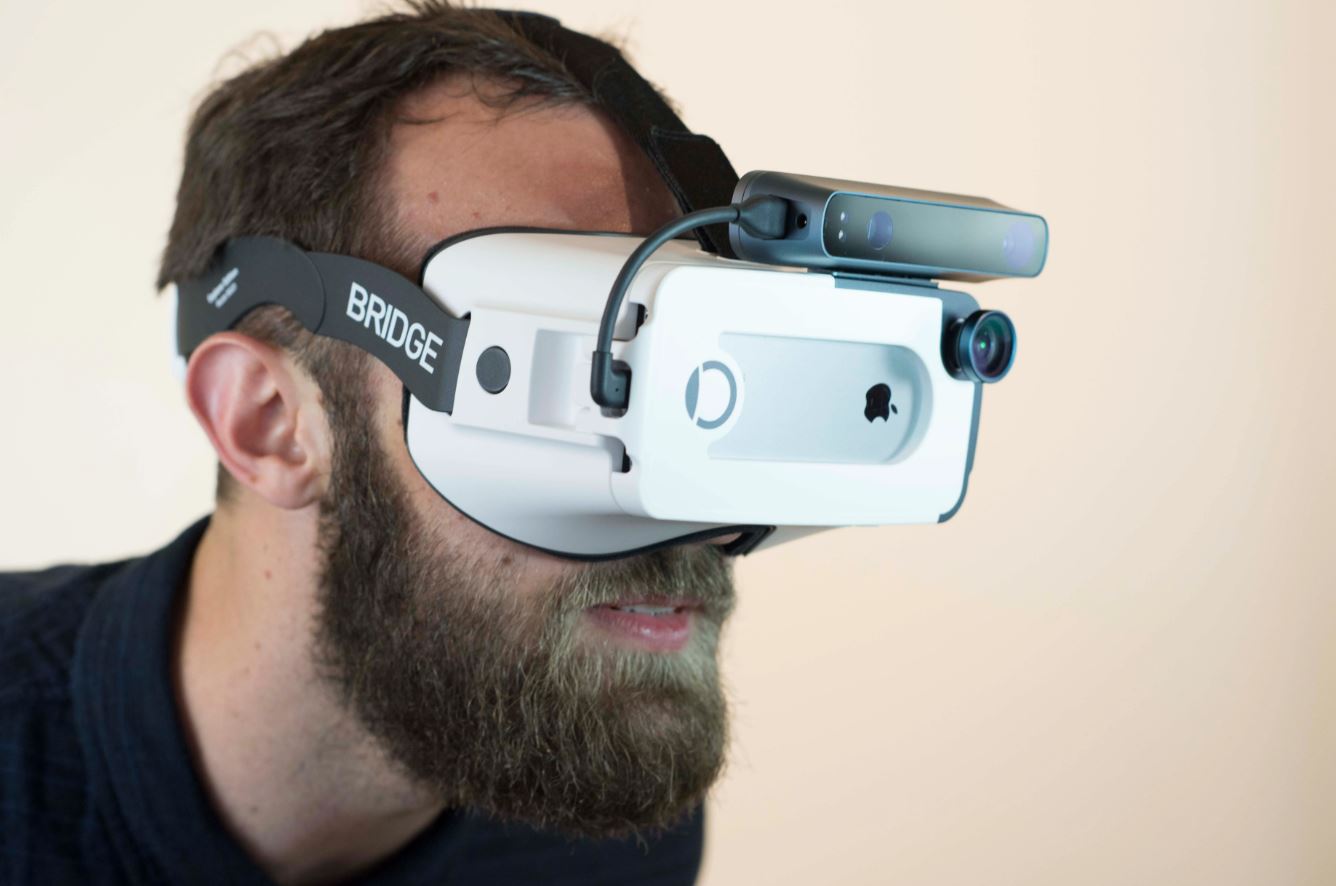
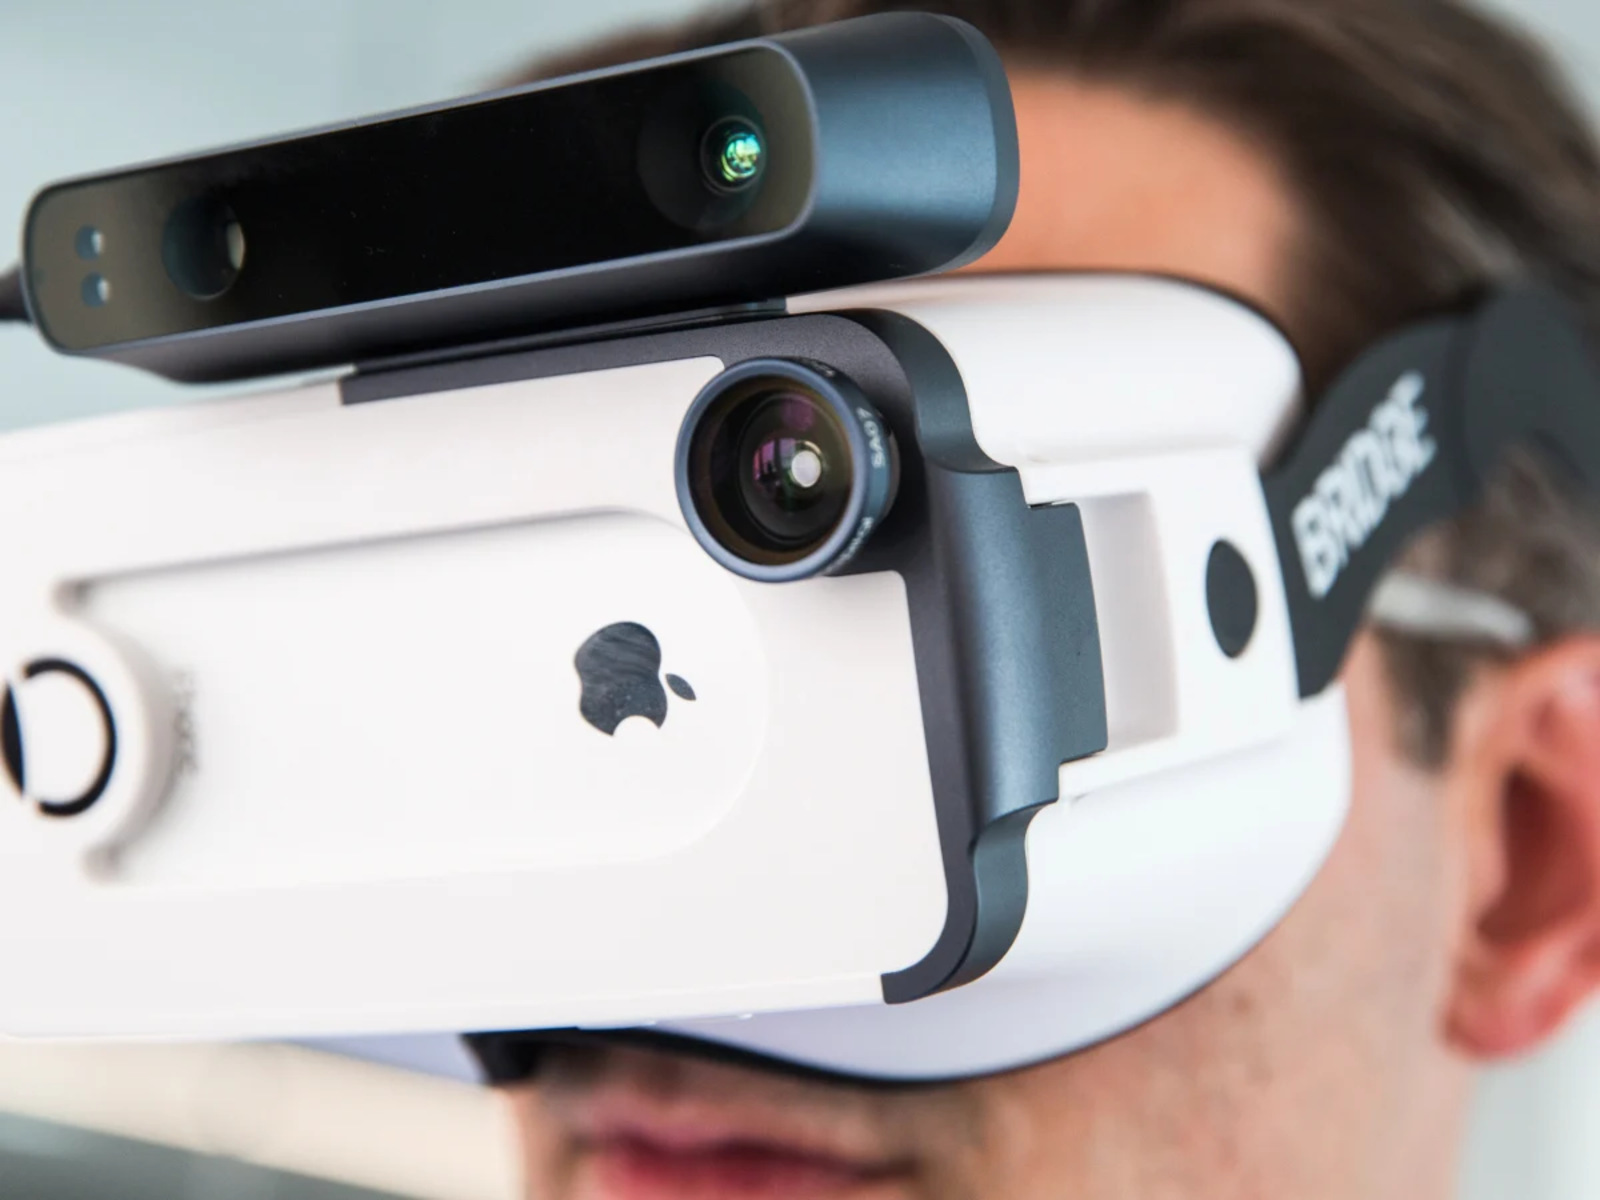
Compatibility: Before purchasing a VR headset, it’s essential to ensure that it is compatible with your iPhone model. Some headsets may only work with specific iPhone versions, so be sure to check the compatibility requirements beforehand.
Comfort: Since VR experiences can be quite immersive and time-consuming, it’s crucial to choose a headset that offers a comfortable fit. Look for soft padding, adjustable straps, and lightweight designs that will prevent any discomfort or strain on your head and face.
Field of view: The field of view (FOV) determines the extent of the virtual environment you can see. For a more immersive experience, opt for a headset with a wider FOV. Generally, headsets with FOVs between 90 and 120 degrees provide a realistic and immersive viewing experience.
Tracking capabilities: Tracking is an essential aspect of VR, as it allows the headset to detect your head movements and adjust the virtual environment accordingly. Make sure the VR headset you choose has accurate and reliable tracking capabilities for a seamless and immersive experience.
Controller options: Depending on the type of VR experiences you plan to engage in, consider whether you prefer a VR headset that includes a compatible controller. Some headsets come with built-in controllers or offer the option to purchase additional ones separately. Controllers can enhance the level of interaction and control within VR apps and games.
Reviews and recommendations: Before making a final decision, take the time to read reviews and recommendations from other iPhone users who have used the VR headset you’re considering. Their experiences can provide valuable insights and help you make an informed choice.
By considering these factors and conducting thorough research, you can choose a VR headset that suits your iPhone and personal preferences. Remember, finding the right headset is key to maximizing your VR experiences and ensuring hours of immersive entertainment.
Setting up your VR headset with your iPhone
Once you’ve selected the perfect VR headset for your iPhone, it’s time to set it up and get ready for an immersive experience. Here’s a step-by-step guide on how to set up your VR headset with your iPhone:
- Remove any protective covers or lens caps from your VR headset, ensuring clear visibility.
- Check the compatibility requirements of your VR headset and iPhone to make sure they are a match.
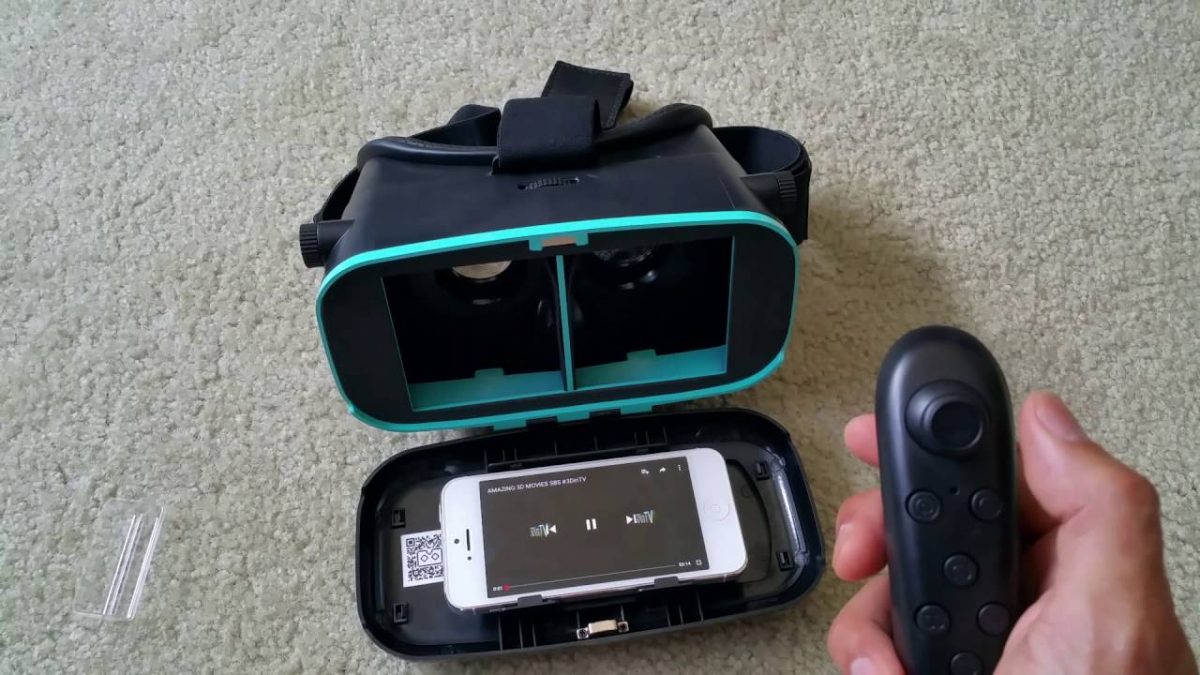
- Connect your iPhone to the VR headset using the provided cable or insert it into the designated slot, ensuring a secure connection.
- Adjust the straps of the headset to fit comfortably around your head. Make sure it is snug but not too tight to avoid discomfort during extended use.
- If your VR headset requires additional setup steps, follow the manufacturer’s instructions provided with the headset. This may include downloading a specific app or software.
- Power on the VR headset and ensure that your iPhone is powered on as well.
- Once powered on, put the VR headset on your head and adjust it until the screen is in clear view.
- Use the controls or touchpad on the headset to navigate through menus and select options. Some headsets may have built-in buttons, while others may require external controllers.
- To further enhance your experience, adjust the IPD (inter-pupillary distance) settings on your VR headset if available. This will ensure that the virtual experience is customized to match the distance between your eyes.
After setting up your VR headset with your iPhone, you’re ready to explore the virtual world. Remember to take breaks when needed to avoid eyestrain or discomfort, and always follow the manufacturer’s guidelines for safe and proper usage of your specific VR headset.
Now that you’re all set up, it’s time to dive into the immersive world of virtual reality and start enjoying the multitude of experiences that await you!
Installing VR apps on your iPhone
With your VR headset set up and ready to go, it’s time to explore the vast library of VR apps available for your iPhone. These apps offer a wide range of virtual experiences, from games and simulations to educational content and virtual tours. Here’s how you can install VR apps on your iPhone:
- Open the App Store on your iPhone by tapping on the App Store icon.
- Tap on the search bar at the bottom of the screen and type in the name of the VR app you want to install. Alternatively, you can browse the “VR” or “Virtual Reality” category to discover new apps.
- Once you’ve found the desired VR app, tap on it to open the app’s page.
- On the app’s page, review the description, ratings, and reviews to ensure it meets your expectations and requirements.
- If you’re satisfied with the app, tap on the “Get” or “Download” button to start the installation process. If the app has a price, you may need to confirm your purchase with your Apple ID password or Touch ID/Face ID.
- Wait for the app to download and install on your iPhone. The progress will be indicated by a loading indicator on the app’s icon.
- Once the installation is complete, you can locate the app on your home screen or in your App Library, depending on your iPhone’s settings.
- Connect your iPhone to your VR headset and put on the headset to enter the virtual world.
- Most VR apps will provide instructions for navigating and interacting within the virtual environment. Use the controls on your headset or any additional controllers to navigate menus, select options, and fully immerse yourself in the VR experience.
Remember to explore different VR app genres to find experiences that suit your interests and preferences. Whether you’re into gaming, travel, art, or education, the App Store offers a vast collection of VR apps to satisfy your curiosity and provide endless hours of entertainment.
Enjoy the journey into virtual reality!
Adjusting VR settings for the best experience
Each individual’s VR experience can vary based on personal preferences, comfort, and the specific VR headset being used. To ensure the best possible experience, it’s important to adjust the VR settings according to your needs. Here are some key settings to consider:
IPD (Inter-Pupillary Distance): This setting allows you to adjust the distance between the lenses to match the distance between your eyes. In most VR headsets, you can find this setting in the device’s menu or settings. Properly adjusting the IPD can significantly improve the visual quality and depth perception within the VR environment.
FOV (Field of View): The FOV determines the extent of the visual field you see when wearing the VR headset. To enhance immersion, make sure to set the FOV to its maximum value if the option is available. A wider FOV will provide a more expansive and realistic view of the virtual world.
Graphics Quality: Depending on the capabilities of your iPhone and the specific VR app, you may have the option to adjust the graphics quality. Higher graphics settings will provide more detailed and visually stunning virtual environments, but may require more processing power. Experiment with different settings to find the right balance between visual quality and smooth performance.
Comfort and Safety: Take advantage of any comfort settings offered by your VR headset. These settings can include adjustments for head straps, lens distance, or even adding foam inserts for additional padding. Additionally, make sure to take regular breaks during VR sessions to prevent discomfort or eye strain.
Audio: Sound plays a crucial role in immersing yourself in a VR experience. Check if your VR headset has built-in audio or if you need to connect headphones to your iPhone. Experiment with different audio settings to find the audio setup that enhances the overall immersion and enjoyment of the VR content.
Remember, every VR headset and app may have unique settings, so it’s essential to refer to the manufacturer’s instructions or the app’s documentation for specific guidance on adjusting settings. Don’t be afraid to experiment and find the perfect combination that caters to your preferences and provides the best VR experience.
By fine-tuning these settings, you’ll be able to fully immerse yourself in the virtual worlds and enjoy an unparalleled VR experience on your iPhone.
Calibrating your VR headset with your iPhone
Calibrating your VR headset with your iPhone is essential to ensure accurate tracking and optimal performance. Calibration helps align the virtual world with your physical movements, providing a more immersive and seamless experience. Here’s a step-by-step guide on how to calibrate your VR headset with your iPhone:
- Ensure that your VR headset is properly connected to your iPhone and that both devices are powered on.
- Place the VR headset on your head and adjust it to ensure a comfortable fit.
- Make sure you are in a well-lit environment that allows the sensors of your VR headset to track your movements accurately.
- Launch the VR app or game you want to use and navigate to the calibration or settings menu. The location of the calibration settings may vary depending on the app or game.
- Follow the on-screen instructions to perform the calibration. This may involve looking straight ahead, turning your head to the left and right, or any other specific actions as prompted.
- Some calibration processes may require you to hold your VR headset in certain positions or perform additional actions to ensure accurate tracking.
- Once the calibration is complete, take a moment to test the tracking by moving your head around and observing the virtual environment’s response.
- If you notice any issues with tracking or misalignment, return to the calibration settings and repeat the process until you achieve satisfactory results.
- It’s also a good idea to recalibrate your VR headset periodically or whenever you change environments or lighting conditions.
Remember, the calibration process may vary depending on the specific VR headset or app you’re using. Be sure to consult the manufacturer’s instructions or the app’s documentation for precise guidance on calibrating your VR headset with your iPhone.
By properly calibrating your VR headset, you can enjoy a more immersive experience with accurate tracking and precise alignment of the virtual world with your movements. So take the time to calibrate your VR headset and get ready to dive into the incredible world of virtual reality.
Navigating VR menus and controls with your iPhone
When using a VR headset with your iPhone, navigating menus and controlling actions within VR apps can be done seamlessly using your iPhone’s screen, buttons, or additional accessories/controllers. Here are some tips on how to effectively navigate VR menus and controls with your iPhone:
Touchscreen Controls: Most VR apps on the iPhone utilize the touchscreen for menu navigation. Simply tap on the desired option or icon to select it. Swipe gestures can be used to scroll through menus or adjust settings. Pay attention to on-screen instructions or prompts that guide you through the navigation process.
Headset Controls: Some VR headsets feature built-in controls or buttons that allow you to navigate menus directly from the headset itself. This can include buttons for selecting, scrolling, or pausing, depending on the specific headset model. Check the manufacturer’s documentation for details on how to use these built-in controls effectively.
External Controllers: Depending on the VR app or game, you may have the option to use external controllers with your iPhone. These controllers can range from handheld options to gamepads or motion controllers. Follow the instructions provided by the app or game to connect and configure the external controller for seamless navigation and interaction within the virtual environment.
Gaze-Based Navigation: Some VR apps utilize gaze-based navigation, where you can navigate menus or interact with objects by directing your gaze at them for a certain duration. This method often includes a visual indication, such as a circular cursor, that follows your gaze. Align your gaze with the desired option and hold it until the interaction is registered.
Voice Commands: In certain VR apps or virtual assistants, you may have the option to control navigation and actions through voice commands. This allows you to interact with the virtual environment without directly touching the iPhone or the VR headset’s controls. Consult the app’s documentation or enable voice command settings to utilize this feature.
It’s important to remember that each VR app or game may have its own unique navigation and control methods. Take the time to explore the settings and instructions provided by each app to understand the specific controls required for optimal navigation and interaction.
By familiarizing yourself with the navigation methods available and following instructions within VR apps, you’ll be able to effortlessly navigate menus, select options, and fully immerse yourself in the virtual world using your iPhone and VR headset.
Tips and tricks for using a VR headset with your iPhone
Using a VR headset with your iPhone opens up a world of immersive experiences. To enhance your VR journey, here are some tips and tricks to keep in mind:
1. Explore a variety of VR apps: Don’t limit yourself to just one type of VR content. Explore a range of VR apps, including games, educational experiences, virtual tours, and social platforms, to discover new and exciting virtual worlds.
2. Take breaks: VR experiences can be intense and captivating, but it’s important to take regular breaks to rest your eyes and prevent motion sickness. Listen to your body and step away from the virtual reality when needed.
3. Clear obstacles: Create a safe and obstacle-free space to avoid accidents while wearing the VR headset. Clear away any furniture, cables, or objects that could potentially cause injury or impede your movements.
4. Use headphones: For a more immersive experience, use headphones with your VR headset. This will enhance the audio quality and immerse you further into the virtual world.
5. Optimize lighting conditions: Ensure that the room you’re in has adequate lighting. Avoid bright lights or direct sunlight that could create glare on the VR headset’s lenses, potentially affecting your viewing experience.
6. Calibrate regularly: Regularly calibrate your VR headset, especially if you switch between different users or environments. Calibration ensures accurate tracking and alignment, resulting in a more realistic and enjoyable VR experience.
7. Keep your iPhone charged: VR experiences can quickly drain your iPhone’s battery. Before starting a VR session, ensure that your iPhone is fully charged or connected to a power source to avoid interruptions.
8. Share the experience: VR can be a social activity. Share the fun with friends and family by having them try the VR headset. Just make sure to clean and sanitize the headset before and after sharing it.
9. Customize your setup: Experiment with different accessories and modifications to enhance your VR experience. This may include adding a comfort strap, lens protectors, or even upgrading to a more advanced VR headset if you find yourself becoming a VR enthusiast.
10. Stay up to date: Stay informed about the latest VR apps, updates, and advancements in virtual reality technology. Follow VR news websites, join VR communities, and regularly check for updates in the App Store for new content and improved features.
By following these tips and tricks, you can make the most of your VR headset and iPhone combination. Prepare to be amazed as you delve into incredible virtual worlds and enjoy the immersive experience that VR has to offer.
Troubleshooting common issues with VR headsets and iPhones
Using a VR headset with your iPhone can be an amazing experience, but like any technology, it may occasionally encounter issues. Here, we’ll address some common problems that users may encounter with VR headsets and iPhones, along with troubleshooting steps:
1. Connectivity issues: If your VR headset is not connecting properly to your iPhone, first ensure that the connections are secure. Try disconnecting and reconnecting the cables or restarting both the headset and the iPhone. If the problem persists, check for firmware updates for the headset or consult the manufacturer’s support documentation.
2. Excessive heat: Extended use of VR apps can cause iPhones to heat up. If your iPhone becomes uncomfortably hot, take a break from using VR and allow it to cool down. You can also try removing the iPhone case or reducing the graphics settings of the VR app to lower the device’s temperature.
3. Motion sickness: Some users may experience motion sickness or discomfort while using VR headsets. To reduce the likelihood of motion sickness, take regular breaks, start with shorter VR sessions, and gradually increase the duration. Adjusting graphics settings, using a fan for better air circulation, or trying different VR apps with smoother movement may also help alleviate symptoms.
4. Blurriness or poor image quality: If the VR image appears blurry or lacks clarity, check the lenses for dirt, smudges, or scratches. Clean them with a microfiber cloth specifically designed for cleaning lenses. Adjust the positioning and IPD settings of the headset to ensure optimal visual clarity. If the problem persists, check if the VR app or game has graphics settings that can be adjusted for better image quality.
5. Lack of responsiveness: If you’re experiencing lag or delays in the VR app’s responsiveness, ensure that your iPhone has enough available storage and memory. Close unnecessary background apps and clear cache data to free up resources. If the issue persists, try reinstalling the VR app or restarting your iPhone.
6. Battery drain: VR experiences can be demanding on the iPhone’s battery. To conserve battery life, close any unnecessary background apps, lower display brightness, and limit the use of power-intensive features like haptic feedback and vibrations. Investing in a portable battery pack can also provide additional power during extended VR sessions.
7. App compatibility issues: Some VR apps may not be fully compatible with certain iPhone models. Before downloading an app, check its compatibility requirements and ensure that your iPhone meets the specifications. If an app is not working correctly, try updating the app to the latest version or contacting the app’s developer for support.
If you encounter any other issues or problems, it’s always helpful to consult the VR headset’s documentation or reach out to the manufacturer’s support team. Additionally, seeking assistance from online communities or forums dedicated to VR can provide valuable insights and solutions to troubleshooting VR-related issues.
By following these troubleshooting tips, you can overcome common challenges and enjoy a smooth and immersive VR experience with your iPhone and VR headset.
Conclusion
Using a VR headset with your iPhone allows you to enter a whole new world of immersive experiences. Whether you’re exploring virtual landscapes, playing games, or engaging in educational content, the combination of your iPhone and VR headset opens up endless possibilities.
In this guide, we’ve covered the key aspects of using a VR headset with your iPhone. From choosing the right headset to calibrating it, installing VR apps, adjusting settings, and troubleshooting common issues, we’ve provided you with the knowledge and tools to enhance your VR experience.
Remember to take breaks, keep your devices charged, and experiment with different VR apps and genres to discover what captivates and entertains you the most. Consider sharing the excitement with others and staying up to date with the latest advancements in VR technology.
While immersive VR experiences continue to evolve, it’s essential to stay attuned to safety guidelines, comfort, and personal preferences in order to make the most of your journey into the virtual realm.
So, put on your VR headset, grab your iPhone, and embark on an incredible adventure where your imagination can roam free in the exciting world of virtual reality!