Introduction
Welcome to the world of networking where the use of two routers in one house has become a popular choice among tech-savvy individuals. Whether you are a household with multiple devices or have a large property that requires extended coverage, setting up two routers can provide you with enhanced internet connectivity and better network management.
Why settle for one router when you can amplify your internet signal and improve your network’s performance? By strategically placing and configuring two routers, you can achieve seamless connectivity throughout your home, eliminate dead zones, and optimize your overall internet experience.
In this guide, we will walk you through the steps of setting up two routers in your house. We will cover the initial setup of the main router, the selection and placement of the secondary router, and the necessary configurations to ensure both routers work harmoniously together.
Before we dive into the technical details, it is important to note that setting up two routers is not overly complicated. With the right equipment and a basic understanding of networking principles, you’ll be well-equipped to create a robust and efficient home network.
So, if you’re ready to unleash the full potential of your internet connection and enjoy unparalleled connectivity throughout your home, let’s get started with setting up two routers in one house!
Why Use Two Routers?
You might be wondering why you would need two routers in your house when one seems to do the job just fine. Well, there are several reasons why using two routers can be beneficial:
- Expanded Coverage: One of the main advantages of using two routers is the extended coverage they provide. If you have a large house or multiple floors, a single router may not be able to reach every corner effectively. By strategically placing a secondary router, you can eliminate dead zones and ensure seamless connectivity throughout your home.
- Improved Connection Speed: When multiple devices are connected to a single router, the network’s performance can be impacted. With two routers, you can distribute the network load more evenly, resulting in improved connection speeds and reduced latency. This is especially useful if you have a household with heavy internet users or if you frequently stream high-definition content or play online games.
- Network Segmentation: Using two routers allows you to create separate network segments for different purposes. For example, you can dedicate one router for your personal devices and another for Internet of Things (IoT) devices like smart home appliances and security cameras. This segregation helps enhance security and ensures that traffic from one network segment does not interfere with the other.
- Better Network Management: With two routers, you have more control over your home network. You can assign specific devices to a particular router, prioritize bandwidth for certain devices or applications, and easily manage and monitor the network settings. This level of control enables you to optimize your internet usage and ensure a smooth online experience.
- Guest Network: Setting up a separate guest network is easier with two routers. The main router can be used for your private network, while the secondary router can be configured to create a dedicated guest network. This allows you to provide internet access to guests without compromising the security of your primary network.
By utilizing two routers in your house, you can enjoy enhanced coverage, improved internet speeds, better network segmentation, and enhanced network management. So, if you value a strong and reliable internet connection, using two routers is definitely worth considering.
Router 1: Setting up the Main Router
The first step in setting up two routers in your house is to configure the main router. The main router acts as the primary device that connects to your internet service provider (ISP) and controls the network settings. Follow these steps to set up the main router:
- Step 1: Selecting the Main Router: Choose a router that suits your needs in terms of range, speed, and features. Look for a router that supports dual-band or tri-band frequencies, as this will provide a more robust wireless connection. It’s also important to choose a router that has enough Ethernet ports to accommodate your wired devices.
- Step 2: Placement of the Main Router: Find a central location for your main router. This will ensure that the Wi-Fi signal is evenly distributed throughout your house. Avoid placing the router near objects that can interfere with the signal, such as large metal appliances or thick walls. Ideally, the main router should be positioned at a higher elevation, such as on a shelf or mounted on a wall.
- Step 3: Connecting the Main Router: Begin by connecting one end of the Ethernet cable to the WAN (or Internet) port of the main router and the other end to the modem provided by your ISP. This will establish the connection between your router and the internet. If your main router supports Power over Ethernet (PoE), you can also connect it to a power source using an Ethernet cable.
- Step 4: Configuring the Main Router: Access the router’s administration interface through a web browser by entering the default IP address (usually found in the router’s manual), or by typing “routerlogin.net” or “192.168.1.1” in the browser’s address bar. Enter the login credentials to access the router’s settings. Configure the Wi-Fi network name (SSID) and password, as well as any other desired settings, such as parental controls or guest network access.
Once you have completed these steps, your main router is ready to provide internet connectivity to your devices. In the next section, we will guide you through setting up the secondary router to complement the main router and extend your network coverage.
Step 1: Selecting the Main Router
When setting up two routers in your house, selecting the right main router is crucial. The main router acts as the primary device that connects to your internet service provider (ISP) and controls the network settings. Here are some factors to consider when selecting your main router:
- Range and Coverage: Consider the size of your house and the range you need for Wi-Fi coverage. Look for a router that offers a long-range signal and can effectively cover all areas of your home, including any outdoor areas you want to have Wi-Fi access.
- Speed and Performance: Check the router’s specifications to ensure it supports the latest wireless standards like 802.11ac or 802.11ax (Wi-Fi 6) for faster speeds and improved performance. If you have a high-speed internet connection, ensure that the router can handle the bandwidth without compromising speed.
- Number of Ethernet Ports: Consider the number of wired devices you’ll be connecting to the main router. If you have several devices that require a wired connection, make sure the router has enough Ethernet ports to accommodate them.
- Security Features: Check for security features like WPA3 encryption, firewall capabilities, and built-in malware protection. These features can help safeguard your network and protect your data from unauthorized access.
- Additional Features: Look for any additional features that may be important to you, such as parental controls, USB ports for printer or file sharing, Quality of Service (QoS) settings for prioritizing certain types of traffic, or support for virtual private networks (VPNs).
Research different router models, read customer reviews, and compare the specifications to find the main router that best meets your needs. It’s important to find a balance between affordability and functionality to ensure you get a reliable and efficient router for your home network.
Once you have selected the main router, you can proceed to the next steps in setting up your two-router configuration. In the following sections, we will cover the placement, connection, and configuration of the main router to create a strong and reliable home network.
Step 2: Placement of the Main Router
The placement of your main router plays a significant role in ensuring optimal Wi-Fi coverage and performance throughout your house. Here are some important considerations when determining the placement of your main router:
- Central Location: Ideally, place the main router in a central location within your house, as this allows for more even distribution of the Wi-Fi signal. This can help minimize dead zones and ensure that all areas receive a strong and reliable connection.
- Avoid Obstacles: Avoid placing the router near objects that can interfere with the Wi-Fi signal, such as thick walls, metal surfaces, large appliances, or electrical equipment. These obstructions can weaken the signal and result in poor connectivity. If possible, position the router away from these obstacles to ensure optimal signal strength.
- Elevation: It is generally recommended to position the main router at a higher elevation, such as on a shelf or mounted on a wall. This helps improve the coverage range by allowing the Wi-Fi signal to propagate more effectively throughout the house. Avoid placing the router on the floor or in low-lying areas, as this can limit the signal’s reach.
- Minimize Interference: Keep the router away from sources of interference, such as cordless phones, microwaves, baby monitors, or other wireless devices that operate on similar frequencies. These devices can cause signal interference and impact the performance of your Wi-Fi network.
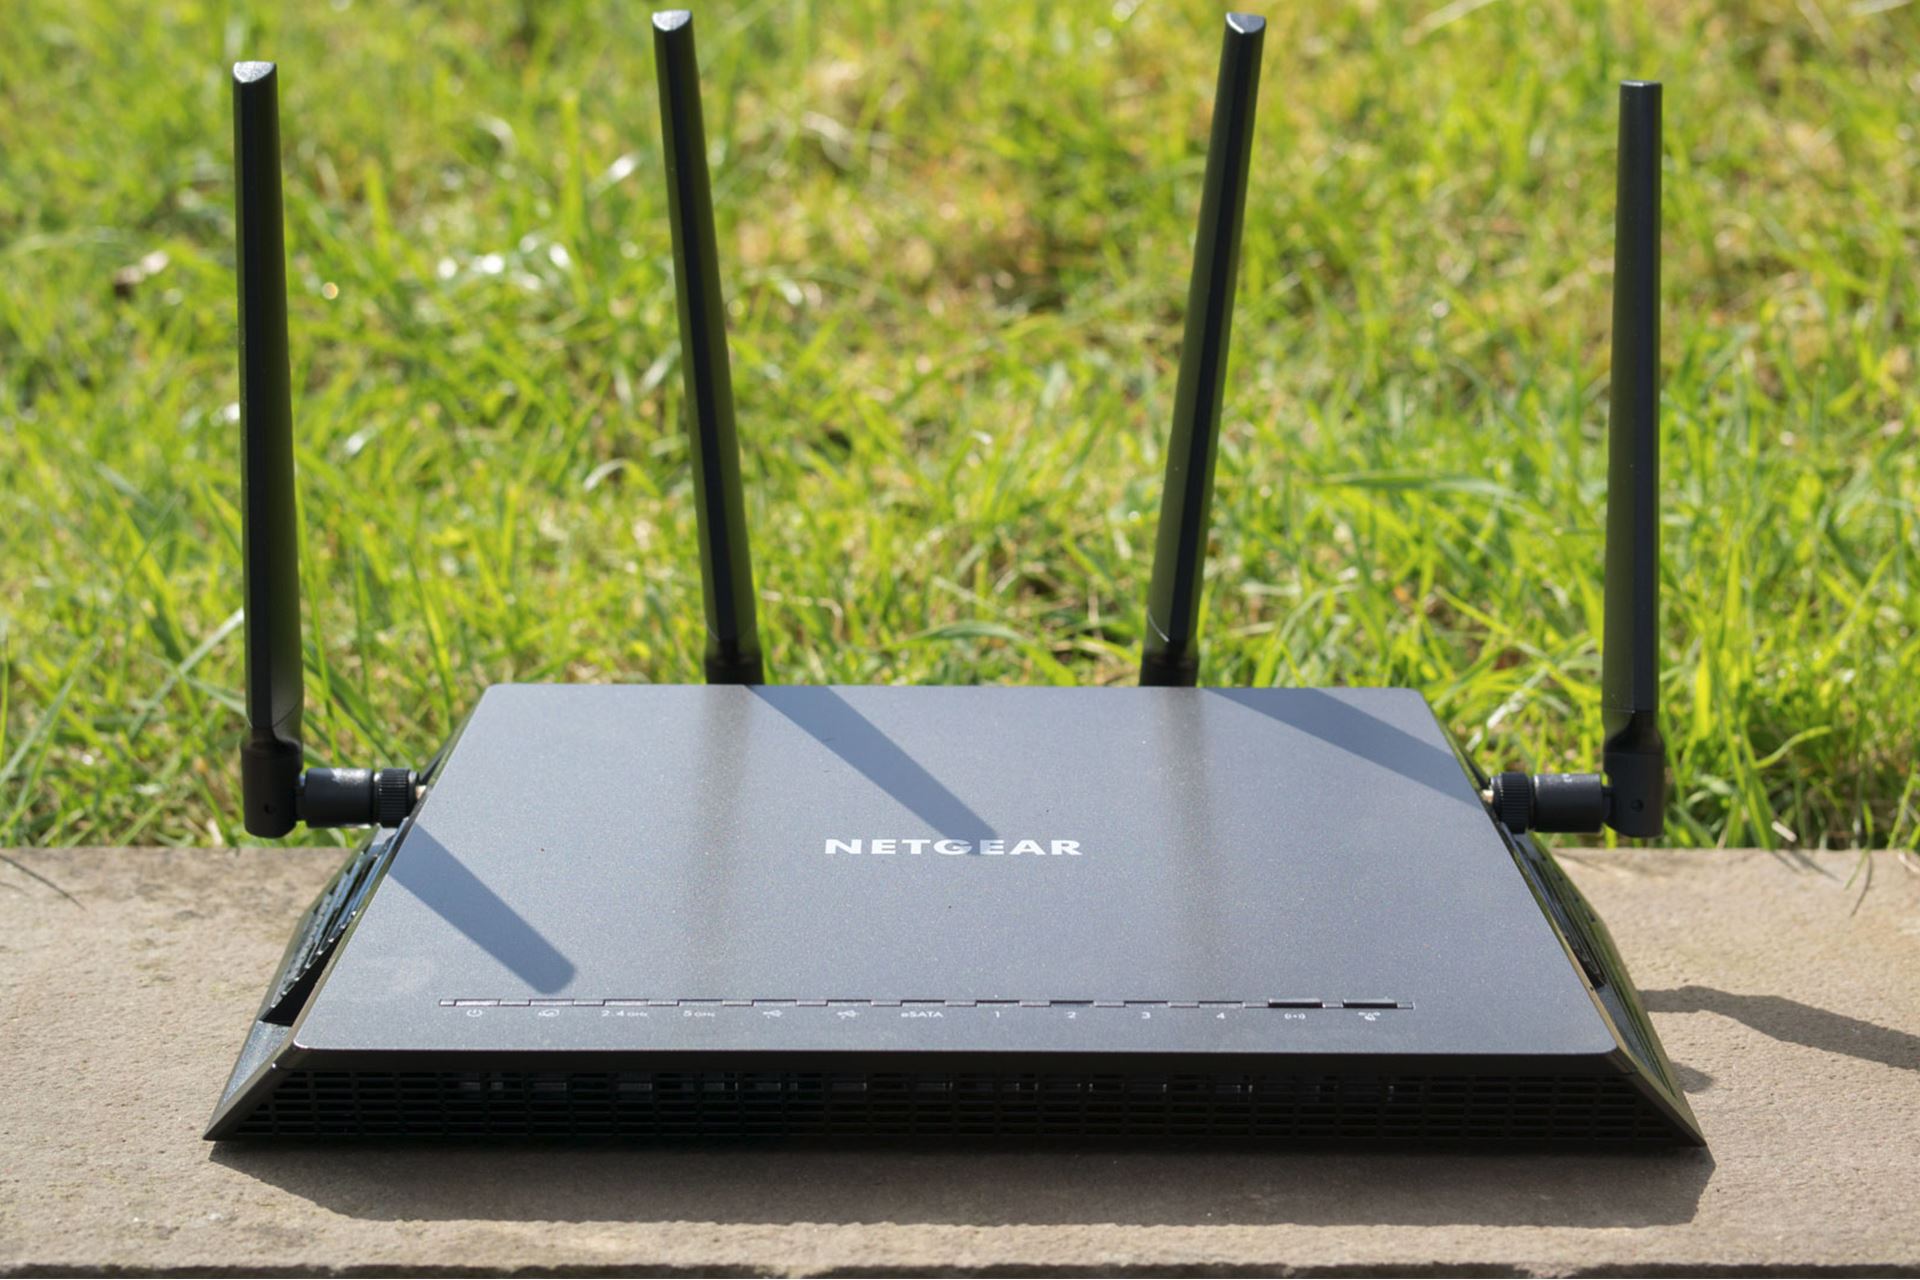
- Consider External Antennas: If your main router has external antennas, position them in a way that they are perpendicular to each other. This configuration allows for better signal coverage in different directions. Adjust the orientation of the antennas to maximize coverage in areas where you need a stronger signal.
By carefully considering these placement guidelines, you can maximize the coverage and performance of your main router. Remember, experimentation may be required to find the optimal placement that works best for your specific environment. Once you have determined the ideal location for your main router, you can proceed to the next steps of the setup process.
Step 3: Connecting the Main Router
Now that you have selected the main router and determined its placement, it’s time to connect it to your internet service provider (ISP) and establish the connection. Follow these steps to connect your main router:
- Locate the WAN (or Internet) Port: Identify the WAN port on the main router. This port is typically labeled and may be a different color or distinct from the other Ethernet ports.
- Connect the Ethernet Cable: Take one end of an Ethernet cable and plug it into the WAN port of the main router. The other end of the cable should be connected to the modem provided by your ISP. This connection establishes the link between the router and the internet.
- Power On: Plug the main router into a power outlet using the provided power adapter. Make sure the router is receiving power and the indicator lights on the front panel are lit up. It may take a few moments for the router to fully power on and establish a connection to the internet.
- Modem Configuration (if required): In some cases, you may need to configure the modem provided by your ISP to work with the main router. If necessary, consult the user manual or contact your ISP for specific instructions on configuring the modem. This step may involve entering your ISP-provided credentials or adjusting certain settings.
Once the main router is connected to the modem and powered on, it will establish a connection to your ISP and provide internet access to your devices. Check the router’s LED indicators to ensure that it is successfully connected to the internet. It’s also a good idea to test the internet connectivity by connecting a device, such as a laptop or smartphone, to the Wi-Fi network.
With the main router set up and connected, you are one step closer to creating a robust and efficient home network. In the next step, we will guide you through the process of configuring the main router to ensure seamless connectivity and customize network settings to suit your needs.
Step 4: Configuring the Main Router
After connecting the main router to the internet, the next step is to configure its settings to ensure seamless connectivity and customize the network according to your preferences. Follow these steps to configure the main router:
- Access the Router’s Administration Interface: Open a web browser on a device connected to the main router’s network and enter the default IP address of the router in the address bar. Common default IP addresses include “192.168.0.1” or “192.168.1.1” (refer to the router’s documentation for the specific IP address).
- Log in to the Router: Enter the login credentials to access the router’s administration interface. Check the router’s manual or documentation for the default username and password. If you have changed the login credentials previously, use the updated information to log in.
- Configure Wi-Fi Network Settings: Once logged in, navigate to the wireless settings section. Here, you can set the Wi-Fi network name (SSID) and password. Choose a unique SSID that makes it easy for you to identify your network. Use a strong password that includes a combination of letters, numbers, and special characters to secure your Wi-Fi network.
- Enable Encryption: To protect your network, ensure that encryption is enabled. Select the latest encryption protocol supported by your router and devices, such as WPA2 or WPA3. This helps to safeguard your network from unauthorized access and ensures that transmitted data remains secure.
- Customize Additional Settings: Explore the various settings available in the router’s administration interface. This includes options like Quality of Service (QoS) settings to prioritize certain types of traffic, parental controls to manage and restrict internet access for specific devices or times, firewall settings to enhance network security, and port forwarding to enable remote access to certain applications or devices.
Once you have configured the desired settings, remember to save the changes made in the router’s administration interface. The router will then restart and apply the new settings. Test the Wi-Fi connectivity on your devices to ensure they connect to the network using the configured SSID and password.
It’s a good practice to periodically check and update the router’s firmware. Manufacturers constantly release firmware updates to improve security, add new features, and enhance performance. Refer to the router’s documentation or the manufacturer’s website for instructions on how to update the firmware.
With the main router successfully configured, you have completed the setup process for the primary router. In the following sections, we will guide you through setting up the secondary router to amplify your network coverage and create a robust home network with seamless connectivity.
Router 2: Setting up the Secondary Router
Now that the main router is up and running, it’s time to set up the secondary router. The secondary router will work in conjunction with the main router to extend your network’s coverage and provide a seamless Wi-Fi experience throughout your home. Follow these steps to set up the secondary router:
- Step 1: Selecting the Secondary Router: Choose a secondary router that is compatible with your main router and meets your specific needs. Ideally, opt for a router that supports the same wireless standards as your main router to ensure compatibility and seamless communication between the two devices.
- Step 2: Placement of the Secondary Router: Determine an optimal location for the secondary router that will help enhance the Wi-Fi coverage in areas where the main router’s signal might be weaker. Ideally, place the secondary router in a central location to maximize coverage throughout your home. Avoid obstructions and interference-causing objects, just like you did with the main router.
- Step 3: Connecting the Secondary Router: Connect an Ethernet cable from one of the LAN ports of the main router to the WAN (or Internet) port of the secondary router. This connection will allow the secondary router to receive the internet signal from the main router and extend the network’s coverage range.
- Step 4: Configuring the Secondary Router: Access the administration interface of the secondary router using the IP address provided in its manual. Configure the Wi-Fi settings of the secondary router, including the network name (SSID) and password. Ensure that the SSID is different from that of the main router to avoid confusion.
- Step 5: Bridge Mode: Depending on the secondary router model, you may need to enable Bridge Mode. Bridge Mode allows the secondary router to function as an extension of the main router, ensuring seamless connectivity and proper network management across both devices. Consult the secondary router’s manual or the manufacturer’s website for instructions on how to enable and configure Bridge Mode.
Once you have completed these steps, the secondary router will extend the Wi-Fi coverage of your network, providing a smoother and more reliable Internet connection in areas that were previously lacking in signal strength.
Keep in mind that the secondary router will act as a relay for the main router’s Wi-Fi signal and will be on the same network. It will not require a separate internet connection unless you plan to set up a completely separate network segment. The devices connected to the secondary router will function as if they were connected directly to the main router, allowing seamless communication between devices across both routers.
With both routers set up and configured, you now have a robust and extended home network that offers improved coverage and performance. In the following section, we will provide troubleshooting tips to help you overcome common issues that may arise during the setup process.
Step 1: Selecting the Secondary Router
Choosing the right secondary router is crucial for setting up a reliable and efficient two-router configuration. The secondary router works in tandem with the main router to extend the network coverage and ensure seamless connectivity throughout your home. Consider the following factors when selecting your secondary router:
- Compatibility: Ensure that the secondary router is compatible with your main router. Check if they support the same wireless standards (such as 802.11ac or 802.11ax) and can communicate effectively with each other. Compatibility ensures smooth integration and better network performance.
- Wireless Standards and Frequencies: Look for a secondary router that supports the latest wireless standards. This ensures faster speeds, better range, and improved performance. Additionally, consider routers that offer dual-band or tri-band frequencies. Dual-band routers operate on both 2.4 GHz and 5 GHz frequencies, while tri-band routers operate on 2.4 GHz and two separate 5 GHz frequencies. This allows for more devices to connect simultaneously without congestion.
- Range and Coverage: Assess the coverage needs of your home and choose a secondary router with sufficient range to cover any areas with weaker Wi-Fi signals. Consider factors like the size of your house, number of floors, and presence of obstacles that can affect Wi-Fi signal strength, such as walls and furniture.
- Number of Ethernet Ports: If you have devices that require a wired internet connection, ensure that the secondary router has enough Ethernet ports to accommodate them. This allows you to connect devices via Ethernet for faster and more reliable connections.
- Price and Budget: Determine your budget for the secondary router and look for options that offer the best value for money. Consider your specific needs and prioritize features that are important to you, such as range, speed, and additional functionalities.
Research different router models, read customer reviews, and compare specifications to find the secondary router that best fits your requirements. It’s important to find a balance between cost and functionality to ensure that you get a reliable and efficient router for extending your network coverage.
By selecting the right secondary router, you can complement your main router, extend network coverage, and create a seamless Wi-Fi experience throughout your home. In the following steps, we will guide you through placing, connecting, and configuring the secondary router to complete the setup process.
Step 2: Placement of the Secondary Router
Proper placement of the secondary router is essential to ensure optimal network coverage and performance in areas where the main router’s signal is weaker. Consider the following factors when determining the placement of your secondary router:
- Signal Strength: Identify areas in your home where the Wi-Fi signal from the main router is weaker or does not reach. These areas, commonly known as dead zones, require improved coverage from the secondary router.
- Distance from the Main Router: Place the secondary router at an appropriate distance from the main router. The exact distance will vary depending on your home’s layout and the strength of the main router’s signal. Experiment with different positions to find the optimal distance for the best signal reception from the main router.
- Obstacles and Interference: Avoid placing the secondary router near physical obstacles such as walls, large furniture, or appliances that may interfere with the Wi-Fi signal. These obstructions can weaken the signal and reduce the coverage range. Position the secondary router away from sources of interference, such as cordless phones or microwave ovens, to ensure a strong and consistent signal.
- Centralized Location: Aim to place the secondary router in a centralized location within your home. This helps ensure that the extended Wi-Fi signal reaches all areas of your house more efficiently. Consider placing it in the middle of the floorplan or on an upper level, depending on the layout of your home.
- Antenna Orientation: If your secondary router has external antennas, it’s important to adjust their orientation. Position the antennas perpendicular to each other to maximize signal coverage in different directions. Experiment with different antenna positions to find the optimal configuration for the best coverage.
By strategically placing the secondary router, you can effectively extend the network coverage and eliminate Wi-Fi dead zones in your home. Remember to test the Wi-Fi signal in different areas after placing the secondary router to ensure that the signal strength has improved. If necessary, adjust the placement until you achieve the desired coverage throughout your home.
With the secondary router properly positioned, you can proceed to the next step of connecting it to the main router to establish a seamless network extension. The following section will guide you through the connection process to complete the setup of your two-router configuration.
Step 3: Connecting the Secondary Router
To extend your network coverage and integrate the secondary router into your two-router configuration, follow these steps to establish the connection:
- Locate the WAN (or Internet) Port: Identify the WAN (or Internet) port on the secondary router. This port is typically labeled and may be a different color or distinct from the other Ethernet ports.
- Connect an Ethernet Cable: Take one end of an Ethernet cable and plug it into the WAN (or Internet) port on the secondary router. The other end of the cable should be connected to one of the LAN ports on the main router. This connection allows the secondary router to receive the internet signal from the main router and extend the network coverage.
- Power On the Secondary Router: Plug the secondary router into a power outlet using the provided power adapter. Ensure that the router is receiving power and that the indicator lights on the front panel are illuminated. The router will power on and establish a connection with the main router.
- Bridge Mode (if applicable): Depending on the secondary router model, you may need to enable Bridge Mode. Bridge Mode allows the secondary router to function as an extension of the main router, ensuring seamless connectivity and unified network management across both devices. Refer to the secondary router’s manual or the manufacturer’s website for instructions on how to enable and configure Bridge Mode.
Once the secondary router is connected to the main router and powered on, it will establish communication and extend the Wi-Fi coverage of your network. The devices connected to the secondary router can seamlessly communicate with those connected to the main router, creating a unified network experience.
It’s important to note that the secondary router will not require a separate internet connection unless you intend to set up a completely isolated network segment. The secondary router acts as an extension, amplifying the main router’s signal and enhancing coverage throughout your home.
With the secondary router successfully connected to the main router, you have completed the setup process for your two-router configuration. In the following section, we will provide troubleshooting tips to address common issues that may arise during the setup or afterward.
Step 4: Configuring the Secondary Router
Once you have connected the secondary router to the main router, the next step is to configure its settings to ensure seamless connectivity and optimize its performance. Follow these steps to configure the secondary router:
- Access the Secondary Router’s Administration Interface: Open a web browser on a device connected to the secondary router’s network and enter the default IP address of the router in the address bar. The default IP address is typically mentioned in the router’s manual or can be found on the manufacturer’s website.
- Log in to the Router: Enter the login credentials to access the administration interface of the secondary router. Refer to the router’s manual or documentation for the default username and password. Change the login credentials to enhance security if you haven’t done so already.
- Configure Wi-Fi and Network Settings: Navigate to the wireless settings section of the secondary router’s administration interface. Set the Wi-Fi network name (SSID) and password, ensuring that they are different from those of the main router. Configure other network settings such as IP addressing, DHCP settings, and any other desired configurations to ensure compatibility with your network setup.
- Wireless Mode and Channel: Set the wireless mode on the secondary router to match that of the main router to ensure compatibility. Set the channel to a different frequency than that of the main router to avoid interference and optimize performance.
- Security and Encryption: Enable security protocols such as WPA2 or WPA3 on the secondary router to ensure the privacy and security of your network. Select a strong password that includes a combination of letters, numbers, and special characters.
- Advanced Configuration: Explore the advanced settings available on the secondary router’s administration interface. This may include port forwarding, Quality of Service (QoS) settings, DNS configuration, or VPN setup. Customize the settings according to your specific requirements.
Once you have made the necessary configurations, save the changes in the administration interface of the secondary router. The router will apply the new settings, and the extended Wi-Fi network will be ready for use.
Remember to test the connectivity and ensure that devices can seamlessly connect to the Wi-Fi network extended by the secondary router. Troubleshoot any connectivity issues that may arise by checking the configurations and adjusting settings if needed.
With the secondary router successfully configured, you have completed the setup process for your two-router configuration. Enjoy the extended Wi-Fi coverage and enhanced network performance provided by your dual-router setup.
Troubleshooting Tips
Setting up two routers in your house can come with its fair share of challenges. If you encounter any issues during or after the setup process, here are some troubleshooting tips to help you resolve common problems:
- Check Physical Connections: Ensure that all cables are securely connected to the appropriate ports on both routers. Verify that the power cables are plugged in and that the indicator lights on the routers are illuminated.
- Restart the Routers: If you are experiencing connectivity issues, try restarting both the main and secondary routers. Power them off, wait for a few seconds, and then power them back on. This simple reboot can resolve many minor issues.
- Verify IP Addresses and Subnets: Ensure that both routers have unique IP addresses and that their subnets do not overlap. The main and secondary routers should have different IP addresses within the same IP address range (e.g., 192.168.1.1 for the main router and 192.168.2.1 for the secondary router).
- Configure DHCP Settings: If you encounter issues with devices obtaining IP addresses or connecting to the network, check the DHCP settings on both routers. Ensure that DHCP is enabled on the main router and disabled on the secondary router to prevent IP conflicts.
- Confirm Wireless Settings: Double-check the SSID and passwords of both routers to ensure that they are correctly configured and match the settings entered on your devices. Mistyped or mismatched wireless settings can prevent devices from connecting to the network.
- Adjust Placement and Antenna Orientation: If you still experience weak or intermittent Wi-Fi signals in certain areas, try repositioning the routers to improve coverage. Experiment with antenna orientation, especially on the main router, to optimize signal strength and range.
- Update Firmware: Check for firmware updates for both routers on the manufacturers’ websites. Outdated firmware can cause compatibility issues and affect performance. Update the firmware to the latest version to ensure stability, security, and improved functionality.
- Reset to Factory Settings: If all else fails and you have exhausted all troubleshooting options, you can consider resetting the routers to their factory default settings. Keep in mind that this will erase any custom configurations, so make sure to document the settings before resetting.
- Consult Manufacturer Support: If the issues persist or if you encounter more complex problems, reach out to the manufacturers’ technical support for assistance. They can provide specialized guidance based on the specific routers you are using.
By following these troubleshooting tips, you can overcome common issues that may arise during the setup or usage of your two-router configuration. Remember to be patient and methodical when resolving any problems, and don’t hesitate to seek professional help if needed.
Conclusion
Setting up two routers in your house provides an effective solution for extending Wi-Fi coverage, improving network performance, and managing your home network more efficiently. By following the steps outlined in this guide and troubleshooting any issues that arise, you can create a robust and seamless two-router configuration.
The main router serves as the primary device that connects to your internet service provider (ISP) and controls the network settings. By selecting the right main router, placing it strategically, connecting it properly, and configuring its settings, you can establish a strong foundation for your home network.
The secondary router, when selected carefully and positioned strategically, works in conjunction with the main router to extend Wi-Fi coverage and eliminate dead zones. By connecting and configuring the secondary router correctly, you can enjoy seamless connectivity throughout your home.
Remember to troubleshoot common issues that may arise during the setup process. Checking physical connections, verifying IP addresses and subnets, restarting routers, adjusting placement and antenna orientation, and updating firmware are some of the troubleshooting steps you can take to resolve any problems.
With a well-planned and properly executed two-router setup, you can enjoy expanded coverage, improved connection speeds, better network management, and the ability to create a separate guest network. This enhanced home network provides a seamless online experience for all your connected devices, ensuring reliable connectivity in every corner of your house.
We hope that this guide has provided you with the information and guidance needed to set up two routers in your house. Whether you are dealing with a large property, multiple floors, or simply want to optimize your network performance, a two-router configuration can help you achieve your goals. Embrace the benefits of extended Wi-Fi coverage and enjoy a robust home network tailored to your needs.


