Introduction
Streaming services have revolutionized the way we consume media, and Netflix is undoubtedly one of the most popular platforms for watching movies and TV shows. While watching Netflix on a small screen may be convenient, sometimes you want to experience your favorite content on a larger display. This is where projectors come in handy.
Using Netflix on a projector allows you to enjoy an immersive and cinematic experience from the comfort of your own home. Whether you want to host a movie night with friends or simply relax and binge-watch your favorite series, connecting Netflix to a projector can take your viewing experience to the next level.
In this guide, we will walk you through the steps to use Netflix on a projector, so you can enjoy your favorite content on a larger screen. From connecting the projector to your device to adjusting the settings, we will cover everything you need to know to get started.
Before diving into the details, it’s important to note that the specific steps may vary depending on the type of projector and device you are using. However, the general principles and guidelines discussed in this article should be applicable to most setups.
So, if you’re ready to elevate your movie-watching experience, let’s get started with connecting your projector to your device.
Connect a Projector to a Device
Before you can start using Netflix on a projector, you need to connect the projector to a device that can stream the content. The specific steps will depend on the type of device and projector you have, but we’ll outline the general process below.
1. Check your projector’s available ports: Most projectors have multiple ports, such as HDMI, VGA, or USB. Identify which ports are available on your projector, as this will determine the type of connection you can make.
2. Check your device’s available ports: Similarly, check what ports are available on the device you want to use to stream Netflix. Commonly, devices like laptops, gaming consoles, or streaming devices have HDMI or USB ports.
3. Connect the projector to the device using the appropriate cable: Select the appropriate cable based on the available ports of your projector and device. For example, if both the projector and the device have HDMI ports, use an HDMI cable to establish the connection. If you have different ports, you may need an adapter or converter.
4. Power on the projector and the device: Ensure that both the projector and the device are turned on and ready for use.
5. Select the correct input source on the projector: On your projector, navigate to the input/source settings and select the corresponding port you connected to. For example, if you connected the projector to your device using an HDMI cable, select the HDMI input source.
6. Adjust the aspect ratio: Depending on the aspect ratio of the projected screen, you may need to adjust the aspect ratio settings on your device or projector. This will ensure that the content is displayed correctly.
7. Test the connection: Once the connection is established, play a video or open the Netflix app on your device to see if the content is being displayed on the projector. Adjust the settings as needed until you are satisfied with the image quality.
Remember, the specific steps may vary depending on the brand and model of your projector and device. Consult the user manuals for both devices if you encounter any difficulties or refer to their respective support websites for more information.
Now that you have successfully connected your projector to a device, let’s move on to the next section to ensure that your projector is compatible with Netflix streaming.
Ensure Projector Support for Netflix Streaming
Before you start streaming Netflix on your projector, it’s essential to ensure that your projector is compatible with Netflix and capable of streaming the content. Here are some key points to consider:
1. Check for internet connectivity: Make sure that your projector is connected to the internet. Streaming Netflix requires a stable internet connection, so ensure that your projector has either built-in Wi-Fi or an Ethernet connection for a wired connection.
2. Check for built-in Netflix support: Some projectors come with built-in apps, including Netflix. These projectors often have a dedicated Netflix button on their remote control or a Netflix app pre-installed. If your projector has this feature, simply access the Netflix app and sign in to start streaming directly.
3. Use a streaming device: If your projector doesn’t have native Netflix support, you can connect an external streaming device, such as a Chromecast, Amazon Fire Stick, Roku, or Apple TV. These devices plug into the projector’s HDMI port and allow you to stream Netflix through their respective apps. Connect the streaming device to your projector, set it up, and install the Netflix app. Then, sign in to your Netflix account to start streaming.
4. Check for Netflix certification: Some projectors are certified by Netflix, ensuring optimal compatibility and performance. Look for projectors with the “Netflix Recommended TV” logo or check the manufacturer’s website for information on Netflix compatibility.
5. Check for supported resolutions: Netflix supports different resolutions, including SD (Standard Definition), HD (High Definition), and even 4K Ultra HD. Verify that your projector supports the desired resolution by checking its specifications or user manual. This will ensure that you can fully enjoy the content at the desired quality.
6. Firmware updates: Ensure that your projector’s firmware is up to date. Manufacturers often release firmware updates to improve the device’s compatibility and functionality. Check the projector’s menu settings or the manufacturer’s website for instructions on how to update the firmware if needed.
By following these steps, you can ensure that your projector supports Netflix streaming and have a smooth viewing experience. If you encounter any issues, refer to the projector’s user manual or contact the manufacturer’s customer support for further assistance.
With the compatibility aspect covered, let’s move on to the next section where we will discuss the necessary adjustments to optimize your projector settings for Netflix streaming.
Adjust Projector Settings
Once you have connected your projector to a device and ensured its compatibility with Netflix streaming, the next step is to adjust the projector settings to optimize your Netflix viewing experience. Here are some key settings to consider:
1. Brightness and Contrast: Adjust the brightness and contrast settings on your projector to achieve a well-balanced image. This will ensure that the colors are vibrant and the details are clear while watching Netflix content.
2. Aspect Ratio: Make sure that the projector’s aspect ratio is set correctly to match the content you are streaming. Most Netflix movies and TV shows are formatted in a 16:9 widescreen aspect ratio. Adjust the aspect ratio accordingly to avoid any distorted or stretched images.
3. Image Size and Focus: Adjust the image size and focus on your projector to ensure that the content is displayed clearly and sharply. Use the projector’s zoom and focus controls to achieve the desired image size and sharpness.
4. Keystone Correction: If your projector is positioned at an angle, you may notice some image distortion known as keystone effect. Use the keystone correction feature, usually found in the projector’s settings menu, to correct this distortion and achieve a rectangular image.
5. Color Settings: Projectors often have color settings that allow you to fine-tune the image quality. Experiment with these settings to find the color balance that suits your preference. You may also find preset modes like Cinema or Vivid that enhance the overall image quality.
6. Noise Reduction: Some projectors have a noise reduction feature that reduces digital noise in the image, resulting in a smoother and clearer picture. Enable this feature if available to enhance the visual experience.
7. Display Mode: Projectors usually offer different display modes, such as standard, cinema, or dynamic. These modes optimize the image settings based on the content being displayed. Choose the mode that best suits the Netflix content you’ll be watching.
Remember to consult your projector’s user manual for specific instructions on adjusting these settings, as the process may vary depending on the brand and model. Take the time to experiment with the settings to find the optimal configuration that suits your preferences and provides a captivating Netflix viewing experience.
With the projector settings adjusted to perfection, it’s time to move on to the next section and explore how to enhance your audio experience by connecting a sound system to your projector setup.
Connect a Sound System
To complete your Netflix viewing experience on a projector, it is recommended to connect a sound system or external speakers for enhanced audio quality. While projectors often have built-in speakers, they may not provide the same level of audio immersion. Here are the steps to connect a sound system to your projector:
1. Determine the available audio output options: Check the audio output options on your projector. Common options include 3.5mm audio jack, HDMI ARC (Audio Return Channel), or optical audio output. Ensure your sound system has a corresponding input.
2. Connect the sound system: Using the appropriate audio cable, connect the audio output of the projector to the audio input of your sound system. For example, if both devices have 3.5mm audio jacks, use a 3.5mm audio cable. If the projector has an HDMI ARC port, connect it to the corresponding HDMI input on your sound system.
3. Configure the sound system: Depending on the sound system you have, you may need to adjust its settings to receive audio from the projector. This may involve selecting the correct input source or enabling the ARC feature. Refer to the sound system’s user manual for specific instructions.
4. Test the sound: Play a Netflix video to ensure that the audio is being output through the sound system. Adjust the volume settings on both the projector and the sound system to achieve the desired audio level.
By connecting a sound system, you can enjoy a more immersive and cinematic audio experience while streaming Netflix on your projector. The sound system will provide richer sound quality, including deeper bass and more dynamic range, enhancing the overall viewing experience.
If you don’t have a separate sound system, you can also consider using Bluetooth speakers or wireless headphones. Most projectors have Bluetooth connectivity, allowing you to wirelessly connect and stream audio to compatible devices.
Now that your projector setup is complete with an audio system, it’s time to move on to the next section and learn how to sign in to your Netflix account on the device you have connected to the projector.
Sign in to Netflix on the Device
After connecting your projector and sound system, the next step is to sign in to your Netflix account on the device that is connected to the projector. Here’s how:
1. Ensure that the device is connected to the internet: Confirm that the device you’re using to stream Netflix is connected to the internet. A stable and reliable internet connection is required to access and stream Netflix content.
2. Open the Netflix app or website: Launch the Netflix app on your device or open a web browser and visit the Netflix website (www.netflix.com).
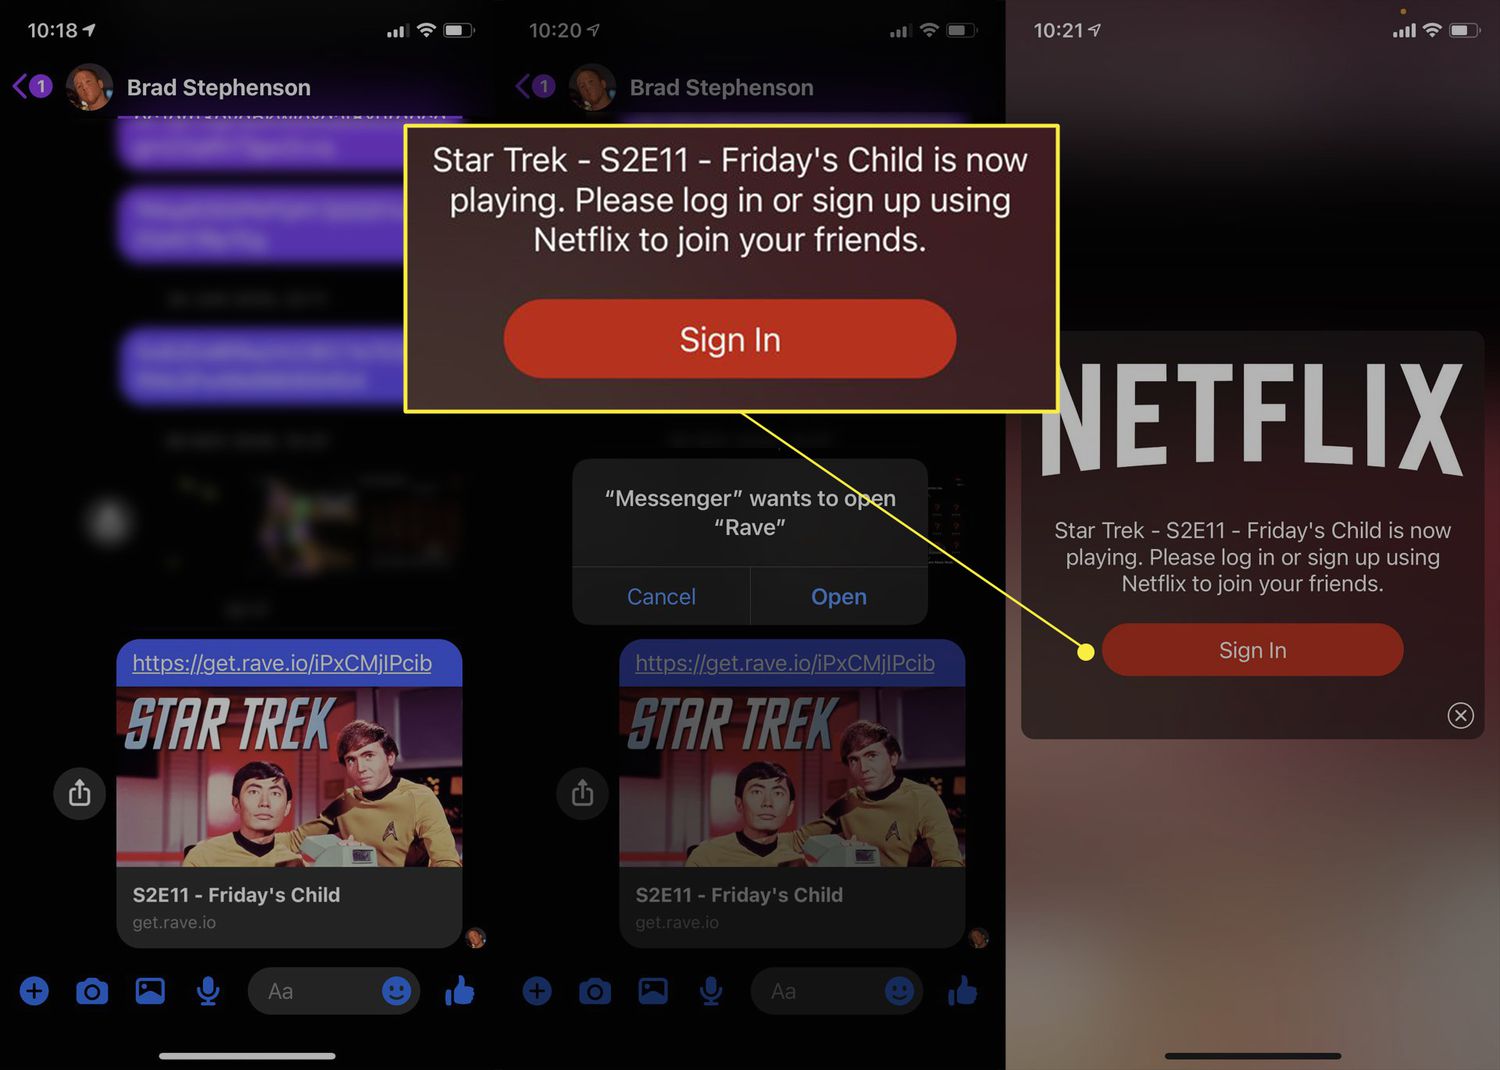
3. Sign in to your Netflix account: Enter your Netflix email address and password to sign in to your account. If you don’t have a Netflix account, you will need to create one by following the on-screen instructions.
4. Verify your account: If prompted, enter the verification code that Netflix sends to your registered email or phone number. This additional step ensures the security of your Netflix account.
5. Select the profile and start streaming: If you have multiple profiles on your Netflix account, choose the profile you want to use for streaming. Select the movie or TV show you wish to watch, and it will begin playing on your projector screen.
It’s important to note that the specific steps may vary slightly depending on the device you’re using and the version of the Netflix app. However, the general process remains the same.
If you encounter any issues during the sign-in process, ensure that you’re using the correct login credentials. If you’ve forgotten your password, you can reset it by following the instructions provided on the Netflix website or app.
Now that you’re signed in to Netflix on your device, let’s move on to the next section to select and play your desired movie or TV show on the projector.
Select and Play a Movie or TV Show
With your Netflix account signed in on the device connected to your projector, it’s time to select and play your desired movie or TV show on the big screen. Here’s how:
1. Browse the Netflix library: Use the Netflix app or website to browse the vast library of movies and TV shows available for streaming. You can explore different genres, popular recommendations, or search for specific titles using the search function.
2. Select a movie or TV show: Once you’ve found a title that interests you, click or tap on it to access its details and playback options. Read the description and check the ratings and reviews to help you make your decision.
3. Choose the playback option: On the movie or TV show details page, you will find playback options such as “Play,” “Add to My List,” or “Watch Trailer.” Select the “Play” option to start streaming the content.
4. Set up subtitles or audio preferences: If you prefer to watch with subtitles or need to adjust the audio settings, look for the “Subtitles” or “Audio” options on the playback screen. Here, you can choose your preferred language, subtitle style, or audio output.
5. Enjoy the movie or TV show: Once you’ve made your selections, sit back, relax, and enjoy the Netflix content on your projector. Adjust the volume on your device or sound system to achieve the desired audio level.
During playback, you can pause, rewind, or fast-forward using the playback controls on your device or the provided remote control. You can also explore additional features like creating playlists, adding titles to your watchlist, or rating and reviewing the content you’ve watched.
Remember, the viewing experience on a larger screen can be more immersive, allowing you to appreciate the visuals and details of the content. Grab some popcorn, get cozy, and enjoy your favorite movies and TV shows in a cinematic manner.
If you encounter any technical issues or playback problems, ensure that your internet connection is stable and try restarting your device or clearing the cache of the Netflix app.
Now that you know how to select and play movies or TV shows on Netflix, let’s explore some troubleshooting tips in the next section to help overcome common issues that you may encounter.
Troubleshooting Tips
While using Netflix on a projector, you may come across some common issues or technical glitches. Here are a few troubleshooting tips to help you overcome them:
1. Slow buffering or playback issues: If you experience slow buffering or frequent interruptions during playback, check your internet connection speed. Ensure that you have a stable and fast internet connection. If the issue persists, try restarting your device, clearing the cache of the Netflix app, or switching to a wired connection if possible.
2. Poor video quality or pixelated images: If the video quality appears poor or pixelated, it could be due to a slow internet connection or a low-quality streaming option selected. Try switching to a lower resolution streaming option in the Netflix settings or upgrading your internet plan for faster speeds.
3. Audio syncing issues: If you notice that the audio and video are not in sync, it may be due to a delay in the audio output or an issue with the projector’s settings. Check the audio delay settings on your sound system or projector and adjust them accordingly to achieve proper synchronization.
4. HDMI connection problems: If you’re using an HDMI connection between the projector and the device, ensure that the HDMI cable is securely connected on both ends. Sometimes, faulty or loose cables can cause signal issues. Try using a different HDMI cable or port if available.
5. App or device updates: Keep your Netflix app and device firmware up to date. Regular updates often include bug fixes, improved compatibility, and new features. Check for updates in the app store or system settings of your device.
6. Check for device compatibility: If you encounter compatibility issues between the device and the projector, verify that both devices support the required resolutions and HDMI standards. Refer to the device and projector’s specifications or contact their respective support teams for assistance.
7. Restart devices: Often, a simple restart can resolve many issues. Restart your projector, streaming device, or computer, and try again.
If the troubleshooting tips mentioned above don’t resolve your issues, consulting the user manual or reaching out to the manufacturer’s customer support for both the projector and device can provide further guidance and solutions.
Now that you’re equipped with troubleshooting tips, you can easily tackle any issues that may arise while using Netflix on your projector. In the next section, we’ll wrap up our guide with a brief summary of the key points discussed.
Conclusion
Streaming Netflix on a projector opens up a whole new world of immersive and cinematic entertainment. By following the steps outlined in this guide, you can easily connect a projector to your device, ensure compatibility with Netflix, adjust the projector settings, connect a sound system for enhanced audio, sign in to your Netflix account, and start enjoying your favorite movies and TV shows on a larger screen.
Remember to check the available ports and connectivity options on your projector and device, as well as the supported resolutions and Netflix compatibility. Adjust the projector settings to optimize the image quality and aspect ratio, and connect a sound system for a more immersive audio experience.
Sign in to your Netflix account on the device, browse their extensive library, and select the content you want to watch. If you encounter any technical issues, refer to the troubleshooting tips provided to overcome common problems.
With your projector setup complete, you can now indulge in movie nights, binge-watch your favorite TV shows, and enjoy Netflix in a whole new way. So grab some popcorn, dim the lights, and get ready for a captivating and cinematic Netflix experience on your projector!


