Introduction
A Japanese keyboard can be a useful tool for individuals who need to type in Japanese characters, whether it is for communication, writing documents, or learning the language. While the concept of using a Japanese keyboard may initially seem intimidating, with a proper understanding of its features and functions, typing in Japanese can become a seamless and efficient process.
In this guide, we will explore the various steps and techniques involved in using a Japanese keyboard. We will cover how to set up a Japanese keyboard on your device, as well as provide detailed instructions on typing different types of Japanese characters, such as Hiragana, Katakana, and Kanji.
We will also discuss the Romaji input method, which allows users to type in Roman characters that are automatically converted into Japanese characters. Additionally, we will explain the functionality of the IME (Input Method Editor) Pad and how it can assist in typing complex characters.
Furthermore, we will delve into using special characters and symbols that are often required for various purposes, including punctuation, emoticons, and foreign language characters. Lastly, we will explore the process of switching between English and Japanese keyboard modes.
By the end of this guide, you will have a comprehensive understanding of how to utilize a Japanese keyboard effectively, enabling you to type in Japanese with ease and confidence.
Step 1: Setting up a Japanese Keyboard
Before you can start using a Japanese keyboard, you need to ensure that it is properly set up on your device. Follow these steps to set up a Japanese keyboard:
- Open the Settings on your device and navigate to the Language & Input section.
- Select the Keyboard option and choose the Add Keyboard option.
- Scroll through the list of available keyboards and locate the Japanese Keyboard option. Tap on it to enable it.
- Once enabled, you can customize the Japanese keyboard settings, such as the keyboard layout and input methods.
- Make sure to set the Japanese keyboard as your default input method to ensure that it is readily accessible whenever you need to type in Japanese.
After completing these steps, you have successfully set up a Japanese keyboard on your device. Now you can proceed to the next step of typing different Japanese characters.
It’s important to note that the exact steps to set up a Japanese keyboard may vary depending on the device and operating system you are using. However, the general process outlined above should be applicable to most devices.
Once you have set up the Japanese keyboard, you can start exploring the various features and functions it offers to enhance your typing experience in Japanese.
Step 2: Typing Hiragana Characters
Hiragana is one of the fundamental writing systems in the Japanese language. It consists of phonetic characters that are used to write native words, verb endings, particles, and more. To type Hiragana characters on a Japanese keyboard, follow these steps:
- Ensure that the Japanese keyboard is selected as your active input method.
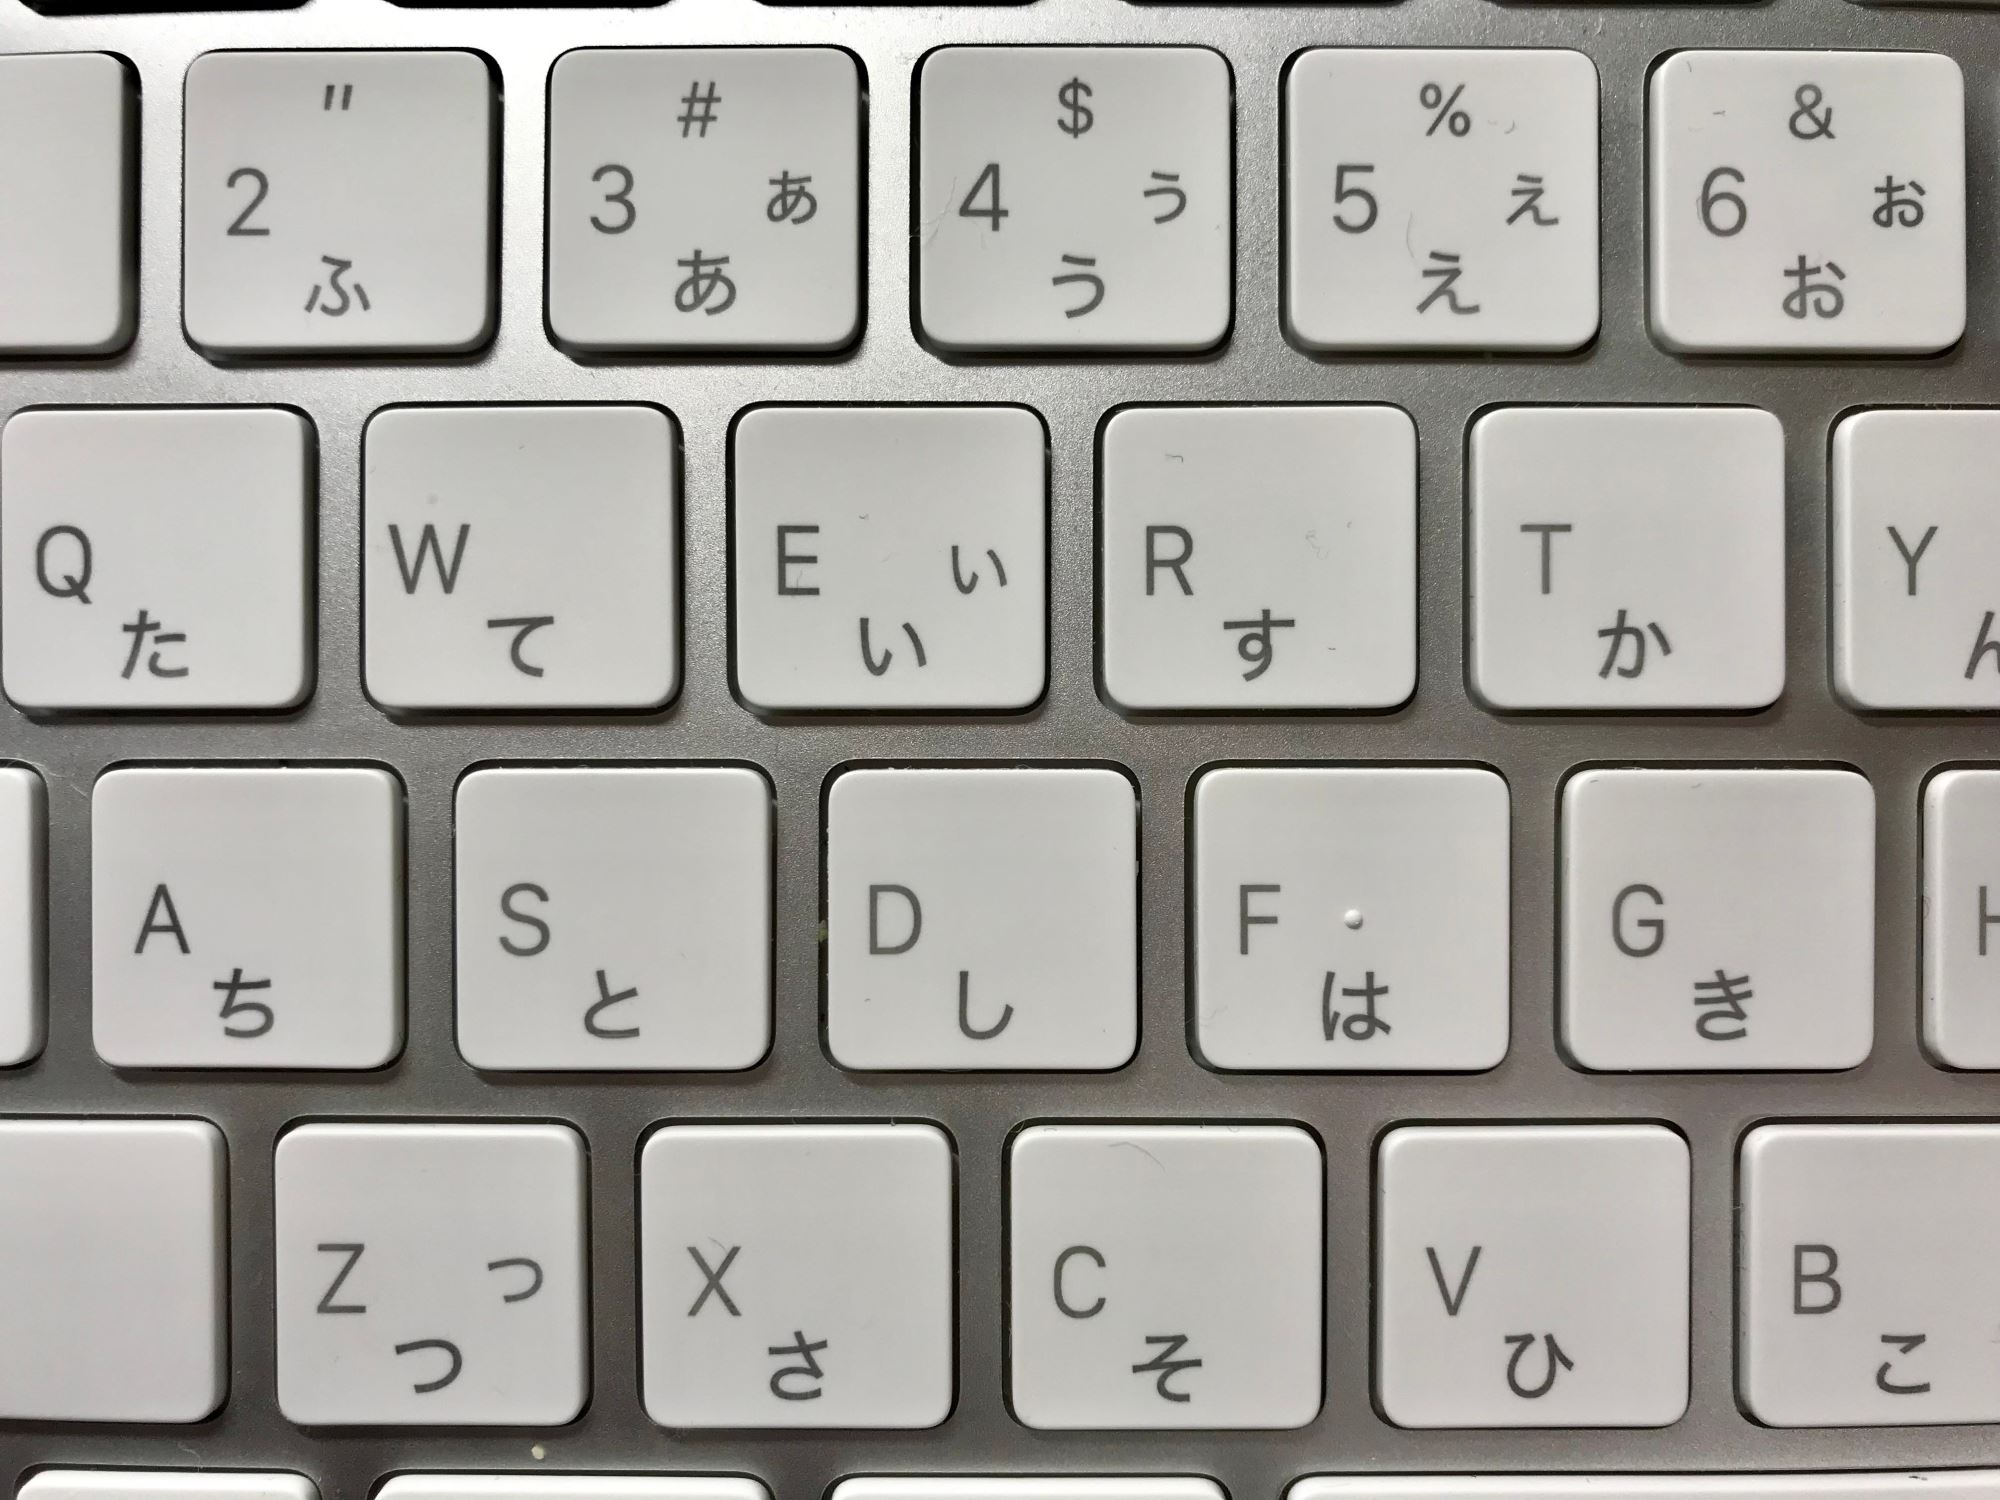
- Locate the dedicated Hiragana key on your keyboard. It is usually labeled with “あ” or “あいう” depending on the layout.
- Press the Hiragana key to switch the character input mode to Hiragana.
- Using the Roman keyboard layout, type the corresponding Romanized spelling of the Hiragana character you want to type.
- As you type, the Japanese Input Method Editor (IME) will provide suggestions for converting the Romanized input into the corresponding Hiragana character.
- Select the desired Hiragana character from the suggestion list by using the arrow keys or by clicking on it with your mouse or touchscreen.
- Continue typing and selecting Hiragana characters until you have completed your desired text.
With practice, you will become familiar with the Romanized spelling of Hiragana characters and the suggested conversions provided by the IME. This will allow you to type in Hiragana efficiently.
Typing Hiragana characters correctly is crucial for accurately representing Japanese words and expressions. It is recommended to consult a Hiragana chart or learning materials to familiarize yourself with the various Hiragana characters and their Romanized counterparts.
Now that you know how to type Hiragana characters, you can move on to typing Katakana characters in the next step.
Step 3: Typing Katakana Characters
Katakana is another important writing system in the Japanese language. It is primarily used for writing foreign words, loanwords, and onomatopoeic expressions. To type Katakana characters on a Japanese keyboard, follow these steps:
- Make sure the Japanese keyboard is active as your input method.
- Locate the dedicated Katakana key on your keyboard. It is usually labeled with “ア” or “アイウ” depending on the layout.
- Press the Katakana key to switch the character input mode to Katakana.
- Using the Roman keyboard layout, type the corresponding Romanized spelling of the Katakana character you want to type.
- The Japanese Input Method Editor (IME) will provide suggestions for converting the Romanized input into the corresponding Katakana character.
- Select the desired Katakana character from the suggestion list using the arrow keys or by clicking on it with your mouse or touchscreen.
- Continue typing and selecting Katakana characters until you have finished typing your desired text.
Similar to typing Hiragana characters, becoming familiar with the Romanized spelling of Katakana characters and the suggested conversions offered by the IME will enable you to type in Katakana smoothly.
Remember that Katakana is often used for writing foreign names or words borrowed from other languages. It is essential to pay attention to accurate transcription when typing in Katakana to ensure proper representation of the intended words or expressions.
Now that you have learned how to type Katakana characters, you can proceed to the next step: typing Kanji characters.
Step 4: Typing Kanji Characters
Kanji characters are logographic characters borrowed from Chinese and integrated into the Japanese writing system. Kanji characters represent a wide range of meanings and can be complex. To type Kanji characters on a Japanese keyboard, follow these steps:
- Ensure that the Japanese keyboard is selected as your active input method.
- Start typing the pronunciation of the desired Kanji character using the Roman keyboard layout.
- The Japanese Input Method Editor (IME) will display a list of suggested Kanji characters based on the input pronunciations.
- Browse through the list and select the correct Kanji character that matches the intended meaning.
- If the desired Kanji character does not appear in the displayed suggestions, you can try entering more specific pronunciations or alternative readings.
- Continue typing and selecting Kanji characters until you have completed your desired text.
Typing Kanji characters can be challenging, especially for complex or less commonly used characters. It is recommended to have a good understanding of the pronunciation and stroke order of Kanji characters to ensure accurate input.
The IME provides a useful feature known as “Radical Input”, where you can input Kanji characters by selecting their radical components. This can be helpful when you are unsure of the pronunciation or when the desired Kanji character is not in the suggestion list.
Mastering the skill of typing Kanji characters takes time and practice. It is beneficial to utilize resources such as online dictionaries, Kanji learning materials, and reference books to improve your Kanji typing proficiency.
Now that you know how to type Kanji characters, you can move forward to explore the Romaji input method in the next step.
Step 5: Using Romaji Input Method
The Romaji input method is a convenient way to input Japanese characters using the Roman alphabet. It allows users who are not yet familiar with the Hiragana or Katakana writing systems to type in Japanese. Here’s how you can use the Romaji input method on a Japanese keyboard:
- Ensure that the Japanese keyboard is selected as your active input method.
- Start typing the Romanized version of the Japanese word or phrase using the standard QWERTY keyboard layout.
- The Japanese Input Method Editor (IME) will automatically convert the Romanized input into the corresponding Hiragana, Katakana, or Kanji characters.
- If the IME doesn’t show the correct conversion, you can manually select the desired characters from the suggestion list.
- Continue typing in Romaji and selecting the appropriate conversion until you have finished typing the desired Japanese text.
The Romaji input method is particularly useful for beginners or those who are more comfortable typing in the Roman alphabet. It eliminates the need to learn all the complex Hiragana, Katakana, and Kanji characters before being able to type in Japanese. However, it is beneficial to gradually learn and familiarize yourself with the Japanese writing systems to improve overall language proficiency.
It’s important to note that the Romaji input method may not be suitable for all situations, especially when precision and accuracy are required. For more formal or professional writing, it is recommended to use the appropriate Hiragana, Katakana, or Kanji characters whenever possible.
Now that you understand how to use the Romaji input method, you can proceed to learn about the IME Pad and its functionalities in the next step.
Step 6: Understanding the IME Pad
The IME Pad, or Input Method Editor Pad, is a versatile tool that provides additional functionalities for typing Japanese characters on a Japanese keyboard. It offers various input options and features to enhance the typing experience. Here’s an overview of the key features of the IME Pad:
- Handwriting Input: The IME Pad allows you to draw the desired Kanji characters on the touchpad or using a mouse. The system will recognize and convert your handwritten input into the corresponding Kanji characters.
- Radical Input: This feature enables you to input Kanji characters by selecting their radical components. It is especially useful when you are unsure of the pronunciation or when the desired Kanji character is not in the suggestion list.
- Word Prediction: The IME Pad offers word prediction, suggesting commonly used words based on the context of your input. This feature saves time by providing quick suggestions for completing your sentence or phrase.
- Special Character Input: The IME Pad includes a wide range of special characters and symbols, such as punctuation marks, emoticons, and foreign language characters. These can be easily accessed and inserted into your text as needed.
- Handy Shortcuts: The IME Pad provides shortcuts for frequently used functions, allowing you to switch between different input modes, activate or deactivate features, and navigate the interface more conveniently.
The IME Pad is a powerful tool that empowers users to type Japanese characters efficiently, especially when dealing with complex Kanji characters or special symbol inputs. It is worth exploring and utilizing the various features it offers to optimize your typing experience.
Take some time to familiarize yourself with the IME Pad and its functionalities. Experiment and explore its options to discover the features that best suit your needs and preferences.
Now that you have an understanding of the IME Pad, let’s move on to step 7 and explore how to use special characters and symbols on a Japanese keyboard.
Step 7: Using Special Characters and Symbols
A Japanese keyboard offers a wide range of special characters and symbols that are commonly used in written communication. These include punctuation marks, emoticons, foreign language characters, and more. Here’s how you can access and use special characters and symbols on a Japanese keyboard:
- To access punctuation marks and symbols, press the Shift key on your keyboard while typing the corresponding key for the desired character. For example, Shift+1 can be used to type the exclamation mark (!), and Shift+2 for the at symbol (@).
- To insert emoticons, you can either type them using specific combinations of punctuation marks and characters or use dedicated emoticon keys on your keyboard if available.
- For foreign language characters, you can switch the keyboard to the desired language input mode using the language settings on your device. This allows you to type characters from languages such as Chinese, Korean, or Spanish, depending on your needs.
- Additionally, you can access special characters and symbols by using the IME Pad. It provides a dedicated section for special characters, allowing you to visually select and insert them into your text.
Using special characters and symbols on a Japanese keyboard can add depth and creativity to your written communication. Whether you need to express emotions through emoticons or include punctuation marks for clarity, these elements play a significant role in conveying meaning.
It’s important to familiarize yourself with commonly used special characters, symbols, and emoticons to effectively incorporate them into your Japanese text. Exploring online resources or keyboard shortcuts can be helpful in discovering new characters or techniques for accessing special characters quickly.
Now that you understand how to use special characters and symbols on a Japanese keyboard, let’s move on to step 8, which covers switching between English and Japanese keyboard modes.
Step 8: Switching between English and Japanese Keyboard Modes
Switching between English and Japanese keyboard modes is a common task when typing in both languages on a Japanese keyboard. Most devices provide convenient methods to toggle between these two modes seamlessly. Here’s how you can switch between English and Japanese keyboard modes:
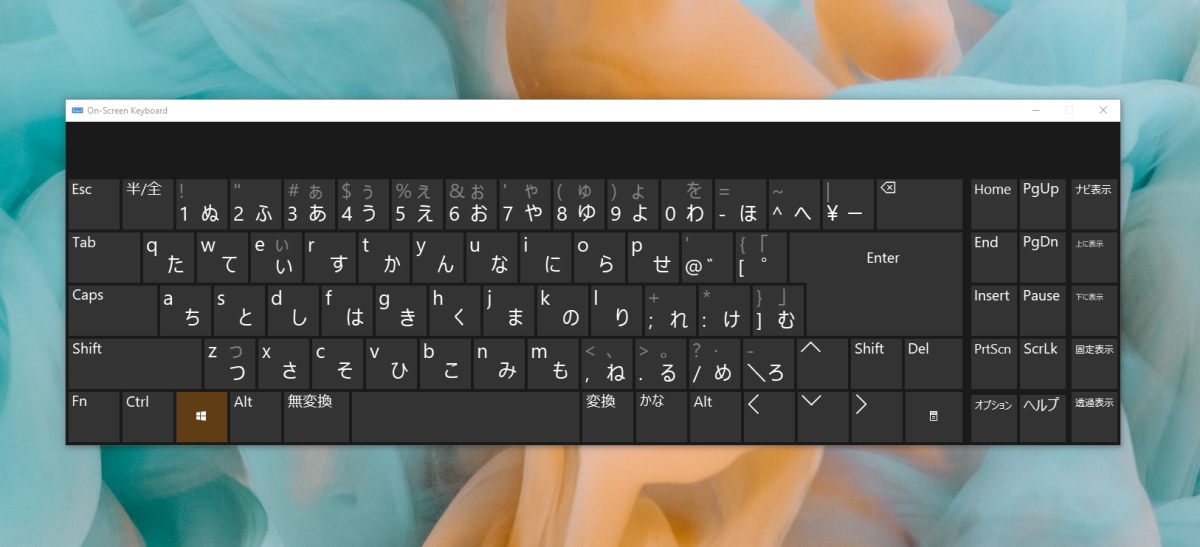
- Look for the dedicated language key or toggle button on your keyboard. It is usually labeled as “EN” for English and “日本語” (Nihongo) for Japanese.
- Press the language key or toggle button to switch between English and Japanese keyboard modes.
- Alternatively, you can use the keyboard shortcut provided by your device to quickly toggle between the two modes. This shortcut is often a combination of keys, such as “Alt + Shift” or “Ctrl + Space”.
- Depending on your device and settings, you may also be able to switch between the two keyboard modes by swiping the space bar or using a dedicated language switcher on the screen for touchscreen devices.
Switching between English and Japanese keyboard modes allows you to seamlessly type in both languages without the need for external keyboards or complex configurations. It is important to make use of this feature to enhance your typing efficiency and productivity.
When switching to the English keyboard mode, you can conveniently type in the Roman alphabet for English text. While in Japanese keyboard mode, you have access to the Hiragana, Katakana, and Kanji characters we discussed in the previous steps.
Mastering the art of switching between different keyboard modes will enable you to effortlessly transition between typing in English and Japanese, catering to your specific writing needs and maximizing your language capabilities.
Now that you understand how to switch between English and Japanese keyboard modes, you have completed all the steps necessary to effectively utilize a Japanese keyboard.
Conclusion
Congratulations! You have now learned how to use a Japanese keyboard effectively. By following the steps outlined in this guide, you can confidently type in Japanese and make the most out of the various features and functions offered by a Japanese keyboard.
We started by setting up a Japanese keyboard on your device, ensuring that it is the active input method. Then, we explored how to type Hiragana, Katakana, and Kanji characters using the Roman keyboard layout and the assistance of the Japanese Input Method Editor (IME).
You also learned about the convenience of the Romaji input method, allowing you to type in Japanese using the Roman alphabet. The IME Pad served as a valuable tool, offering options for handwriting input, radical input, word prediction, special character input, and handy shortcuts.
Additionally, we discussed how to access and use special characters, symbols, and emoticons on a Japanese keyboard, adding depth and expression to your written communication. Finally, you learned how to seamlessly switch between English and Japanese keyboard modes to cater to your language needs.
With practice and familiarity, typing in Japanese will become easier and more natural. Remember to consult resources, such as Hiragana and Kanji charts, online dictionaries, and learning materials, to expand your knowledge and improve your accuracy in typing Japanese characters.
Now, armed with your newfound understanding of the Japanese keyboard, you are ready to communicate and immerse yourself in the rich and beautiful Japanese language. Embrace the opportunities it brings and continue to explore and refine your Japanese typing skills.
Happy typing!