Introduction
Google Calendar API is a powerful tool that allows developers to programmatically interact with Google Calendar. With this API, you can create, update, and delete events on your Google Calendar, as well as retrieve information about existing events. Whether you’re developing a web or mobile application, integrating Google Calendar can provide users with seamless scheduling capabilities and enhance their overall productivity.
In this article, we will guide you through the process of using the Google Calendar API, step by step. We will cover everything from enabling the API and setting up the necessary libraries to authenticating the client and performing various operations on the calendar. By the end of this guide, you will have the knowledge and skills to fully utilize the Google Calendar API in your own applications.
It’s important to note that this guide assumes you have a basic understanding of programming concepts and are comfortable working with APIs. Additionally, we will be using the Google API Client Library, which requires knowledge of HTML and JavaScript. However, even if you are not familiar with these technologies, you can still follow along and adapt the code to your preferred programming language or framework.
Please make sure to have a Google account and access to the Google Cloud Platform Console, where we will enable the API and obtain the necessary credentials for authentication. Also, make sure you have a project set up in the Google Cloud Platform Console, as we will be using it to create and manage our calendar events.
Now, let’s dive into the exciting world of the Google Calendar API and learn how to make the most of its features to streamline scheduling and organization in your applications.
Prerequisites
Before we start using the Google Calendar API, there are a few prerequisites that you need to fulfill. These prerequisites will ensure that you have all the necessary tools and access to successfully integrate the API into your application.
1. Google Account: You will need a Google account to access the Google Cloud Platform Console and create a project. If you don’t have one already, you can create a Google account for free.
2. Google Cloud Platform Console: Access to the Google Cloud Platform Console is essential for enabling the Google Calendar API and obtaining the required credentials for authentication. Make sure you have access to the Console and are logged in with your Google account.
3. Create a Project: In the Google Cloud Platform Console, you need to create a project that will be used to manage your calendar events. If you already have a project set up, you can skip this step. Otherwise, follow the instructions provided to create a project.
4. Enable the Google Calendar API: Once you have a project set up, you need to enable the Google Calendar API for that project. This step allows your application to interact with Google Calendar programmatically. In the Google Cloud Platform Console, navigate to the APIs & Services section, search for “Google Calendar API,” and enable it for your project.
5. Set Up Authentication Credentials: To authenticate your application and access the Google Calendar API, you need to set up credentials. In the Google Cloud Platform Console, under the APIs & Services section, navigate to the Credentials section. Here, you will generate the necessary credentials, such as API key or OAuth 2.0 client ID, depending on the type of authentication you choose to use in your application.
It’s important to have all these prerequisites fulfilled before proceeding with the implementation of the Google Calendar API. Once you have completed these steps, you will be ready to move on to the next sections and start integrating the API into your application.
Step 1: Enable the Google Calendar API
The first step in using the Google Calendar API is to enable it within your Google Cloud Platform Console project. Enabling the API will provide your application with the necessary permissions to interact with Google Calendar programmatically.
To enable the Google Calendar API, follow the steps below:
- Go to the Google Cloud Platform Console and sign in with your Google account.
- Create a new project or select an existing project from the project dropdown menu.
- In the left-hand sidebar menu, click on “APIs & Services” and then navigate to “Library”.
- Search for “Google Calendar API” in the library search bar.
- Click on the “Google Calendar API” result that appears.
- Click the “Enable” button to enable the API for your project.
Once you have completed these steps, the Google Calendar API will be enabled for your project. You are now ready to proceed with the next steps and start using the API in your application.
Step 2: Set up the Google API Client Library
After enabling the Google Calendar API, the next step is to set up the Google API Client Library in your project. The Google API Client Library provides a convenient way to interact with Google APIs, including the Google Calendar API, using various programming languages.
To set up the Google API Client Library, follow the steps below:
- Choose the programming language or platform you’re using for your application. The Google API Client Library supports several programming languages, such as JavaScript, Python, Java, and .NET.
- Visit the Google Calendar API Quickstart page for your chosen programming language.
- Click on the “Enable the Google Calendar API” button at the top of the page. This will create a new project in your Google Cloud Platform Console (if you don’t already have one) and configure the necessary settings.
- On the setup page, select the project you want to use and click the “Next” button.
- Follow the instructions provided to install the required dependencies and set up the authentication credentials for your chosen programming language.
Once you have completed these steps, you will have the Google API Client Library set up in your project. This library will provide you with the necessary tools and functions to interact with the Google Calendar API in your chosen programming language. You can now proceed to the next steps and start authenticating your API client.
Step 3: Authenticate the API client
To interact with the Google Calendar API, you need to authenticate your API client. Authentication ensures that only authorized users or applications can access and modify calendar data. There are different authentication methods available, but in this guide, we will focus on using OAuth 2.0 for user-based authentication.
To authenticate the API client using OAuth 2.0, follow these steps:
- Ensure that you have completed the prerequisites from Step 1 and Step 2.
- Go to the Google Cloud Platform Console and navigate to the Credentials section under APIs & Services.
- Click on the “Create Credentials” button and select “OAuth client ID” from the dropdown menu.
- Choose your application type (web application, mobile application, or desktop application) and enter the required information, such as name and authorized redirect URIs.
- Click on the “Create” button to generate your OAuth client ID and client secret.
- Implement the OAuth 2.0 flow in your application’s code to obtain an access token and refresh token for the authenticated user. This typically involves redirecting the user to Google’s authorization endpoint and handling the callback with the authorization code.
- Exchange the authorization code for an access token and refresh token by making a POST request to Google’s token endpoint.
- Store the access token and refresh token securely, as you will need them to make authorized API requests on behalf of the user.
Once you have authenticated your API client using OAuth 2.0, you can start making authorized API requests to create, update, delete, and retrieve events in the Google Calendar API. The access token will act as the user’s authorization to access their calendar data. Additionally, you can use the refresh token to obtain a new access token when the current one expires.
Authentication is a critical step in ensuring the security and privacy of user data when interacting with the Google Calendar API. By properly implementing OAuth 2.0 authentication, you can provide a seamless and secure experience for your users while leveraging the full functionalities of the API.
Step 4: Create a new calendar
Once you have authenticated the API client, you can start creating a new calendar using the Google Calendar API. Creating a new calendar allows you to organize and manage events separately from your primary calendar, providing flexibility and customization options for different use cases.
To create a new calendar using the Google Calendar API, follow these steps:
- Make sure you have obtained a valid access token for the authenticated user. If you have not completed the authentication process, refer to Step 3 for instructions.
- Create an HTTP POST request to the Google Calendar API’s
/calendarsendpoint, providing the necessary parameters and data to create the new calendar. - Include the access token in the request’s Authorization header, using the Bearer authentication scheme.
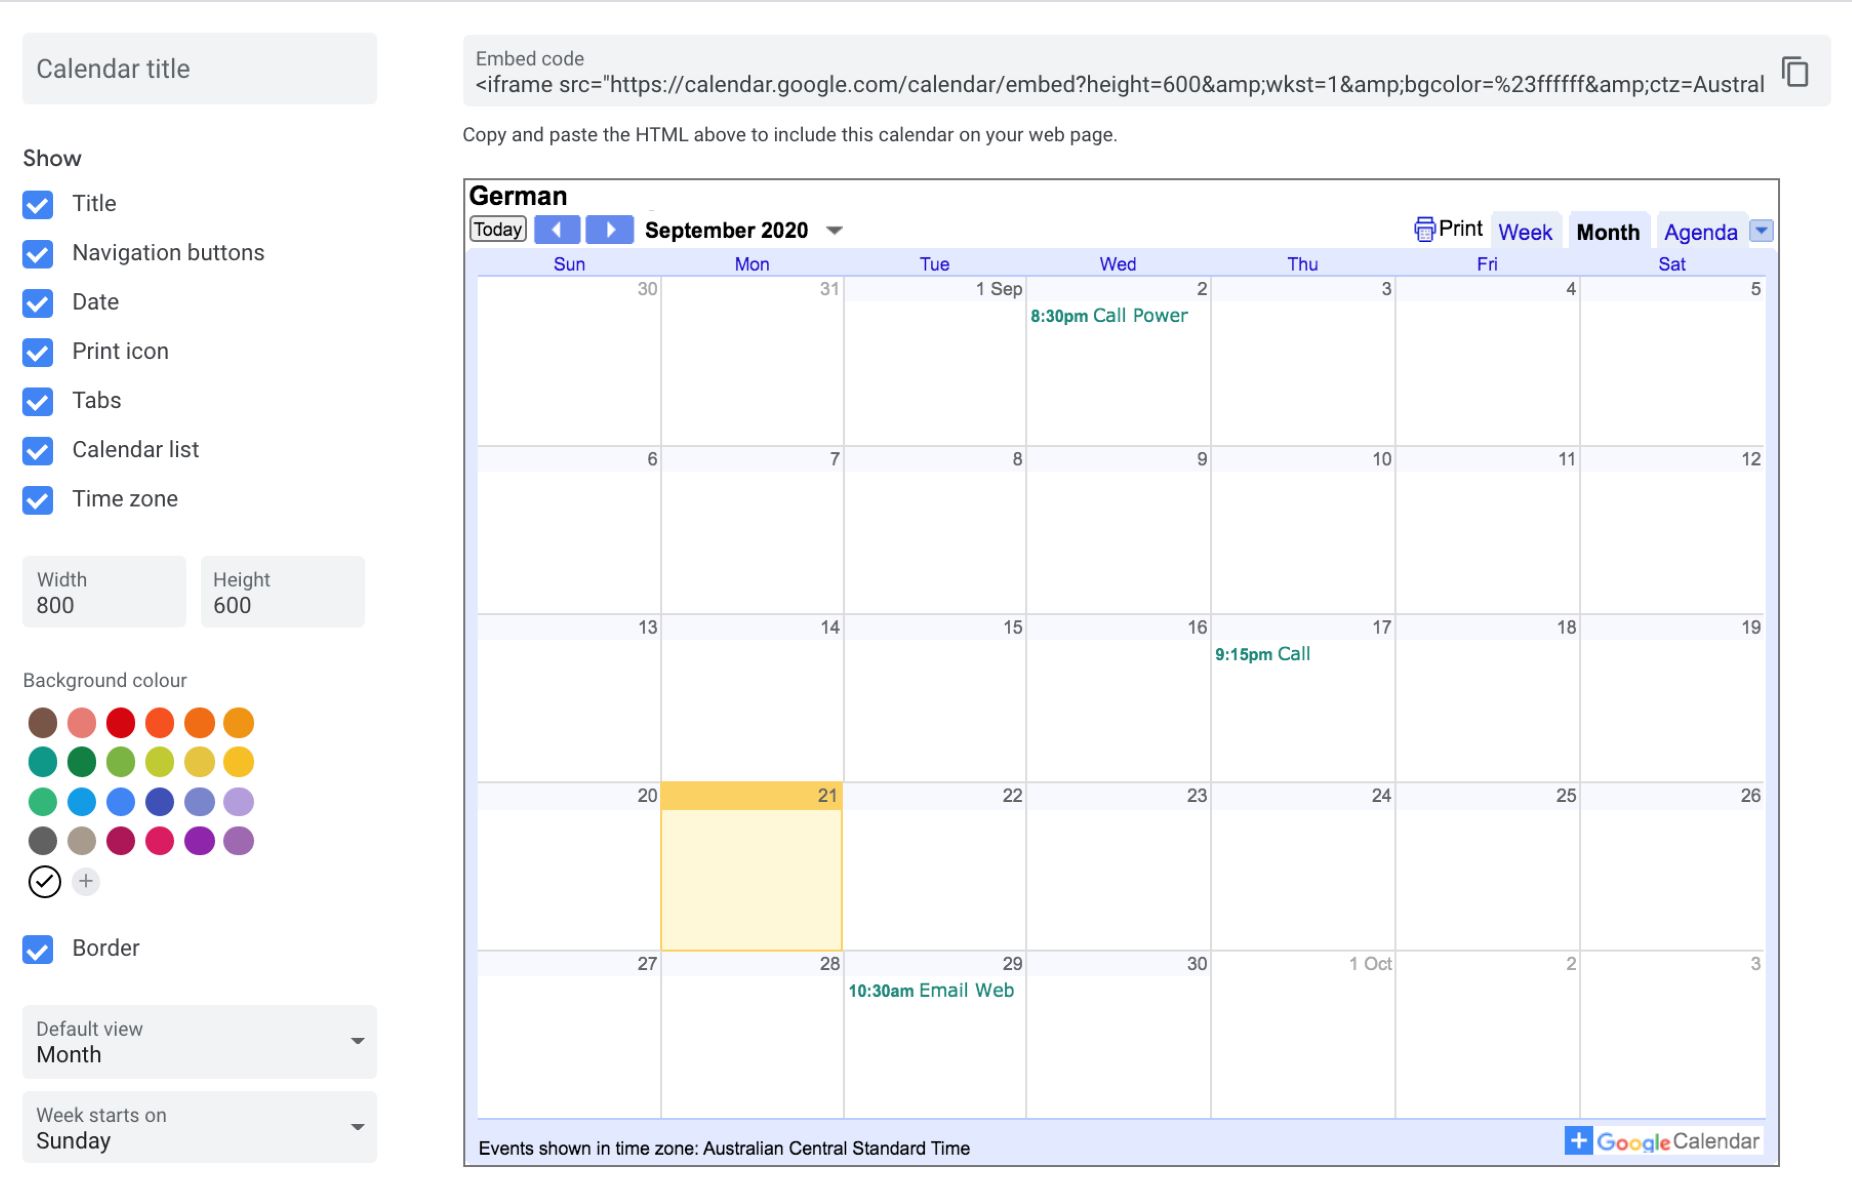
- In the request’s body, specify the calendar’s properties, such as the calendar’s title, description, time zone, and other optional fields.
- Send the HTTP request and handle the response. If successful, the API will return a JSON object containing the newly created calendar’s information, including its calendar ID.
The calendar ID is a unique identifier for the newly created calendar. You can use this ID to reference and perform operations on the calendar, such as adding events, updating properties, or deleting the calendar.
By creating a new calendar, you can have separate calendars for different purposes, such as personal, work, or project-specific events. This allows for better organization and management of events, ensuring that each calendar serves a specific purpose and can be easily accessed and modified as needed.
Remember to handle any errors or exceptions that may occur during the process of creating a new calendar. Proper error handling ensures that you can provide meaningful feedback to users and handle any unforeseen issues that may arise.
Congratulations! You have successfully created a new calendar using the Google Calendar API. In the next step, we will explore how to add events to the calendar.
Step 5: Add events to the calendar
Now that you have created a new calendar, it’s time to start adding events to it using the Google Calendar API. Adding events allows you to schedule and manage various activities, appointments, and meetings in your calendar.
To add events to the calendar using the Google Calendar API, follow these steps:
- Ensure that you have obtained a valid access token for the authenticated user. If you have not completed the authentication process, refer to Step 3 for instructions.
- Create an HTTP POST request to the Google Calendar API’s
/calendars/{calendarId}/eventsendpoint, where{calendarId}is the ID of the calendar to which you want to add the event. - Include the access token in the request’s Authorization header, using the Bearer authentication scheme.
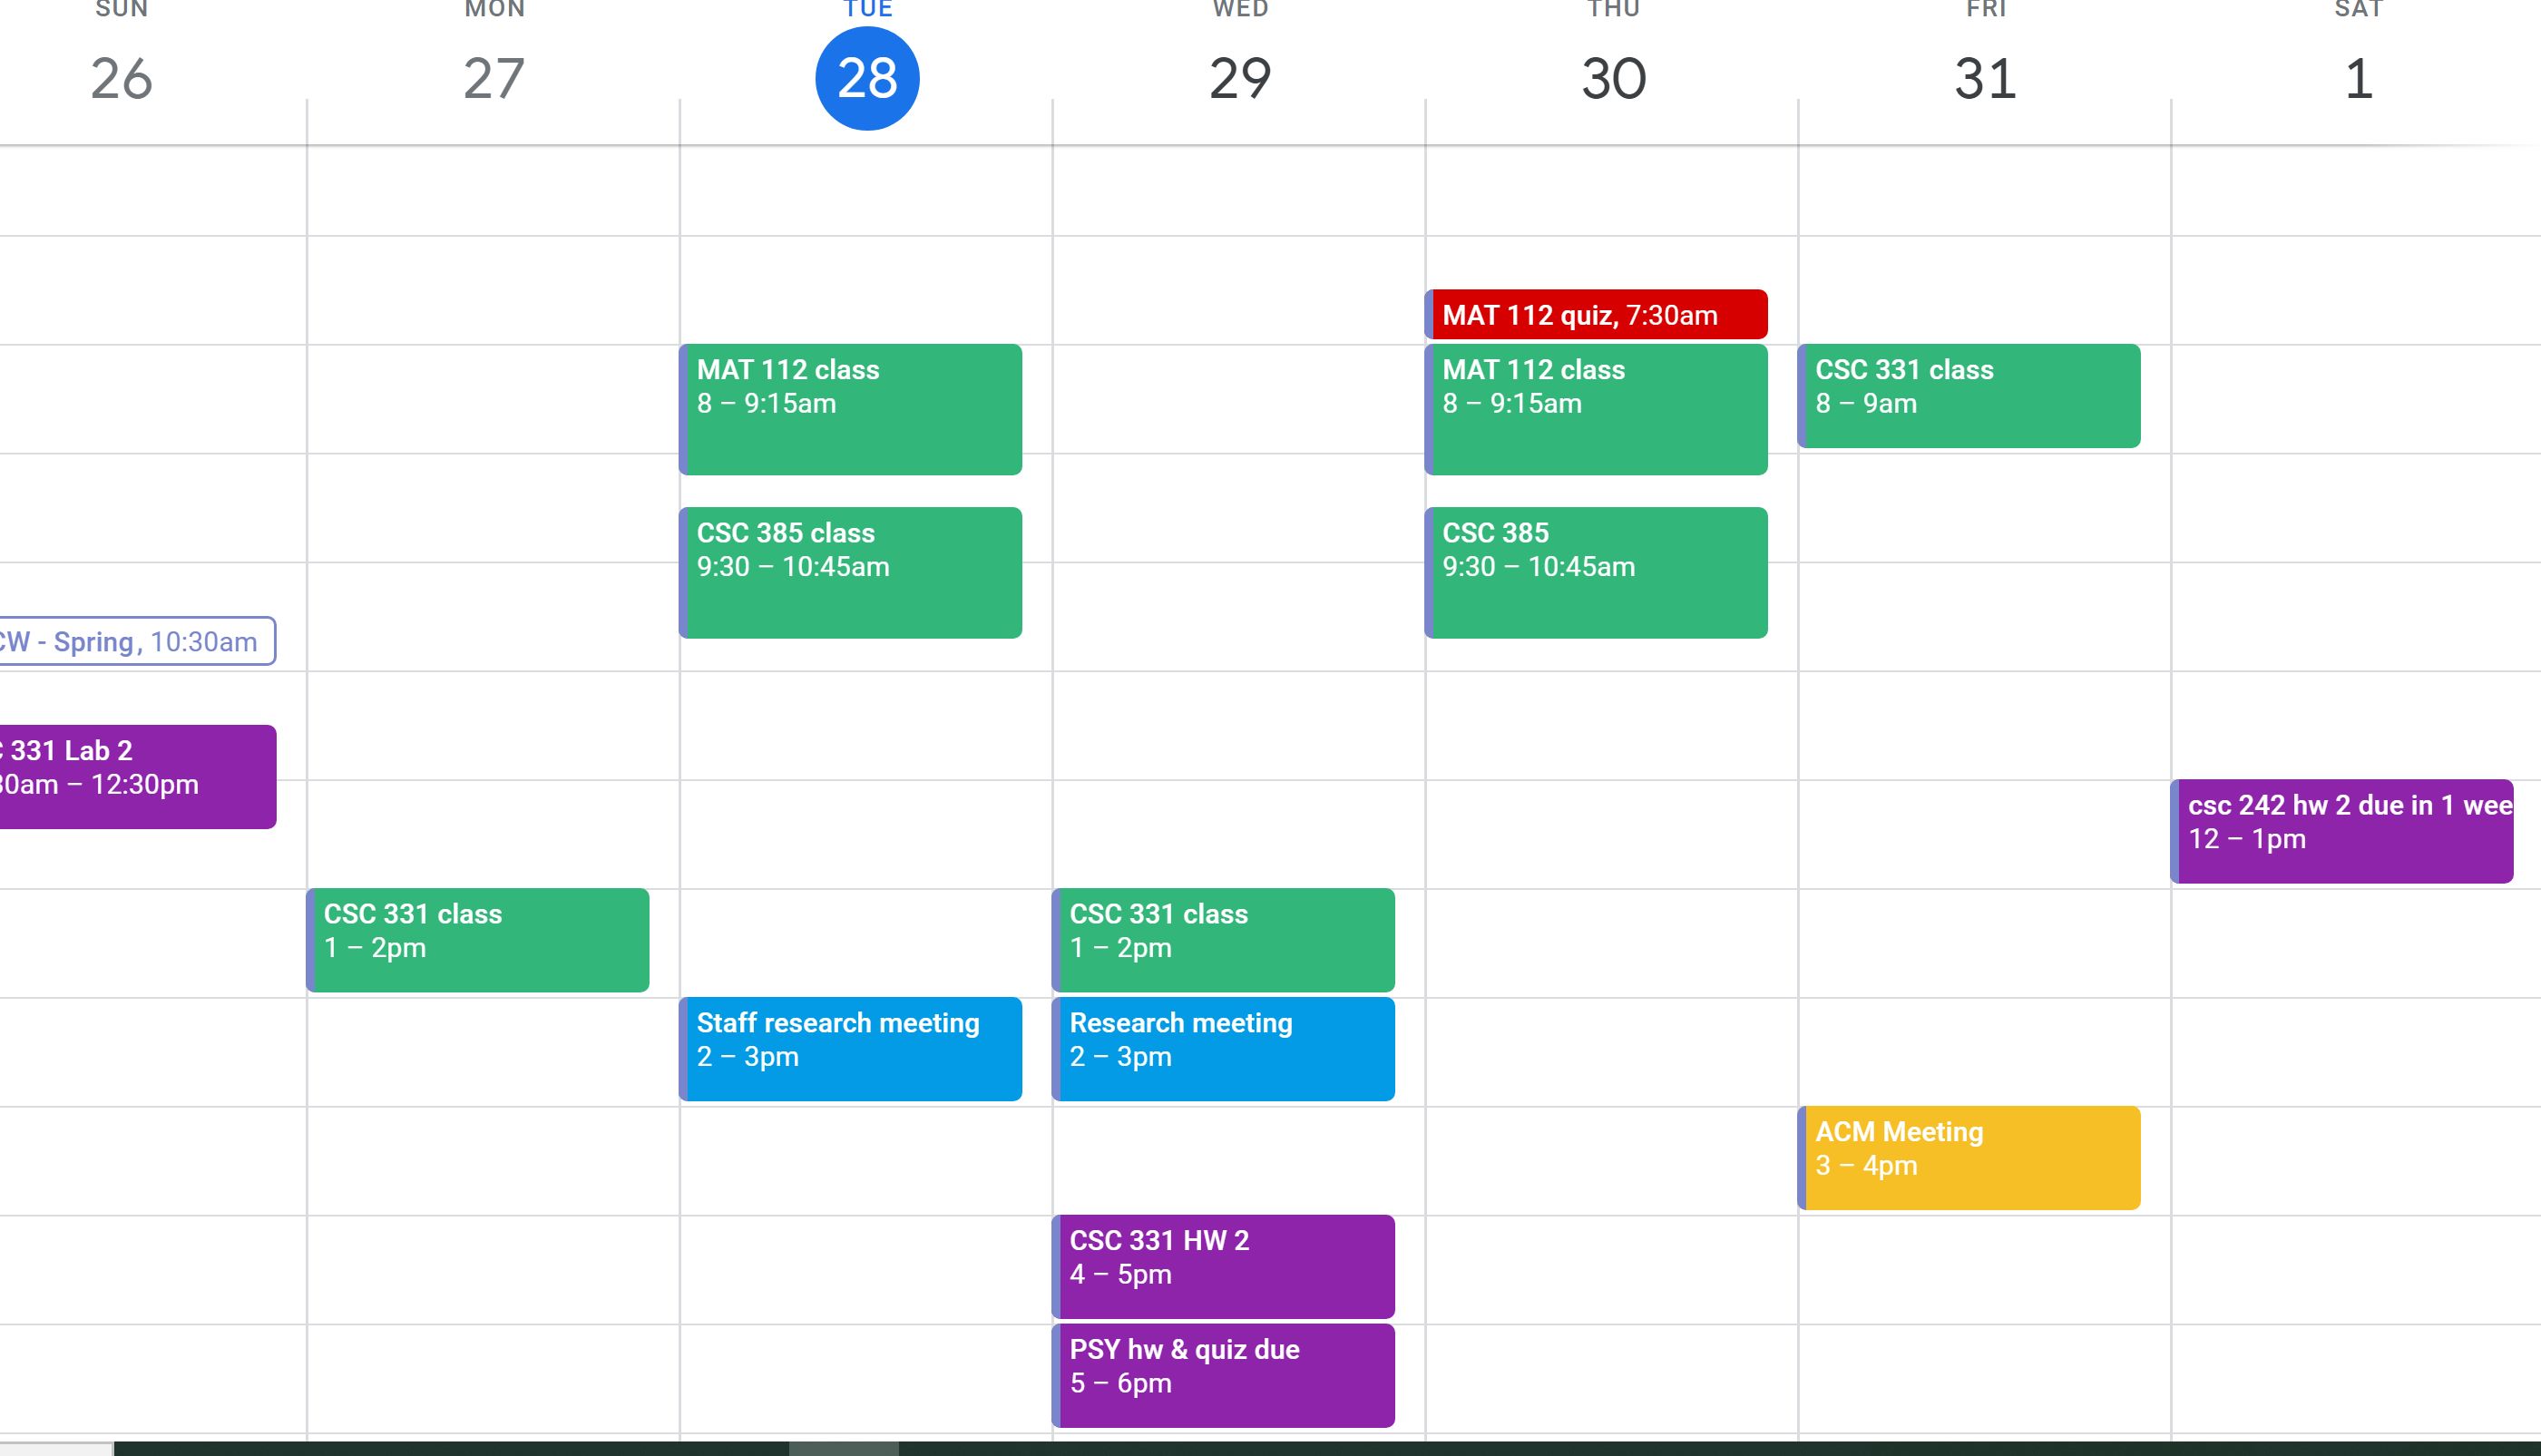
- In the request’s body, specify the event’s properties, such as the event’s title, start and end time, location, description, and other optional fields.
- Send the HTTP request and handle the response. If successful, the API will return a JSON object containing the newly created event’s information, including its event ID.
The event ID is a unique identifier for the newly created event. You can use this ID to reference and perform operations on the event, such as updating its properties or deleting it.
It’s important to note that Google Calendar API supports various parameters and properties to customize and enhance your events. You can specify reminders, recurrence patterns, attendees, and other details to tailor the events according to your requirements.
Make sure to handle any errors or exceptions that may occur during the process of adding events to the calendar. Robust error handling enables you to provide meaningful feedback to users and gracefully handle any issues that may arise.
Congratulations! You have successfully added events to the calendar using the Google Calendar API. In the next step, we will learn how to retrieve events from the calendar.
Step 6: Retrieve events from the calendar
Retrieving events from the calendar is an important functionality that allows you to display, manage, and work with existing events using the Google Calendar API. By retrieving events, you can retrieve information about specific events, list all events within a specific time period, or search for events based on various parameters.
To retrieve events from the calendar using the Google Calendar API, follow these steps:
- Ensure that you have obtained a valid access token for the authenticated user. If you have not completed the authentication process, refer to Step 3 for instructions.
- Create an HTTP GET request to the Google Calendar API’s
/calendars/{calendarId}/eventsendpoint, where{calendarId}is the ID of the calendar from which you want to retrieve events. - Include the access token in the request’s Authorization header, using the Bearer authentication scheme.
- Add query parameters to the request to specify the desired time range, search criteria, or other parameters for event retrieval. For example, you can specify the start and end date for the events, search for events by title or location, or filter events based on attendees.
- Send the HTTP request and handle the response. If successful, the API will return a JSON object containing the retrieved events’ information.
The response will include an array of event objects, each representing an event in the calendar. You can access various properties of the event object, such as its title, start and end time, location, description, and more.
Retrieving events from the calendar allows you to fetch and display important information about events in your application. You can use this functionality to show upcoming events, create a calendar view, or provide users with an overview of their scheduled activities.
Remember to handle any errors or exceptions that may occur during the process of retrieving events. Proper error handling ensures that you can provide meaningful feedback to users and handle any issues that may arise.
Congratulations! You have successfully retrieved events from the calendar using the Google Calendar API. In the next step, we will explore how to update events on the calendar.
Step 7: Update events on the calendar
Updating events on the calendar is an essential feature provided by the Google Calendar API. It allows you to modify existing events, such as changing the title, start and end time, location, or any other details associated with the event.
To update events on the calendar using the Google Calendar API, follow these steps:
- Ensure that you have obtained a valid access token for the authenticated user. If you have not completed the authentication process, refer to Step 3 for instructions.
- Create an HTTP PUT request to the Google Calendar API’s
/calendars/{calendarId}/events/{eventId}endpoint, where{calendarId}is the ID of the calendar containing the event you want to update, and{eventId}is the ID of the event you want to update. - Include the access token in the request’s Authorization header, using the Bearer authentication scheme.
- In the request’s body, specify the updated properties and values for the event you want to update. You can change the event’s title, start and end time, location, description, attendees, and more.
- Send the HTTP request and handle the response. If successful, the API will return a JSON object containing the updated event’s information.
Updating events allows you to reflect any changes or modifications made to an event in your application. This could be useful when users modify event details, change the event duration, or update the event’s location or description.
Remember to handle any errors or exceptions that may occur during the process of updating events. Proper error handling ensures that you can provide meaningful feedback to users and gracefully handle any issues that may arise.
Congratulations! You have successfully updated events on the calendar using the Google Calendar API. In the next step, we will learn how to delete events from the calendar.
Step 8: Delete events from the calendar
Deleting events from the calendar is an important step in managing and maintaining an up-to-date schedule using the Google Calendar API. By deleting events, you can remove unwanted or canceled events from the calendar, ensuring accurate and reliable event listings.
To delete events from the calendar using the Google Calendar API, follow these steps:
- Ensure that you have obtained a valid access token for the authenticated user. If you have not completed the authentication process, refer to Step 3 for instructions.
- Create an HTTP DELETE request to the Google Calendar API’s
/calendars/{calendarId}/events/{eventId}endpoint, where{calendarId}is the ID of the calendar containing the event you want to delete, and{eventId}is the ID of the event you want to delete. - Include the access token in the request’s Authorization header, using the Bearer authentication scheme.
- Send the HTTP request and handle the response. If successful, the API will return a 204 No Content status code, indicating that the event has been successfully deleted.
Deleting events allows you to maintain an accurate and updated calendar schedule. It’s especially useful when events are no longer relevant or have been canceled, ensuring that users have the most up-to-date information about their upcoming activities.
Remember to handle any errors or exceptions that may occur during the process of deleting events. Proper error handling ensures that you can provide meaningful feedback to users and gracefully handle any issues that may arise.
Congratulations! You have successfully deleted events from the calendar using the Google Calendar API. By following these steps, you can effectively manage and modify the events in your application’s calendar.
Conclusion
In this comprehensive guide, we have explored the step-by-step process of using the Google Calendar API to enable powerful scheduling capabilities in your applications. By following these steps, you can seamlessly create, update, retrieve, and delete events in Google Calendar, providing a robust scheduling solution for your users.
We started by enabling the Google Calendar API and setting up the necessary libraries in Step 1 and Step 2. Then, in Step 3, we authenticated the API client using OAuth 2.0, ensuring secure access to the user’s calendar data. In Step 4, we learned how to create a new calendar, allowing for easy organization and separation of events.
Step 5 covered adding events to the calendar, allowing you to schedule and manage various activities. Additionally, in Step 6, we explored how to retrieve events from the calendar, providing the ability to display and work with existing events. In Step 7, we discussed updating events, enabling modifications and keeping event details up to date.
Finally, in Step 8, we learned how to delete events, ensuring accurate and up-to-date event listings. By going through these steps, you have gained a solid foundation in utilizing the Google Calendar API to enhance scheduling and productivity in your applications.
As you continue to implement the Google Calendar API in your projects, remember to handle errors and exceptions, provide meaningful feedback to users, and ensure the security and privacy of data. The API documentation provides additional details and advanced functionalities that you can explore to further customize and optimize your integration.
By leveraging the power of the Google Calendar API, you can create seamless scheduling experiences, streamline event management, and enhance productivity. Now, go ahead and start integrating the Google Calendar API into your applications, and unlock the full potential of scheduling capabilities for your users.