Introduction
Google Calendar is a powerful tool that helps you stay organized and manage your schedule with ease. It allows you to create multiple calendars to keep track of different aspects of your life, such as work, personal appointments, and social events. While using Google Calendar, you might find it useful to set a default calendar to streamline your workflow and ensure that new events are added to the right calendar by default.
In this article, we will guide you through the process of setting a default calendar in Google Calendar. Whether you want to create a new calendar or change your existing default calendar, we’ve got you covered. By setting a default calendar, you can save time and reduce the risk of accidentally adding events to the wrong calendar. Let’s dive in and explore the steps to get started!
Before we begin, it’s important to note that these instructions apply to the web version of Google Calendar. The steps might vary slightly if you are using a mobile device or a third-party application that syncs with Google Calendar.
Now, let’s move on to the first step of creating a new calendar in Google Calendar.
Create a New Calendar in Google Calendar
If you want to set a specific calendar as your default, you will first need to create a new calendar in Google Calendar. Follow these steps to create a new calendar:
- Open Google Calendar in your web browser and sign in to your Google account.
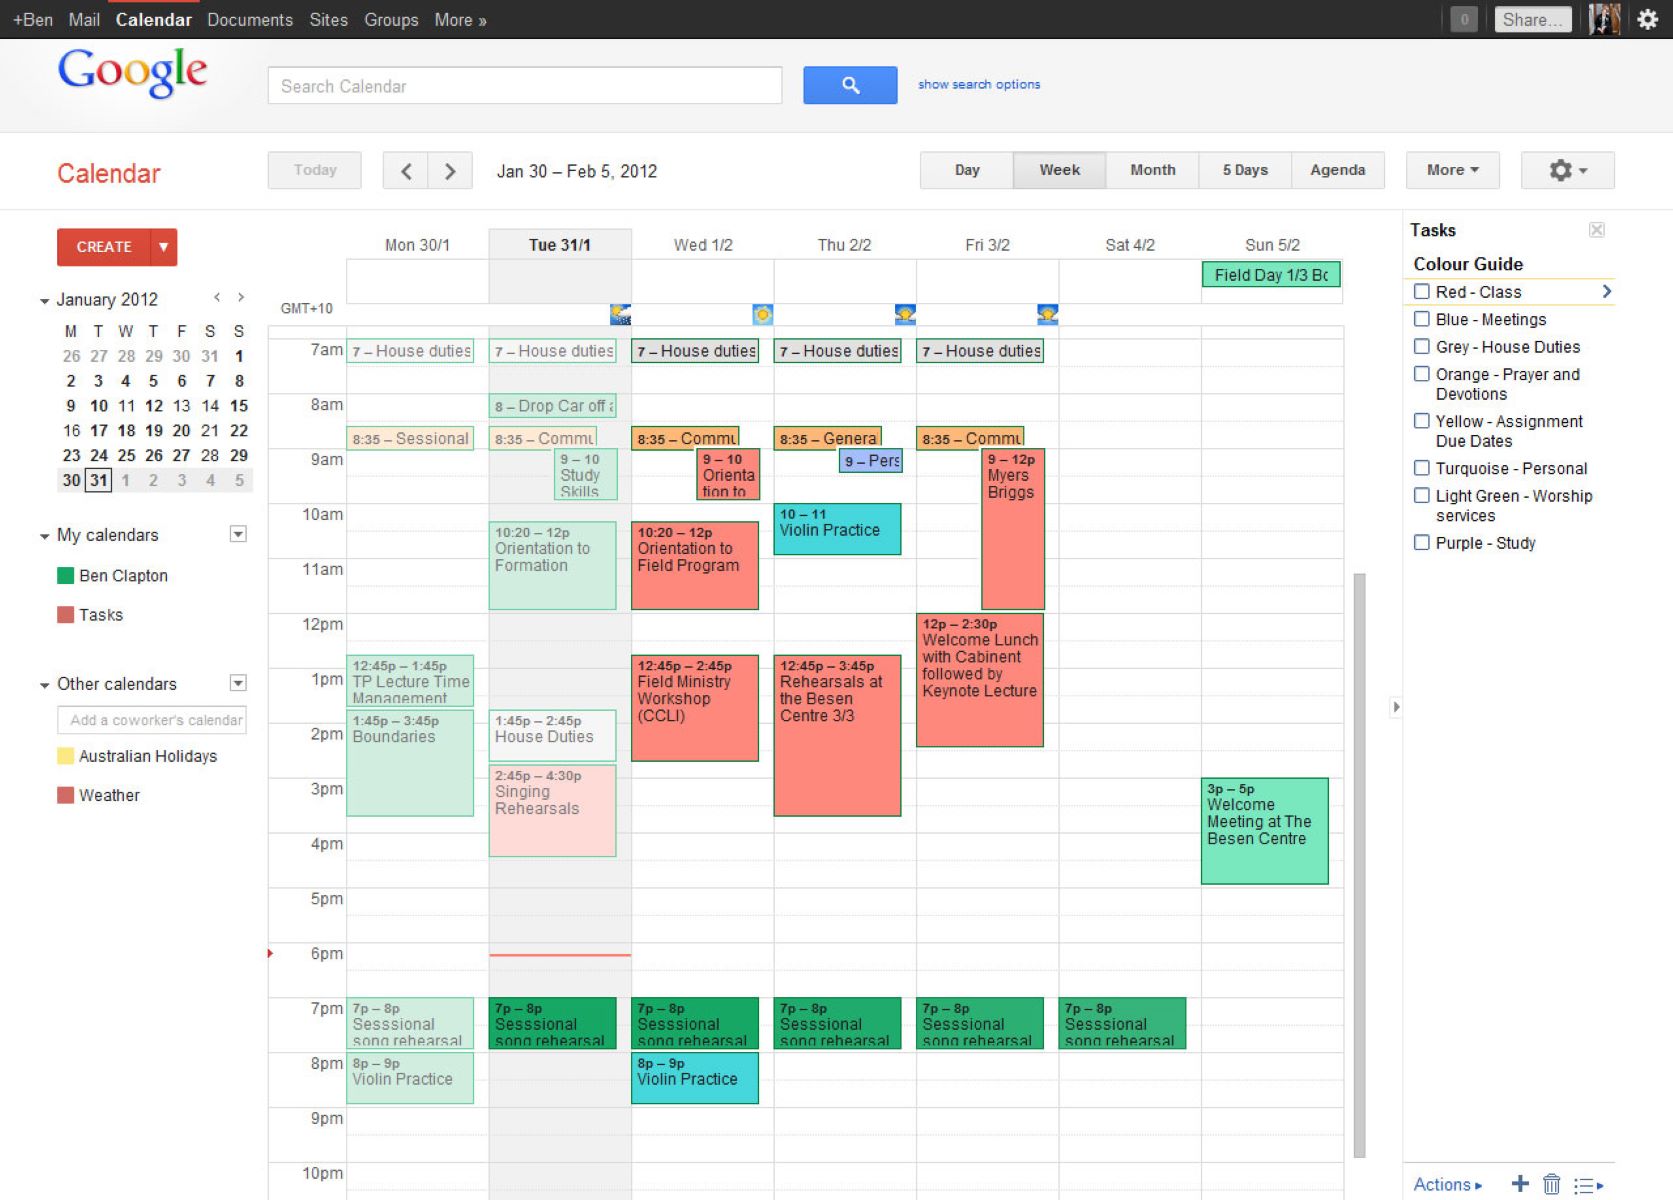
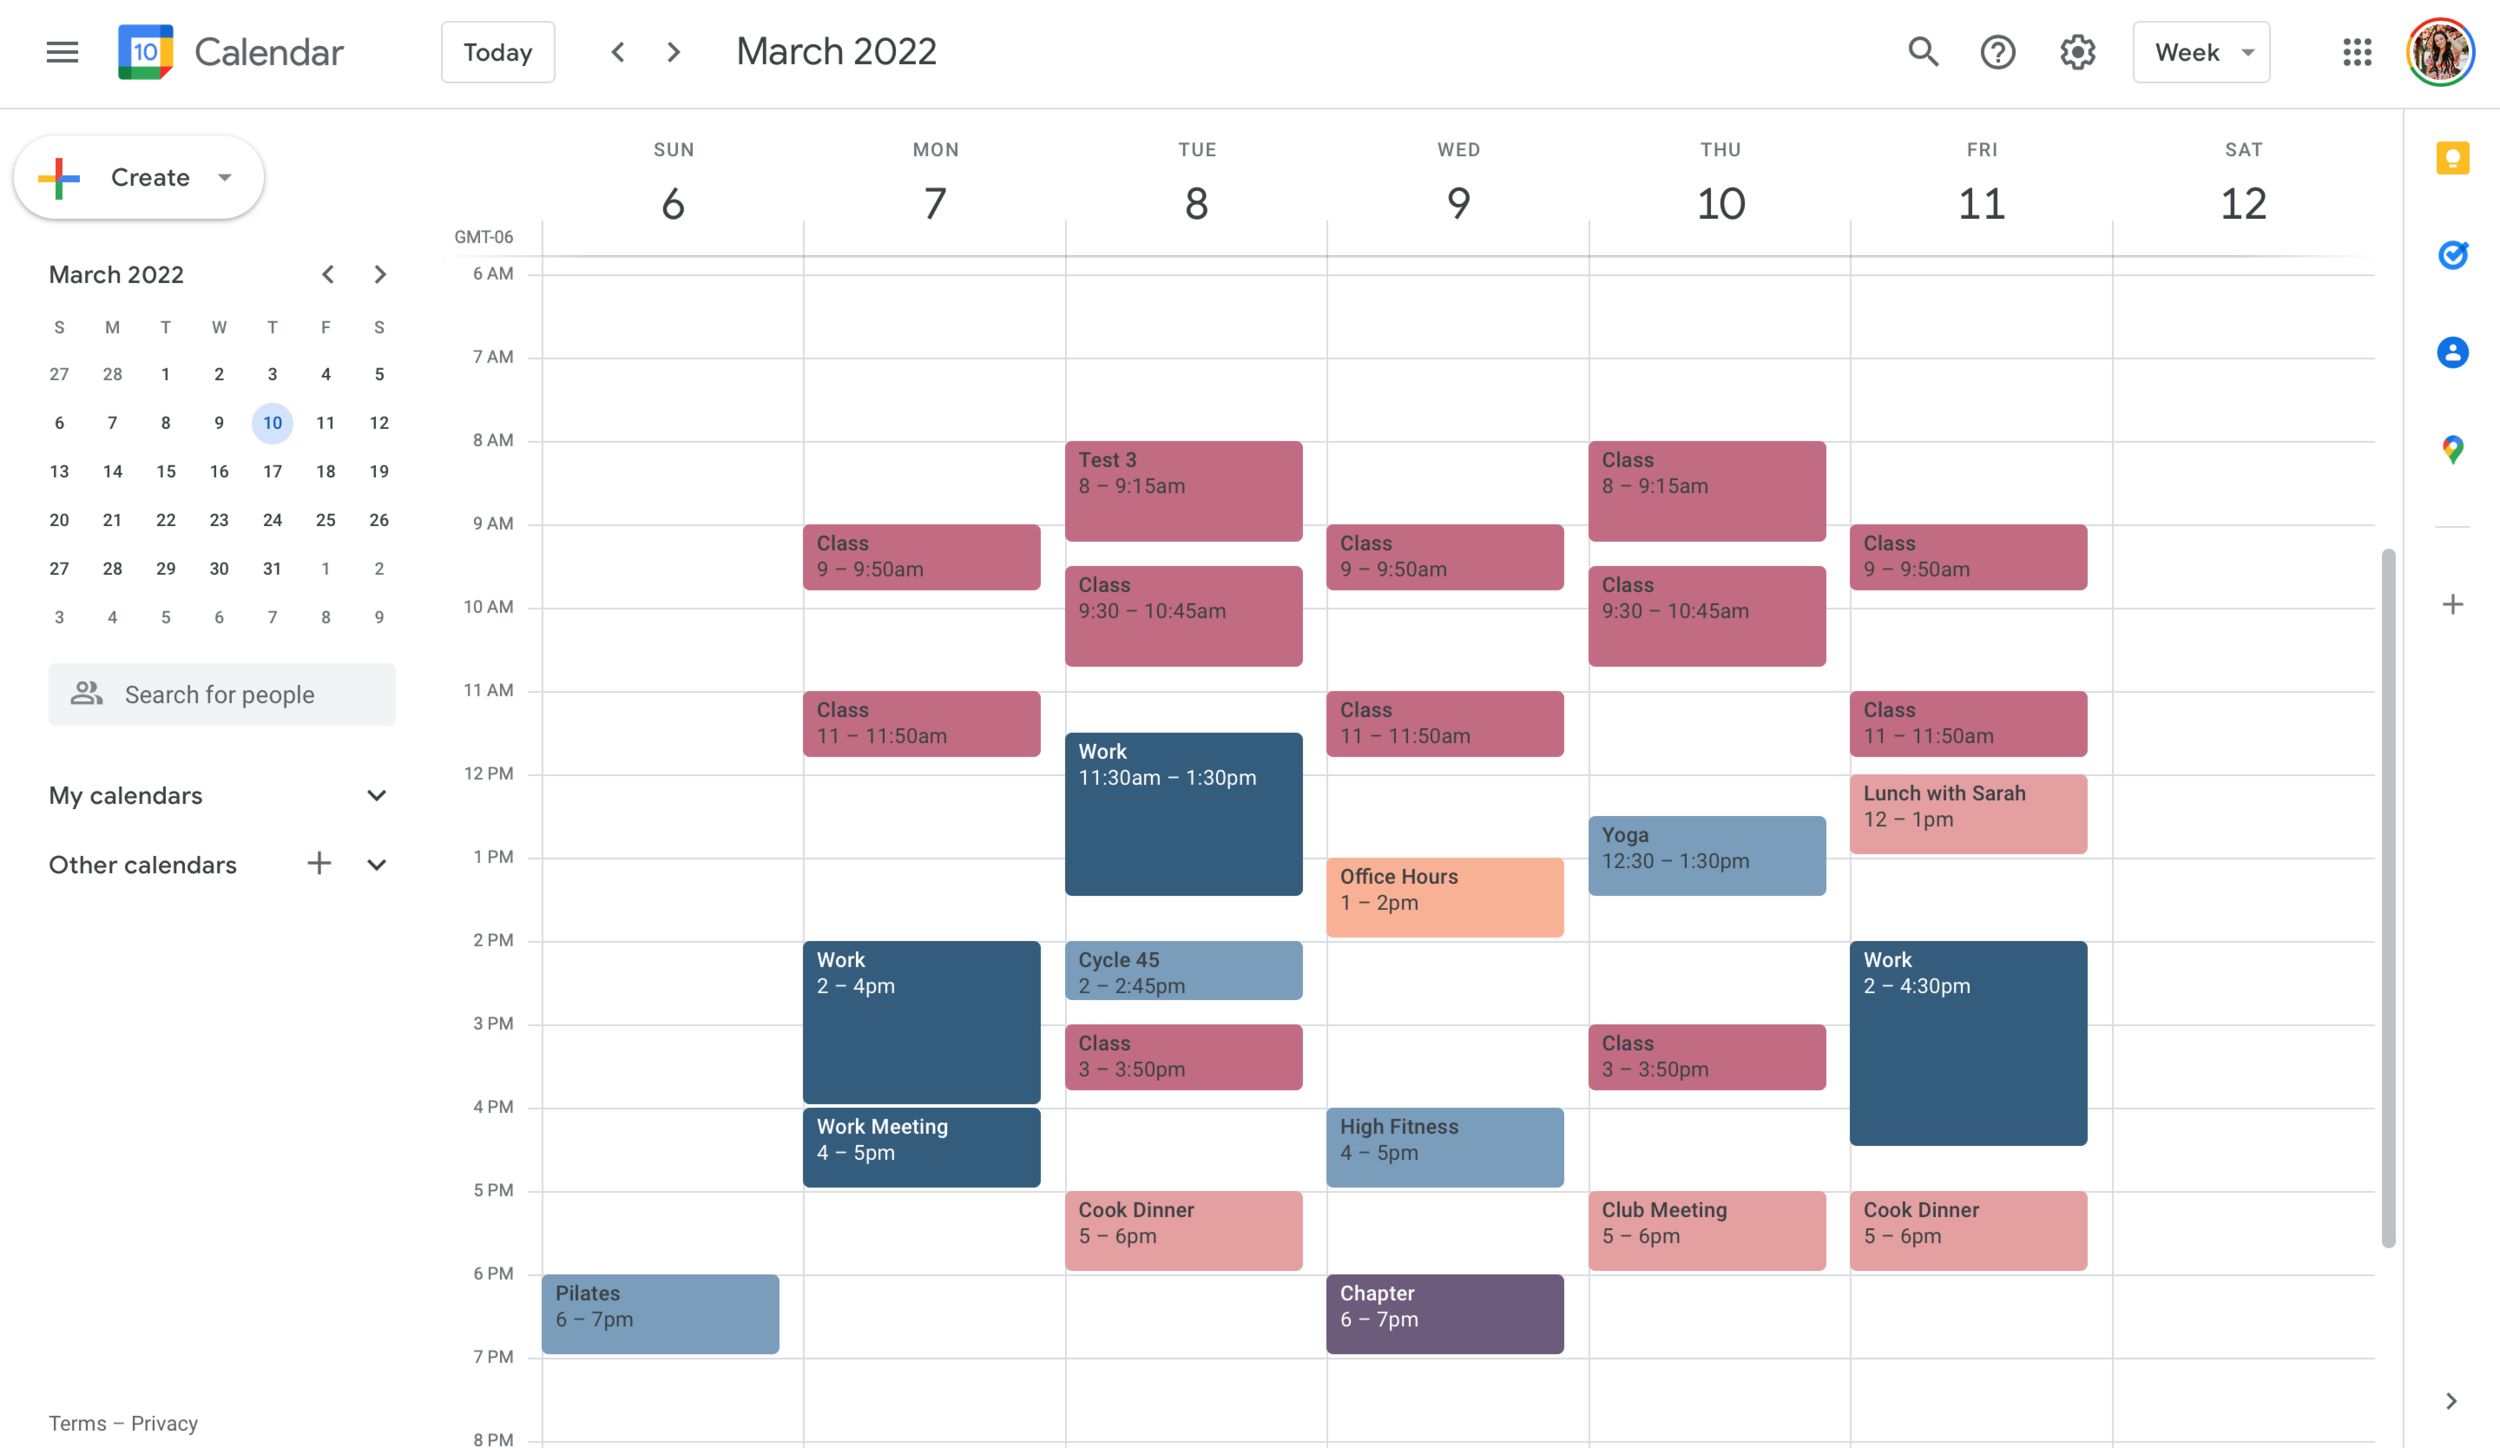
- On the left-hand side of the screen, you will see a panel with your existing calendars. Click on the “+” icon next to “Add a friend’s calendar” to create a new calendar.
- A pop-up window will appear. Enter a name for your new calendar in the “Calendar name” field. You can choose a name that reflects the purpose or theme of the calendar.
- Optional: Customize the calendar’s color by clicking on the color palette icon next to the calendar name field. This can help you visually distinguish it from other calendars.
- If you want to share the calendar with others, you can add specific people or make it publicly accessible. Adjust the sharing settings according to your preferences.
- Click on the “Create calendar” button to finish creating your new calendar.
Congratulations! You have successfully created a new calendar in Google Calendar. Now, let’s move on to the next section to learn how to set this new calendar as your default.
Set the New Calendar as Default
Now that you have created a new calendar in Google Calendar, you can set it as your default calendar. Setting a default calendar ensures that new events you add will automatically be assigned to this calendar. Follow the steps below to set your new calendar as the default:
- Open Google Calendar and sign in to your account.
- On the left-hand side of the screen, locate the “My calendars” section and find the newly created calendar.
- Hover your mouse over the calendar name, and you will see a small downward arrow appear.
- Click on the arrow to open a drop-down menu and select “Calendar settings.”
- In the calendar settings menu, you will see a “General” tab. Scroll down until you find the “Default color” option.
- Next to the “Default color” option, you will find a checkbox labeled “Make this my default calendar.” Check the box to set the new calendar as your default.
- Click on the “Save” button at the bottom of the page to save your changes.
That’s it! You have successfully set your new calendar as the default in Google Calendar. From now on, any new events you create will be automatically added to this calendar. If you want to change your default calendar in the future, simply follow the same steps and select a different calendar.
Now, let’s move on to the next section to learn how to change your default calendar in Google Calendar.
Change the Default Calendar in Google Calendar
If you’ve already set a default calendar in Google Calendar but want to change it to a different calendar, you can easily do so by following these steps:
- Open Google Calendar and sign in to your account.
- On the left-hand side of the screen, locate the “My calendars” section and find the calendar you want to set as your default.
- Hover your mouse over the calendar name, and you will see a small downward arrow appear.
- Click on the arrow to open a drop-down menu and select “Calendar settings.”
- In the calendar settings menu, you will see a “General” tab. Scroll down until you find the “Default color” option.
- Next to the “Default color” option, you will find a checkbox labeled “Make this my default calendar.” Check the box to set the selected calendar as your default.
- Click on the “Save” button at the bottom of the page to save your changes.
That’s it! You have successfully changed your default calendar in Google Calendar. From now on, any new events you create will be automatically added to the newly selected calendar. Remember, you can always repeat these steps to change your default calendar whenever needed.
Now, let’s move on to the next section to learn how to switch to a different calendar in Google Calendar.
Switch to a Different Calendar
In addition to setting a default calendar, Google Calendar allows you to easily switch between different calendars based on your needs. Here’s how you can switch to a different calendar:
- Open Google Calendar and sign in to your account.
- On the left-hand side of the screen, locate the “My calendars” section and find the calendar you want to switch to.
- Click on the checkbox next to the calendar name to enable or disable it. Enabled calendars will be visible on your calendar grid, while disabled calendars will be hidden.
- You can also choose to view multiple calendars at once by checking the boxes next to the calendars you want to display simultaneously.
By toggling the visibility of your calendars, you can easily switch between different calendars and customize your view in Google Calendar. Whether you want to focus on work-related events or personal appointments, it’s all just a click away.
Remember, switching to a different calendar does not change your default calendar. Your default calendar remains the one where new events are automatically added. By using the switch functionality, you can easily manage and view multiple calendars without changing your default settings.
Congratulations! You’ve now learned how to switch to a different calendar in Google Calendar. Take advantage of this feature to organize and view your events according to your preferences.
Conclusion
Google Calendar offers a range of customizable features to help you stay organized and manage your schedule effectively. By setting a default calendar, you can streamline your workflow and ensure that new events are added to the right calendar automatically. Whether you create a new calendar or switch to an existing one, the process is simple and straightforward.
In this article, we have provided step-by-step instructions on creating a new calendar, setting it as your default, changing the default calendar, and switching between calendars in Google Calendar. We hope that these instructions have helped you take control of your schedules and improve your productivity.
Remember to utilize the various features offered by Google Calendar, such as color-coding calendars, sharing them with others, and enabling or disabling calendars as needed. These features allow you to customize your calendar view and manage multiple aspects of your life.
Keep in mind that while these instructions are focused on the web version of Google Calendar, similar functionality is available on mobile devices and third-party calendar applications that sync with Google Calendar.
Now that you have a solid understanding of how to set a default calendar and switch between calendars, go ahead and customize Google Calendar to suit your needs. Enjoy the benefits of a well-organized schedule and make the most of your time!