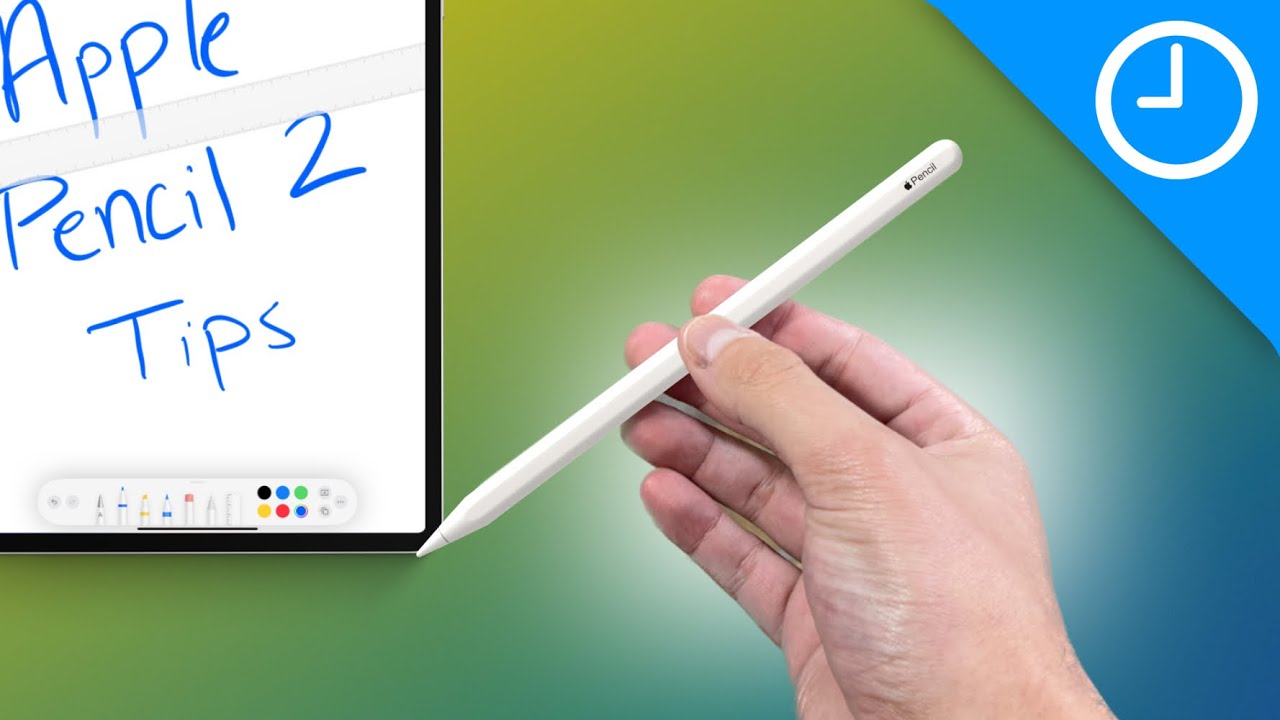
Setting Up Apple Pencil 2
Getting started with your Apple Pencil 2 is a breeze. Follow these simple steps to set it up and get ready to unleash its powerful capabilities:
- First, ensure compatibility: Apple Pencil 2 is designed to work with specific iPad models. Check if your iPad is compatible with Apple Pencil 2 on Apple’s official website.
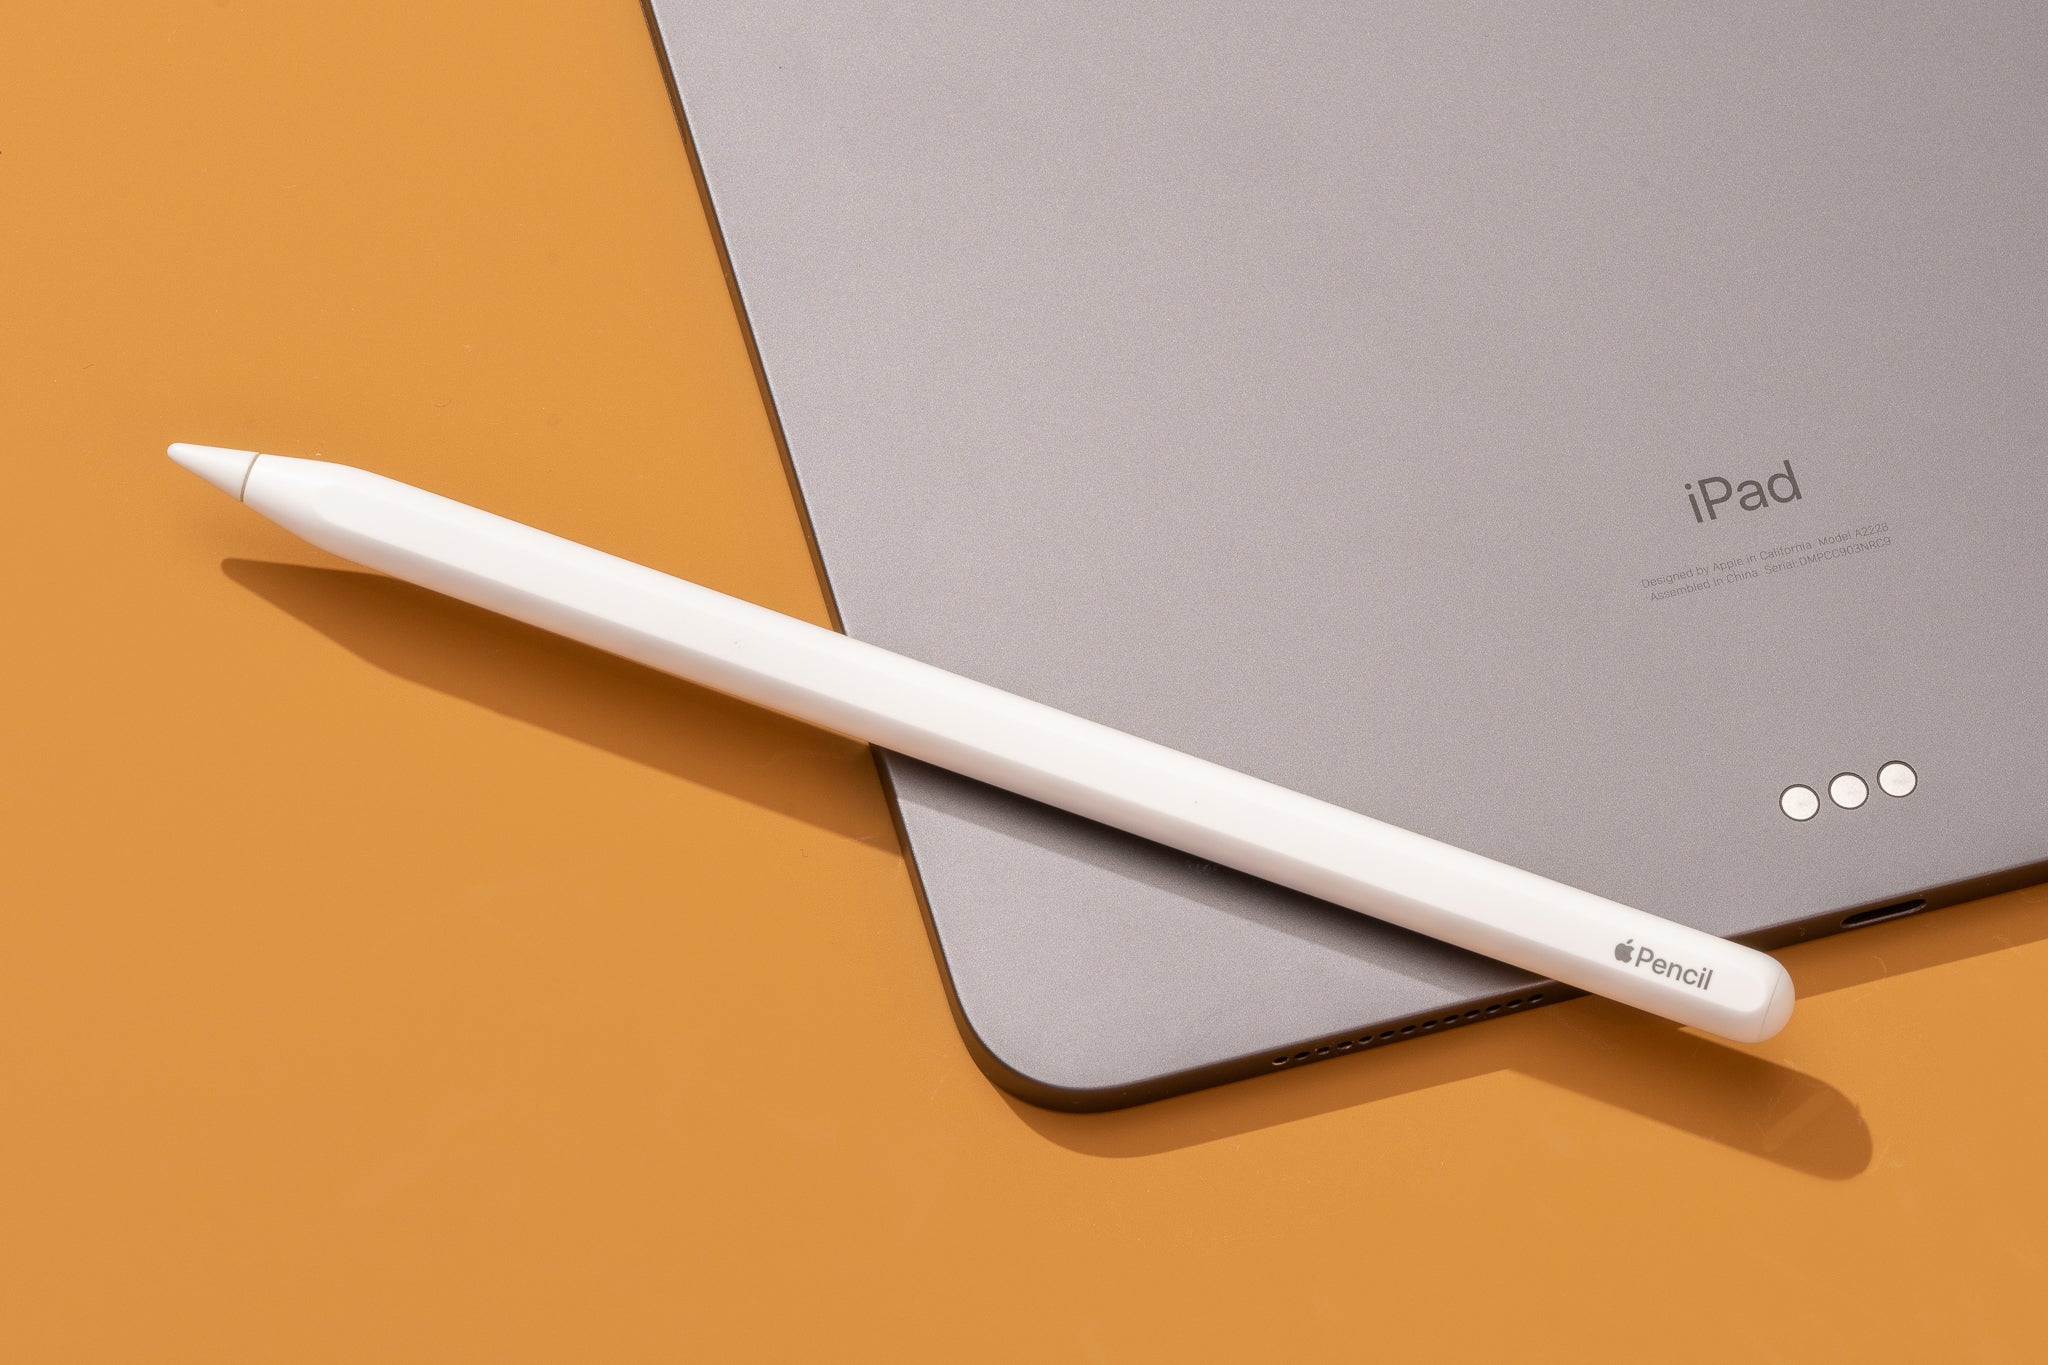
- Remove the cap: Gently remove the cap at the end of your Apple Pencil 2 to expose the Lightning connector.
- Charge your Apple Pencil 2: Connect your Apple Pencil 2 to your iPad using the Lightning connector. It will automatically pair and start charging. Alternatively, you can use the Lightning adapter included with your Apple Pencil 2 to charge it with a Lightning cable.
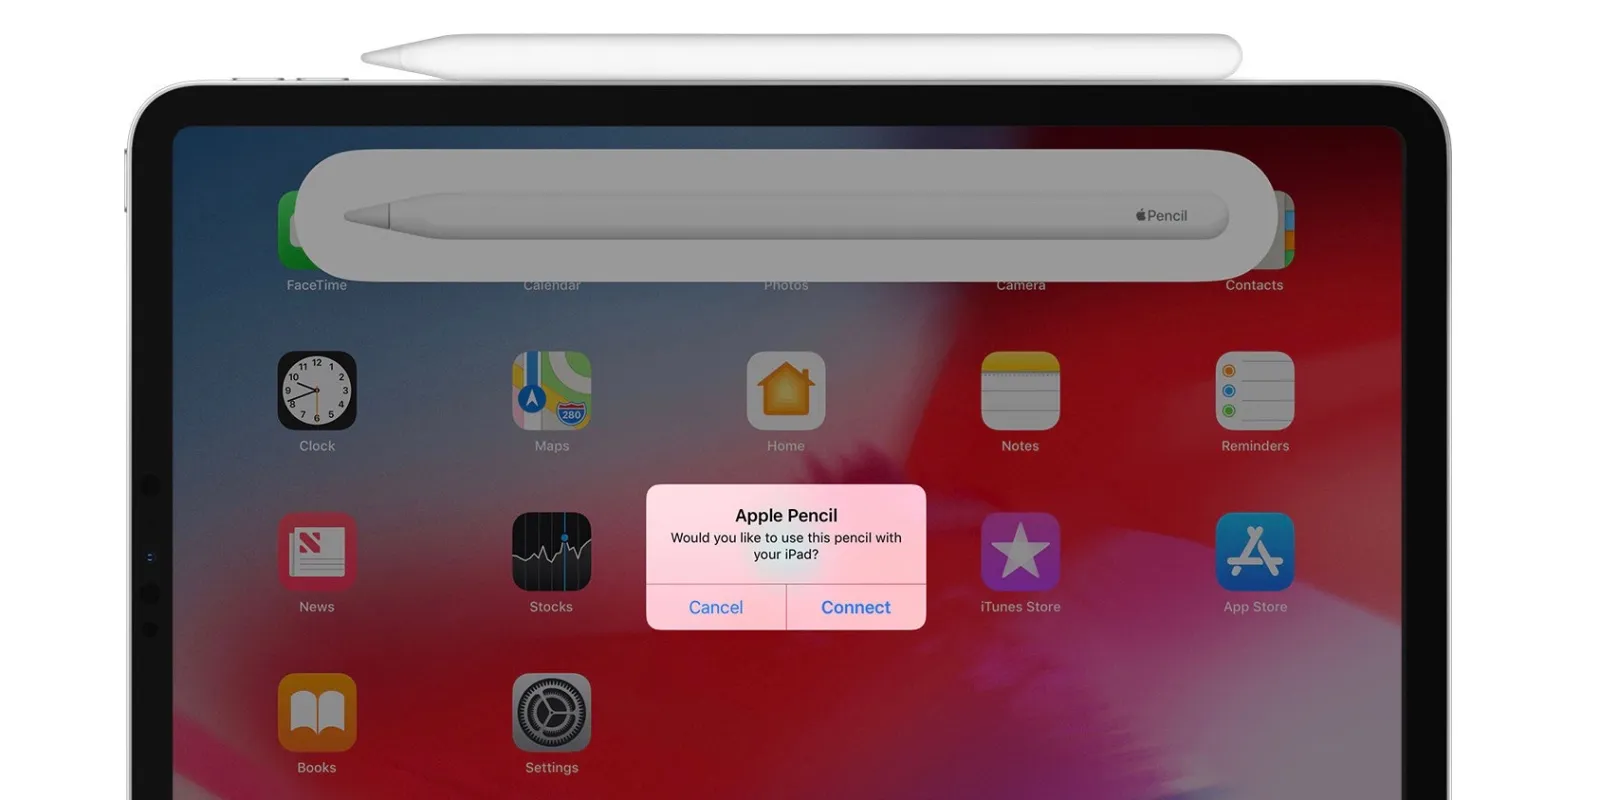
- Check the pairing status: Once connected, a pop-up will appear on your iPad’s screen, asking if you want to pair your Apple Pencil 2. Tap “Pair” to complete the pairing process.
- Customize your Apple Pencil 2 settings: Open the Settings app on your iPad and navigate to the Apple Pencil settings. Here, you can customize various options such as double-tap functionality, tip sensitivity, and palm rejection to suit your preferences.
That’s it! Your Apple Pencil 2 is now set up and ready to use. You can start exploring its features and enjoy a seamless and intuitive drawing experience.
Pairing Apple Pencil 2 with Your iPad
Pairing your Apple Pencil 2 with your iPad allows you to effortlessly use it for various tasks such as drawing, note-taking, and more. Follow these steps to pair your Apple Pencil 2:
- Make sure Bluetooth is enabled: On your iPad, go to “Settings” and check if Bluetooth is enabled. If not, toggle it on.
- Remove the cap: Gently remove the cap at the end of your Apple Pencil 2 to reveal the Lightning connector.
- Connect your Apple Pencil 2: Plug the Lightning connector of your Apple Pencil 2 into the Lightning port of your iPad. The pairing process will start automatically.
- Follow on-screen instructions: On your iPad, a pop-up will appear, asking if you want to pair your Apple Pencil 2. Tap “Pair” to confirm.
- Confirm the pairing: Your iPad will display a message confirming that your Apple Pencil 2 is paired and connected. You’re now ready to use it with your iPad.
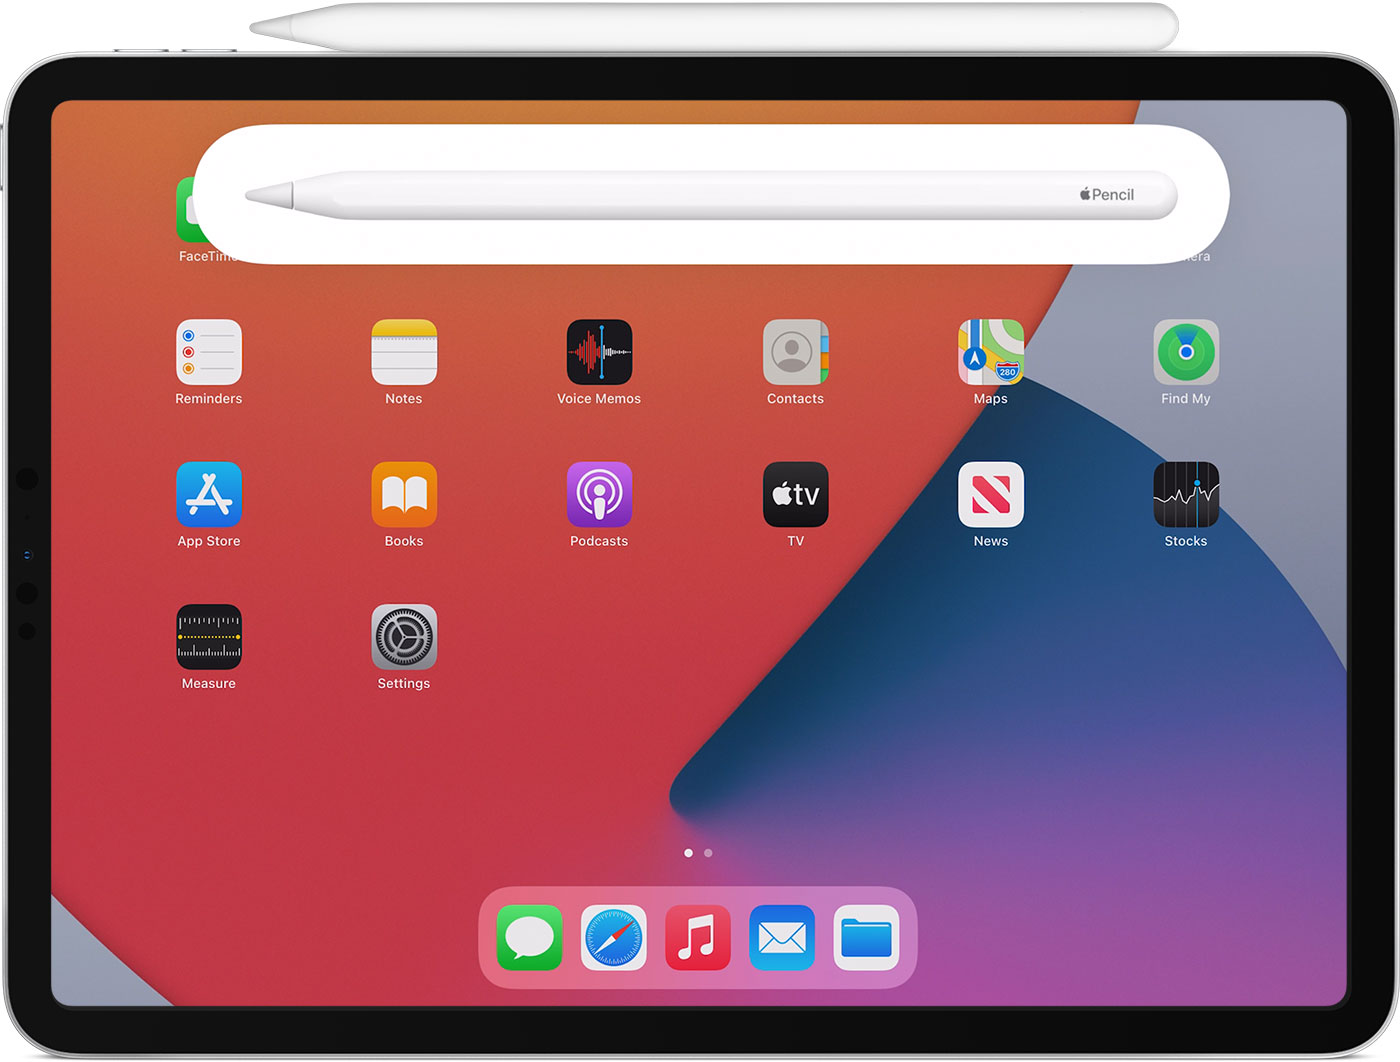
Once paired, your Apple Pencil 2 will be recognized by your iPad, and you can start using it right away. The seamless pairing ensures a stable connection and optimized performance, allowing you to draw, sketch, and write with precision and ease.
Charging Apple Pencil 2
Keeping your Apple Pencil 2 charged is essential to ensure uninterrupted use and optimal performance. Follow these steps to charge your Apple Pencil 2:
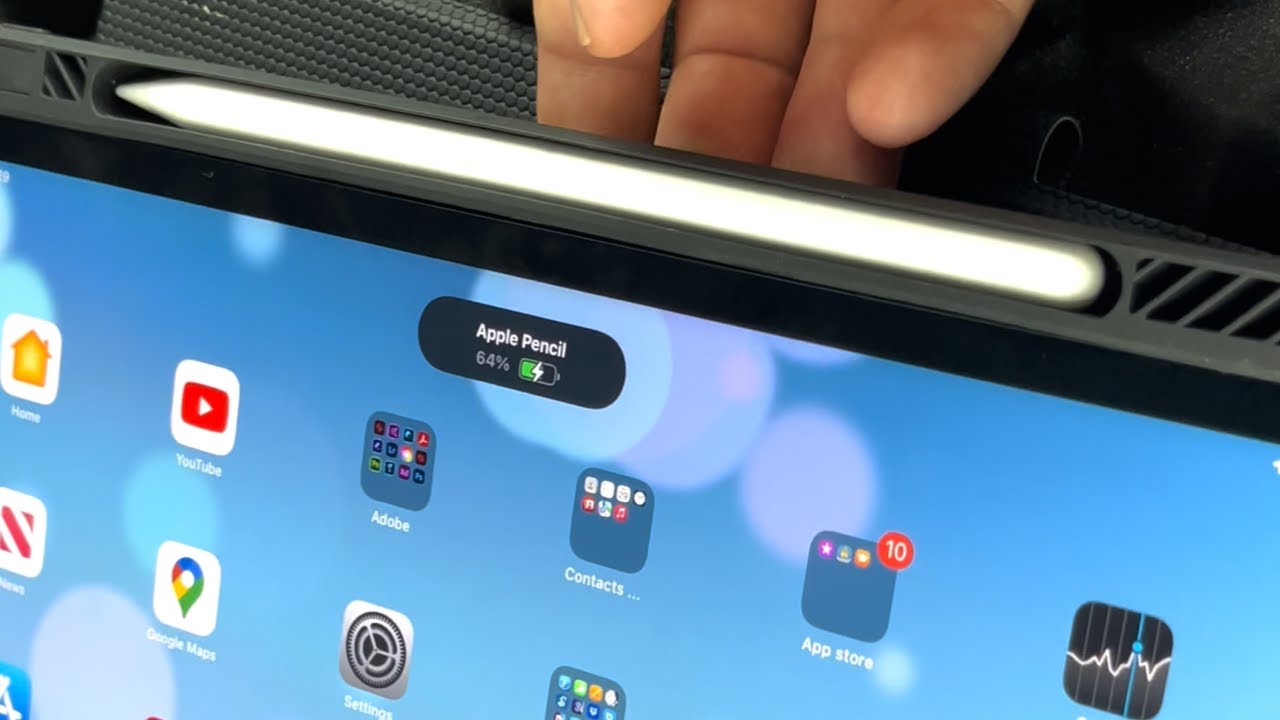
- Check the battery level: To check the battery level of your Apple Pencil 2, you can swipe down from the top-right corner of your iPad’s screen to access the Control Center. Look for the battery widget and check the Apple Pencil 2’s battery percentage.
- Charge with your iPad: The easiest way to charge your Apple Pencil 2 is to connect it directly to your iPad. Simply remove the cap at the end of the Apple Pencil 2, revealing the Lightning connector. Plug it into the Lightning port on your iPad, and the charging will begin automatically.
- Use a Lightning adapter: In case you don’t want to charge the Apple Pencil 2 using your iPad, you can use the Lightning adapter that comes with it. Connect one end of the Lightning adapter to the Lightning cable, and the other end to the Apple Pencil 2’s Lightning connector. Then, plug the Lightning cable into a power source.
- Monitor the charging status: You can monitor the charging status of your Apple Pencil 2 either through the battery widget in the Control Center or by checking the charging indicator in the status bar of your iPad’s screen.
- Full charge: It takes approximately 15 minutes of charging to get up to 30 minutes of usage. A full charge will give you around 12 hours of usage, but this may vary depending on your usage patterns.
Remember, it’s a good practice to charge your Apple Pencil 2 whenever its battery level drops significantly to avoid running out of charge when you need it the most. By following these simple charging guidelines, you can ensure that your Apple Pencil 2 is always ready to assist you in your creative endeavors.
Checking Battery Life
It’s important to keep an eye on the battery life of your Apple Pencil 2 to ensure that it’s ready for use whenever you need it. Here are a few ways to check the battery life of your Apple Pencil 2:
- Using the battery widget: Swipe down from the top-right corner of your iPad’s screen to access the Control Center. Look for the battery widget, which displays the battery percentage of your Apple Pencil 2.
- In the Bluetooth settings: Open the Settings app on your iPad and go to “Bluetooth”. Find your Apple Pencil 2 in the list of connected devices. The battery level will be displayed next to the Apple Pencil 2’s name.
- Checking the charging status: When you connect your Apple Pencil 2 to your iPad for charging, the battery indicator will appear in the status bar of your iPad’s screen. It will show a lightning bolt icon next to the battery icon until the Apple Pencil 2 is fully charged.
- Low battery notifications: When the battery level of your Apple Pencil 2 is low, your iPad will display a notification to alert you. This gives you an indication that it’s time to charge your Apple Pencil 2.
By regularly checking the battery life of your Apple Pencil 2, you can ensure that it’s adequately charged for your creative tasks. Remember to charge your Apple Pencil 2 whenever necessary to avoid running out of battery power during use. Keeping your Apple Pencil 2 charged will enable you to make the most of its features and unleash your creativity without interruption.
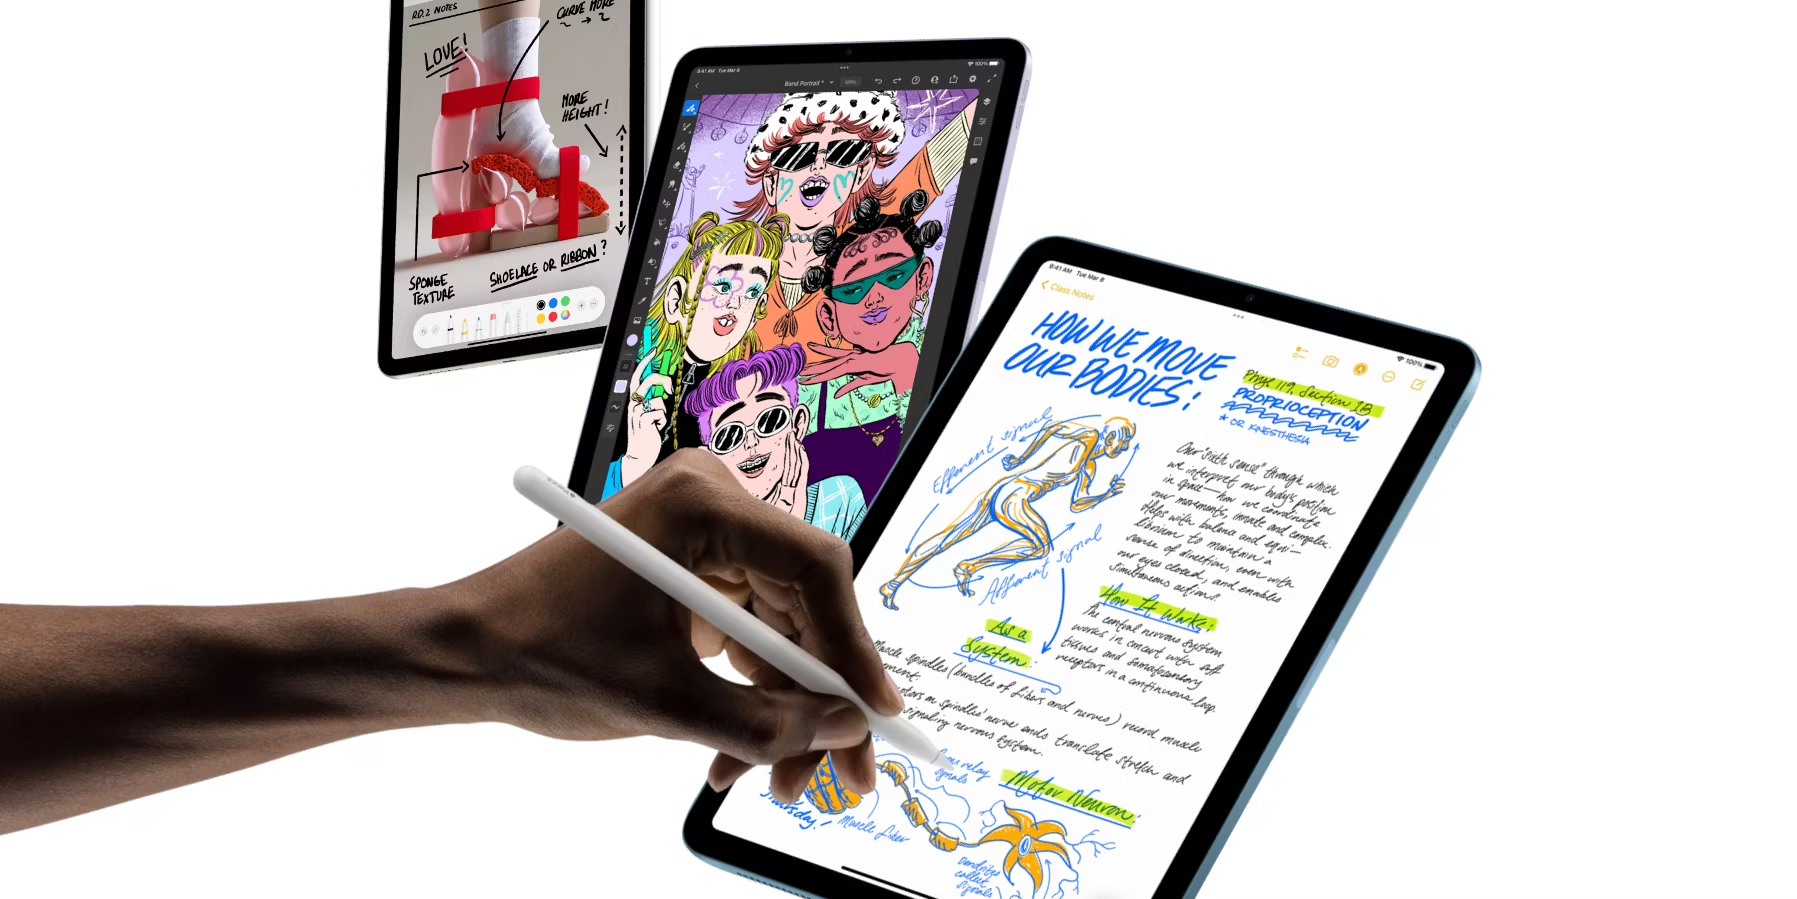
Using Apple Pencil 2 with Notes App
The Apple Pencil 2 is a perfect companion for the Notes app on your iPad. Its precision and pressure sensitivity make it ideal for sketching, handwriting, and annotating. Here are some tips on how to make the most of using your Apple Pencil 2 with the Notes app:
- Create new notes: Open the Notes app on your iPad and tap the “+” button to create a new note. You can choose a blank canvas or utilize one of the predefined templates.
- Write and draw: With your Apple Pencil 2, simply start writing or drawing on the note. The high-resolution touch sensor of the Apple Pencil 2 captures every stroke with precision, giving you a natural and responsive experience.
- Change pen styles: Tap on the pen icon at the bottom of the screen to reveal various pen styles and thickness options. Experiment with different styles to add variety to your sketches or emphasize certain annotations.
- Use the eraser: The Apple Pencil 2 features a built-in eraser. Simply flip your Apple Pencil 2 and use the back end to erase any mistakes or unwanted strokes. It functions just like a traditional eraser, making it easy to correct errors.
- Utilize the ruler: Tap on the ruler icon at the bottom of the screen to enable the ruler tool. The ruler helps create straight lines or precise shapes in your sketches and diagrams.
- Add images and attachments: The Notes app allows you to easily insert images and attachments into your notes. Tap on the “+” button, select “Take a Photo” or “Scan Documents” to capture images directly or add files from your device.
- Organize your notes: The Notes app provides a straightforward interface for organizing your notes. You can create folders, use tags, or utilize the search function to find specific notes quickly.
- Collaboration and syncing: The Notes app allows you to collaborate with others on shared notes and sync your notes across multiple devices using iCloud. This makes it convenient to access your notes and collaborate seamlessly.
With the powerful combination of the Apple Pencil 2 and the Notes app, you can unleash your creativity, take handwritten notes, sketch ideas, and stay organized. Whether you’re a student, professional, or creative enthusiast, the Apple Pencil 2 and the Notes app make the perfect duo for capturing your thoughts and ideas in a digital format.
Using Apple Pencil 2 with Procreate App
If you’re an artist or enjoy digital drawing, the combination of the Apple Pencil 2 and the Procreate app provides a powerful and immersive creative experience. Here’s how you can make the most of using your Apple Pencil 2 with Procreate:
- Open Procreate: Launch the Procreate app on your iPad, and you’ll be greeted with a blank canvas ready for your creations.
- Choose your brush: Procreate offers a wide range of brushes to simulate various drawing tools and textures. Experiment with different brushes to find the one that fits your artistic style.
- Customize brush settings: Procreate allows you to tweak brush settings such as size, opacity, and flow. Adjust these parameters to achieve the desired effect in your artwork.
- Start drawing: With your Apple Pencil 2, begin drawing on the canvas. The pressure-sensitive tip of the Apple Pencil 2 allows you to vary line thickness and opacity, giving your artwork a realistic touch and depth.
- Use layers: Procreate supports layers, allowing you to work on different elements of your artwork independently. This provides flexibility and makes it easier to make edits without affecting the entire composition.
- Blend and smudge: Procreate offers blending and smudging tools that simulate traditional art techniques. Use your Apple Pencil 2 to blend and smudge colors, creating beautiful gradients and textures.
- Take advantage of gestures: Procreate supports various gestures that streamline your workflow. Use gestures like pinch to zoom, two-finger tap to undo, and three-finger swipe to redo to navigate the app effortlessly.
- Explore additional tools and features: Procreate comes equipped with a multitude of features such as brushes, effects, layer masks, selection tools, and more. Take the time to explore and experiment to unlock the full potential of the app.
- Export and share: Once you’re satisfied with your artwork, Procreate allows you to export your creations in various formats, including JPEG, PNG, and PSD. Share your masterpiece with others or showcase it on social media platforms.
The seamless integration of the Apple Pencil 2 with the Procreate app brings digital art to life, offering a wide range of tools and features that cater to both professional artists and art enthusiasts. Use your Apple Pencil 2 to create stunning digital artwork with precision and creativity.
Using Apple Pencil 2 with Adobe Illustrator
Adobe Illustrator is a powerhouse for vector-based graphics, and when combined with the Apple Pencil 2, it becomes a versatile tool for digital artists and designers. Here’s how you can make the most of using your Apple Pencil 2 with Adobe Illustrator:
- Open Adobe Illustrator: Launch the Adobe Illustrator app on your iPad, and create a new project or open an existing one to start working on.
- Select the Pen tool: In Adobe Illustrator, the Pen tool is your go-to tool for creating precise vector shapes and paths. Select the Pen tool from the toolbar.
- Start drawing: With your Apple Pencil 2, begin drawing on the canvas using the Pen tool. The pressure sensitivity of the Apple Pencil 2 allows you to control the thickness and weight of your strokes.
- Use the Selection tool: Adobe Illustrator provides a Selection tool that allows you to manipulate and modify your shapes or paths. Use your Apple Pencil 2 to select and transform individual elements or groups.
- Access additional tools: Adobe Illustrator offers a wide range of tools and features. Use your Apple Pencil 2 to access tools like the Shape Builder, Gradient tool, or Blob Brush for more advanced editing and designing.
- Utilize layers: Working with layers in Adobe Illustrator helps you organize and manage different elements of your artwork. Use the Layers panel to create, name, and arrange layers to keep your project well-structured.
- Adjust brush settings: Adobe Illustrator allows you to customize brush settings such as size, opacity, and pressure sensitivity. Experiment with different brush options to achieve the desired effect in your artwork.
- Take advantage of shortcuts: Adobe Illustrator offers various keyboard shortcuts that can speed up your workflow. Use your Apple Pencil 2 in combination with these shortcuts to navigate through tools and perform actions more efficiently.
- Save and export your artwork: Once you’re satisfied with your Adobe Illustrator artwork, save your project and export it in a desired file format. Adobe Illustrator supports popular formats like SVG, PDF, and AI.
With the Apple Pencil 2 and Adobe Illustrator, you have the power of a professional design tool at your fingertips. Whether you’re creating logos, illustrations, or intricate designs, the seamless integration of the Apple Pencil 2 with Adobe Illustrator enhances your precision and control, allowing you to bring your creative visions to life.
Customizing Apple Pencil 2 Settings
The Apple Pencil 2 offers customizable settings that allow you to personalize your drawing and writing experience on your iPad. Here’s how you can customize the settings of your Apple Pencil 2:
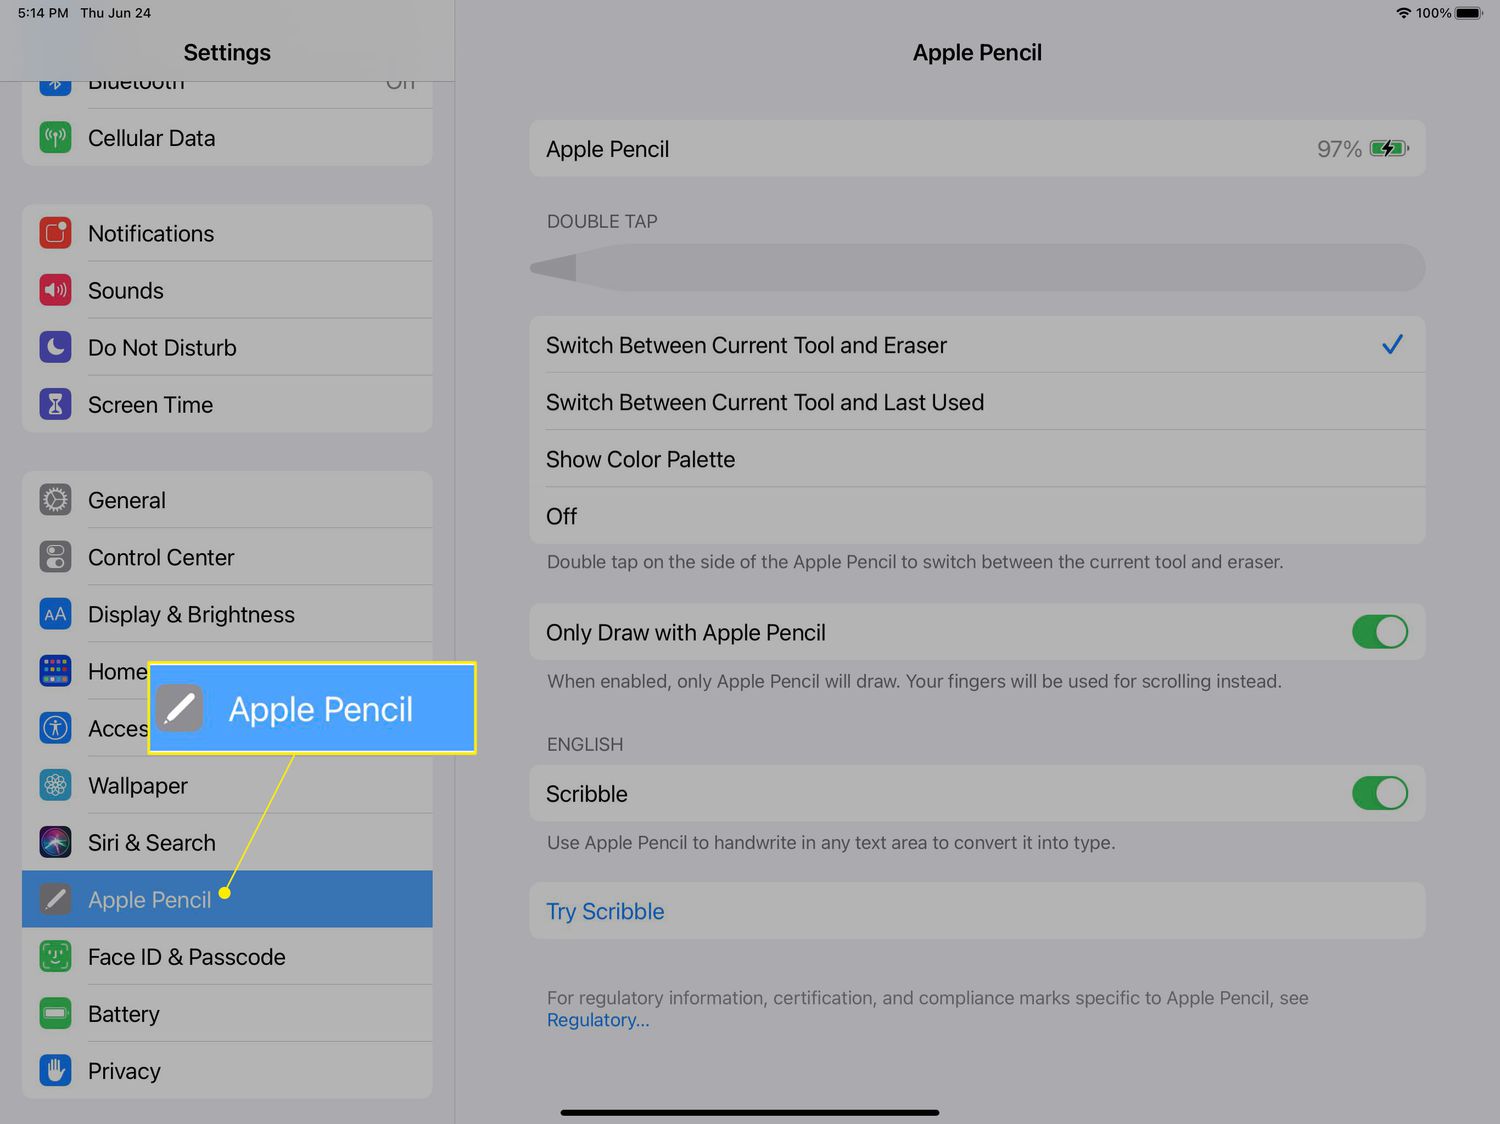
- Open the Settings app: On your iPad, open the Settings app from the home screen to access the Apple Pencil settings.
- Select Apple Pencil settings: Scroll down and tap on “Apple Pencil” to access the settings specific to your Apple Pencil 2.
- Double-tap functionality: By default, double-tapping the side of your Apple Pencil 2 switches between the current tool and the eraser. In the Apple Pencil settings, you can customize the double-tap functionality to perform various actions, such as launching specific apps or switching to a different brush in drawing apps.
- Adjust tip feel and sensitivity: Depending on your preference, you can adjust the tip feel and sensitivity of the Apple Pencil 2. Play around with these settings to find the ideal balance that suits your drawing and writing style.
- Enable or disable palm rejection: Palm rejection allows your iPad to ignore touches and gestures made by your palm while using the Apple Pencil 2. This prevents accidental marks on your screen while you draw or write. In the Apple Pencil settings, you can toggle this feature on or off based on your preference.
- Check battery status: In the Apple Pencil settings, you can view the battery percentage of your Apple Pencil 2. This provides you with an overview of the current charge level, ensuring that you always have enough power for your creative sessions.
- Pair or unpair your Apple Pencil 2: If needed, you can pair or unpair your Apple Pencil 2 from your iPad in the Apple Pencil settings. This can be helpful when switching between devices or troubleshooting connectivity issues.
By customizing the settings of your Apple Pencil 2, you can tailor its functionality to your specific preferences and workflow. Experiment with different settings to optimize your drawing and writing experience, allowing you to fully unleash the potential of your Apple Pencil 2 on your iPad.
Troubleshooting Apple Pencil 2 Issues
While the Apple Pencil 2 is known for its seamless performance, there may be times when you encounter issues. Here are some common problems and troubleshooting steps you can take to resolve them:
- Check the charging: If your Apple Pencil 2 is not working, ensure that it is fully charged. Connect it to your iPad using the Lightning connector and let it charge for a few minutes.
- Restart your iPad: Sometimes, a simple restart can resolve connectivity or compatibility issues. Restart your iPad by pressing and holding the power button until the “Slide to Power Off” slider appears. Then, slide to turn it off and wait a few seconds before turning it on again.
- Check for firmware updates: Ensure that your iPad and Apple Pencil 2 are running the latest firmware versions. Go to the Settings app on your iPad, navigate to “General” > “Software Update,” and update your device if there are any available updates.
- Re-pair your Apple Pencil 2: If your Apple Pencil 2 is not connecting to your iPad, try unpairing and re-pairing it. Open the Settings app, go to “Bluetooth,” find your Apple Pencil 2 in the list of devices, tap the “i” icon next to it, and select “Forget This Device.” Then, follow the initial pairing steps mentioned earlier.
- Check for debris or damage: Inspect the Lightning connector on your Apple Pencil 2 for any debris or damage. If necessary, gently clean it with a soft, lint-free cloth. Also, check the tip of the Apple Pencil 2 for any visible wear or damage.
- Try a different app: If your Apple Pencil 2 is not working in a particular app, try using it in a different app to determine if the issue is app-specific or related to the Apple Pencil 2 itself.
- Reset your iPad’s settings: If none of the above solutions work, you can try resetting your iPad’s settings. Go to the Settings app, navigate to “General” > “Reset,” and select “Reset All Settings.” Note that this will reset all your personalized settings, but it may help fix any underlying software-related issues.
- Contact Apple Support: If you have tried all the troubleshooting steps and your Apple Pencil 2 is still not functioning correctly, it may be time to contact Apple Support for further assistance. They can provide guidance specific to your situation and help resolve any hardware or software problems.
By following these troubleshooting steps, you can address common issues and ensure that your Apple Pencil 2 functions smoothly, allowing you to enjoy a seamless and uninterrupted experience with your iPad.
Cleaning and Care for Apple Pencil 2
Proper cleaning and care of your Apple Pencil 2 can help prolong its lifespan and maintain its performance. Here are some tips to keep your Apple Pencil 2 in optimal condition:
- Regularly wipe the exterior: Use a soft, lint-free cloth to wipe the exterior of your Apple Pencil 2. This helps remove fingerprints, dust, and dirt that may accumulate over time.
- Be mindful of the tip: The tip of the Apple Pencil 2 is delicate and can wear down over extended use. Avoid pressing too hard or using excessive force while drawing or writing. If you notice any deformation or wear on the tip, consider replacing it with a new one.
- Keep it in a secure place: When you’re not using your Apple Pencil 2, store it in a secure place to protect it from accidental damage. Opt for a pencil case or a dedicated holder to ensure it’s safe from scratches or being dropped.
- Avoid extreme temperatures: Extreme temperatures can affect the performance of the Apple Pencil 2. Avoid exposing it to excessive heat or cold, as it can cause damage to the internal components or affect the battery life.
- Use the iPad’s magnetic attachment: If your iPad has a magnetic attachment feature, take advantage of it to keep your Apple Pencil 2 secure when not in use. This helps prevent accidental falls or misplacement.
- Only use a Lightning cable for charging: When charging your Apple Pencil 2, use the Lightning cable provided or a compatible cable. Avoid using non-certified cables, as they may not provide the necessary power or damage the battery.
- Avoid contact with liquids: Liquids can damage the internal components of your Apple Pencil 2. Keep it away from water, beverages, and any other liquids to prevent any potential damage.
- Regularly check for updates: Keep your iPad and Apple Pencil 2 up to date with the latest firmware updates. These updates often contain performance improvements and bug fixes that can enhance the functionality and reliability of your Apple Pencil 2.
By following these cleaning and care tips, you can maintain the performance and longevity of your Apple Pencil 2. With proper care, your Apple Pencil 2 will continue to be a valuable tool for your creative endeavors on your iPad.