Introduction
Google Chrome, the popular web browser developed by Google, allows users to install various extensions to enhance their browsing experience. These extensions can range from ad blockers and password managers to productivity tools and social media add-ons. However, it is crucial to keep these extensions updated to ensure they function properly and remain secure.
In this article, we will guide you through the process of updating Google Chrome extensions. We will cover both automatic and manual update methods, as well as provide troubleshooting tips for any issues you may encounter during the process.
Regularly updating your Chrome extensions is essential for several reasons. First, updates often include bug fixes and performance enhancements, which can improve the overall efficiency and stability of the extension. Second, updates may introduce new features and functionalities that enhance your browsing experience. Lastly, and most importantly, updates often address security vulnerabilities, keeping your browser and personal information safe from malicious attacks.
Now, let’s explore the different methods you can use to update your Google Chrome extensions and ensure a seamless browsing experience.
Checking for Updates
Before diving into the update process, it’s important to know how to check if there are any pending updates for your Google Chrome extensions. Thankfully, Chrome provides a straightforward way to do this.
To check for updates, follow these simple steps:
- Launch Google Chrome on your computer.
- Click on the three-dot menu icon in the top-right corner of the browser window.
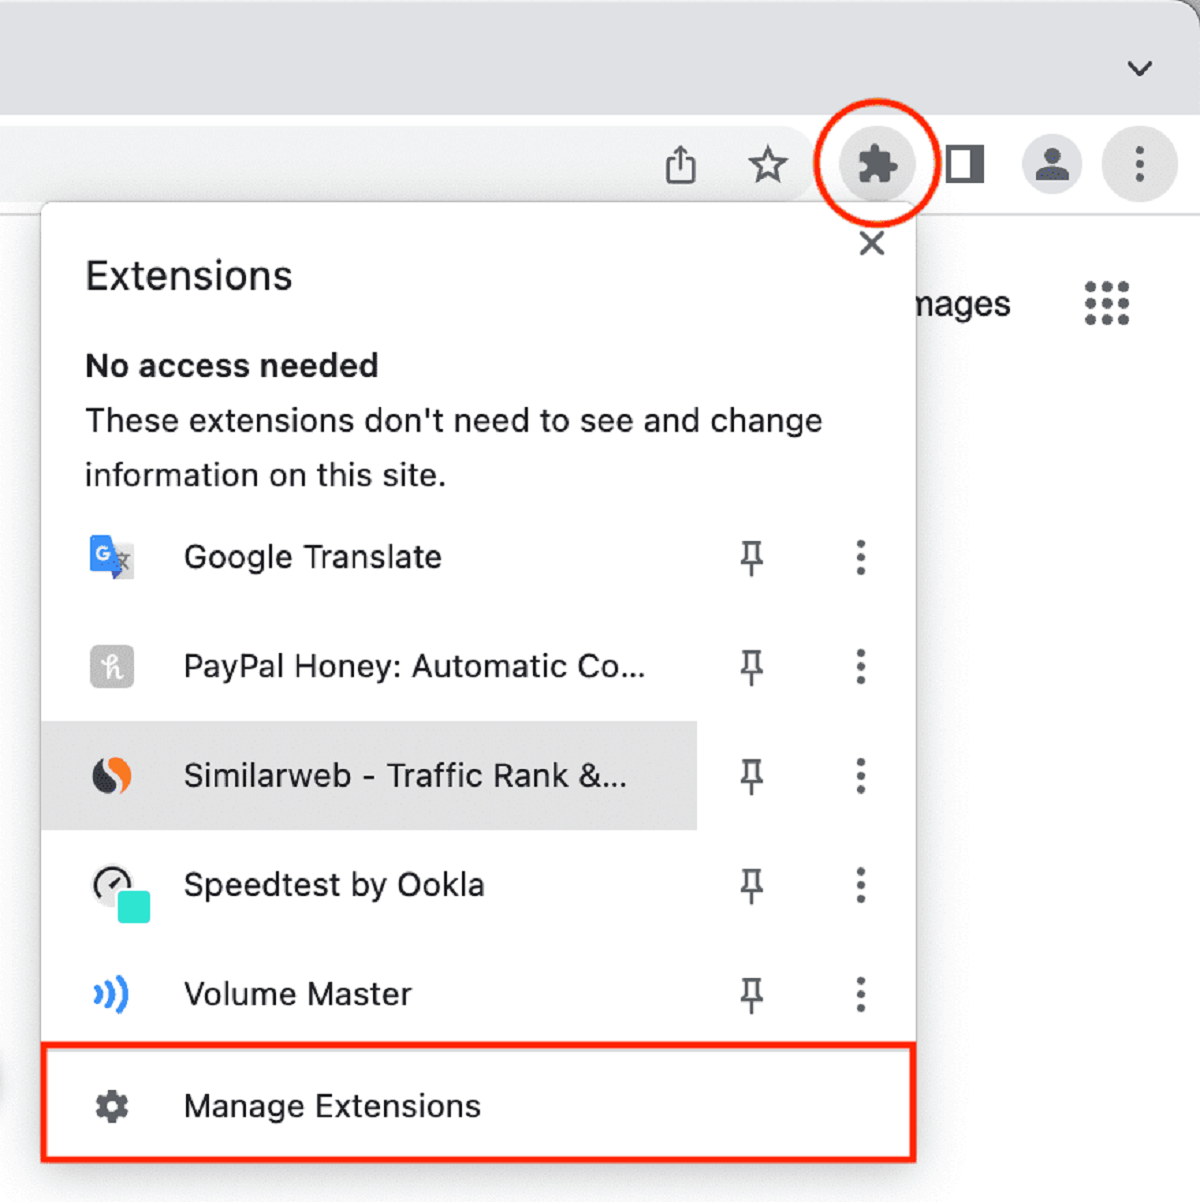
- From the dropdown menu, hover your cursor over “More tools” and then click on “Extensions.”
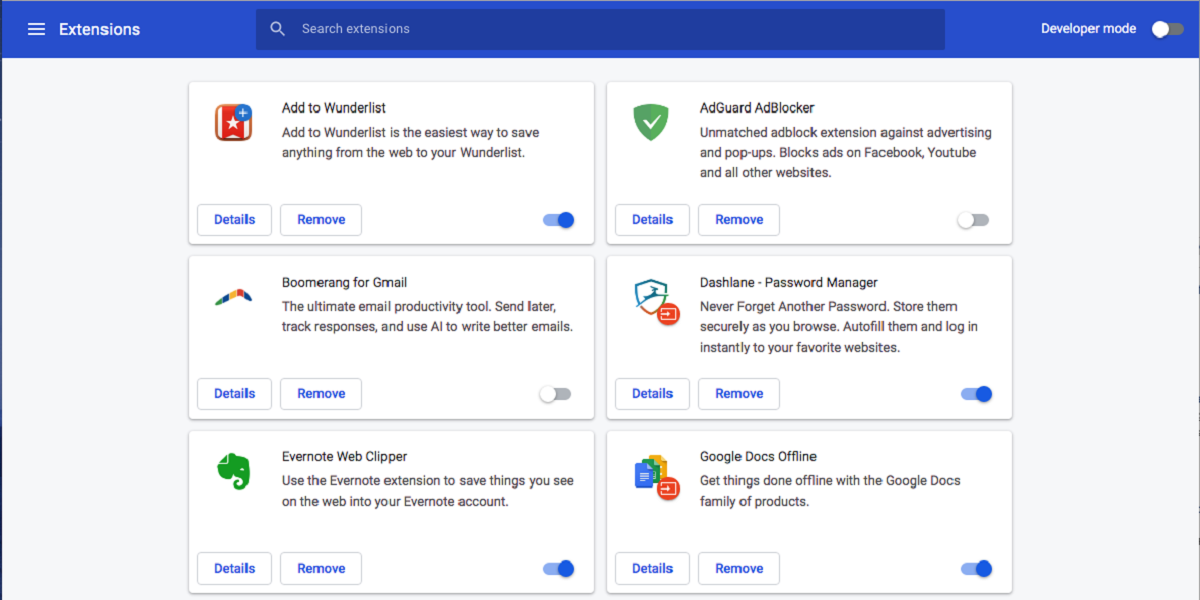
- You will be redirected to the Extensions page, where you can see a list of all the extensions currently installed in your browser.
- Look for the “Developer mode” toggle switch on the top-right corner of the page and make sure it’s turned off.
- Once developer mode is disabled, you will see an “Update” button appear next to any extensions that have an available update. Click on this button to update the respective extension.
- If you don’t see an “Update” button next to any extensions, it means that all your installed extensions are already up to date.
It’s important to note that Chrome automatically checks for updates to your extensions periodically. However, if you want to manually check for updates, simply follow the steps outlined above.
Regularly checking for updates is crucial to ensure that you have the latest features, bug fixes, and security patches for your extensions. It’s recommended to check for updates at least once a month to stay on top of any potential updates released by extension developers.
Updating Automatically
Google Chrome provides the option to automatically update your installed extensions, ensuring that you always have the latest version without manual intervention. Enabling automatic updates is a convenient way to keep your extensions up to date without having to check for updates regularly.
Follow these steps to enable automatic updates for your Chrome extensions:
- Launch Google Chrome and click on the three-dot menu icon in the top-right corner of the browser window.
- From the dropdown menu, hover your cursor over “More tools” and then click on “Extensions.”
- In the Extensions page, locate the “Update” button and click on it to open the extension’s settings.
- In the extension’s settings, look for the “Allow automatic updating” option and ensure that it is turned on.
- If the option is already turned on, you can be confident that your extension will be updated automatically whenever a new version is released.
Enabling automatic updates for your extensions is highly recommended to ensure that you are always using the latest features and security patches. This way, you can enjoy a smooth browsing experience without any interruptions caused by outdated or vulnerable extensions.
However, it’s important to note that enabling automatic updates may result in new versions of extensions being installed without your knowledge. If you prefer to have more control over the update process, you can choose to update your extensions manually instead.
Manual Updating
If you prefer to have more control over the update process or if you have disabled automatic updates, you can manually update your Google Chrome extensions. Manual updating allows you to review the changes made in the new version before applying the update.
Here’s how you can manually update your extensions:
- Open Google Chrome and click on the three-dot menu icon located in the top-right corner of the browser window.
- From the dropdown menu, hover your cursor over “More tools” and then click on “Extensions.”
- In the Extensions page, you will see a list of all the extensions installed in your browser.
- Take note of any extensions that have a pending update. These extensions will display an “Update” button next to them.
- To update a specific extension, click on the “Update” button next to it.
- The extension will start updating, and you may need to wait a few seconds for the process to complete.
- Once the update is finished, you can verify that the extension now displays the latest version.
It’s important to periodically check for updates manually, especially if you have disabled automatic updates. This ensures that you don’t miss out on important bug fixes, security patches, and new features released by the extension developers.
Remember to check for updates regularly and update your extensions as needed to ensure optimal performance and security while browsing with Google Chrome.
Troubleshooting
While updating Google Chrome extensions is usually a smooth process, you may encounter some issues along the way. Here are some common troubleshooting steps to help you overcome any problems you might face:
- Extension Update Failure: If an extension update fails, you can try disabling and re-enabling the extension. Go to the Extensions page and toggle off the extension, then turn it back on again. If the issue persists, consider uninstalling and reinstalling the extension.
- Incompatibility with Chrome Version: Sometimes, an extension may not work properly after updating Chrome. In such cases, check for extension compatibility. Visit the extension’s page on the Chrome Web Store to see if any user comments indicate compatibility issues with the current Chrome version. If compatibility is a problem, you may need to wait for the extension developer to release an update that resolves the issue.
- Other Extension Conflicts: Conflicts between extensions can cause issues with updates. Try disabling other extensions one by one to identify if a particular extension is causing the problem. Once you identify the conflicting extension, you can decide whether to keep it disabled or seek an alternative.
- Clearing Cache and Cookies: If you experience any unexpected behavior after updating extensions, it’s a good practice to clear your browser’s cache and cookies. This can help resolve any conflicts caused by outdated or corrupted data.
- Rebooting and Reinstalling Chrome: In rare cases, if none of the above troubleshooting steps work, you may need to reboot your computer or reinstall Chrome to resolve the issue. Remember to back up your bookmarks, passwords, and other important data before reinstalling Chrome.
If you have followed these troubleshooting steps and are still experiencing issues with updating or using Chrome extensions, it’s recommended to reach out to the extension developer for further assistance. Developers are often responsive and can provide specific guidance tailored to their respective extensions.
Remember, keeping your extensions updated is crucial for optimal functionality and security. By troubleshooting and resolving any issues, you can ensure a seamless browsing experience with Google Chrome.
Conclusion
Updating your Google Chrome extensions is essential to maintain a secure and efficient browsing experience. In this article, we have explored the different methods for updating your extensions, including checking for updates, enabling automatic updates, and manually updating extensions.
By regularly checking for updates, you can ensure that you have the latest features, bug fixes, and security patches for your extensions. This helps optimize their performance and protect your browsing activities from potential threats.
If you prefer a hands-off approach, enabling automatic updates is a convenient option. It ensures that your extensions are automatically updated whenever new versions are released.
On the other hand, manual updating grants you more control over the update process. It allows you to review the changes in the new version before applying the update. This is helpful if you want to ensure compatibility with your current Chrome version or if you prefer to have more visibility into the updates being installed.
Lastly, we provided troubleshooting tips to help you overcome any issues you may encounter during the updating process. From extension update failures to conflicts with other extensions, these troubleshooting steps can help you resolve common problems and maintain a smooth browsing experience.
Remember to regularly check for updates, whether manually or automatically, and promptly apply any available updates to keep your extensions performing at their best.
By staying proactive and keeping your Google Chrome extensions updated, you can enjoy a more secure and enjoyable browsing experience with enhanced functionality and improved performance.