Introduction
Chrome extensions have become an integral part of our browsing experience, allowing us to customize and enhance the functionality of Google Chrome. From ad blockers and productivity tools to language translators and social media assistants, these extensions have made our lives easier in countless ways.
However, there may be instances where you need to save or backup your Chrome extensions. This could be due to a system upgrade, switching to a new computer, or simply wanting to have a backup copy of your favorite extensions in case they become unavailable in the future.
In this article, we will explore three different methods to save your Chrome extensions. Whether you prefer the built-in options provided by Google Chrome or want to utilize a third-party tool, we’ve got you covered.
By the end of this article, you’ll have the knowledge and tools necessary to save your Chrome extensions and ensure that you never lose them again. So without further ado, let’s dive in and discover the different methods at your disposal.
Why Save Chrome Extensions?
As avid users of Chrome extensions, you might wonder why it’s important to save them. After all, can’t you just reinstall them from the Chrome Web Store if needed? While that may be true for most extensions, there are several reasons why saving your Chrome extensions is a good idea.
Firstly, not all extensions available today will be available in the future. Extension developers may decide to discontinue their creations or remove them from the Chrome Web Store due to various reasons. By saving your favorite extensions, you can ensure that you always have access to them, even if they are no longer publicly available.
Secondly, if you rely heavily on certain extensions for your daily workflow or productivity, reinstalling them one by one can be time-consuming. By saving your extensions, you can easily restore them in one go, allowing you to quickly get back up and running after a system upgrade or switching to a new device.
Moreover, saving your Chrome extensions is a great way to preserve your personalized browsing experience. Extensions often store valuable data, such as settings, preferences, bookmarks, or even accumulated data like browsing history. By saving your extensions, you can ensure that you don’t lose any of this information, making the transition to a new device or reinstallation process seamless and hassle-free.
Furthermore, saving your extensions can be especially useful if you have limited internet connectivity or are going offline for an extended period of time. By having a backup copy of your extensions, you can still access their functionality even when an internet connection is not available.
Lastly, saving your Chrome extensions provides you with peace of mind. It’s always better to be proactive and have a backup in case anything unexpected happens to your extensions. Whether it’s a computer crash, accidental deletion, or an extension becoming incompatible with future Chrome updates, having a saved copy ensures that you won’t lose any valuable functionality or data.
Now that we understand the importance of saving Chrome extensions, let’s explore three different methods you can use to accomplish this task.
Method 1: Using the chrome://extensions page
The first method to save your Chrome extensions is by utilizing the built-in functionality provided by Google Chrome through the chrome://extensions page. This method allows you to easily export your extensions and save them as individual files on your computer.
To start, open a new tab in Google Chrome and type “chrome://extensions” in the address bar. Press Enter, and you will be taken to the extensions management page.
On this page, you will see a list of all your installed extensions, along with various details and options for each. Scroll down to the bottom of the page and click on the “Pack extension” button.
A small dialog box will appear, prompting you to specify the extension you want to pack. Click on the “Browse” button and select the folder where you want to save the packed extension file.
Note that you can choose to pack multiple extensions by selecting the “Pack extension with a key” option and providing the path to the extension folder. This is useful if you want to save multiple extensions at once.
Once you have selected the extension and the destination folder, click on the “Pack Extension” button. Google Chrome will then create a .crx file, which is a packed version of the extension that can be easily installed and restored.
Now, whenever you want to reinstall the extension or move it to another device, simply drag and drop the .crx file onto the chrome://extensions page, or use the “Load unpacked” option to select the folder containing the unpacked extension files.
Using the chrome://extensions page to save your extensions is a straightforward and efficient method. It allows you to quickly create backup copies of your extensions, ensuring that you can reinstall them whenever needed.
Now that we’ve covered the first method, let’s move on to the next one: using the Extension Manager.
Method 2: Using the Extension Manager
If you prefer a graphical interface to manage your Chrome extensions, you can use the Extension Manager to save and backup your extensions. The Extension Manager provides a user-friendly way to organize and export your extensions.
To access the Extension Manager, click on the three-dot menu icon in the top-right corner of your Chrome browser and go to “More Tools” > “Extensions”. Alternatively, you can type “chrome://extensions” in the address bar and press Enter.
Once you are on the Extension Manager page, you will see a list of all your installed extensions, similar to what you saw on the chrome://extensions page. However, the Extension Manager provides additional features and options for managing your extensions.
To save an extension, simply click on the “Details” button for the extension you want to back up. This will open the extension’s details page, where you can view its description, permissions, and other information.
On the details page, scroll down until you see the “Export” button. Clicking on this button will prompt you to choose a location on your computer to save the extension file. Select a folder, give the file a name, and click “Save” to export the extension.
The exported file will have a .crx extension, similar to the method using the chrome://extensions page. You can now store this file in a safe place or transfer it to another computer for later installation.
To install the extension from the backup file, navigate back to the Extension Manager page and click on the “Load unpacked” button. Browse to the location where you saved the extension backup file and select it.
The extension will be installed and ready to use. This method of using the Extension Manager provides a convenient way to export and import your extensions, making it easy to save and restore your favorite extensions whenever necessary.
Now that we’ve explored the second method, let’s move on to the final method: using a third-party backup tool.
Method 3: Using a Third-Party Backup Tool
If you prefer a more automated and comprehensive approach to backing up your Chrome extensions, using a third-party backup tool can be an excellent option. These tools provide additional features and flexibility for saving and restoring your extensions.
One popular third-party backup tool for Chrome extensions is called “Extension Backup” available on the Chrome Web Store. To use this tool, open the Chrome Web Store and search for “Extension Backup”. Install the extension and follow the instructions to set it up.
Once installed, the Extension Backup tool will automatically scan and detect all your installed extensions. It will provide you with a list of these extensions, allowing you to select the ones you want to back up.
After selecting the desired extensions, you can choose the backup location where you want to save the backup files. This can be a local folder on your computer or a cloud storage service for added security.
Click on the “Backup” button, and the Extension Backup tool will create a backup file for each selected extension. These backup files contain all the necessary information to restore the extensions on any device or reinstall them after a system upgrade.
Additionally, the Extension Backup tool also offers options to schedule automatic backups, ensuring that your extensions are always up-to-date and safely stored.
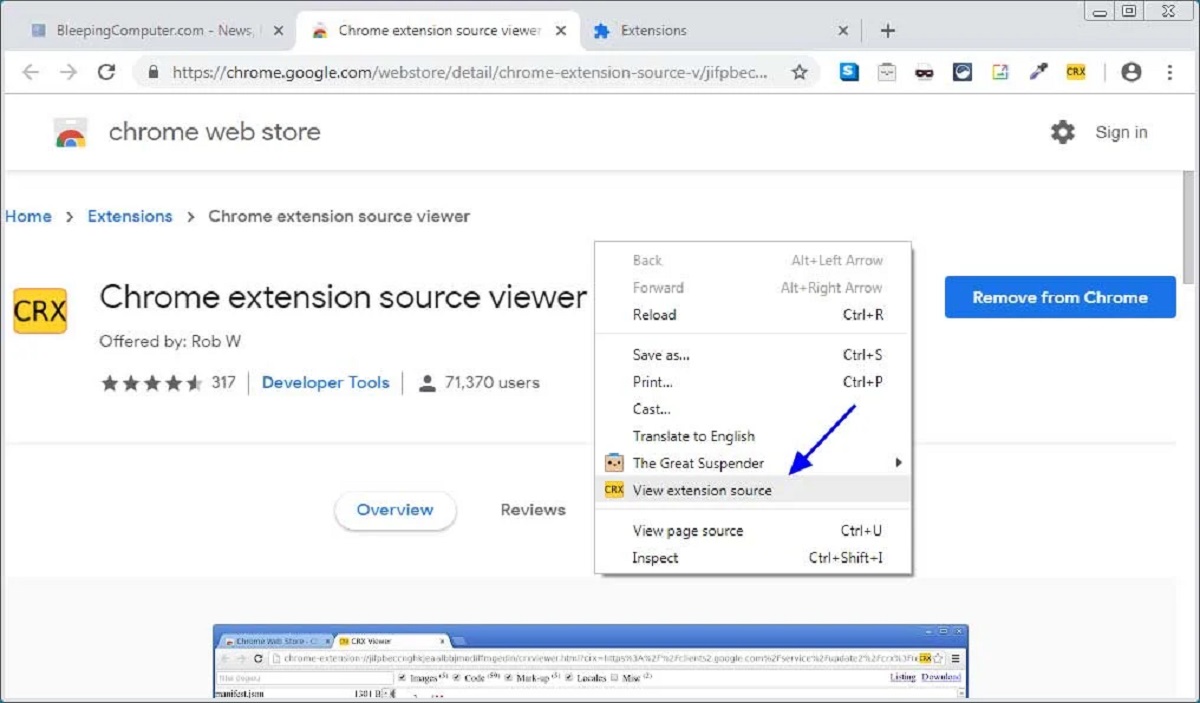
Other third-party backup tools, such as “Extension Source Viewer” and “ExtensionMania”, provide similar functionalities and may be worth exploring based on your preferences and requirements.
Using a third-party backup tool offers convenience and peace of mind, as it simplifies the process of saving and restoring your Chrome extensions. These tools often provide additional features and customization options, allowing you to have more control over your extension backups.
With the third method covered, we have now explored three different methods to save your Chrome extensions. Whether you choose to use the built-in options provided by Google Chrome or opt for a third-party backup tool, you now have the necessary knowledge to ensure that your favorite extensions are always backed up and easily accessible.
So go ahead and choose the method that suits you best, and never worry about losing your Chrome extensions again.
Conclusion
Having the ability to save and backup your Chrome extensions is essential for ensuring that you can always enjoy their functionality, even in unforeseen circumstances. We explored three different methods to help you accomplish this task: using the chrome://extensions page, utilizing the Extension Manager, and using third-party backup tools.
The chrome://extensions page provides a built-in option within Google Chrome itself. With just a few clicks, you can export your extensions as packed .crx files, which can be easily installed and restored whenever needed.
The Extension Manager offers a more user-friendly graphical interface for managing your extensions. Within the manager, you can export extensions as .crx files, allowing you to back them up and restore them effortlessly.
If you prefer a comprehensive and automated approach, using third-party backup tools like Extension Backup provides additional features and customization options. These tools make it easy to back up and restore your extensions, ensuring that you always have access to them, regardless of system upgrades or device changes.
By following any of these methods, you can confidently save your favorite Chrome extensions, safeguarding them from being discontinued or misplaced. Furthermore, preserving your extensions allows you to maintain your personalized browsing experience without losing valuable data or settings.
Now that you’re equipped with the knowledge of these three methods, you can choose the one that best suits your needs and preferences. Whether you rely on the built-in options or choose to utilize third-party tools, you can ensure that your Chrome extensions are securely backed up and ready for use whenever and wherever you need them.
So go ahead and start saving your Chrome extensions today, and never worry about losing them again. Enjoy a seamless browsing experience with your favorite extensions, knowing that you have taken the necessary steps to keep them safe.


