Introduction
Welcome to this step-by-step guide on how to disconnect a case fan from your computer. Whether you’re looking to upgrade, clean, or replace your case fan, this tutorial will provide you with the necessary instructions to safely and effectively unconnect it. Case fans play a crucial role in maintaining optimal airflow and preventing overheating in your computer system. However, there may be instances when you need to remove or replace a case fan, such as when it’s malfunctioning or when you want to upgrade to a more efficient model.
Before we get started, it’s important to note that this guide assumes you have some basic knowledge of computer hardware and are comfortable working with computer components. If you’re unsure or uneasy about any of the steps, it’s always recommended to consult a professional or have someone experienced assist you. Safety should always be a top priority when working with electronics.
In this guide, we will walk you through each step of disconnecting a case fan, from turning off the computer and opening the case to identifying the fan connection and safely unplugging it from the motherboard. We’ll also provide an optional step for those who want to replace the case fan with a new one.
So, if you’re ready to learn how to unconnect a case fan and tackle your computer maintenance or upgrade project, let’s get started!
Tools and Materials Needed
Before you begin the process of unconnecting a case fan, it’s important to gather the necessary tools and materials to ensure a smooth and successful operation. Here’s a list of what you’ll need:
- Screwdriver (typically a Phillips-head or a flat-head)
- Anti-static wrist strap (optional, but recommended to prevent static electricity damage to your computer components)
- Clean cloth or compressed air canister (if you’re planning to clean the case fan or the surrounding area)
- Replacement case fan (optional, if you’re planning to replace the existing fan)
- Thermal paste (optional, if you’re planning to replace the case fan and need to reapply thermal paste)
The screwdriver will be used to remove any screws securing the case fan to the computer case or holding the fan connector in place. The anti-static wrist strap can help prevent damage from static electricity that may be present while working with computer components. Using a clean cloth or compressed air canister can be useful for cleaning any dust or debris accumulated on the case fan or in the vicinity. If you’re planning to replace the case fan, having a replacement fan and thermal paste on hand will be necessary.
It’s important to ensure that you have the correct screwdriver for the job, as different computer cases may use different types of screws. Additionally, be sure to choose a replacement case fan that is compatible with your computer’s specifications, such as size, connector type, and airflow requirements.
Having these tools and materials ready before you begin will save you time and ensure that you have everything you need to successfully unconnect the case fan from your computer. With that said, let’s move on to the next step of the process.
Step 1: Turn Off the Computer and Disconnect the Power
The first and most crucial step in disconnecting a case fan is to turn off your computer and disconnect the power source. This is a crucial safety precaution to avoid any potential harm to yourself or damage to your computer.
Start by shutting down your computer. Close any open applications or files, and save your work if necessary. Once your computer has fully shut down, locate the power button and press it to turn off the system. Ensure that the computer is completely powered down before proceeding to the next step.
Next, it’s important to disconnect the power source by unplugging the power cord from the wall outlet or the surge protector. This will cut off the electricity supply to your computer and eliminate the risk of electric shock.
While it may be tempting to skip this step if you’re confident in your abilities, it’s essential to always follow proper safety procedures when working with electronics. Even if you’re only removing a case fan, unexpected electrical surges or accidental contact with live components can lead to injury or damage to your system.
Additionally, it’s a good practice to ground yourself to avoid any static electricity buildup. You can use an anti-static wrist strap connected to a grounded surface or touch a grounded metal object before proceeding. This helps to discharge any static electricity that could potentially damage sensitive electronic components.
By taking the time to turn off your computer and disconnect the power, you’re ensuring a safe working environment for yourself and protecting your computer from any accidental damage. Now that you’ve completed this step, you’re ready to move on to the next stage of the process.
Step 2: Open the Computer Case
Now that you have safely turned off your computer and disconnected the power, it’s time to open the computer case. Opening the case will provide you with access to the internal components, including the case fan that you want to unconnect.
The process of opening the computer case can vary depending on the type of case you have. Most desktop computer cases are held together with screws or clips.
If your computer case has screws, locate the screws that secure the side panel to the main body of the case. Typically, there are two or more screws on the backside of the case. Use a screwdriver to remove these screws and carefully set them aside. Once the screws are removed, gently slide or lift the side panel away from the case, revealing the internal components.
Alternatively, if your computer case has clips, look for small levers or buttons on the back or side of the case. Press, slide, or release these clips to unlock and remove the side panel. Be mindful of any resistance and ensure that you’re following the correct method specified for your particular case.
Some computer cases may have a combination of screws and clips, so it’s essential to examine the case carefully to determine the appropriate removal method.
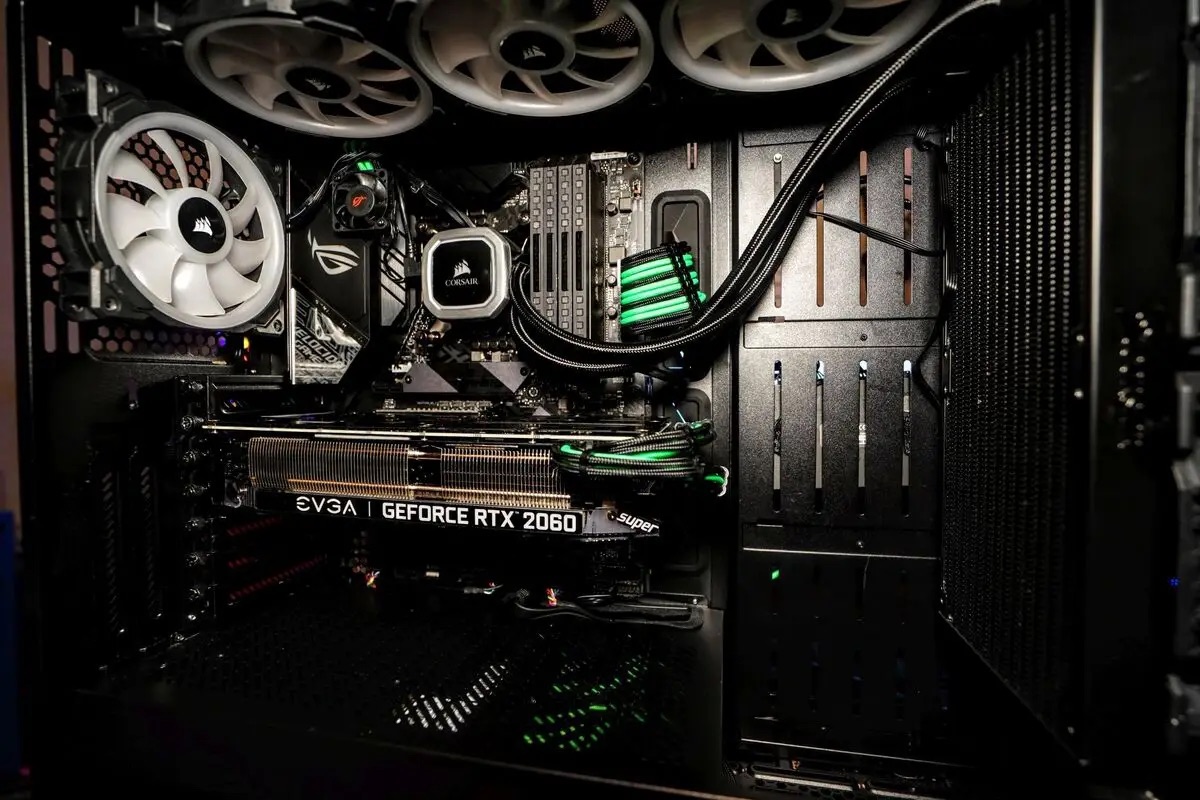
Once the side panel is removed, take a moment to familiarize yourself with the inside of the computer case. You will likely see various components, including the motherboard, CPU, RAM, and, of course, the case fan(s) that you’re planning to unconnect.
Keep in mind that different computer cases may have varying layouts and configurations, so the precise location and arrangement of components within the case may differ. Take note of the case fan that you want to unconnect and its connection to the motherboard.
With the computer case open, you’re now ready to proceed to the next step, where we will locate the case fan and identify its connection.
Step 3: Locate the Case Fan and Identify the Connection
Now that you have opened the computer case, it’s time to locate the specific case fan that you want to unconnect. Case fans are typically positioned within the case to provide optimal airflow and cooling for the internal components.
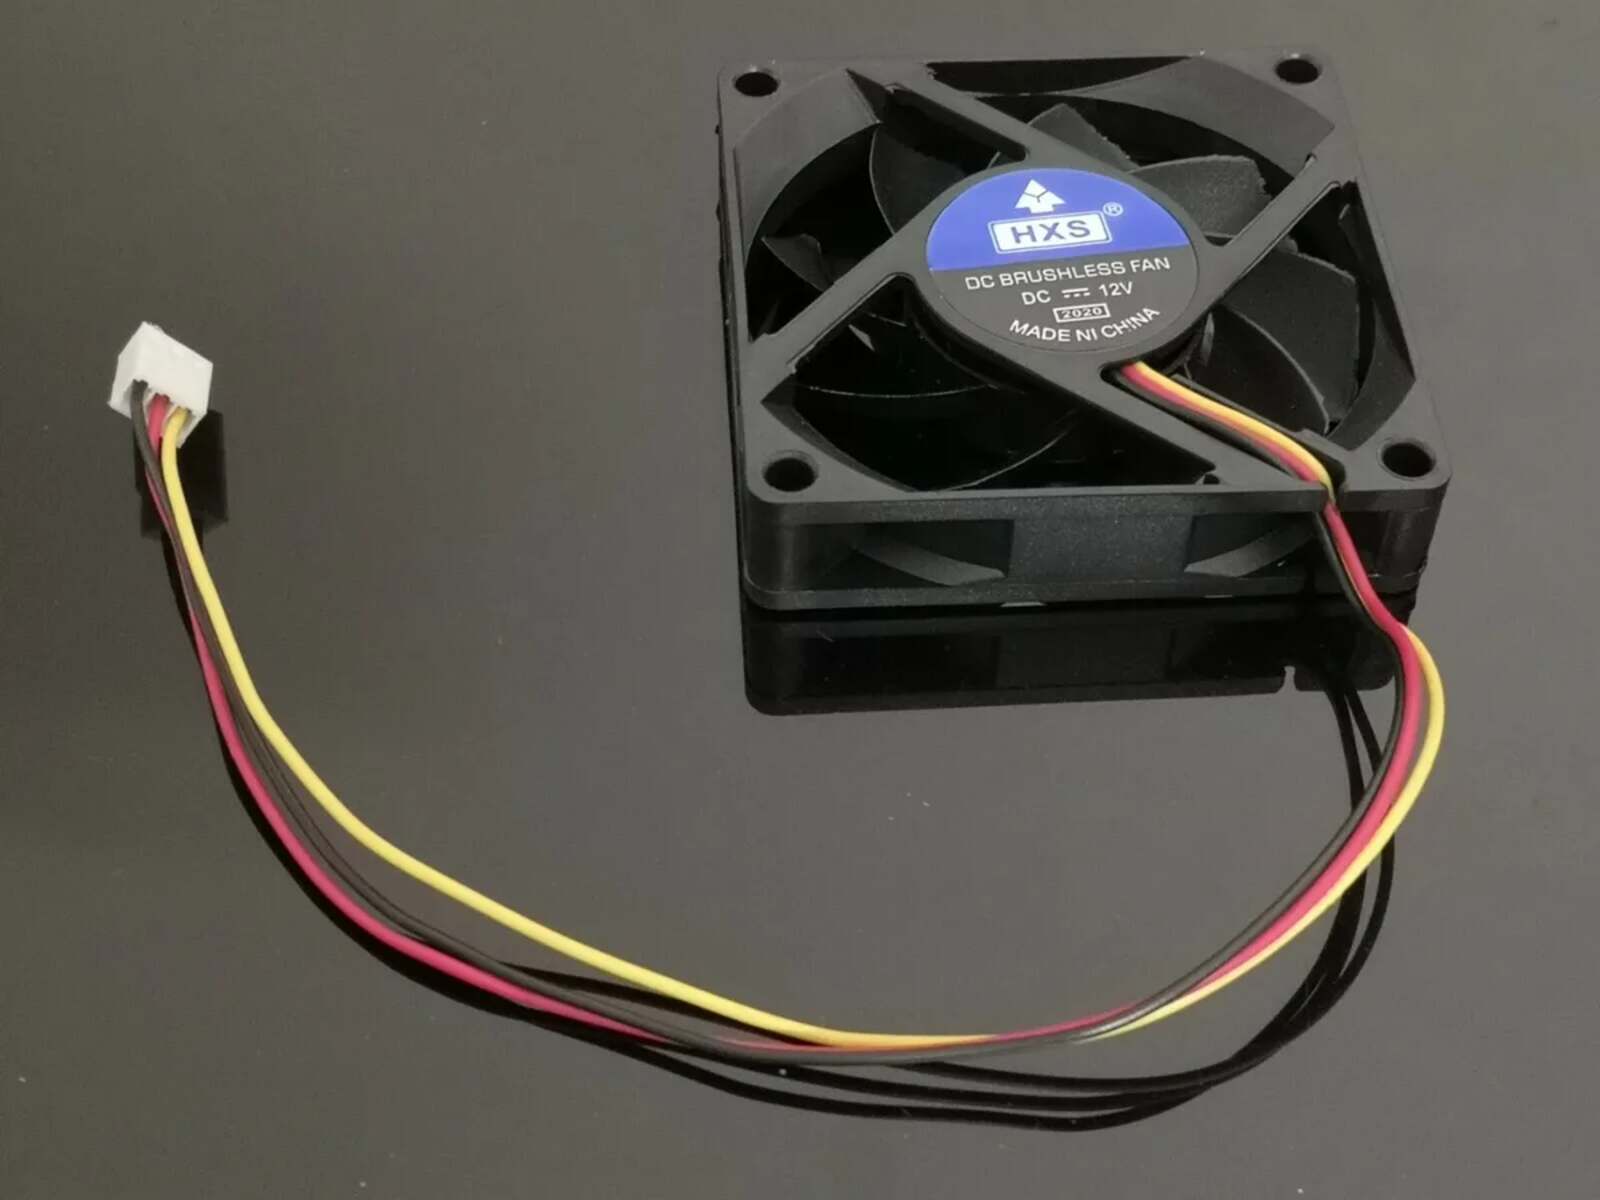
Take a moment to visually inspect the components and cables inside the case. Case fans are usually square or rectangular in shape, and they are often attached to the case using screws or brackets. Look for the fan that matches the size and appearance of the one you want to unconnect.
Once you have located the case fan, it’s important to identify its connection to the motherboard. The case fan is typically connected to the motherboard via a cable that plugs into a specific header labeled “SYS_FAN” or “CHA_FAN”. This connection allows the motherboard to control the fan speed and monitor the fan’s performance.
Carefully trace the cable from the case fan to its point of connection on the motherboard. Take note of any clips or connectors that may be securing the cable in place. Depending on the fan and motherboard model, the connector may be a small 3-pin or 4-pin connector.
By identifying the connection, you will have a better understanding of how to proceed with unconnecting the case fan. It’s important to handle the cables and connectors with care to prevent any damage.
Once you have successfully located the case fan and identified its connection, you’re ready to move on to the next step, where we will unplug the fan connector from the motherboard.
Step 4: Unplug the Fan Connector from the Motherboard
With the case fan and its connection to the motherboard identified, it’s time to unplug the fan connector. This step will effectively disconnect the power supply and control signal from the motherboard, allowing you to remove the case fan.
Before proceeding, ensure that your computer is still powered off and disconnected from the power source. This will prevent any accidental damage or electrical shock during the unconnecting process.
Take a close look at the fan connector on the motherboard. Depending on the fan and motherboard model, the connector may have either three or four pins. You may see a small tab or lock mechanism near the connector. This tab helps secure the connector in place and prevents accidental disconnection.
To unplug the fan connector, carefully press down on the tab (if present) and gently wiggle the connector from side to side. Be cautious not to exert excessive force or pull on the wires, as this can damage the connector or the fan cable.
If there is no tab or lock mechanism, simply grip the connector firmly and pull it straight out from the motherboard’s fan header. Remember to support the connector as you remove it to prevent any strain on the motherboard or other components.
Once the fan connector is successfully unplugged from the motherboard, set it aside safely. Take a moment to inspect the connector and ensure that there are no bent pins or damage. If you notice any issues with the connector, it is recommended to replace it or consult a professional for assistance.
By unconnecting the case fan from the motherboard, you have effectively disconnected the power supply and control signal, allowing you to proceed to the next step, where we will remove the case fan itself from the computer case.
Step 5: Removing the Case Fan
Now that you have successfully unplugged the fan connector from the motherboard, it’s time to remove the case fan from the computer case. This step involves physically detaching the fan from its mounting location to allow for replacement, cleaning, or other maintenance tasks.
Start by examining how the case fan is secured within the computer case. Most case fans are held in place by screws or brackets. Look for the mounting points or brackets that are securing the fan.
If the case fan is held by screws, identify the screws that attach it to the computer case. Depending on the fan and case model, there may be two or four screws holding it in place. Use a screwdriver appropriate for the screw type (usually Phillips-head) and carefully remove each screw.
If the case fan is held by brackets, locate the brackets on either side of the fan. These brackets typically snap or clip onto the fan and the case. Gently squeeze or release the brackets to disengage them, allowing you to lift the fan away from the case.
As you remove the screws or release the brackets, be mindful of any cables or wires that may be attached to the fan. These cables can sometimes be tucked away under nearby components or connected to other fan units.
Once the fan is free from its mounting points, gently lift it out of the computer case. Take note of the fan’s orientation and the direction of airflow, if applicable. You may want to reference this information when installing a new fan or cleaning the existing one.
Set the removed case fan aside in a safe location. If you plan to reuse the fan, handle it with care to avoid any damage to the fan blades or wiring.
Congratulations! You have successfully removed the case fan from the computer case. Now you can proceed to the next step, where we will cover an optional step for those who wish to replace the case fan with a new one.
Step 6: Optional: Replacing the Case Fan
In this step, we will cover the optional task of replacing the case fan with a new one. If you’re satisfied with the existing fan or don’t have a replacement, you can skip this step and proceed to the next section.
Replacing a case fan can improve airflow, reduce noise, and enhance cooling performance in your computer system. Before you begin, ensure that you have a compatible replacement fan ready. Check the size, connector type, and airflow specifications to ensure a proper fit.
Start by positioning the new case fan in the previously occupied location. Align the screw holes or brackets of the new fan with the mounting points in the computer case. Pay attention to the orientation of the fan to ensure proper airflow direction.
If your fan uses screws for mounting, insert and tighten the screws into the corresponding holes on the fan and the computer case. Use a screwdriver to ensure they are securely fastened, but be mindful not to overtighten, as this can damage the fan or the case.
If your fan uses brackets, snap or clip the brackets onto the fan and attach them to the case as per the manufacturer’s instructions. Ensure that the brackets are fully engaged and provide proper support for the fan.
With the new case fan securely in place, locate the fan connector that we previously unplugged in Step 4. Orient the connector properly and insert it into the corresponding fan header on the motherboard. Ensure that the connection is secure with no loose pins or cables.
If necessary, refer to any additional instructions provided by the fan manufacturer regarding installation and connection.
Now that you have successfully replaced the case fan, double-check all connections to ensure everything is securely in place. Take a moment to admire your work and pat yourself on the back for completing this optional but rewarding step.
Before moving on to the final step, ensure that all tools and materials are properly stored and that the computer case is free from any loose screws or debris.
Great job! You have completed the optional step of replacing the case fan. If you’re not replacing the fan, you can proceed to the next section, where we will cover closing the computer case.
Step 7: Closing the Computer Case
Now that you have completed the necessary tasks related to the case fan, it’s time to close the computer case. Properly sealing the case will protect the internal components from dust, debris, and any potential damage.
If you removed the side panel of the case, carefully align it with the corresponding slots or hooks on the main body of the case. Gently slide or push the panel back into place. Ensure that it fits snugly and securely, but be cautious not to force it.
If your case uses screws to secure the side panel, insert and tighten the screws using a screwdriver. Make sure to tighten them evenly to maintain a balanced fit. If your case uses clips or levers, follow the manufacturer’s instructions to secure the panel in place.
Once the side panel is properly secured, inspect the edges of the case to ensure that no gaps or openings remain. A tightly closed case will help maintain proper airflow and prevent dust accumulation.
Finally, double-check that all cables and connectors are properly routed and secured. Ensure that no cables are obstructing the case fan(s) or any other components within the case.
With the computer case successfully closed, it’s time to restore power to your computer. Reconnect the power cord to the wall outlet or surge protector, but do not power on the computer just yet.
Take a moment to clean up your workspace and organize any tools or materials used during the process. Store them in a safe place for future use or dispose of them properly if they are no longer needed.
Congratulations! You have now completed the process of unconnecting a case fan, and your computer is ready to be powered on and used once again.
Remember, if you encounter any difficulties or are not confident in performing these steps on your own, it’s always advisable to seek professional assistance or guidance.
Thank you for following this step-by-step guide, and happy computing!
Conclusion
Unconnecting a case fan from your computer may seem like a daunting task, but with the right tools and guidance, it can be a straightforward process. By following the steps outlined in this guide, you have learned how to safely disconnect a case fan, open the computer case, locate and identify the fan connection, unplug the fan connector from the motherboard, remove the case fan itself, and optionally replace it with a new one.
It’s important to remember that working with computer hardware requires caution and attention to detail. Always ensure that your computer is powered off and disconnected from the power source before beginning any maintenance procedures. Additionally, take the necessary precautions to prevent static electricity damage by using an anti-static wrist strap or grounding yourself before handling components.
Replacing a case fan can significantly improve your computer’s cooling performance and overall system stability. Regularly unconnecting and cleaning case fans can help prevent dust buildup and extend the lifespan of your hardware.
We hope this guide has provided you with the knowledge and confidence to successfully unconnect a case fan from your computer. Remember, if you’re unsure or uncomfortable with any step of the process, it’s always best to consult a professional or someone experienced in computer hardware.
Now that you have completed the process, take a moment to appreciate your newfound skills and the improved performance of your computer. Enjoy the benefits of a well-maintained and efficiently cooled system!