Introduction
Welcome to the world of WiFi calling! In this digital age, staying connected is more important than ever. Whether you’re in an area with weak cellular coverage or traveling internationally, WiFi calling can be a savior, allowing you to make and receive calls over a WiFi network. If you own an iPhone, you’re in luck because Apple has made it incredibly easy to enable WiFi calling on their devices.
WiFi calling is a feature that allows you to make and receive phone calls using a WiFi network, instead of relying solely on your cellular network. It utilizes your internet connection to transmit voice data, giving you the ability to maintain a reliable connection even in areas where cellular coverage may be limited or nonexistent. This can be especially useful if you live in a building with poor reception or often travel to remote locations.
The benefits of WiFi calling are numerous. Not only does it help you stay connected in areas with weak signal, but it can also improve call quality and reduce the likelihood of dropped calls. Additionally, WiFi calling can save you money by utilizing your internet connection instead of consuming your cellular data. This is especially advantageous when making international calls, as it can bypass expensive long-distance charges.
Before you can start using WiFi calling on your iPhone, there are a few requirements to keep in mind. Firstly, your carrier must support WiFi calling. Not all carriers offer this feature, so it’s important to check with your provider to ensure compatibility. Additionally, you need to have an iPhone running the latest software version to access the WiFi calling option. Once you meet these requirements, enabling WiFi calling on your iPhone is a straightforward process that can be done in just a few simple steps.
In this article, we will guide you through the process of enabling WiFi calling on your iPhone, step by step. Whether you’re experiencing weak signal at home or planning a trip overseas, WiFi calling is a valuable feature that can keep you connected when you need it most. Without further ado, let’s dive in and get your iPhone set up for WiFi calling!
What is WiFi Calling?
WiFi calling is a technology that allows you to make and receive calls using a WiFi network instead of relying solely on a cellular network. With WiFi calling enabled, your iPhone can utilize your internet connection to transmit voice data, providing you with a reliable way to communicate even in areas with poor cellular reception.
Traditionally, when making a call, your iPhone connects to a cellular tower to establish the call. However, in scenarios where the cellular signal is weak or nonexistent, such as in basements or remote areas, making or receiving phone calls can be challenging. WiFi calling comes to the rescue by bypassing the cellular network and utilizing your WiFi connection instead.
When you make a WiFi call, your iPhone converts your voice into a digital signal and transmits it over your WiFi network to the intended recipient. This means that as long as you have access to a stable internet connection, you can use WiFi calling to stay connected with family, friends, and colleagues, even in areas where cellular coverage is scarce.
One of the significant advantages of WiFi calling is that it can improve call quality. By using a WiFi network to transmit voice data, you can experience clearer and more reliable phone calls. This is especially beneficial when you’re in a location prone to dropped calls or poor voice quality on traditional cellular networks.
Another advantage of WiFi calling is the potential for cost savings. When making calls over a cellular network, you may exceed your plan’s allotted minutes, resulting in additional charges. WiFi calling bypasses this issue by using your internet connection, which is typically a part of your home or office broadband service. This can be particularly beneficial when making international calls, as you can avoid expensive long-distance charges.
It’s worth noting that WiFi calling is not limited to just voice calls. Depending on your carrier and device, you may also be able to use WiFi calling for video calls, messaging, and other communication services. This can further enhance your ability to stay connected and communicate effectively, regardless of your location.
In essence, WiFi calling is a valuable feature that allows you to make and receive calls over a WiFi network. It offers improved call quality, broader coverage, and potential cost savings. It’s an excellent option in situations where cellular reception is weak or unavailable, ensuring that you can always stay connected on your iPhone.
Benefits of WiFi Calling
WiFi calling offers several benefits that can greatly enhance your communication experience on your iPhone. Let’s explore some of these advantages:
- Improved Call Quality: One of the primary benefits of WiFi calling is the potential for improved call quality. By utilizing a WiFi network, which often has a more stable and robust connection compared to cellular networks, you can experience clearer and more reliable voice calls. Background noise and interference are reduced, resulting in conversations that are easier to hear and understand.
- Extended Coverage: WiFi calling extends your coverage beyond the limitations of cellular networks. In areas with weak or no cellular signal, as long as you have access to a stable WiFi network, you can make and receive calls seamlessly. This is especially helpful for people who live or work in buildings with poor cellular reception, or those who frequently travel to remote locations with limited coverage.
- Cost Savings: WiFi calling can potentially save you money, particularly when making international calls. Instead of relying on your cellular plan’s allotted minutes or incurring additional charges for long-distance calls, WiFi calling uses your internet connection, which is often already included in your broadband service. This can result in significant savings, especially for frequent international callers.
- Seamless Handoff: WiFi calling allows for seamless handoff between WiFi and cellular networks. For example, if you’re on a WiFi call and move out of range of your WiFi network, your iPhone will automatically switch to your cellular network without interrupting the call. This ensures that your conversations remain uninterrupted, even when you’re on the move.
- Multi-device Support: Depending on your carrier and device compatibility, WiFi calling may allow you to make and receive calls on multiple devices, such as your iPhone, iPad, and Mac. This flexibility enables you to use the device that’s most convenient for you, without being tied to a specific phone. You can seamlessly switch between devices without missing a beat.
- International Roaming: WiFi calling can be a game-changer for international travelers. Instead of dealing with high roaming charges or purchasing local SIM cards, you can simply connect to a WiFi network and make calls as if you were at home. This can save you a considerable amount of money while still allowing you to stay connected with your loved ones.
These are just a few of the many benefits that WiFi calling brings to iPhone users. Whether it’s improved call quality, extended coverage, or cost savings, WiFi calling offers a convenient and reliable way to stay connected, regardless of your location.
Requirements for WiFi Calling on iPhone
In order to enable WiFi calling on your iPhone, there are a few requirements that you need to meet. These include:
- Carrier Support: The first and most crucial requirement is that your carrier must support WiFi calling. Not all carriers offer this feature, so it’s essential to check with your provider to confirm compatibility. Most major carriers now support WiFi calling, but it’s always a good idea to verify this beforehand.
- iPhone Model: WiFi calling is available on most recent iPhone models, including iPhone 5c and later. However, it’s worth noting that older models may not support WiFi calling, so it’s important to ensure that your iPhone model is compatible before enabling the feature. You can check with Apple or your carrier for a complete list of supported iPhone models.
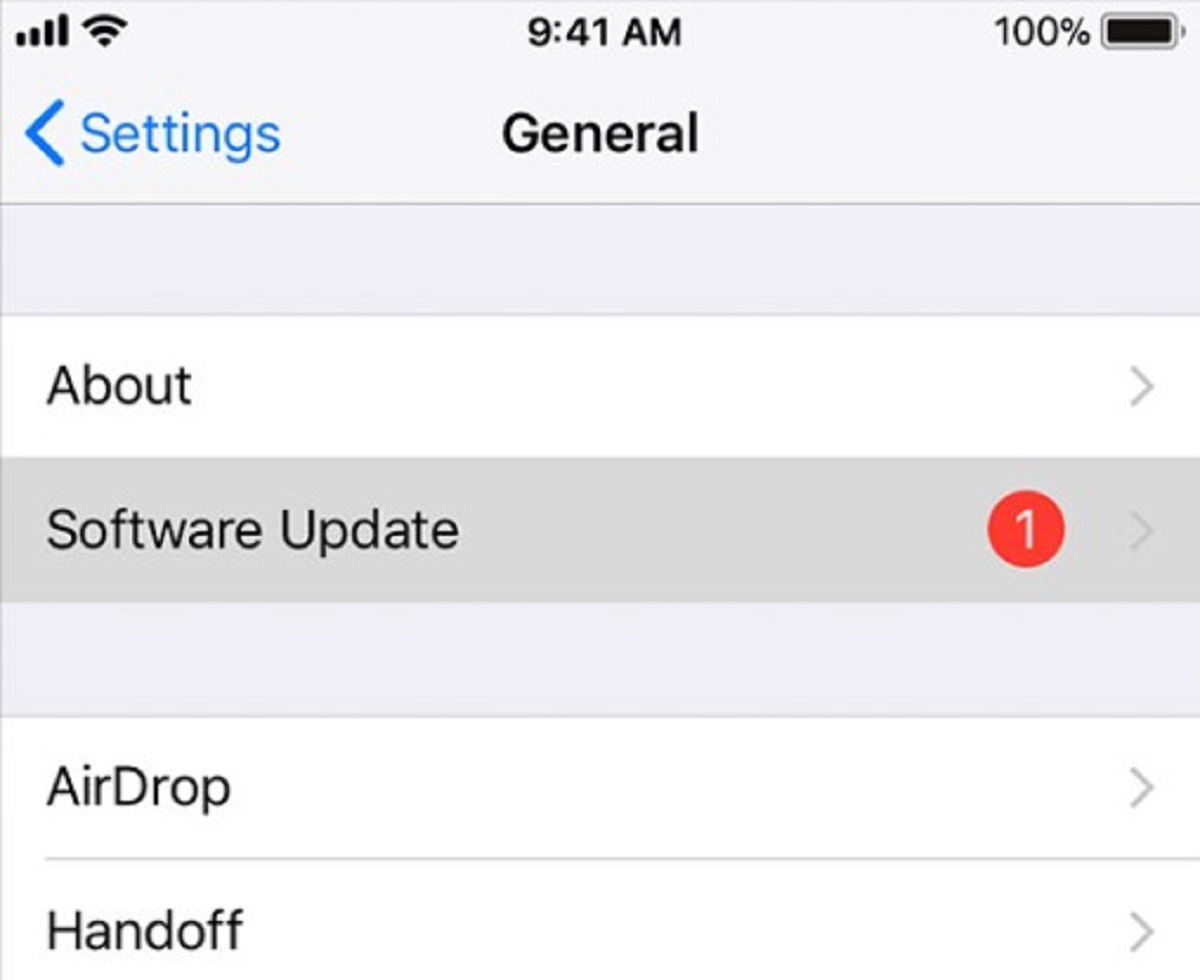
- Latest Software: To access the WiFi calling option on your iPhone, you need to ensure that your device is running the latest software version. Apple regularly releases updates for iOS, which often include bug fixes, security enhancements, and new features. To update your iPhone, go to Settings > General > Software Update, and if a new update is available, follow the instructions to install it.
- Valid Carrier Plan: Along with carrier support, you also need to have an active and valid carrier plan that includes WiFi calling. Some carriers may require you to add WiFi calling as a feature or have it included in your plan. Consult your carrier or check your plan details to verify if WiFi calling is part of your service.
- Compatible WiFi Network: To utilize WiFi calling, you must have access to a stable and secure WiFi network. This can be your home or office network, or any other trusted network that provides a reliable internet connection. A weak or unstable WiFi network may result in poor call quality or dropped calls, so it’s important to ensure that your network meets the necessary requirements.
By meeting these requirements, you will be able to enable WiFi calling on your iPhone and enjoy the benefits of uninterrupted communication, even in areas with weak cellular coverage.
How to Enable WiFi Calling on iPhone
Enabling WiFi calling on your iPhone is a straightforward process that can be done in just a few simple steps. Let’s walk through the process:
- Step 1: Check if your carrier supports WiFi Calling: Before proceeding with the setup, you need to ensure that your carrier supports WiFi calling. Contact your carrier or visit their website to confirm if WiFi calling is available and supported for your specific plan.
- Step 2: Update your iPhone to the latest software: It’s essential to keep your iPhone software up to date to access the latest features, bug fixes, and improvements. To update your iPhone, go to Settings > General > Software Update. If an update is available, follow the on-screen instructions to download and install it.
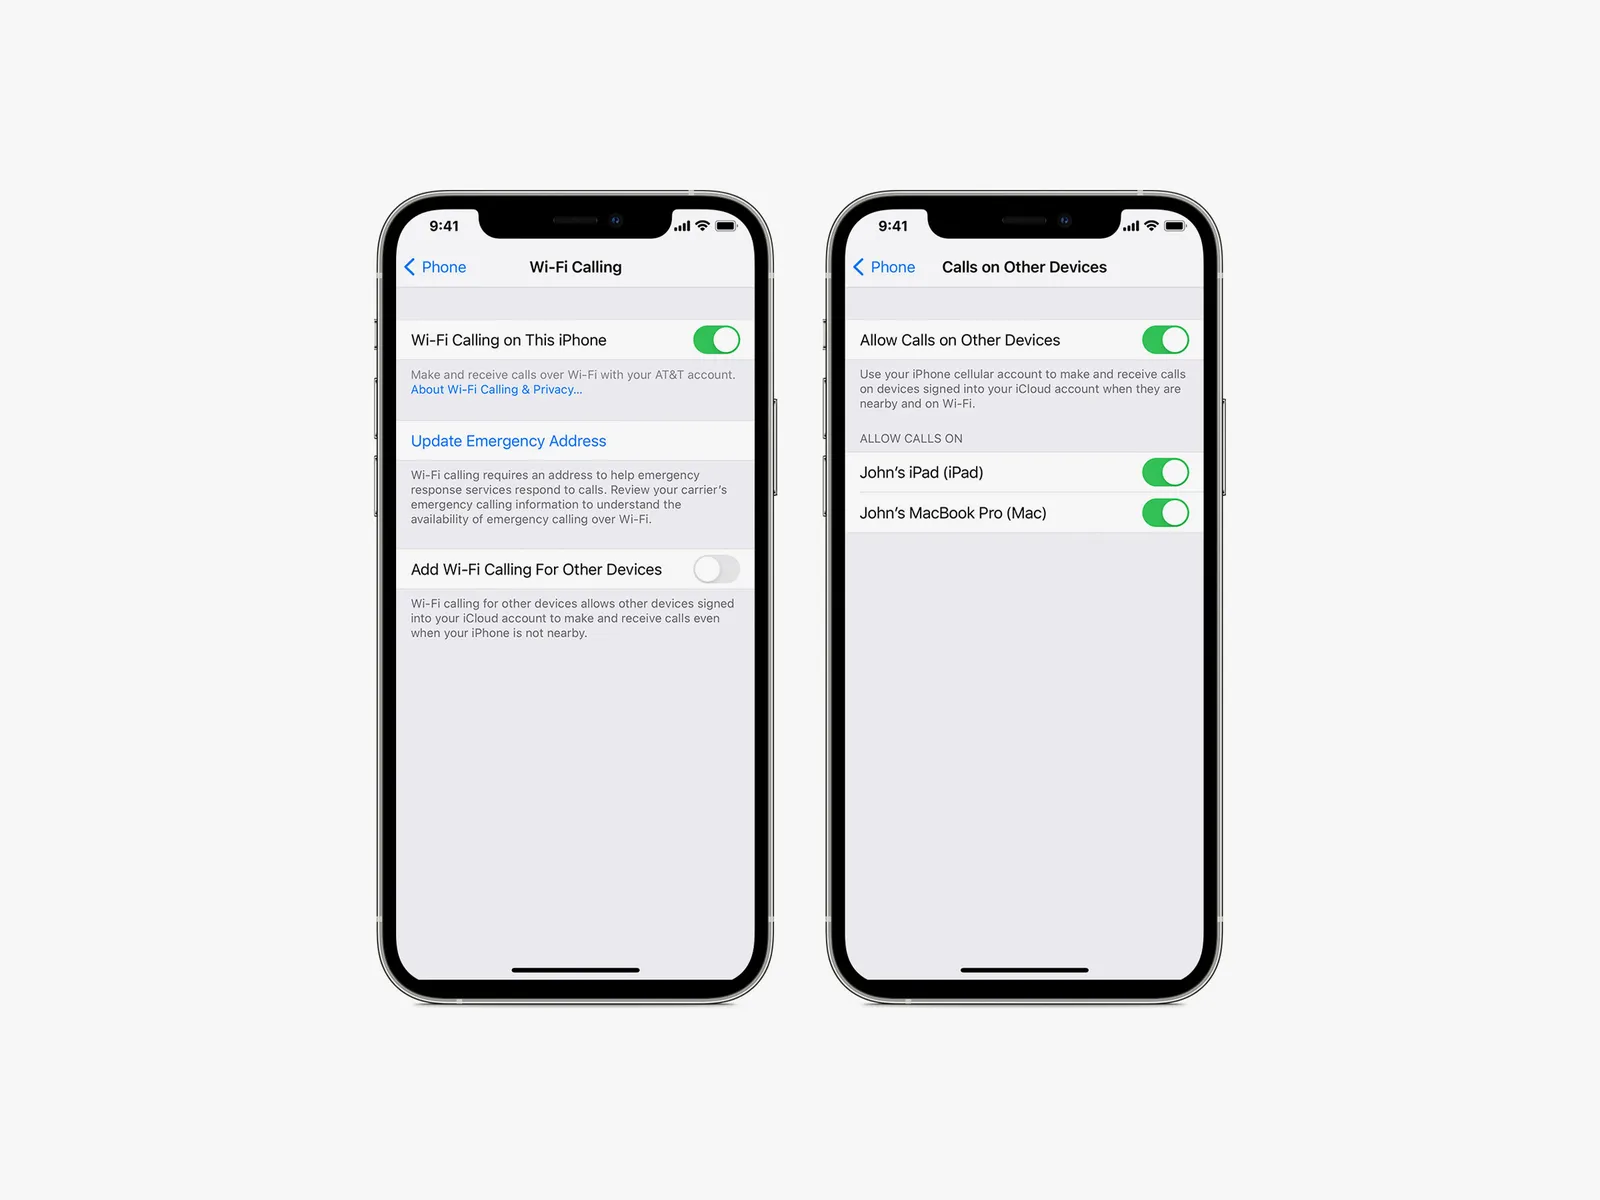
- Step 3: Enable WiFi Calling in iPhone settings: Once your iPhone is running the latest software version, you can proceed to enable WiFi calling. Open the Settings app on your iPhone and tap on “Phone”. Next, select “WiFi Calling” and toggle the switch to enable it. You may be prompted to enter your emergency address, as this information is necessary for emergency services in case you make a 911 call.
- Step 4: Set up your emergency address for WiFi Calling: To ensure that emergency services can locate you accurately when you make a 911 call via WiFi calling, you will need to enter your emergency address. Follow the on-screen instructions to provide this information, which will be securely stored and used only for emergency purposes.
- Step 5: Test WiFi Calling on your iPhone: Once you have enabled WiFi calling and set up your emergency address, it’s a good idea to test the feature to ensure everything is working correctly. Place a call as you normally would, and your iPhone will automatically use WiFi calling if it detects a WiFi network with a stronger signal than the cellular network.
Voila! You have successfully enabled WiFi calling on your iPhone. Now, you can enjoy the benefits of extended coverage, improved call quality, and potential cost savings, all through your WiFi network.
Note that the exact steps to enable WiFi calling may vary slightly depending on your iPhone model and iOS version. If you encounter any difficulties, refer to the Apple Support website or reach out to your carrier for specific instructions and assistance.
Step 1: Check if your carrier supports WiFi Calling
Before proceeding with the setup of WiFi calling on your iPhone, it is crucial to check if your carrier supports this feature. Not all carriers offer WiFi calling, so it is essential to confirm compatibility with your provider. Here’s how you can check if your carrier supports WiFi calling:
- Visit your carrier’s website: Start by visiting the official website of your carrier. Look for the “Support” or “Help” section, where you can find information about the services and features offered by your carrier. Browse through the support articles or search for “WiFi calling” to determine if this feature is supported.
- Contact customer support: If you are unable to find clear information on the website, the next step is to contact your carrier’s customer support. You can usually find a customer support phone number or live chat option on the carrier’s website. Reach out to a representative and inquire about the availability of WiFi calling on your specific plan.
- Check your carrier’s app: Some carriers have dedicated mobile apps that provide detailed information about your account and services. Download and install your carrier’s app from the App Store, then log in to your account. Look for a “WiFi calling” section within the app to verify if this feature is supported for your plan.
- Ask fellow iPhone users on community forums: Online forums and communities dedicated to iPhone or carrier discussions can be a valuable resource. Join these communities and ask fellow iPhone users if they have successfully enabled WiFi calling with your carrier. They can provide insights based on their personal experiences and share any tips or troubleshooting advice.
Checking if your carrier supports WiFi calling is an important first step in enabling this feature on your iPhone. It ensures that you have the necessary infrastructure and support from your carrier to make use of WiFi calling. If your carrier does not currently support WiFi calling, you may consider exploring other carrier options that do offer this feature.
Remember, each carrier may have different criteria, plans, and requirements for WiFi calling. It’s essential to obtain accurate information from your carrier to ensure a seamless WiFi calling experience on your iPhone.
Step 2: Update your iPhone to the latest software
Updating your iPhone to the latest software version is an important step to ensure that you have access to the latest features, bug fixes, and improvements, including the option to enable WiFi calling. Here’s how you can update your iPhone:
- Connect to a stable Wi-Fi network: Before updating your iPhone, connect it to a stable Wi-Fi network. This will ensure a faster and more reliable download and installation process. To connect to Wi-Fi, go to Settings > Wi-Fi, and select a network from the available options by entering the password if required.
- Check for updates: Once connected to a Wi-Fi network, go to Settings > General > Software Update. Your iPhone will check for available updates. If a new software update is available, you will see a notification indicating its availability.
- Download and install the update: Tap on “Download and Install” to begin downloading the update. Depending on the size of the update and your internet connection speed, this process may take some time. Ensure that your iPhone is connected to a power source or has sufficient battery charge to complete the installation without interruption.
- Enter your passcode, if prompted: During the installation process, you may be prompted to enter your passcode. This is to authenticate the update and ensure the security of your device. Enter your passcode when prompted, and the installation process will continue.
- Agree to the Terms and Conditions: Once the update has finished downloading, you will be presented with the Terms and Conditions. Read through these terms and conditions, and if you agree, tap on “Agree” or “Accept” to proceed with the installation.
- Wait for the installation to complete: The installation process will commence, and your iPhone will restart. During this time, it’s important to keep your iPhone connected to a power source and refrain from using it until the installation is complete. The time taken for the installation may vary depending on the size of the update.
- Verify the update and enable WiFi calling: Once your iPhone has restarted, go to Settings > General > Software Update again to verify that the installation was successful. Ensure that you are running the latest software version. Now, you can proceed with enabling WiFi calling by following the steps provided by your carrier or in the iPhone settings.
By updating your iPhone to the latest software version, you ensure that you have access to all the latest features and improvements, including WiFi calling. Keeping your iPhone updated not only enhances your overall experience but also ensures that your device remains secure and optimized.
Step 3: Enable WiFi Calling in iPhone settings
Enabling WiFi calling on your iPhone is a simple process that can be done through the settings. Follow these steps to enable WiFi calling:
- Open the Settings app: Locate the Settings app on your iPhone’s home screen and tap on it to open.
- Select “Phone”: Scroll down the list of options and tap on “Phone.” This will take you to the Phone settings menu.
- Tap on “WiFi Calling”: Within the Phone settings menu, you will find the “WiFi Calling” option. Tap on it to proceed.
- Toggle the switch to enable WiFi calling: On the WiFi Calling screen, you will see a toggle switch. Slide the switch to the right to enable WiFi calling. It will turn green once enabled.
- Authorize the Terms and Conditions: After enabling WiFi calling, you may be prompted to review and accept the Terms and Conditions. Read through the terms and conditions, and if you agree, tap on “Enable” or “Accept” to proceed.
- Enter your emergency address: To complete the setup of WiFi calling, you may need to enter your emergency address. This address is crucial for emergency services to locate you accurately in case of a 911 call. Follow the on-screen instructions and enter your emergency address when prompted. Once entered, tap on “Done” or “Save.”
- Verify that WiFi calling is enabled: Once you have completed the setup, go back to the WiFi Calling settings screen. You should see that the WiFi calling toggle switch is still in the enabled position, indicating that WiFi calling is now activated on your iPhone.
Once enabled, your iPhone will automatically switch to WiFi calling if it detects that you have a stronger WiFi network connection than the cellular signal. This ensures that you can make and receive calls smoothly over WiFi, even in areas with weak cellular coverage.
Please note that the exact location of the WiFi Calling option may vary slightly depending on your iPhone model and the iOS version installed.
Now that you have successfully enabled WiFi calling, you can enjoy the benefits of extended coverage, improved call quality, and potential cost savings, all through your WiFi network.
Step 4: Set up your emergency address for WiFi Calling
When enabling WiFi calling on your iPhone, it is important to set up your emergency address. This is a crucial step to ensure that emergency services can accurately locate you in case of a 911 call. Follow these steps to set up your emergency address for WiFi calling:
- Open the Settings app: Locate the Settings app on your iPhone’s home screen and tap on it to open.
- Select “Phone”: Scroll down the list of options and tap on “Phone.” This will take you to the Phone settings menu.
- Tap on “WiFi Calling”: Within the Phone settings menu, tap on “WiFi Calling.”
- Tap on “Update Emergency Address”: On the WiFi Calling screen, you will find an option labeled “Update Emergency Address” or a similar phrase. Tap on this option to proceed.
- Verify your information: You may be prompted to verify your information, such as your Apple ID or carrier account details. Enter the required information accurately to proceed.
- Enter your emergency address: On the emergency address screen, enter your complete and accurate emergency address. This should include your street address, apartment or suite number (if applicable), city, state, and zip code. Make sure to enter the address where you are most likely to be located during an emergency.
- Save your emergency address: Once you have entered the emergency address, tap on “Save” or “Done” to save it. Your emergency address information will be securely stored for emergency services to use if you make a 911 call via WiFi calling.
- Verify your emergency address: After saving your emergency address, double-check that it is accurately displayed on the WiFi Calling settings screen. This ensures that emergency services have the correct information to locate you in an emergency situation.
Setting up your emergency address for WiFi calling is an important step to ensure your safety and the efficiency of emergency services. Keep in mind that your emergency address should always be up to date, especially if you move or during travel.
With your emergency address properly set up, you can use WiFi calling with confidence, knowing that emergency services can quickly and accurately respond to your location in case of an emergency.
Step 5: Test WiFi Calling on your iPhone
After enabling WiFi calling on your iPhone and setting up your emergency address, it’s a good idea to test the feature to ensure that everything is working correctly. Follow these steps to test WiFi calling on your iPhone:
- Ensure that you are connected to a WiFi network: Make sure that your iPhone is connected to a stable and reliable WiFi network. You can do this by going to Settings > Wi-Fi and selecting a network from the available options. If needed, enter the password to connect to the network.
- Locate the Phone app: Open the Phone app on your iPhone. This is the app with a green icon that resembles a traditional telephone receiver.
- Make a call: In the Phone app, dial the phone number of a contact you wish to call. Alternatively, you can call a landline or another mobile number to test the WiFi calling feature.
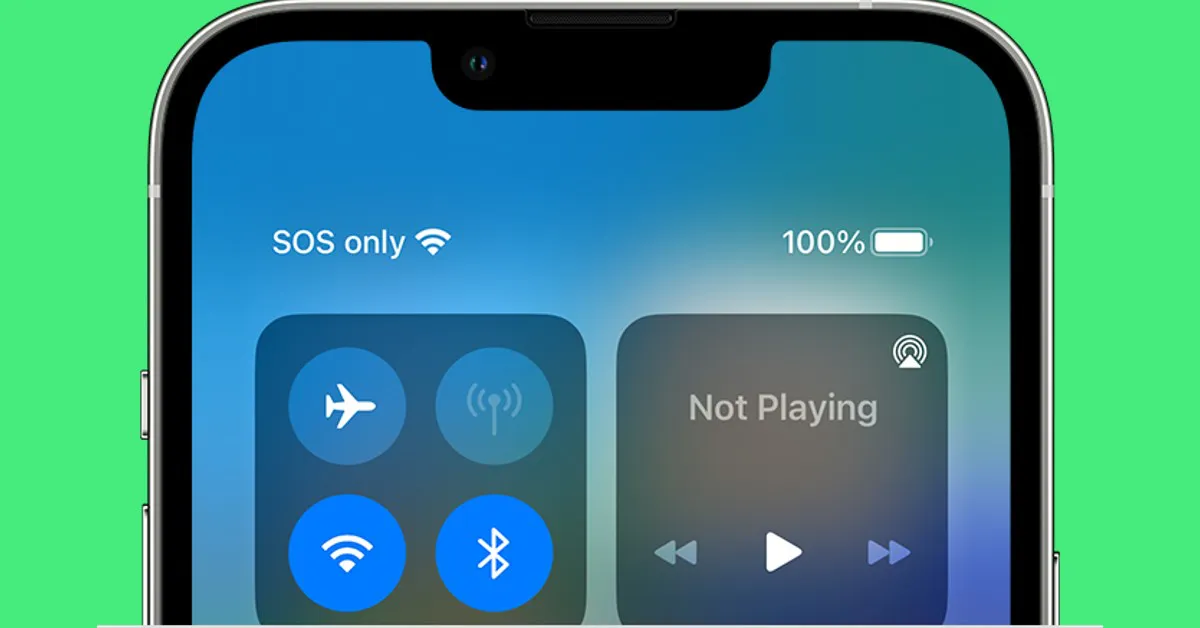
- Monitor the call status: As the call is in progress, observe the call status displayed on the screen. On the iPhone X and later models, the call status appears in the top left or right corner of the screen, depending on your device’s orientation.
- Ensure WiFi calling is active: During the call, check if the call status displays “WiFi” or “WiFi calling” instead of the usual cellular network name (e.g., “Verizon” or “AT&T”). This indicates that your iPhone is utilizing the WiFi network for the call.
- Test call quality and stability: Pay attention to the call quality and stability during the WiFi call. WiFi calling uses your internet connection instead of a cellular network, so you may notice improved call clarity and stability, especially if the cellular coverage in your area is weak.
- End the call: Once you are satisfied with testing WiFi calling, end the call as you normally would by tapping the “End” button or hanging up the phone.
- Verify WiFi calling deactivation: After ending the call, check that the call status returns to displaying the cellular network name. This confirms that your iPhone has switched back to the cellular network now that the WiFi call has ended.
By following these steps, you can verify that WiFi calling is active on your iPhone and ensure that it is functioning correctly. Testing WiFi calling helps you gain confidence in using the feature and confirms that you have a stable WiFi connection for future calls.
If you notice any issues or have concerns about call quality or stability during WiFi calls, contact your carrier’s customer support for assistance. They can provide further guidance and troubleshoot any problems you may encounter.
Troubleshooting WiFi Calling Issues
While WiFi calling is generally reliable, you may encounter occasional issues. If you’re experiencing problems with WiFi calling on your iPhone, follow these troubleshooting tips to resolve common issues:
- Check your WiFi network: Ensure that your WiFi network is stable and providing a strong signal. Check if other devices connected to the same network are experiencing any connectivity issues. If your WiFi network is unreliable, consider connecting to a different network or contacting your internet service provider for assistance.
- Restart your iPhone: Sometimes, a simple restart can resolve connectivity issues. Turn off your iPhone, wait for a few seconds, and then turn it back on. This can help reset network settings and resolve any temporary glitches that may be affecting WiFi calling.
- Update carrier settings: It’s important to have the latest carrier settings installed on your iPhone for optimal WiFi calling performance. To check for carrier settings updates, go to Settings > General > About. If an update is available, you will be prompted to install it. Follow the on-screen instructions to update the carrier settings.
- Disable and re-enable WiFi calling: Sometimes, toggling off and on the WiFi calling feature can resolve connectivity issues. Go to Settings > Phone > WiFi Calling, toggle the switch to turn it off, wait a few seconds, and then toggle it back on. This can refresh the connection and potentially resolve any minor issues.
- Reset network settings: If WiFi calling issues persist, you can try resetting the network settings on your iPhone. Go to Settings > General > Reset > Reset Network Settings. Note that this will delete saved WiFi passwords, so make sure to have them handy. After the reset, reconnect to your WiFi network and check if the WiFi calling issue is resolved.
- Contact your carrier: If none of the above solutions work, it’s advisable to reach out to your carrier’s customer support for further assistance. They can troubleshoot the issue specific to your carrier and provide guidance tailored to your situation. They may also be able to perform additional diagnostics on their end to identify and resolve the problem.
Remember, WiFi calling issues can sometimes be attributed to factors beyond your control, such as carrier network maintenance or temporary service disruptions. In such cases, patience may be required until the issue is resolved by your carrier.
If you continue to experience persistent WiFi calling issues, consider contacting Apple Support or visiting an Apple Store for expert assistance. They can diagnose any potential hardware or software issues with your iPhone and provide appropriate solutions.
Conclusion
WiFi calling on your iPhone opens up a world of possibilities, allowing you to make and receive calls over a WiFi network when cellular coverage is weak or unavailable. By following the steps outlined in this guide, you can easily enable WiFi calling and take advantage of its numerous benefits.
We started by understanding the concept of WiFi calling and its advantages, including improved call quality, extended coverage, and potential cost savings. We then discussed the requirements for WiFi calling, such as carrier support, iPhone compatibility, and the importance of running the latest software version.
The step-by-step process of enabling WiFi calling on iPhone was outlined, starting with checking carrier support, updating iPhone software, and enabling WiFi calling in the iPhone settings. We also covered important details, such as setting up your emergency address for enhanced safety.
To ensure a smooth experience, we provided troubleshooting tips to address common WiFi calling issues. By following these troubleshooting steps, you can resolve connectivity problems and enjoy uninterrupted WiFi calling.
WiFi calling is a valuable feature that keeps you connected, regardless of cellular coverage limitations. With extended coverage, improved call quality, and potential cost savings, WiFi calling enhances your communication experience and provides peace of mind for emergencies.
Remember, each carrier and iPhone model may have specific instructions or variations, so it’s always a good idea to consult your carrier or Apple’s support resources for the most accurate and up-to-date information.
Now that you have the knowledge to enable and troubleshoot WiFi calling on your iPhone, you can enjoy the benefits of reliable and high-quality phone calls, even when you’re in areas with poor cellular reception.