Introduction
Welcome to our guide on how to transfer data from a hard drive to a solid state drive (SSD). As technology continues to advance, many computer users are opting for the lightning-fast performance and improved reliability of SSDs over traditional hard drives. However, making the transition from a hard drive to an SSD can be a daunting task, especially when it comes to transferring your valuable data.
In this article, we will walk you through the process of transferring data from your hard drive to an SSD. Whether you are upgrading your laptop or desktop, the steps outlined here will help you ensure a smooth and successful data transfer.
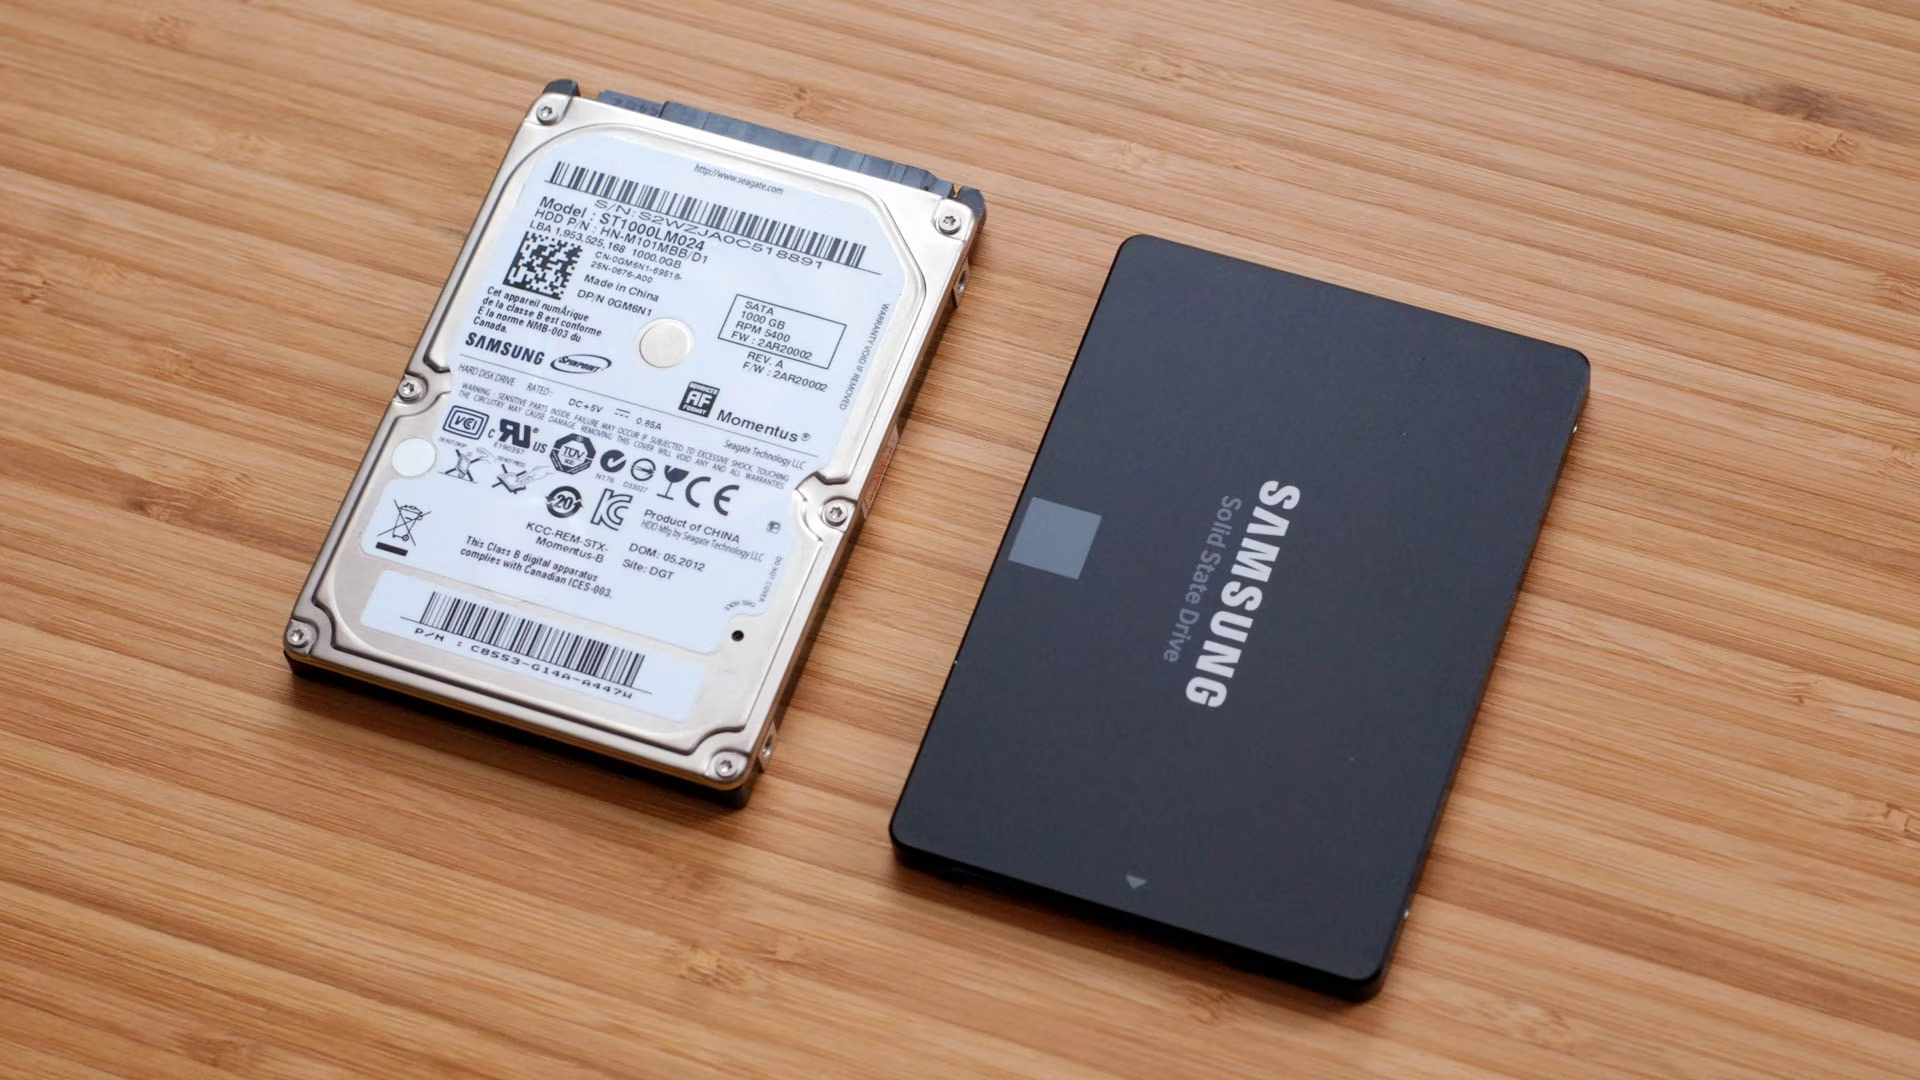
Before we dive into the details, it is important to understand the key differences between a hard drive and an SSD. Traditional hard drives store data on spinning magnetic discs, while SSDs use flash memory chips to store information. This fundamental difference gives SSDs significant advantages over hard drives in terms of speed, size, and durability.
With an SSD, you can experience faster boot times, quicker application launches, and improved overall system responsiveness. Additionally, since SSDs have no moving parts, they are less prone to failure and can withstand physical shocks and vibrations better than hard drives.
Transferring your data from a hard drive to an SSD will not only allow you to enjoy these performance benefits but also ensure that your important files and documents are retained.
However, before you embark on this data transfer journey, there are a few factors you need to consider. We will discuss these factors in the next section to help you make an informed decision and prepare for a successful transfer.
Understanding the Difference Between Hard Drive and Solid State Drive
Before we delve into the process of transferring data from a hard drive to a solid state drive (SSD), it is essential to understand the key differences between these two storage technologies.
A hard drive, also known as a HDD (hard disk drive), utilizes spinning magnetic platters and a mechanical arm to read and write data. This mechanical design often introduces latency, resulting in slower performance compared to solid state drives.
On the other hand, a solid state drive (SSD) relies on flash memory chips to store and retrieve data. Unlike hard drives, which require the physical movement of components, SSDs have no moving parts, resulting in significantly faster data access speeds and improved overall system responsiveness.
One major advantage of SSDs is their incredible speed. With read and write speeds that can be up to 5 times faster than traditional hard drives, SSDs can significantly reduce loading times for applications, boot times for your operating system, and overall file transfer speeds.
In addition to speed, SSDs offer other benefits. They are more durable and shock-resistant since they lack the delicate mechanical components found in hard drives. This makes them an excellent choice for portable devices that are often subjected to bumps and jolts.
Another advantage of SSDs is their compact size. Since they don’t require space for spinning platters and mechanical arms, SSDs can be much smaller and lighter than hard drives. This makes them ideal for slim laptops and ultra-compact desktop systems where space is at a premium.
However, there are a few limitations to consider when it comes to SSDs. The primary concern is their relatively limited lifespan compared to hard drives. While modern SSDs have significantly improved in this aspect, it is essential to be mindful of their endurance and ensure proper maintenance to maximize their lifespan.
Additionally, SSDs tend to be more expensive per gigabyte of storage compared to hard drives. However, the price difference has been narrowing over the years, making SSDs more affordable than ever.
Overall, the transition from a hard drive to an SSD offers significant performance improvements, enhanced durability, and a smaller form factor. Understanding these differences will help you appreciate the benefits of SSDs and make an informed decision when transferring your data.
Factors to Consider Before Transferring Data
Before you begin the process of transferring data from your hard drive to a solid state drive (SSD), there are several important factors to consider. These factors will help ensure a smooth transition and minimize the risk of data loss or potential complications. Let’s take a look at them below:
1. Capacity: SSDs generally have smaller storage capacities compared to traditional hard drives. It is crucial to evaluate the amount of data you have on your hard drive and choose an SSD with adequate storage space. Consider whether it is necessary to transfer all your data or if you can selectively transfer important files and documents.
2. Compatibility: Ensure that the SSD you choose is compatible with your computer’s motherboard and connectors. Check if your computer supports the SATA (Serial ATA) interface or newer NVMe (Non-Volatile Memory Express) protocol. Consult your computer’s user manual or manufacturer’s website for compatibility information.
3. Backup Data: Before you proceed with the data transfer process, it is crucial to back up all your important files and documents. This ensures that you have a copy of your data in case anything goes wrong during the transfer. You can store the backup on an external hard drive, cloud storage, or even on another computer.
4. Clean up and organize: Take this opportunity to clean up and organize your data on the hard drive. Delete any unnecessary files, uninstall unused applications, and organize your folders to make the transfer process more efficient. This will also help you avoid transferring clutter and unnecessary files to the SSD.
5. Selective data transfer: If you have limited storage space on your new SSD, consider transferring only essential files and documents. Prioritize files that are frequently accessed or those that require fast loading times, such as your operating system, applications, and frequently used software.
6. Firmware updates: Check for any firmware updates for your SSD before you begin the transfer process. Firmware updates often bring performance improvements, bug fixes, and enhanced compatibility. Visit the manufacturer’s website or use their software utility to ensure your SSD has the latest firmware version.
7. Cleaning the hard drive: Once you have successfully transferred your data to the SSD, it is advisable to securely wipe the hard drive. This ensures that your sensitive data cannot be recovered by unauthorized individuals. Use specialized software or follow the manufacturer’s instructions to perform a secure erase of the hard drive.
By considering these factors before transferring your data, you can ensure a seamless transition to your new SSD. Taking the time to properly prepare and backup your data will provide peace of mind and ensure that your valuable files remain safe.
Backing Up Your Data
Before embarking on the process of transferring data from your hard drive to a solid state drive (SSD), it is crucial to back up all your important files and documents. Data backup is a vital step to protect your valuable information in case of any unforeseen issues or complications during the transfer process. Here are some important considerations and options for backing up your data:
1. External Hard Drive: One of the most common and convenient methods of data backup is using an external hard drive. Connect an external hard drive to your computer and copy all the necessary files and folders to it. Ensure that you have ample storage capacity on the external drive to accommodate all your data.
2. Cloud Storage: Cloud storage services such as Google Drive, Dropbox, or Microsoft OneDrive offer an excellent alternative for backing up your data. These services provide secure and reliable storage, allowing you to access your files from any device with an internet connection. Upload your files to the cloud storage platform of your choice and make sure to select the files you want to transfer to the SSD.
3. Network Attached Storage (NAS): If you have a NAS device or access to one, you can create a backup of your data on the network. NAS devices provide centralized storage that can be accessed by multiple devices in your home or office network. Set up a backup routine to automatically copy your files and folders to the NAS, ensuring that your data remains safe and easily accessible.
4. Disk Imaging Software: Disk imaging software allows you to create a complete image or clone of your hard drive. This creates an exact replica of your hard drive, including the operating system, applications, and files. Tools like Clonezilla, Macrium Reflect, or Acronis True Image offer disk imaging capabilities. Once the backup image is created, you can use it to restore your data on the new SSD.
5. Online Backup Services: Another option is to utilize online backup services that specialize in securely storing your data on remote servers. These services, such as Backblaze or Carbonite, automatically back up your files in the background whenever your computer is connected to the internet. This provides an offsite backup solution, protecting your data from local disasters or hardware failures.
6. Multiple Backups: It is always a good practice to create multiple backups of your data to ensure redundancy and maximum protection. Consider employing a combination of methods, such as an external hard drive backup combined with cloud storage or online backup services, for added peace of mind.
Remember, the key to effective data backup is to regularly perform backups and ensure that your backup copies are up to date. Once you have successfully backed up your data, you can proceed with confidence to transfer your files from the hard drive to the solid-state drive.
Removing the Hard Drive
Before you can transfer your data from a hard drive to a solid state drive (SSD), you need to physically remove the hard drive from your computer. Here are the steps to safely remove the hard drive:
1. Power Off and Unplug: Start by shutting down your computer completely and unplugging it from the power source. This will ensure your safety and prevent any accidental damage to the components.
2. Open the Case: Depending on your computer model, you may need to remove the side panel or unscrew specific screws to gain access to the internal components. Consult your computer’s manual or search online for specific instructions on how to open the case for your particular model.
3. Locate the Hard Drive: Once the case is open, locate the hard drive within your computer. It is usually a small rectangular or square-shaped device mounted on a bracket or tray. Refer to your computer’s manual or manufacturer’s website for the exact location of the hard drive if you are unsure.
4. Disconnect Cables: Before removing the hard drive, disconnect all the cables attached to it. Start by unplugging the SATA data cable, which is a thin, flat cable connected to the back of the hard drive. Next, disconnect the power cable, which is a wider cable with a 4-pin or 15-pin connector.
5. Remove Mounting Screws: Most hard drives are secured with screws or brackets to keep them in place. Depending on your computer’s configuration, you may need to remove the mounting screws or release the brackets that secure the hard drive. Use a screwdriver to carefully unscrew the screws or follow any specific instructions provided by your computer’s manufacturer.
6. Gently Remove the Hard Drive: Once the mounting screws or brackets are removed, gently slide or lift the hard drive out of its slot or tray. Be careful not to apply too much force or twist the hard drive, as it is a delicate component.
7. Store the Hard Drive Safely: To ensure that your hard drive remains protected, store it in an anti-static bag or a safe place away from any potential damage or static electricity. You may want to keep the hard drive as a backup or properly dispose of it in accordance with local regulations.
Note: The process of removing a hard drive can vary for different computer models and manufacturers. If you are unsure about any step or encounter any difficulties, it is recommended to consult the user manual or seek assistance from a professional.
By following these steps, you can safely remove the hard drive from your computer, paving the way for the installation of your new solid state drive (SSD) and the transfer of your precious data.
Preparing the Solid State Drive
After successfully removing the hard drive from your computer, the next step in transferring data to a solid-state drive (SSD) is to prepare the SSD for installation. Properly preparing the SSD ensures a smooth and error-free data transfer process. Here are the steps to help you prepare the SSD:
1. Check Compatibility: Before proceeding, confirm that the SSD you have is compatible with your computer’s motherboard and connectors. Ensure that the SSD is the correct form factor (e.g., 2.5-inch, M.2) and that it supports the same interface (SATA or NVMe) as your computer. Consult the SSD manufacturer’s documentation or your computer’s manual for compatibility information.
2. Anti-Static Precautions: SSDs are sensitive electronic devices, so it is essential to take anti-static precautions. Either wear an anti-static wristband or frequently ground yourself by touching a grounded piece of metal (such as your computer’s case) to discharge any static electricity before handling the SSD.
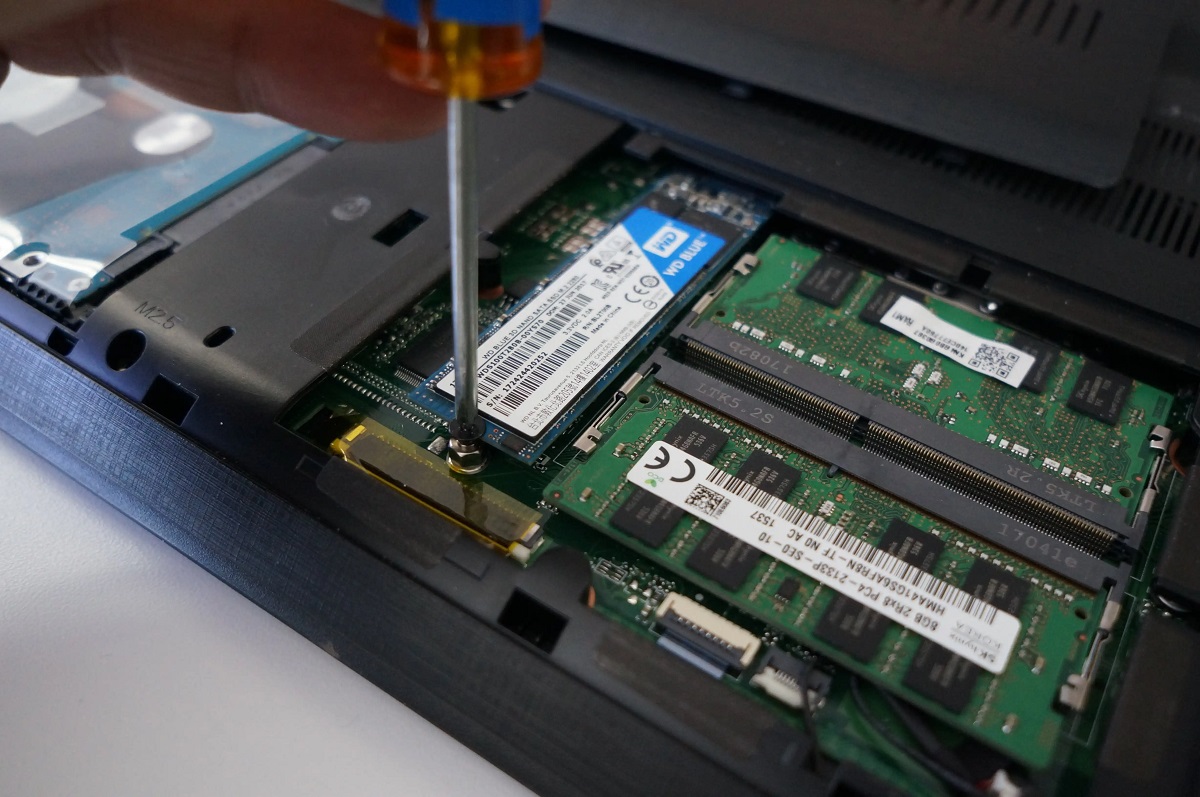
3. Mounting the SSD: Depending on your computer’s configuration, you may need to use a bracket or adapter to securely mount the SSD in the available slot. Follow the manufacturer’s instructions or consult your computer’s manual to determine the appropriate method for mounting the SSD in your specific computer model.
4. Connecting the Cables: Connect the appropriate cables to the SSD. If you’re using a 2.5-inch SSD, use a SATA data cable to connect the SSD to the motherboard. If you’re using an M.2 SSD, find the corresponding M.2 slot on the motherboard and insert the SSD into it. Consult your computer’s manual or the manufacturer’s documentation for guidance on cable connections and slot locations.
5. Secure Screws or Clips: Once the SSD is properly connected, secure it in place using screws or clips provided with the SSD or your computer’s hardware. Ensure that the SSD is firmly attached to prevent any movement or disconnection during operation.
6. Checking the BIOS: Access your computer’s BIOS (Basic Input/Output System) settings by restarting your computer and pressing the designated key during startup (such as F2, DEL, or ESC). Navigate to the storage configuration or boot order settings and ensure that the SSD is recognized and set as the boot drive. Save any changes made in the BIOS before exiting.
7. Verifying Power Supply: Confirm that the SSD is receiving power by checking the SATA power cable connection or by observing the LED indicator (if available) on the SSD. If the power cable is securely connected and the SSD is not receiving power, double-check the cable and connection or try using a different power cable if necessary.
By following these steps, you can prepare the solid-state drive (SSD) for data transfer and installation in your computer. Taking the time to ensure proper preparation will help ensure a successful transfer of your data and allow you to fully experience the benefits of an SSD.
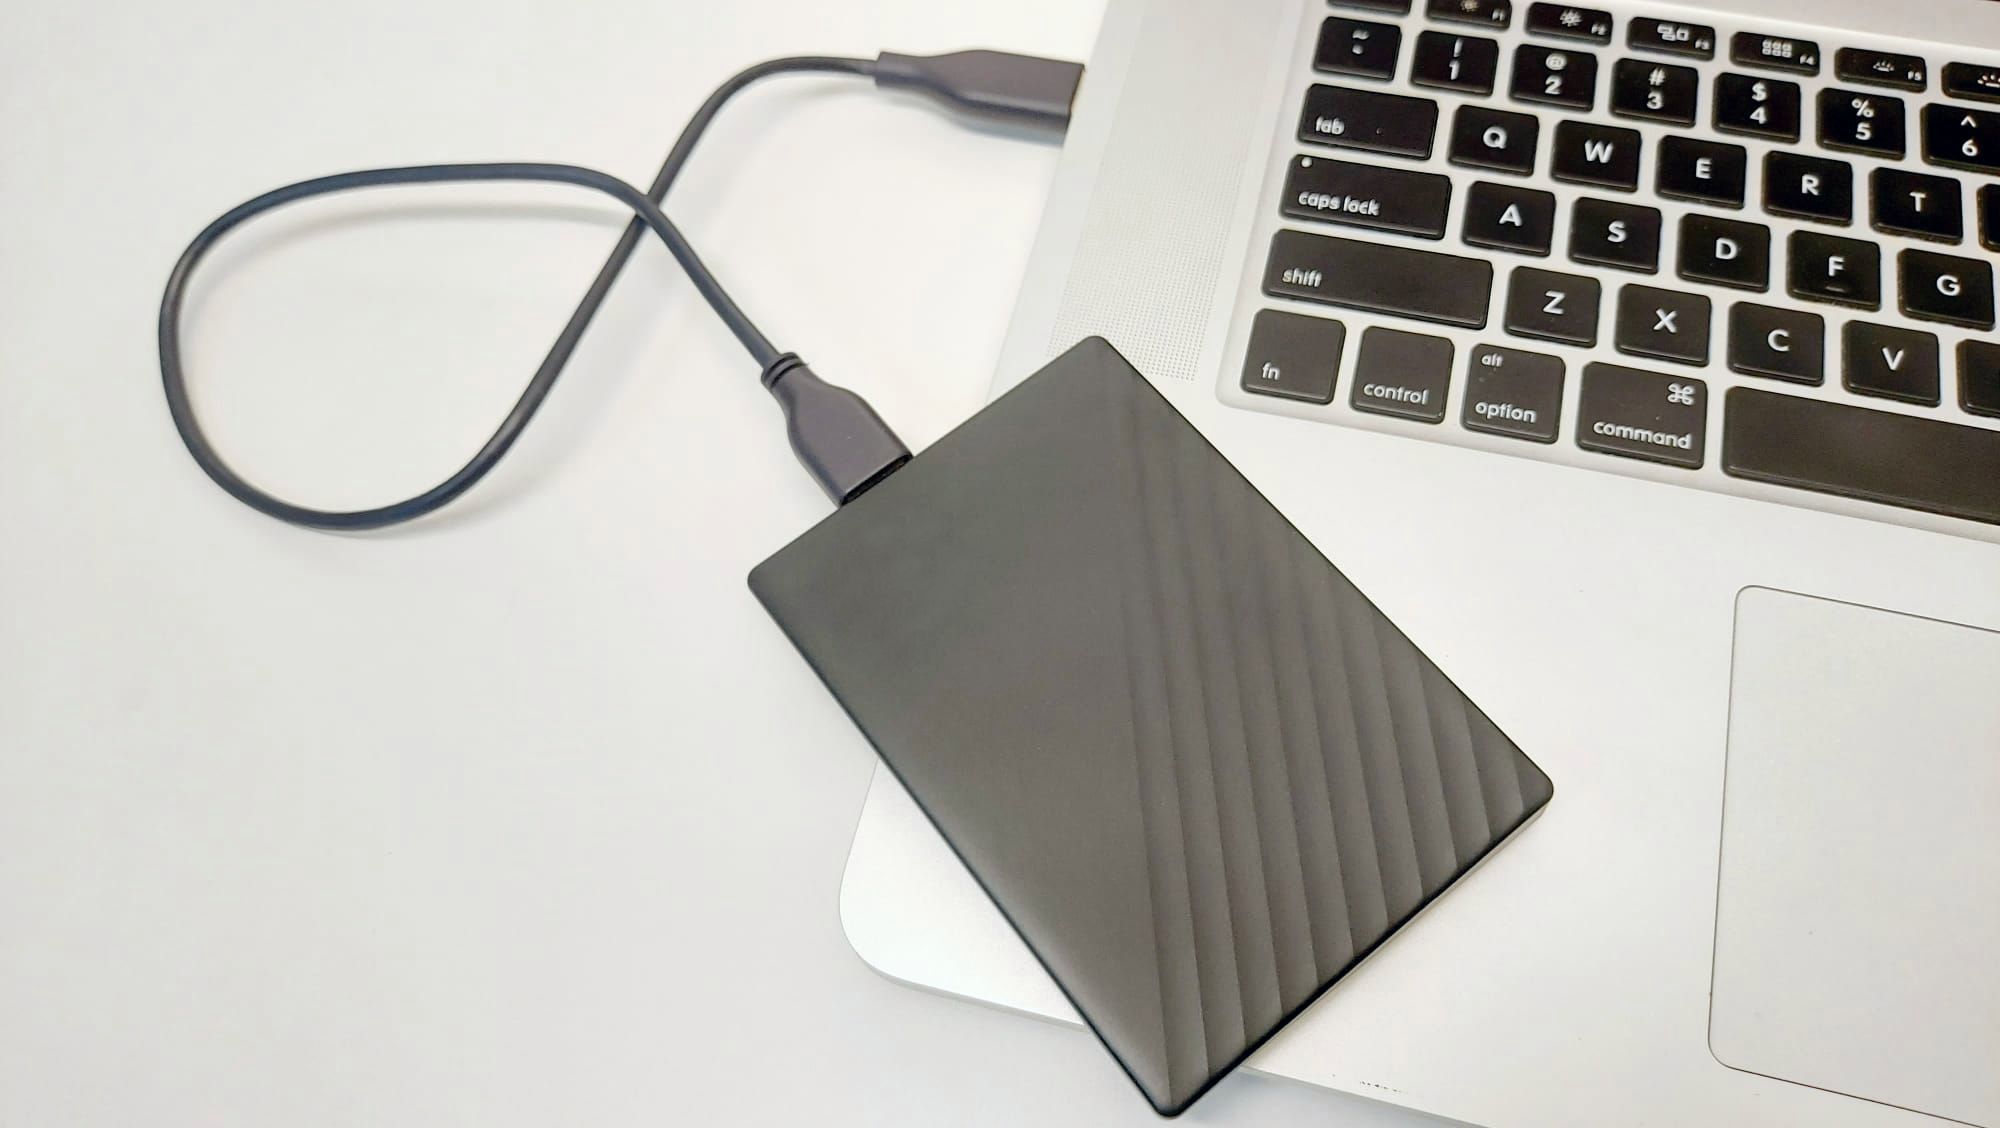
Connecting the Solid State Drive
Once you have prepared the solid-state drive (SSD) for installation, the next step in transferring your data is to connect the SSD to your computer. Properly connecting the SSD ensures that it is recognized by the system and ready for data transfer. Here are the steps to help you connect the SSD:
1. Power Off and Unplug: Begin by shutting down your computer and disconnecting it from the power source. This will prevent any accidental damage to the components and ensure your safety during the installation process.
2. Open the Case: Depending on your computer model, remove the side panel or unscrew specific screws to access the internal components. Refer to your computer’s manual or search online for instructions on how to open the case for your specific model.
3. Locate Available SATA Ports: Find the available SATA ports on your computer’s motherboard. These ports are used for connecting storage devices such as hard drives and SSDs. They are rectangular in shape with a small notch on one side.
4. Connect SATA Data Cable: Take a SATA data cable and connect one end to the SATA port on the motherboard. Align the notch on the cable and the port, and gently push the cable in until it is securely connected. Ensure that the cable is not twisted or strained.
5. Connect SATA Power Cable: Connect one end of a SATA power cable to the power supply unit (PSU) and the other end to the SSD. The SATA power cable has a flat and L-shaped connector. Ensure that the cable is firmly connected to both the PSU and the SSD.
6. Secure Cables: Once the data and power cables are connected, ensure that they are neatly routed and secured. Use cable ties or clips to manage the cables and prevent them from interfering with other components or impeding airflow inside the computer.
7. Close the Case: Carefully put the side panel back in place or reattach the screws to secure the case. Ensure that everything is properly aligned and that there are no loose or protruding cables that could be damaged when closing the case.
8. Power On and Verify: Plug in your computer and power it on. Upon startup, enter the BIOS menu by pressing the designated key (e.g., F2, DEL, or ESC) and navigate to the storage or boot device settings. Confirm that the SSD is detected and listed as a connected device. Save any changes made in the BIOS before exiting.
By following these steps, you can successfully connect your solid-state drive (SSD) to your computer. Connecting the SSD is a critical step in preparing for data transfer and ensuring that your system recognizes and utilizes the SSD effectively. With the SSD connected, you are ready to proceed with transferring your data.
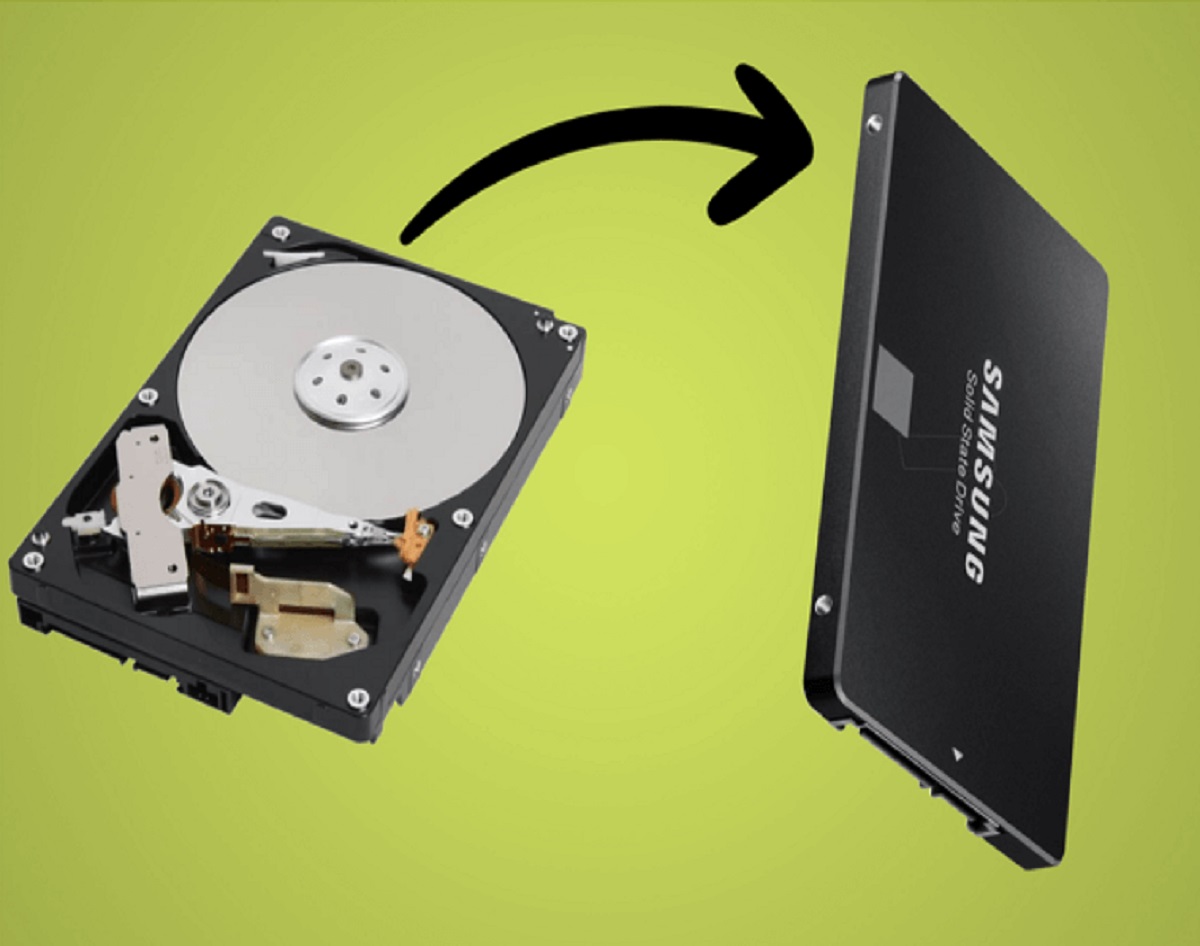
Using Software to Clone the Data
Once you have connected the solid-state drive (SSD) to your computer, you need to transfer your data from the old hard drive to the new SSD. One of the most efficient methods for accomplishing this is by using software to clone the data. Cloning software creates an exact replica of your hard drive, ensuring that all files, applications, and settings are preserved. Here are the steps to clone your data using software:
1. Choose Cloning Software: Select a reliable and reputable cloning software that suits your needs. Some popular options include Acronis True Image, EaseUS Todo Backup, and Macrium Reflect. Download and install the cloning software onto your computer.
2. Open the Cloning Software: Launch the cloning software and familiarize yourself with its interface. Most cloning software provides a user-friendly wizard-driven interface to simplify the cloning process.
3. Select Source and Target Drives: In the cloning software, select your old hard drive as the source drive and the new SSD as the target drive. Double-check to ensure that you have chosen the correct drives, as the cloning process will overwrite any data on the target drive.
4. Configure Cloning Options: Depending on the cloning software you are using, you may have various options to customize the cloning process. These may include options to resize partitions, clone only specific partitions or files, or exclude certain data. Configure the cloning options according to your preferences.
5. Start the Cloning Process: Once you have reviewed and confirmed your cloning settings, initiate the cloning process. The cloning software will begin copying all the data from the source drive to the target SSD. The time required for the process will depend on the amount of data being transferred.
6. Monitor the Cloning Process: During the cloning process, the software will provide progress updates. Ensure that you monitor the process and keep an eye out for any error messages or warnings that may require your attention.
7. Complete the Cloning Process: Once the cloning process is complete, the cloning software will notify you. Close the software and shut down your computer.
8. Test the Cloned SSD: Power on your computer and access the BIOS menu to verify that the cloned SSD is detected and set as the boot drive. Ensure that your computer successfully boots from the SSD and that all your files, applications, and settings are intact.
By utilizing cloning software, you can efficiently transfer your data from the old hard drive to the new solid-state drive with minimal effort. Cloning ensures that all your files and settings are preserved, allowing you to seamlessly transition to the improved performance and reliability of an SSD.
Manually Transferring Data
If you prefer not to use cloning software or if you want more control over the data transfer process, you can manually transfer your data from the old hard drive to the new solid-state drive (SSD). This method allows you to selectively choose which files and folders to transfer and gives you an opportunity to organize and clean up your data. Here are the steps for manually transferring data:
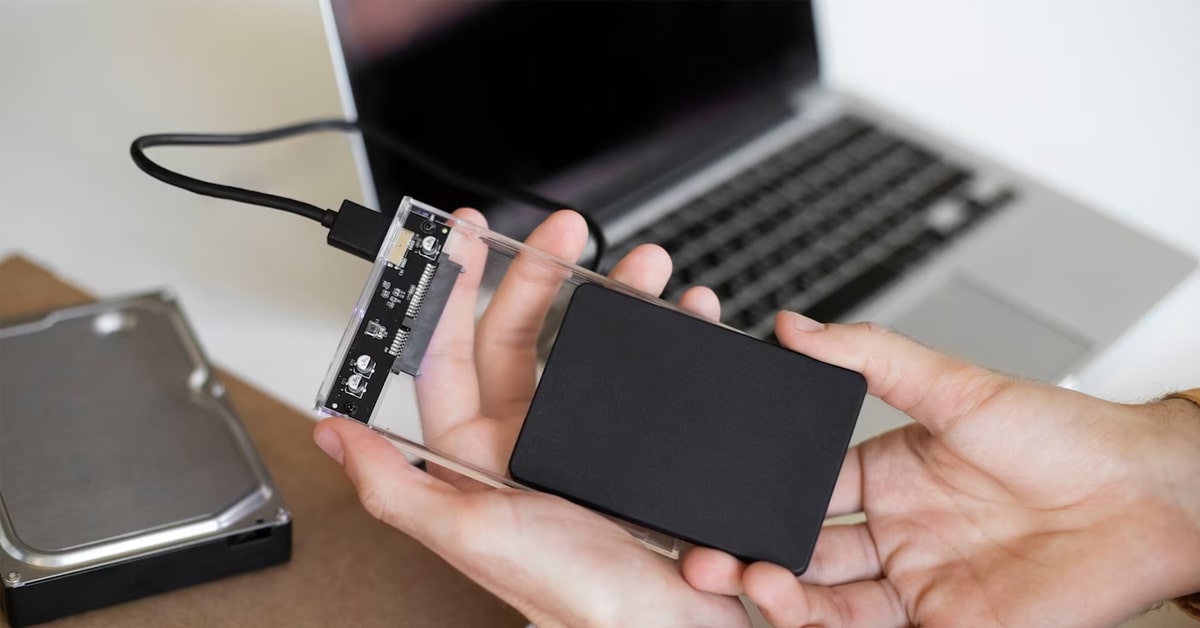
1. Connect both Drives: Ensure that both the old hard drive and the new SSD are connected to your computer. The old hard drive can be connected either internally or via an external enclosure. The SSD can be connected using the method described earlier in this guide.
2. Identify and Organize Data: Take the opportunity to review your data on the old hard drive and organize it into relevant folders. Identify the files and folders that you want to transfer to the SSD, such as personal documents, photos, videos, and important applications.
3. Copy Data: Open a File Explorer window and navigate to the location of the data on the old hard drive. Select the desired files and folders, right-click, and choose “Copy”. Navigate to the destination folder on the SSD, right-click, and choose “Paste” to initiate the copying process.
4. Monitor the Transfer: Depending on the amount of data being transferred, the process may take some time. Monitor the progress of the data transfer and ensure that there are no errors or interruptions during the copying process.
5. Transfer Application Settings: In addition to transferring files, you may also need to transfer application settings or preferences. Some applications store their settings in specific folders, such as the AppData folder in Windows. Consult the documentation of your applications to determine the location of their settings and transfer them accordingly.
6. Update File Paths and Settings: After transferring the data, you may need to update file paths or settings in certain applications. For example, if you transferred a music library, you might need to update the media player’s library settings to point to the new location on the SSD.
7. Test and Verify: Once the data transfer is complete, it is important to test and verify that everything is functioning as expected. Launch applications, open files, and browse through your data on the SSD to ensure that everything has been successfully transferred.
Manually transferring data gives you more control over the process, allowing you to selectively choose and organize your files and folders. It may require more time and effort compared to using cloning software, but it offers flexibility and customization options to suit your specific needs.
Verifying and Testing the Transferred Data
Once you have transferred your data from the old hard drive to the new solid-state drive (SSD), it is crucial to verify and test the transferred data to ensure its integrity and functionality. Verifying and testing the transferred data helps identify any potential issues or errors, allowing you to address them promptly. Here are the steps to verify and test the transferred data:
1. Check File Integrity: Begin by checking the integrity of your transferred files. A quick way to do this is by comparing the file sizes and checksums of the files on the old hard drive with those on the SSD. File integrity verification tools like md5sum (Linux), fciv (Windows), or third-party software can assist you in performing this comparison.
2. Access Files and Folders: Open various files and folders on the SSD to ensure that they can be accessed without any issues. Test files from different categories, including documents, images, videos, and applications, to verify that they function as expected.
3. Test Applications: Launch the applications that you transferred to the SSD and perform basic tasks or operations. Ensure that the applications run smoothly and that all functionalities are intact. Test advanced features or specific workflows if relevant to your usage.
4. Test Boot Time and Performance: Measure the boot time of your computer with the new SSD to assess the improved performance. Observe if the boot time is significantly faster than before. Additionally, launch applications and perform tasks to evaluate the overall system responsiveness and performance differences compared to the old hard drive.
5. Perform Data Replication: If you initially performed a selective transfer of your data, make sure to replicate any changes or additions made on the old hard drive to the corresponding locations on the SSD. This may include newly created or modified files, updated application settings, or additional folders created since the initial transfer.
6. Check for Data Loss or Corruption: Carefully review your transferred data on the SSD and cross-check it with the data on the old hard drive. Pay attention to missing files, corrupted files, or any other anomalies. If you detect any issues, investigate the potential causes and take corrective measures, such as re-copying the affected files from the old hard drive.
7. Create a Backup of the SSD: Once you are confident that the transferred data is accurate and functional, create a backup of your SSD. This ensures that you have an additional copy of your data in case of any future issues or accidental data loss.
By thoroughly verifying and testing the transferred data, you can ensure that all your files, applications, and settings are correctly transferred and functional on the new SSD. This step is essential to confirm a successful data transfer and to fully benefit from the improved performance and reliability of your solid-state drive.
Conclusion
Transferring data from a hard drive to a solid-state drive (SSD) is a process that can greatly enhance the performance, speed, and reliability of your computer. Whether you choose to use cloning software or manually transfer the data, it is crucial to ensure a smooth and successful transition. By following the steps outlined in this guide, you can confidently transfer your data to your new SSD without the risk of losing any important files or encountering complications.
Understanding the differences between a hard drive and an SSD helps you appreciate the advantages that an SSD brings, such as faster boot times, improved application performance, and enhanced durability. It is important to consider factors such as capacity, compatibility, and backup options before beginning the data transfer process.
Using cloning software provides a straightforward and efficient way to clone your data, including files, applications, and system settings, to the new SSD. On the other hand, manually transferring data offers more control and customization, allowing you to selectively choose and organize the files and folders that are important to you.
After transferring the data, it is essential to verify and test the transferred data to ensure its integrity and functionality. Checking file integrity, accessing files and folders, testing applications, and measuring boot time and performance will help identify any potential issues and ensure a smooth user experience on the new SSD.
Remember to always keep backups of your data and regularly update them to safeguard against any unforeseen data loss. Backups provide additional security and peace of mind, ensuring that your important files are protected.
By successfully transferring your data to an SSD, you can enjoy the benefits of improved performance, faster access times, and enhanced reliability. Your computer will feel more responsive, allowing you to work, play, and multitask with greater efficiency. Embrace the power of SSD technology and experience a significant boost in your computing experience!