Introduction
Welcome to the world of solid-state drives (SSDs), where speed, reliability, and performance are the top priorities. If you’re a proud owner of an SSD drive or considering getting one, it’s essential to understand the importance of testing it periodically to ensure optimal functionality.
An SSD drive utilizes flash memory technology to store data, providing faster access speeds, higher reliability, and lower power consumption compared to traditional hard disk drives (HDDs). However, like any electronic device, SSD drives can experience issues over time.
In this article, we will delve into why testing an SSD drive is important and explore various methods to effectively assess its performance and health. Whether you’re a tech enthusiast, a professional user, or simply want to ensure your computer is running smoothly, this article will guide you through the necessary steps to test your SSD drive and detect any potential problems.
Regularly testing your SSD drive can help identify early warning signs of failure, prevent data loss, optimize performance, and prolong the lifespan of your drive. By thoroughly examining its SMART status, running diagnostic tools, testing read and write speeds, verifying the TRIM functionality, stress testing the drive, checking for bad sectors, and ensuring the firmware is up to date, you can ensure your SSD drive is operating at its best.
Whether you’re troubleshooting an existing issue, preparing for an upgrade, or simply curious about the health of your drive, this article will equip you with the knowledge and tools necessary to confidently test and evaluate your SSD drive’s performance.
What is an SSD drive?
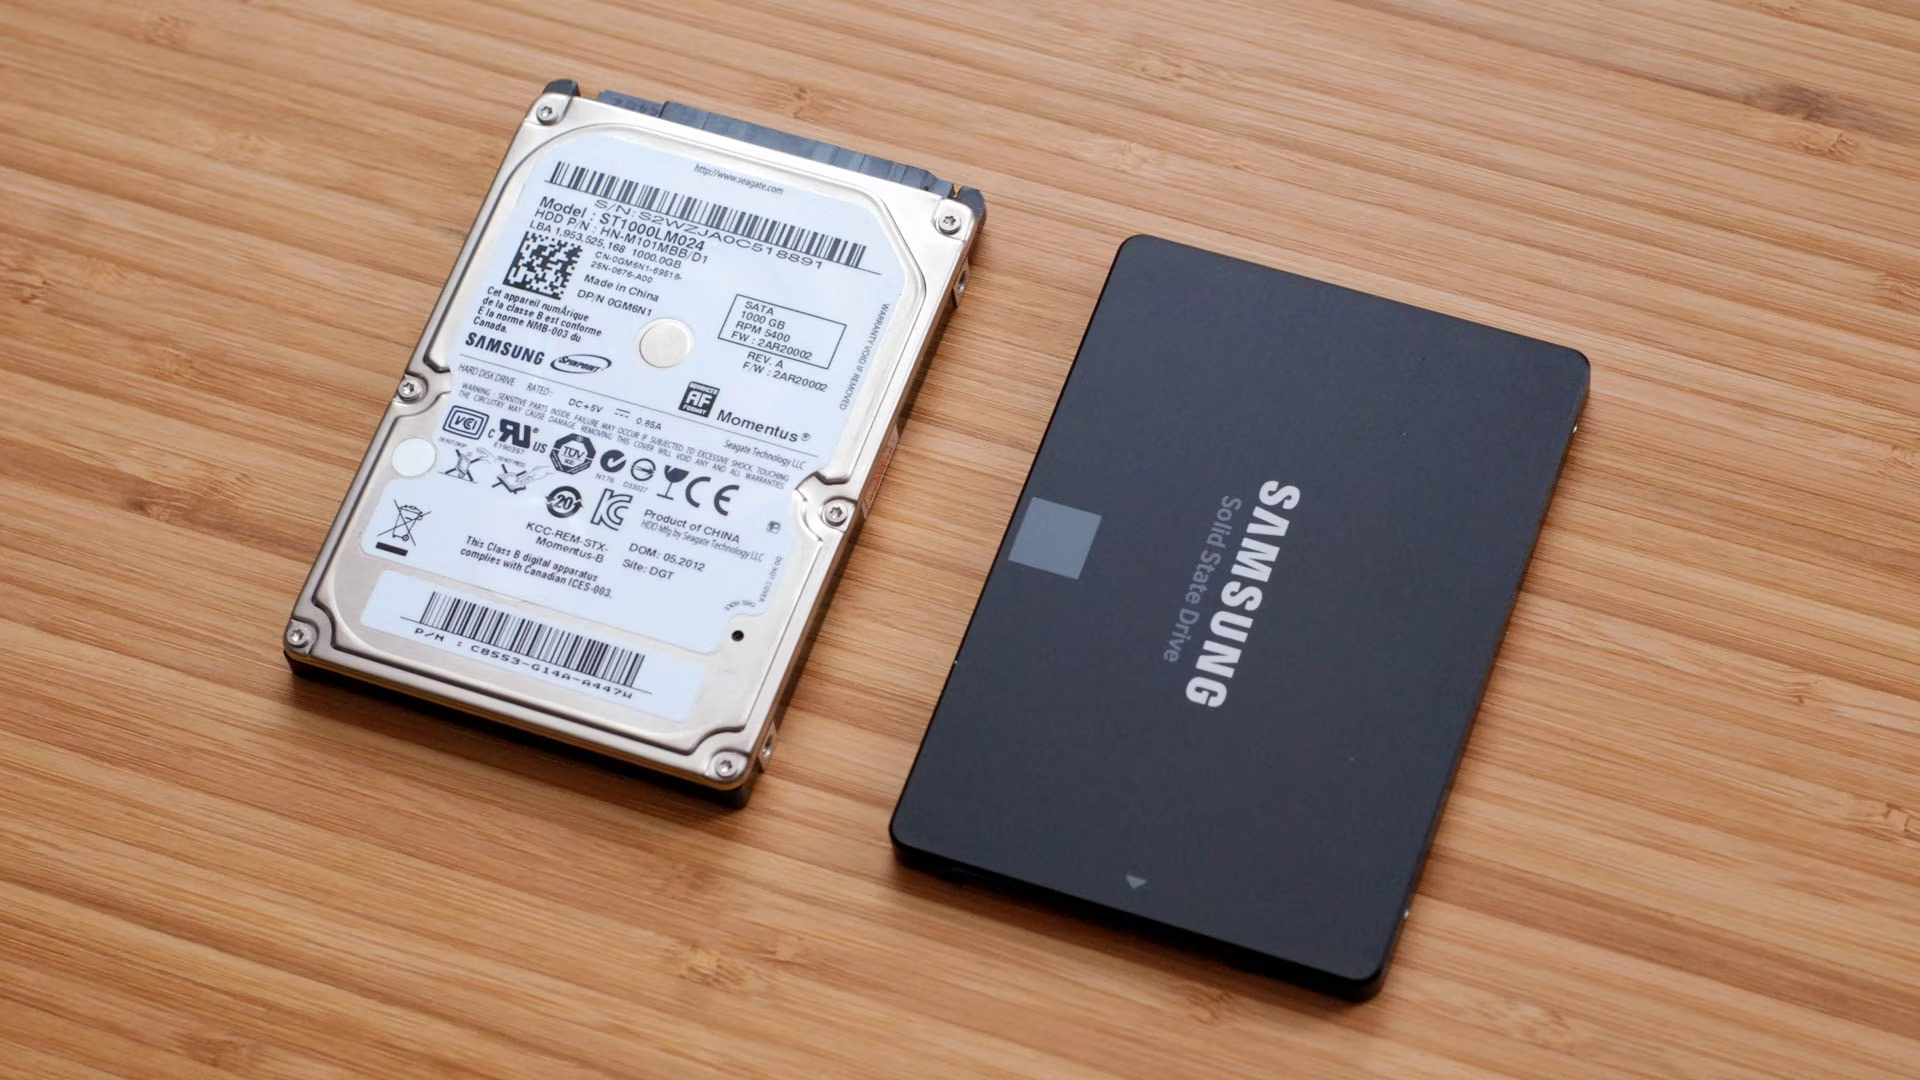
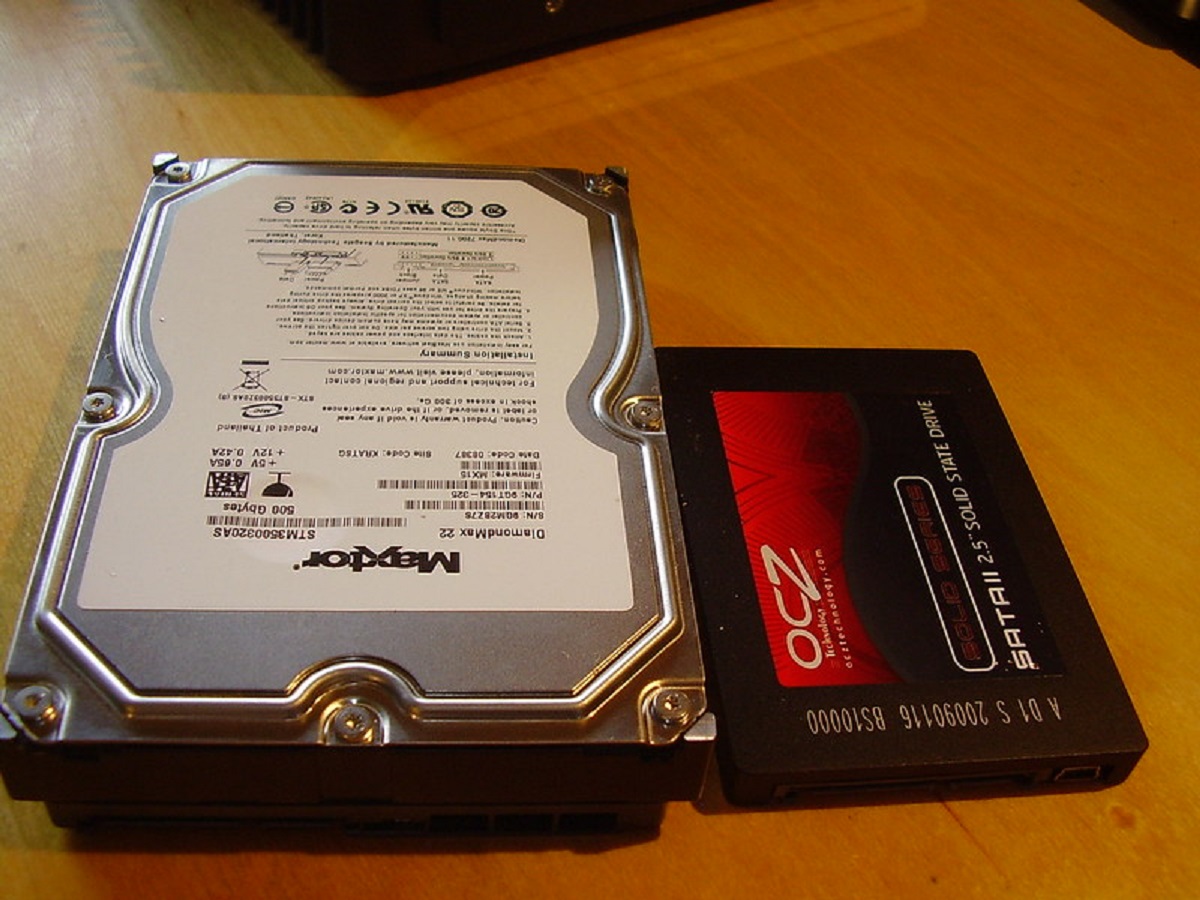
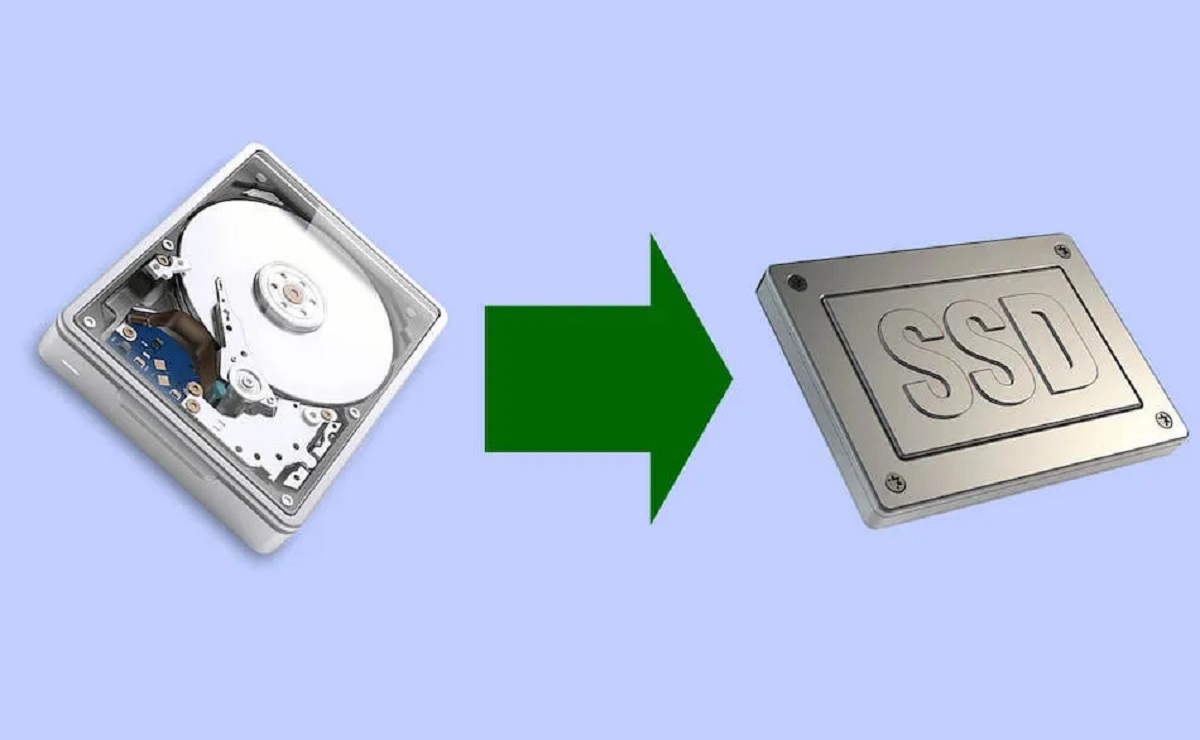
A solid-state drive (SSD) is a type of storage device that offers a significant upgrade over traditional hard disk drives (HDDs). Unlike HDDs, which use spinning disks and magnetic platters to store data, SSDs utilize flash memory technology to store data electronically.
This flash memory technology has several advantages over HDDs. Firstly, SSDs have no moving parts, which means they are more resistant to physical shock and less prone to mechanical failures. This makes SSDs more durable and reliable, particularly for portable devices like laptops or external drives.
Secondly, because SSDs don’t rely on moving parts, they have much quicker access times and faster data transfer speeds. This translates to faster boot times, quicker application launches, and speedier file transfers. SSDs can greatly improve the overall performance and responsiveness of a computer system.
Additionally, SSDs are known for their efficiency and lower power consumption. Since they don’t require electricity to spin platters or move read/write heads, SSDs consume less power and generate less heat than HDDs. This not only helps extend the battery life of laptops but also contributes to a cooler and quieter computing experience.
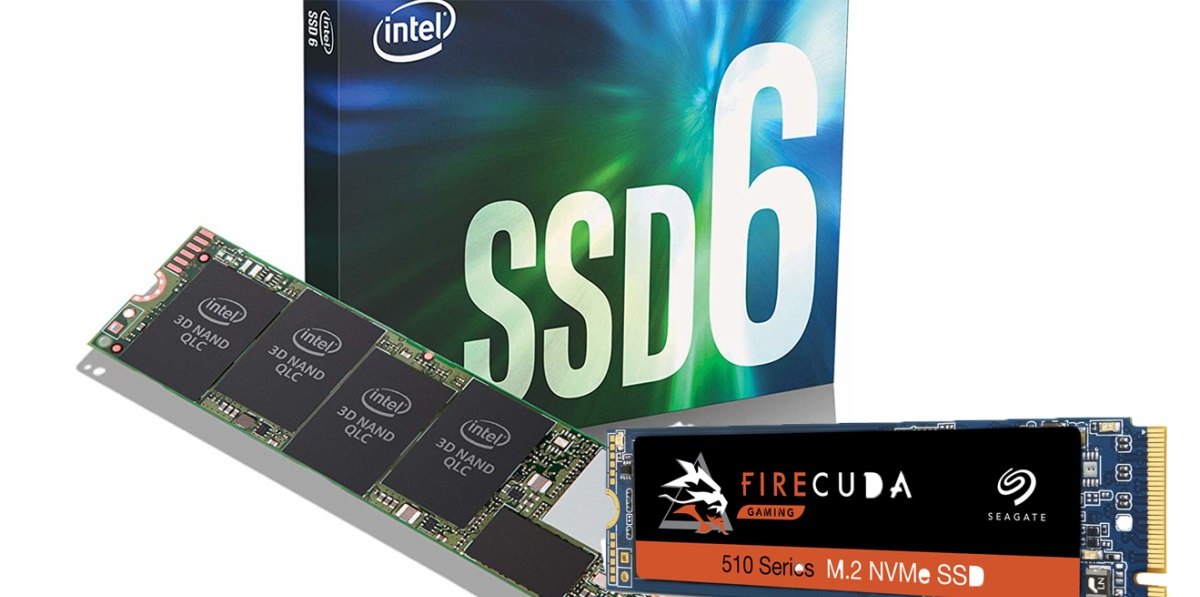
SSDs come in various form factors and interfaces, including 2.5-inch SATA drives, M.2 drives, and PCIe (Peripheral Component Interconnect Express) cards. These different form factors allow for compatibility with different types of devices, from desktop computers to ultrabooks and gaming laptops.
Overall, SSDs are revolutionizing the storage industry with their numerous advantages over traditional HDDs. Their speed, reliability, efficiency, and compact form factor make them an ideal choice for anyone looking to upgrade their storage and experience a significant boost in performance.
Why test an SSD drive?
Testing an SSD drive is crucial to ensure its optimal performance, reliability, and longevity. Although SSDs are more robust and reliable than traditional HDDs, they are not exempt from potential issues that can arise over time. Here are a few reasons why it’s important to regularly test your SSD drive:
- Detecting early warning signs: Testing an SSD drive allows you to identify any potential issues or warning signs of failure before they become major problems. By monitoring the drive’s SMART (Self-Monitoring, Analysis, and Reporting Technology) status, you can receive notifications about critical parameters such as temperature, wear leveling, and reallocated sectors. Early detection allows you to take necessary steps to prevent data loss and replace the drive if needed.
- Optimizing performance: Over time, an SSD drive’s performance may degrade due to factors like wear leveling, garbage collection, and firmware updates. By running performance tests, such as checking read and write speeds, you can assess if the drive is operating at its expected levels. Optimizing performance ensures that your system runs smoothly, applications launch quickly, and file transfers are speedy.
- Verifying TRIM functionality: TRIM is a crucial feature in SSDs that helps maintain performance and lifespan by efficiently managing discarded data. Regularly testing the TRIM functionality ensures that the drive can properly communicate with the operating system, allowing for efficient deletion of data blocks and preventing performance degradation over time.
- Stress testing: Stress testing an SSD drive involves subjecting it to heavy workloads or simulated real-life scenarios. This test helps assess the drive’s ability to handle intense usage and determine if it can maintain stability and performance under demanding conditions.
- Checking for bad sectors: Bad sectors can develop on an SSD drive, impacting its ability to store and retrieve data. By running tests to detect and mark any bad sectors, you can ensure that your drive remains reliable and prevent potential data loss in the future.
- Verifying firmware version: Firmware updates for SSD drives can provide bug fixes, improved compatibility, and enhanced performance. By checking the current firmware version and comparing it to the latest available version, you can determine if a firmware update is needed to optimize the drive’s functionality.
Regularly testing your SSD drive is an essential part of maintaining its health and performance. By proactively identifying and addressing potential issues, you can prevent data loss, optimize performance, and extend the lifespan of your valuable storage device.
Checking the SMART status
The SMART (Self-Monitoring, Analysis, and Reporting Technology) status is a built-in feature in SSD drives that monitors various parameters related to the drive’s health and performance. Checking the SMART status regularly can provide valuable insights into the overall condition of your SSD drive. Here’s how to go about it:
- Use SMART monitoring tools: There are several software tools available that can read and interpret the SMART data from your SSD drive. These tools provide an easy-to-understand interface with detailed information about key parameters like temperature, wear leveling, reallocated sector count, and more. Some popular SMART monitoring tools include CrystalDiskInfo, HD Tune, and SSD Health.
- Look for warning signs: When examining the SMART status, keep an eye out for any warning signs that indicate potential issues with the drive. These might include an increasing number of reallocated sectors, high operating temperature, or a significant decrease in the drive’s overall health value. If you notice any abnormal values or indicators, it may be a sign that your SSD drive requires further investigation or possible replacement.
- Pay attention to the drive’s lifespan: Many SSD monitoring tools provide an estimate of the drive’s remaining lifespan, based on factors like total bytes written or Power-On Hours (POH). This information can give you an idea of how much life is left in your SSD drive and help you plan for necessary backups or replacement in the future.
- Monitor over time: Checking the SMART status is not a one-time event. It is recommended to monitor the SMART data regularly to track any changes or trends. By comparing current values with past readings, you can identify if any parameters are deteriorating or if any new issues have arisen. Regular monitoring allows early detection of potential problems, providing you with an opportunity to take proactive measures to safeguard your data.
The SMART status is a valuable tool for assessing the health and performance of your SSD drive. By using dedicated SMART monitoring software, being vigilant about warning signs, and consistently monitoring over time, you can stay informed about the condition of your drive and make informed decisions regarding its maintenance or replacement, if necessary.
Running a diagnostic tool
Running a diagnostic tool is an effective way to thoroughly assess the performance and health of your SSD drive. These tools are designed to analyze various aspects of the drive and provide detailed reports on any potential issues. Here is how you can use a diagnostic tool to test your SSD drive:
- Choose a reliable diagnostic tool: There are several diagnostic tools available that are specifically designed for testing SSD drives. Some popular options include CrystalDiskMark, AS SSD Benchmark, and Samsung Magician. These tools provide comprehensive testing capabilities and give you an in-depth understanding of your drive’s performance.
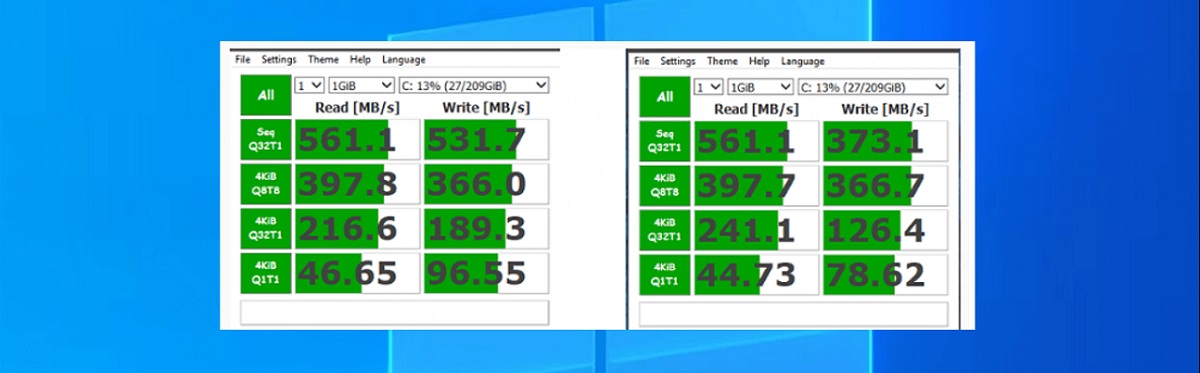
- Perform read and write tests: Diagnostic tools typically include read and write tests that simulate real-world data transfer scenarios. These tests measure the speed at which your SSD drive can read and write data, providing valuable insights into its overall performance. The results can help you identify any potential bottlenecks and determine if the drive is performing up to its expected specifications.
- Analyze random and sequential performance: Diagnostic tools often differentiate between random and sequential performance tests. Random performance measures how well the SSD drive handles small and random read/write operations, which is crucial for tasks like opening multiple applications or booting up the system. Sequential performance, on the other hand, tests the drive’s ability to handle large and sequential data transfers, such as copying large files. Evaluating both aspects allows you to assess the drive’s capabilities for different usage scenarios.
- Check for errors and SSD health: Diagnostic tools can also provide information about the health and potential errors of your SSD drive. They may report the wear level of the drive, the number of bad sectors, or any other error codes that indicate issues. By reviewing these reports, you can determine if your drive requires further attention or if any immediate actions need to be taken.
- Compare results and seek optimization opportunities: Running diagnostic tests at different intervals can help you track changes in your SSD drive’s performance over time. By comparing the results, you can identify any performance degradation or anomalies. This information can guide you in optimizing your drive’s performance by taking appropriate measures, such as enabling drive firmware updates or adjusting system settings.
Running a diagnostic tool is an essential step in thoroughly evaluating the performance and health of your SSD drive. By choosing a reliable tool, performing comprehensive tests, analyzing the results, and seeking optimization opportunities, you can ensure that your SSD drive is operating at its peak performance and identify any potential issues before they impact your data or system’s reliability.
Testing the read and write speeds
The read and write speeds of an SSD drive are crucial factors that determine its overall performance and responsiveness. Testing these speeds can help you assess the drive’s efficiency and identify any potential bottlenecks or issues. Here’s how you can test the read and write speeds of your SSD drive:
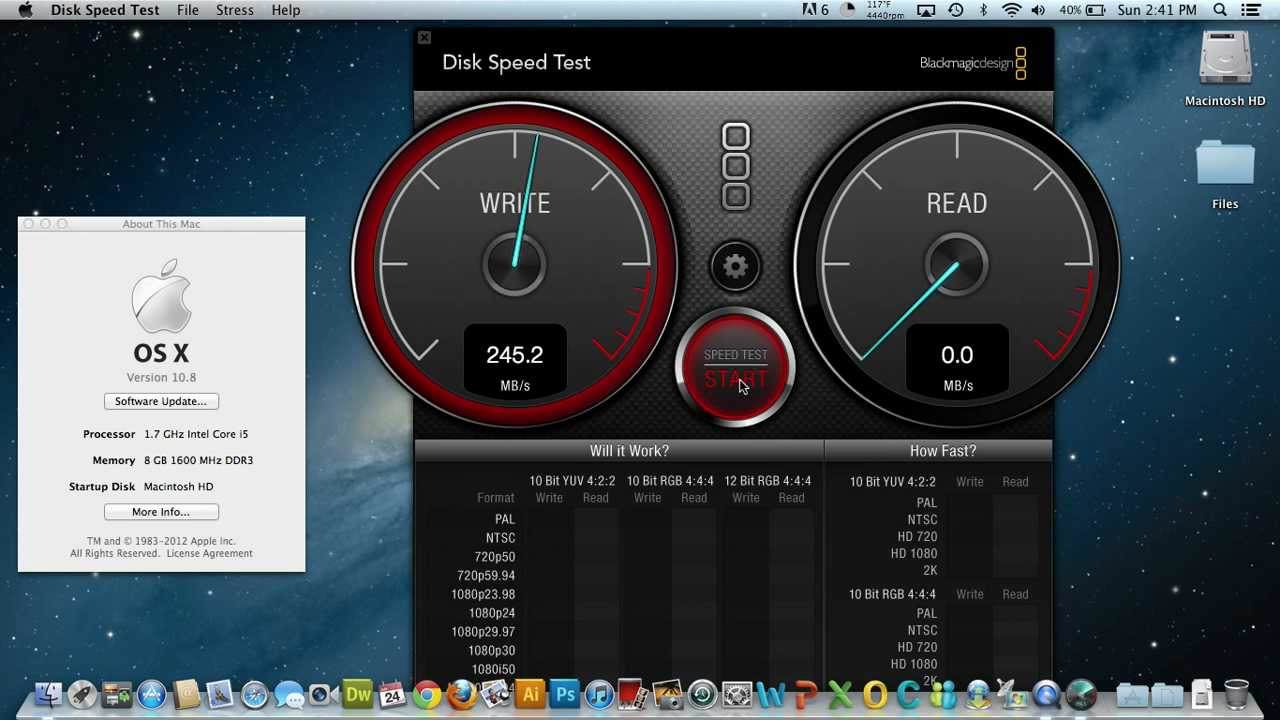
- Choose a reliable benchmarking tool: There are various benchmarking tools available that specifically measure the read and write speeds of storage devices. Some popular options include CrystalDiskMark, AS SSD Benchmark, and ATTO Disk Benchmark. These tools provide standardized tests that simulate real-world data transfer scenarios to evaluate the performance of your SSD drive accurately.
- Run the benchmark tests: Once you have chosen a benchmarking tool, run the tests to measure the read and write speeds of your SSD drive. These tests involve transferring a fixed amount of data and measuring the time it takes to complete the operation. The benchmarking tool will provide the results in terms of data transfer rate and access times, allowing you to compare them with the expected specifications of your SSD drive.
- Compare results with manufacturer specifications: Each SSD drive has its own specified read and write speeds provided by the manufacturer. Compare the benchmark results with these specifications to ensure that your SSD drive is performing within the expected range. Significant deviations from the manufacturer’s specifications may indicate performance issues or the need for further investigation.
- Consider other factors: While read and write speeds are important, it’s worth noting that real-world performance can be influenced by various other factors, such as the size and type of files being transferred, the drive’s firmware, and the system configuration. Keep these factors in mind when interpreting the benchmark results and consider the overall performance of your SSD drive under typical usage scenarios.
- Benchmark regularly: Monitoring the read and write speeds of your SSD drive periodically can help you track any performance changes over time. By benchmarking at different intervals, you can identify any significant decreases in speed, which may indicate issues like drive degradation or firmware concerns. Regular benchmarking allows you to catch any performance degradation early and take appropriate action.
Testing the read and write speeds of your SSD drive is essential for evaluating its performance and identifying any potential issues. By choosing a reliable benchmarking tool, running the tests, comparing the results with manufacturer specifications, considering other factors influencing performance, and benchmarking regularly, you can ensure that your SSD drive is operating at its optimal speed and address any performance concerns proactively.
Verifying the TRIM functionality
TRIM is a critical feature for maintaining the performance and lifespan of your SSD drive. It helps the drive efficiently manage discarded data and maintain optimal performance over time. Verifying the TRIM functionality is essential to ensure that your SSD drive is properly communicating with the operating system and performing the necessary tasks to optimize its performance. Here’s how you can verify the TRIM functionality of your SSD drive:
- Check if TRIM is enabled: The first step is to confirm whether TRIM is enabled on your operating system. TRIM is typically enabled by default on modern operating systems, but it’s always a good idea to verify it. You can do this by opening the command prompt or terminal and entering a specific command depending on your operating system. For Windows, the command is `fsutil behavior query DisableDeleteNotify`. If the response is “0,” TRIM is enabled.
- Verify TRIM support: Ensure that your SSD drive supports TRIM functionality. Most modern SSD drives come with built-in TRIM support, but it’s worth confirming to avoid any compatibility issues. Check the manufacturer’s website or product documentation to find information about TRIM support for your specific SSD model.
- Monitor TRIM activity: Once you have verified that TRIM is enabled and supported, you can monitor the TRIM activity on your SSD drive. There are various software tools available that provide detailed information about the TRIM commands executed by your operating system on the SSD drive. These tools can help you verify if the TRIM commands are being successfully issued and executed, ensuring that discarded data is efficiently managed.
- Ensure a TRIM-aware file system: TRIM commands work in conjunction with the file system on your SSD drive. It’s important to ensure that you are using a TRIM-aware file system, such as NTFS for Windows or APFS for macOS. These file systems are designed to optimize the TRIM functionality and maintain the performance of your SSD drive.
- Consider TRIM frequency and scheduling: While TRIM is typically an automatic process, it can be useful to understand the frequency at which TRIM commands are issued on your SSD drive. Some operating systems issue TRIM commands on a regular basis, while others may have a more adaptive or scheduled approach. Understanding the TRIM frequency can help you monitor the efficiency of the TRIM functionality and take any necessary actions if you notice any anomalies.
Verifying the TRIM functionality of your SSD drive is essential to ensure that it is properly optimizing performance and maintaining its longevity. By checking if TRIM is enabled, verifying TRIM support, monitoring TRIM activity, using a TRIM-aware file system, and considering TRIM frequency and scheduling, you can ensure that your SSD drive is efficiently managing discarded data and maintaining its peak performance.
Stress testing the SSD drive
Stress testing your SSD drive is a rigorous way to evaluate its performance, stability, and durability under heavy workloads or intense usage scenarios. By subjecting the drive to demanding conditions, you can assess its ability to handle high volumes of data and ensure its reliability. Here’s how you can stress test your SSD drive:
- Choose a stress testing tool: Select a reliable stress testing tool that is specifically designed for SSD drives. Tools like CrystalDiskMark, AS SSD Benchmark, or Samsung Magician often include stress tests among their features. These tests simulate real-life scenarios and push the limits of your SSD drive to gauge its performance capabilities.
- Select an appropriate stress test: Stress tests may vary depending on the tool you choose. Common stress testing scenarios include heavy read/write operations, continuous data transfers, or simultaneous access from multiple applications. Choose a stress test that matches the workload or usage scenario that you want to simulate.
- Run the stress test: Once you have selected the appropriate stress test, run it on your SSD drive. Stress tests usually involve intensive data transfers or workloads that push the drive to its limits. These tests can take some time to complete, as they require significant resources and heavily utilize the drive. Monitor the drive’s performance and temperature during the stress test to check for any potential issues or abnormalities.
- Assess the results: After the stress test is complete, analyze the results to evaluate the drive’s performance under the stressful conditions. Look for any errors, performance drops, or abnormal behavior during the test. Stress testing helps identify whether your SSD drive can sustain high workloads without experiencing issues like bottlenecks, overheating, or data corruption.
- Consider real-world usage implications: While stress testing is helpful for evaluating the drive’s capabilities, it’s important to remember that it represents extreme scenarios. Take the stress testing results into consideration along with your typical usage patterns to assess the SSD’s performance under normal conditions. This will give you a better understanding of how the drive will perform in real-world scenarios.
Stress testing your SSD drive provides valuable insights into its performance, durability, and stability. By selecting a reliable stress testing tool, choosing an appropriate stress test scenario, running the test, assessing the results, and considering real-world usage implications, you can ensure that your SSD drive is capable of handling heavy workloads, maintaining stability, and delivering optimal performance.
Checking for bad sectors
Checking for bad sectors is an important step in ensuring the reliability and integrity of your SSD drive. Bad sectors are areas of the drive where data cannot be properly read or written, which can lead to data loss or corruption. Here’s how you can check for bad sectors on your SSD drive:
- Use built-in diagnostic tools: Many SSD drives come with built-in diagnostic tools that can help detect and mark bad sectors. These tools can be accessed through the manufacturer’s software or firmware interface. Consult the documentation or support resources for your SSD drive to find the specific tool and instructions for checking for bad sectors.
- Run a full surface scan: The full surface scan option in diagnostic tools scans the entire SSD drive for any potential bad sectors. This scan tests each sector to verify if data can be properly read or written. The scan can take a significant amount of time, but it provides a thorough analysis of the drive’s health and identifies any problematic areas.
- Check for any reported errors: During the scan, the diagnostic tool will report any errors or bad sectors it encounters. These errors may be categorized as “reallocated sectors” or “pending sectors.” Reallocated sectors indicate that the drive has successfully moved data from a bad sector to a spare area, while pending sectors are sectors that the drive identifies as potentially problematic. Both types of errors warrant attention and may indicate the need for further investigation or drive replacement.
- Consider using third-party disk utilities: In addition to the built-in diagnostic tools, there are third-party disk utility programs available that can scan and analyze SSD drives for bad sectors. These utilities may offer additional features, such as advanced error reporting or detailed SMART data analysis. Popular options include HDDScan, HDD Regenerator, and HD Sentinel.
- Regularly check for bad sectors: It’s important to check for bad sectors on your SSD drive periodically, especially if you notice any unexpected system behavior or suspect drive issues. Regular checking allows you to catch any potential problems early on and take appropriate actions, such as data backups or replacing the drive if necessary.
Checking for bad sectors on your SSD drive is essential to ensure the integrity and reliability of your data. By using built-in diagnostic tools, running a full surface scan, checking for reported errors, considering third-party disk utilities, and regularly checking for bad sectors, you can identify and address any issues proactively, preventing potential data loss and ensuring the longevity of your SSD drive.
Verifying the firmware version
Verifying the firmware version of your SSD drive is an important step in ensuring that your drive is up to date with the latest enhancements, bug fixes, and performance optimizations provided by the manufacturer. Firmware updates can improve the stability, compatibility, and overall performance of your SSD drive. Here’s how you can verify the firmware version:
- Check the manufacturer’s website: Visit the manufacturer’s website and navigate to the support or downloads section. Look for the specific SSD drive model and check if there are any firmware updates available. The manufacturer may provide release notes that outline the changes and improvements made in each firmware version.
- Consult the manufacturer’s documentation: Some SSD drives come with dedicated software utilities or documentation that can be used to check the current firmware version. These utilities may also provide options to update the firmware directly from within the software. Refer to the manufacturer’s documentation or search for the utility specific to your SSD drive to verify the firmware version.
- Use third-party firmware update tools: In certain cases, the manufacturer may provide third-party firmware update tools that can be used alongside or in place of their proprietary software utilities. These tools are specifically designed to update the firmware of SSD drives from various manufacturers. Ensure that you download and use the tool recommended by the manufacturer to avoid any compatibility or security issues.
- Proceed with caution: Firmware updates should be approached with caution as they can have significant impacts on the drive’s functionality. Before updating the firmware, it is recommended to back up your data to prevent any potential loss in case of unforeseen issues during the update process. Follow the manufacturer’s instructions carefully and ensure your SSD drive is connected to a stable power source throughout the firmware update.
- Regularly check for firmware updates: Firmware updates are periodically released by SSD manufacturers to address potential issues and improve the drive’s performance. It is important to check for firmware updates regularly, even if you haven’t encountered any noticeable problems with your SSD drive. Keeping the firmware up to date ensures that you have access to the latest enhancements and optimizations provided by the manufacturer.
Verifying the firmware version of your SSD drive is crucial to ensure that it is operating with the latest updates and optimizations. By checking the manufacturer’s website, consulting the documentation, using third-party firmware update tools, proceeding with caution during firmware updates, and regularly checking for firmware updates, you can ensure that your SSD drive is up to date and performing at its best.
Conclusion
Regularly testing your SSD drive is a vital aspect of maintaining its performance, reliability, and longevity. By following the steps discussed in this article, you can effectively evaluate the health and functionality of your SSD drive.
We started by understanding what an SSD drive is and the benefits it brings over traditional HDDs. SSD drives provide faster access speeds, higher reliability, and lower power consumption, making them an ideal choice for modern computing needs.
We explored various reasons why testing an SSD drive is important. Testing helps detect early warning signs of failure, optimize performance, verify the TRIM functionality, stress test the drive, check for bad sectors, and ensure the firmware is up to date.
Throughout the article, we provided detailed instructions on how to perform each testing method, including checking the SMART status, running a diagnostic tool, testing read and write speeds, verifying the TRIM functionality, stress testing the drive, checking for bad sectors, and verifying the firmware version.
By incorporating these testing methods into your regular maintenance routine, you can identify potential issues, optimize performance, and ensure the longevity of your SSD drive. Regular monitoring and testing allow you to take proactive measures and address concerns before they turn into critical problems that could result in data loss or performance degradation.
Remember to consult the manufacturer’s documentation and use reliable diagnostic tools or utilities specific to your SSD drive. Keep in mind that real-world performance can differ from stress test results, so it’s important to consider both when evaluating your SSD drive’s performance.
In conclusion, taking the time to test and evaluate your SSD drive is a worthwhile investment. By maintaining its health and performance, you can continue to enjoy the benefits of speed, reliability, and efficiency that SSD drives bring to your computing experience.