Introduction
When it comes to the performance of your computer, one crucial component that plays a vital role is the RAM, or Random Access Memory. RAM temporarily stores data that your computer is actively using to carry out tasks, such as running programs and opening files. Over time, RAM can experience issues that can affect your computer’s overall performance. Therefore, it’s important to be able to determine if your RAM is working properly or if there are any problems that need to be addressed.
In this article, we will explore various methods for assessing the health of your RAM. We will discuss how to check for physical damage, use built-in Windows tools to test your RAM, employ third-party software for more comprehensive testing, and identify common issues related to corrupted or misconfigured RAM. Additionally, we will cover how to monitor RAM usage and performance to stay on top of potential problems.
Having a clear understanding of the condition of your computer’s RAM can help you troubleshoot and resolve any issues that may arise. Whether you’re a tech-savvy individual or just a casual computer user, the information provided in this article will assist you in determining whether your RAM is functioning correctly and help you take the necessary steps to ensure optimal performance.
Checking for Physical Damage
One of the first steps in evaluating the health of your RAM is to inspect it for any physical damage. RAM sticks can be vulnerable to damage due to mishandling or electrical surges. Here’s how you can check for physical damage:
- Power off your computer: Before inspecting the RAM, make sure your computer is turned off and disconnected from any power source. This will help avoid any potential electrical hazards.
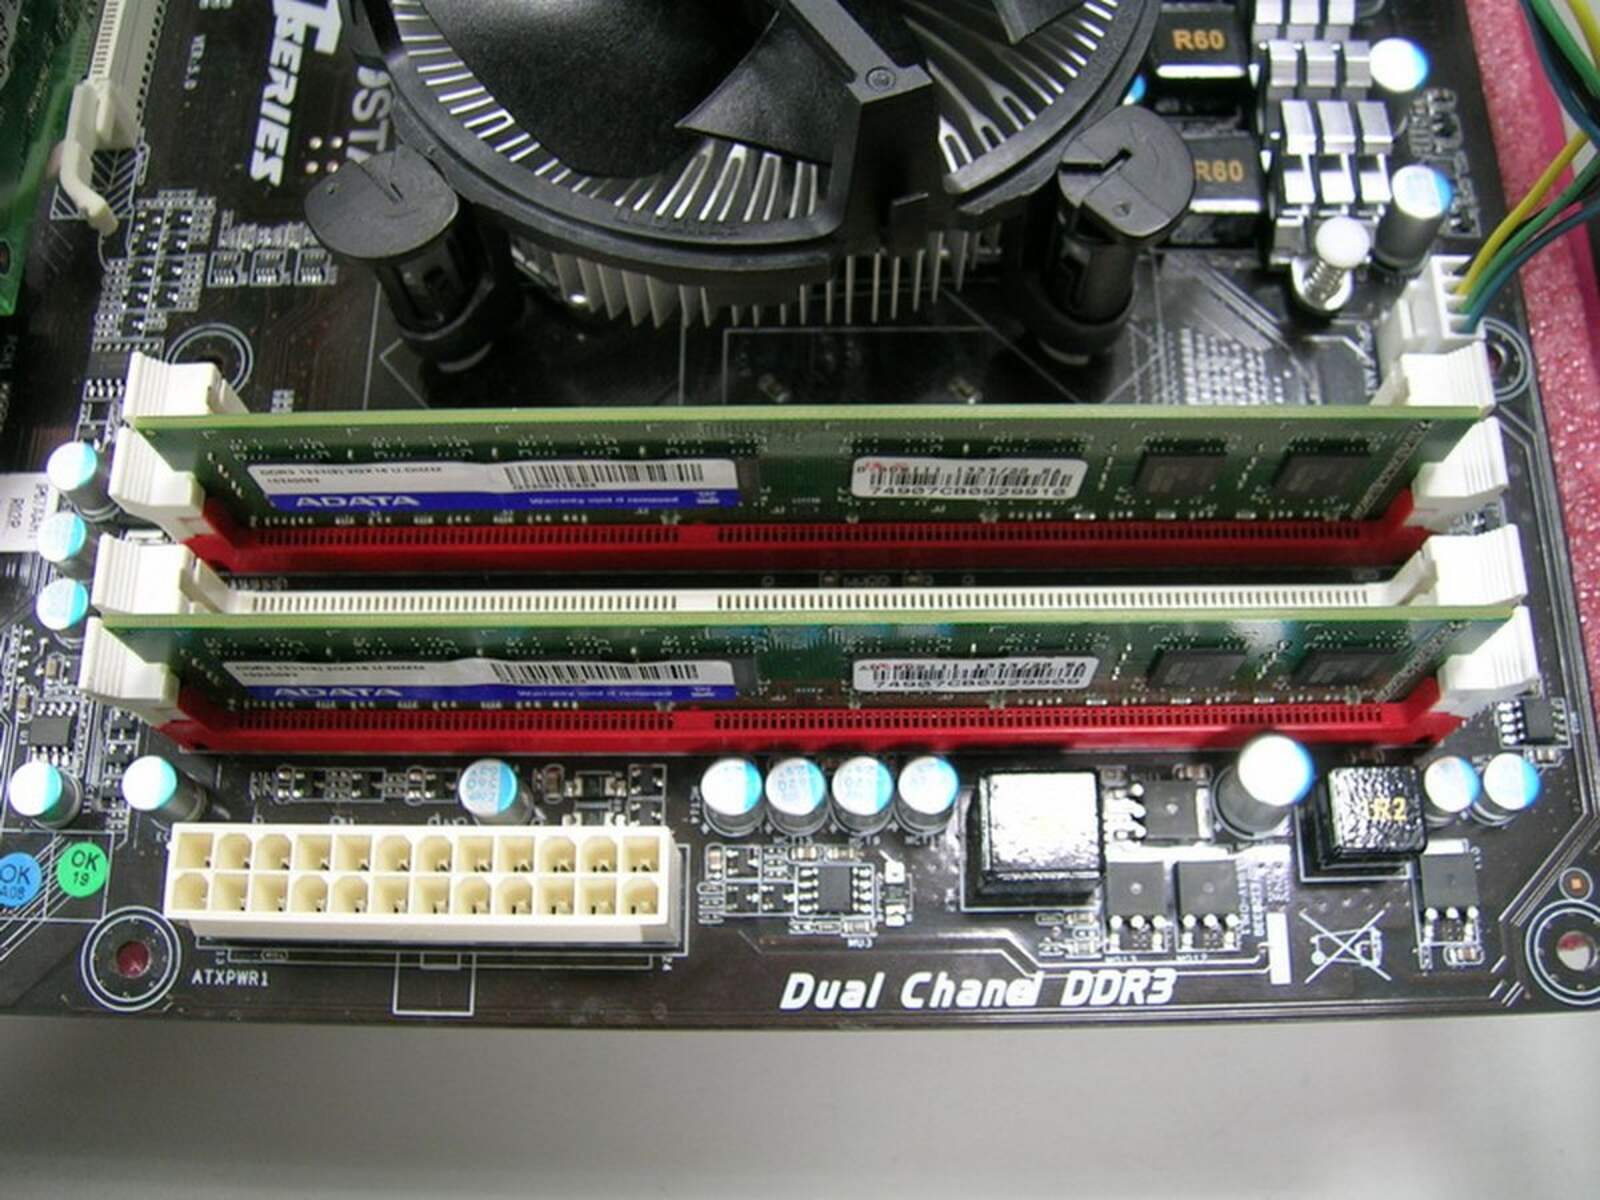
- Locate the RAM slots: The RAM slots are typically located near the CPU socket on the motherboard. Refer to your computer’s documentation if you are unsure about the exact location.
- Remove the RAM sticks: Gently press down on the clips that hold the RAM sticks in place, and carefully remove them from the slots.
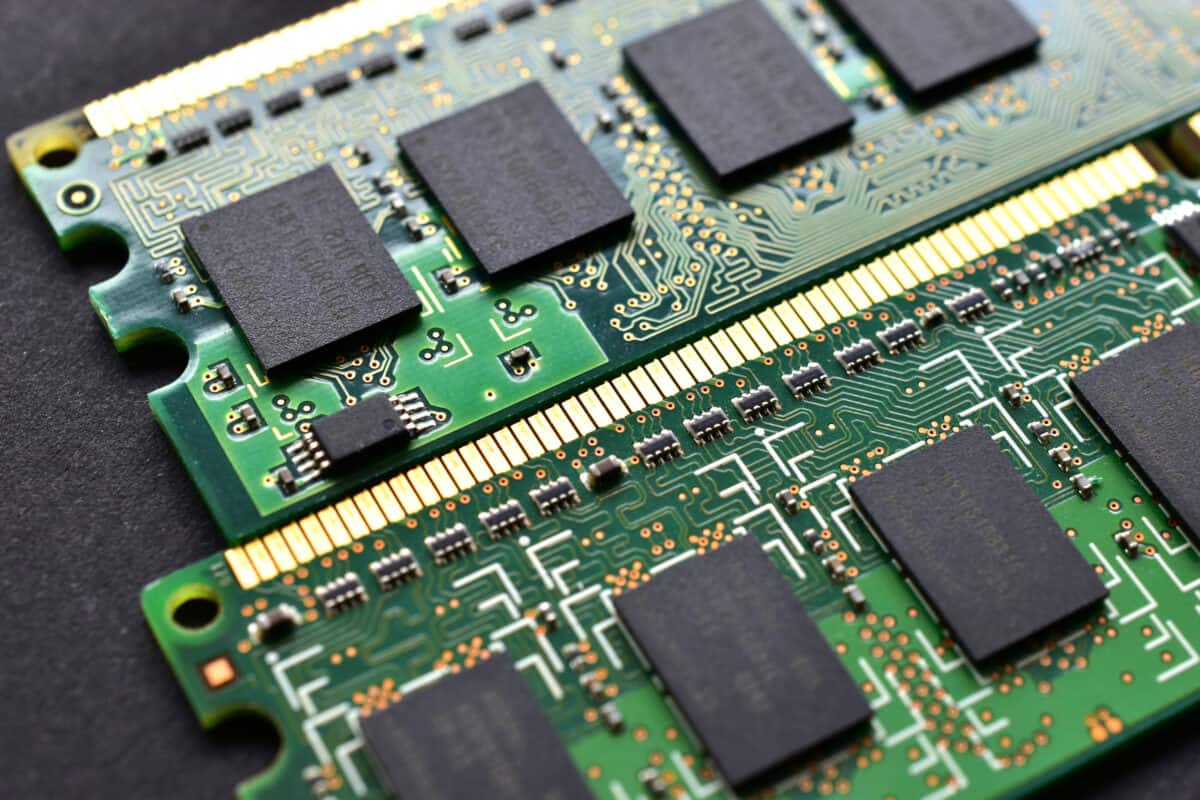
- Check for physical damage: Examine the RAM sticks for any signs of physical damage, such as bent or broken pins, discoloration, or corrosion. If you notice any visible damage, it is likely that the RAM sticks need to be replaced.
- Clean the RAM slots: Use a can of compressed air or a soft brush to clean any dust or debris that may have accumulated in the RAM slots. This will ensure a good connection when reinstalling the RAM sticks.
- Reinstall the RAM sticks: Place the RAM sticks back into the slots, making sure they are properly seated. Ensure that the clips on the slots securely lock the RAM sticks in place.
Checking for physical damage is a crucial step, as any physical issues with the RAM can directly impact its performance. If you find any damage, it is advisable to replace the faulty RAM sticks with new ones. However, if there are no visible signs of damage, you can proceed to the next steps to further assess the functionality of your RAM.
Testing with Built-in Windows Tools
Windows operating systems provide built-in tools that can help you test the functionality of your RAM. These tools are convenient and straightforward to use. Here are the steps to test your RAM using the built-in Windows tools:
- Open the Windows Memory Diagnostic tool: Press the Windows key on your keyboard and type “Windows Memory Diagnostic” in the search bar. Select the corresponding option to open the tool.
- Choose between two testing options: The Windows Memory Diagnostic tool offers two testing options: “Restart now and check for problems” or “Check for problems the next time I start my computer.” Select the option that suits your needs.
- Restart your computer (if applicable): If you selected the “Restart now and check for problems” option, the tool will prompt you to save your work and restart your computer. Make sure to save any unsaved work and proceed with the restart.
- Wait for the testing process to complete: Once your computer restarts, the Windows Memory Diagnostic tool will automatically run several tests to check for memory errors. The process may take a while, so be patient and let it complete.
- Review the test results: After the testing process finishes, your computer will restart again. When it starts up, you can view the test results in the Windows Memory Diagnostic tool.
- Identify any memory errors: If the Windows Memory Diagnostic tool detects any memory errors, it will display them in the test results. In such cases, you may need to replace the faulty RAM sticks.
Using the built-in Windows Memory Diagnostic tool is a quick and convenient method to determine if there are any memory errors. However, it may not catch every issue, so it’s advisable to use additional third-party software for more comprehensive testing, as discussed in the next section.
Using Third-Party Software for Testing
In addition to the built-in Windows tools, there are several third-party software options available for testing your RAM. These software programs offer more advanced features and extensive testing capabilities. Here are the steps to test your RAM using third-party software:
- Research and download a reliable RAM testing software: Look for reputable third-party software that specializes in RAM testing. Some popular options include Memtest86, HCI Memtest, and PassMark MemTest.
- Install and launch the chosen software: Follow the installation instructions provided by the software and launch it on your computer.
- Select the appropriate testing options: Different software programs may offer various testing options, such as quick tests, extensive tests, or specific tests for different types of memory. Choose the testing options that suit your needs.
- Start the RAM testing process: Once you have chosen the testing options, start the testing process. The software will run a series of tests to assess the functionality and performance of your RAM.
- Review the test results: After the testing process completes, the software will provide detailed test results. Pay close attention to any errors or issues identified during the tests.
- Take necessary actions based on the results: If the software detects any errors or issues with your RAM, you may need to replace the faulty RAM sticks. Consult the software’s documentation or seek professional assistance for guidance on resolving the identified problems.
Using third-party software for RAM testing can provide a more thorough analysis of your RAM’s performance. These programs offer advanced testing capabilities and options that can help you identify even subtle issues that may not be caught by the built-in Windows tools. Regularly running RAM tests with third-party software can ensure that your system is functioning optimally and help prevent potential crashes or stability issues.
Checking for Corrupted or Misconfigured RAM
In addition to physical damage or hardware issues, RAM can also suffer from corruption or misconfiguration, which can cause performance problems. Here are some methods to check for corrupted or misconfigured RAM:
- Run System File Checker (SFC) scan: The SFC scan is a built-in Windows tool that scans your system for corrupted files and attempts to repair them. Open the command prompt as an administrator and type “sfc /scannow” followed by Enter. The tool will scan your system and identify any corrupted system files, including those related to RAM.
- Check event logs for memory-related errors: Windows logs events related to memory issues in the Event Viewer. Open the Event Viewer from the Start menu, navigate to the “Windows Logs” section, and look for entries under “System” or “Application.” Look for warnings or errors related to memory or RAM and take note of any specific error codes for further troubleshooting.
- Verify RAM settings in BIOS/UEFI: Access your computer’s BIOS or UEFI settings by restarting it and pressing the corresponding key (often Del, F1, F2, or Esc) during startup. Look for settings related to RAM, such as frequency, timings, and voltages. Ensure that these settings match the specifications of your RAM modules. Incorrect settings can lead to stability issues or suboptimal performance.
- Reset RAM settings to default: If you suspect that any changes you made to RAM settings in the BIOS/UEFI may be causing issues, you can try resetting them to their default values. Look for an option to “Load Optimized Defaults” or “Reset to Default” in the BIOS/UEFI settings and select it to restore the original settings.
- Update motherboard BIOS/UEFI firmware: Check the manufacturer’s website for your computer’s motherboard or the system manufacturer’s website for any available BIOS/UEFI updates. Updating the firmware can provide bug fixes or improvements that may help resolve RAM-related issues.
Checking for corrupted or misconfigured RAM requires a combination of software and hardware troubleshooting. By following these steps, you can identify and resolve any issues related to RAM corruption or misconfiguration, ensuring that your computer operates smoothly and efficiently.
Monitoring RAM Usage and Performance
Monitoring the usage and performance of your RAM is essential for detecting any abnormalities or excessive resource utilization. By keeping an eye on your RAM’s behavior, you can pinpoint potential issues and take appropriate action. Here’s how you can monitor your RAM usage and performance:
- Task Manager: The built-in Task Manager in Windows allows you to monitor the usage of various system resources, including RAM. To open Task Manager, press
Ctrl + Shift + Escand navigate to the “Performance” tab. Here, you can view real-time data about your RAM usage, including the total amount of RAM, the amount in use, and the percentage of usage. - Resource Monitor: Resource Monitor provides a more detailed analysis of your system’s resource usage, including RAM. To access it, open Task Manager and click on the “Performance” tab. Then, click on “Open Resource Monitor” at the bottom. Within Resource Monitor, navigate to the “Memory” tab to view information about active processes, their memory usage, and the overall memory load on your system.
- Third-party monitoring software: There are various third-party software options available that offer more advanced monitoring features. Programs like HWMonitor, Speccy, or Rainmeter provide detailed information about your RAM usage, as well as other system components. These tools can give you insights into memory speed, timings, and temperature, helping you make more informed decisions about your RAM’s performance.
- Set up notifications: Some monitoring software allows you to set up custom notifications or alerts based on specific RAM usage thresholds. These alerts can warn you when your system’s memory usage is reaching or exceeding a certain level, helping you proactively address any performance issues.
- Keep an eye on performance over time: Monitoring your RAM usage and performance should not be a one-time task. Regularly check the metrics to identify any patterns of high usage or performance degradation. This can help you identify potential long-term issues or trends that require attention.
Monitoring your RAM usage and performance empowers you to stay proactive in detecting any anomalies or performance bottlenecks. By utilizing the built-in tools or third-party software, you can gain insights into how your RAM is utilized and make informed decisions to optimize its performance.
Troubleshooting Common RAM Problems
RAM-related issues can manifest in various ways, impacting the overall performance and stability of your computer. Fortunately, many common RAM problems can be resolved through troubleshooting techniques. Here are some common RAM problems and their respective troubleshooting steps:
- Random system crashes or freezes: If your computer frequently crashes or freezes, it could be a result of faulty RAM. To troubleshoot this issue, start by running a RAM testing tool such as Memtest86. If errors are detected, try removing and reseating the RAM sticks. If the problem persists, you may need to replace the faulty RAM modules.
- Slow performance or frequent slowdowns: If your computer is experiencing slow performance or frequent slowdowns, it could be due to insufficient RAM. Check your system’s RAM usage in the Task Manager or Resource Monitor, and if it consistently reaches or exceeds the maximum capacity of your RAM, consider upgrading to a higher capacity module or adding more RAM sticks if there are available slots.
- Blue screen errors (BSOD): Blue screen errors, commonly known as BSOD, can occur due to several factors, including faulty or incompatible RAM. To troubleshoot this issue, ensure that your RAM is properly installed and compatible with your system. Consider running a RAM testing tool to check for any errors. Additionally, updating your drivers and performing a malware scan can also help resolve BSOD errors.
- Applications crashing or behaving erratically: If specific applications are crashing or behaving erratically, it may indicate RAM-related problems. Try closing other unnecessary programs to free up RAM and see if the issue persists. If it does, running a RAM testing tool can help identify any errors or faulty modules.
- Windows not recognizing the full amount of RAM: If your computer is not recognizing the full amount of installed RAM, it may be due to a hardware limitation or a misconfiguration. Ensure that the RAM sticks are properly seated in the slots and that they are compatible with your motherboard. Additionally, check your BIOS/UEFI settings to ensure that the RAM is detected and configured correctly.
Troubleshooting common RAM problems requires a systematic approach and a combination of software and hardware solutions. By following these troubleshooting steps, you can effectively resolve many common RAM-related issues, improving the overall performance and stability of your computer.
Conclusion
Ensuring that your RAM is functioning properly is crucial for maintaining optimal performance and stability in your computer. By following the methods outlined in this article, you can effectively check the health of your RAM and troubleshoot any issues that arise. Checking for physical damage, using built-in Windows tools, utilizing third-party software, and monitoring RAM usage and performance are all essential steps in maintaining the functionality of your RAM.
Physical damage can directly impact the performance of your RAM, so it’s important to inspect the RAM sticks for any signs of damage and clean the slots to ensure a good connection. Built-in Windows tools like the Windows Memory Diagnostic tool can help you quickly identify any memory errors, while third-party software provides more comprehensive testing options for a thorough analysis of your RAM’s performance.
In addition, checking for corrupted or misconfigured RAM is essential for preventing performance issues. Running system file checks, reviewing event logs, and verifying RAM settings in the BIOS/UEFI can help identify and resolve any corruption or misconfiguration issues.
Monitoring RAM usage and performance over time provides valuable insights into how your RAM is utilized and can help you proactively address any abnormalities or performance bottlenecks. By using the built-in Task Manager or advanced third-party software, you can keep track of your RAM’s behavior and make informed decisions regarding its optimization.
Lastly, troubleshooting common RAM problems, such as system crashes, slow performance, application instability, and compatibility issues, requires a systematic approach and a combination of software and hardware solutions. By following the recommended troubleshooting steps, you can effectively resolve these issues and ensure the smooth functioning of your computer.
In conclusion, regularly assessing the health of your RAM and taking appropriate measures to address any issues can significantly enhance the overall performance and stability of your computer. By implementing the methods discussed in this article, you can confidently monitor, diagnose, and resolve RAM-related problems, ensuring an optimal computing experience.