Introduction
RAM (Random Access Memory) is a crucial component in any computer system, responsible for temporarily storing data that the processor needs to access quickly. A faulty RAM module can lead to system instability, crashes, and sluggish performance. Therefore, it is essential to know how to determine if your RAM is working properly.
There are several signs that can indicate faulty RAM. Random system crashes, blue screen errors, frequent application crashes, and slow performance are some of the common symptoms. However, these issues can also be caused by other hardware or software problems, making it necessary to thoroughly assess the RAM’s condition.
Thankfully, there are straightforward methods to check the functionality of RAM on different operating systems. By following some simple steps, you can diagnose potential RAM issues and determine if a replacement is necessary.
In this article, we will guide you on how to test RAM on Windows, macOS, and Linux operating systems. Additionally, we will discuss common RAM issues and provide troubleshooting tips to help you resolve any problems you encounter.
Keep in mind that testing RAM requires some technical knowledge, but we will break down the steps to make the process as user-friendly as possible. Determining if your RAM is working properly can save you time and money by pinpointing the source of performance issues without the need for unnecessary hardware replacements.
Signs of Faulty RAM
Identifying the signs of faulty RAM is crucial to determine if your computer’s memory modules are causing performance issues. Here are some common signs to look out for:
- Random System Crashes: If your computer frequently crashes or reboots without any apparent reason, it can be a sign of faulty RAM. Inconsistent system behavior is often caused by RAM errors.
- Blue Screen Errors (BSOD): A blue screen error, also known as the Blue Screen of Death (BSOD), is a clear indication of potential RAM problems. If you encounter frequent BSODs with error messages related to memory, RAM may be the culprit.
- Frequent Application Crashes: If programs on your computer crash frequently, it could be due to faulty RAM. When software doesn’t have access to proper memory resources, it can result in unexpected crashes and instability.
- Slow Performance: RAM-related performance issues can manifest as slow and sluggish system performance. If your computer takes an unusually long time to load programs or perform basic tasks, it may be due to faulty RAM.
- Errors and Corrupted Data: RAM errors can lead to data corruption, causing files to become corrupted or unreadable. If you notice file errors or encounter difficulties accessing your data, RAM issues could be the underlying cause.
- Memory Diagnostic Tool Warnings: Some operating systems, like Windows, have built-in memory diagnostic tools that can identify potential RAM problems. If you receive warnings or notifications from these tools, it is crucial to investigate further.
If you experience one or more of these symptoms, it is essential to diagnose your RAM to determine if it is truly the cause of the issues. While these signs can suggest RAM problems, they can also be attributed to other hardware or software faults. Therefore, it is crucial to perform comprehensive tests to confirm if RAM is causing the issues.
Checking RAM on Different Operating Systems
When it comes to checking the functionality of RAM, the process may vary slightly depending on the operating system you are using. Let’s explore how to test RAM on Windows, macOS, and Linux:
How to Test RAM on Windows
Windows provides a built-in diagnostic tool called Windows Memory Diagnostic. To access this tool, follow these steps:
- Press the Windows key + R to open the Run dialog box.
- Type mdsched.exe and press Enter.
- Choose between restarting now and checking for problems immediately or scheduling the tool to run at the next system startup.
- During the diagnostic process, Windows will test your RAM for any errors.
- After the test is complete, Windows will restart, and a report of the results will be available.
How to Test RAM on macOS
macOS provides a memory diagnostic tool called Apple Hardware Test. To run this diagnostic tool, follow these steps:
- Shut down your Mac.
- Turn on your Mac and immediately press and hold the D key.
- Release the D key when prompted to select a language.
- Select your language and wait for the Apple Hardware Test to load.
- Follow the on-screen instructions to run the memory test.
- If any errors are found, note the specific error codes or details for further troubleshooting or contacting Apple Support.
- Once the test is complete, you can either restart your Mac or shut it down.
How to Test RAM on Linux
Linux provides various command-line tools to test memory, including Memtest86 and Memtest86+. These tools are widely used and can effectively check RAM for errors. Here’s how to use Memtest86:
- Download the Memtest86 ISO file from the official website.
- Create a bootable USB drive using the ISO file.
- Insert the bootable USB drive into your computer and restart.
- Boot from the USB drive.
- Memtest86 will automatically start testing your RAM for errors.
- Allow the test to run for several passes or until errors are detected.
- If errors are found, it indicates faulty RAM that should be replaced.
By following these steps, you can easily test the RAM on different operating systems and gain insights into its functionality. Remember to consult the respective documentation or support resources for more specific instructions based on your operating system version.
How to Test RAM on Windows
Windows provides a built-in diagnostic tool called Windows Memory Diagnostic for checking the functionality of your RAM. Follow these steps to run the Windows Memory Diagnostic tool:
- Press the Windows key + R to open the Run dialog box.
- Type mdsched.exe and press Enter.
- You will be prompted to choose between restarting now and checking for problems immediately or scheduling the tool to run at the next system startup.
- Select your desired option.
- If you choose to restart immediately, make sure to save all your work as the computer will restart and begin testing your RAM.
- The Windows Memory Diagnostic tool will run a series of tests to check your RAM for any errors.
- Once the test is complete, your computer will automatically restart, and a report of the results will be available.
- To view the test results, open Event Viewer by pressing the Windows key + X and selecting “Event Viewer” from the menu.
- In Event Viewer, navigate to Applications and Service Logs > Microsoft > Windows > MemoryDiagnostics-Results.
- In the right pane, you will find the test results, including any errors that were detected during the memory test.
It is important to note that the Windows Memory Diagnostic tool will not provide detailed information about the specific faulty RAM module in your system. If errors are detected, you may need to manually test each RAM module individually by removing and testing them one at a time or consulting with a professional technician.
Regularly testing your RAM on Windows can help identify potential issues before they cause system instability or crashes. It is recommended to run a memory test when you suspect RAM-related problems or when experiencing frequent system errors.
Remember, RAM testing requires technical knowledge, and it is essential to follow the instructions carefully. If you are unsure or uncomfortable performing the tests, it is recommended to seek assistance from a qualified professional.
How to Test RAM on macOS
To test the RAM on macOS, you can use the built-in Apple Hardware Test. Follow these steps to run the memory diagnostic tool:
- Shut down your Mac.
- Turn on your Mac and immediately press and hold the D key.
- Release the D key when prompted to select a language.
- The Apple Hardware Test will start, and you will see a progress bar indicating the test’s progress.
- The test will automatically check your hardware, including the RAM, for any errors.
- If any errors are found, the Apple Hardware Test will display a message with specific error codes or details.
- Note down the error codes or details for further troubleshooting or when contacting Apple Support.
- Once the test is complete, you can either restart your Mac or shut it down.
If your Mac is running macOS 10.13 or later, the Apple Hardware Test is no longer available. In this case, you can use the Apple Diagnostics tool:
- Shut down your Mac.
- Turn on your Mac and immediately press and hold the D key.
- Release the D key when prompted to select a language.
- Select your preferred language and follow the on-screen instructions.
- Apple Diagnostics will test your Mac’s hardware, including the RAM, for any errors.
- If errors are detected, take note of the error codes or details for further investigation or when seeking support.
- Once the test is complete, you can restart or shut down your Mac.
Testing your Mac’s RAM using the built-in diagnostic tools can help identify potential memory issues. If errors are found, it is recommended to consult Apple Support or a qualified technician for further assistance and guidance.
Remember, before running any hardware tests, make sure to save any unsaved work, as the tests may require restarting your Mac.
Regularly checking the RAM’s functionality on your macOS system can ensure optimal performance and help prevent unexpected crashes or instability resulting from faulty RAM modules.
How to Test RAM on Linux
Testing the RAM on a Linux system can be done using various command-line tools. One popular option is Memtest86, which provides a thorough memory testing process. Follow these steps to test your RAM using Memtest86:
- Visit the official Memtest86 website and download the ISO file.
- Create a bootable USB drive using the downloaded ISO file.
- Insert the bootable USB drive into your computer and restart.
- Ensure that your computer is set to boot from the USB drive.
- Memtest86 will automatically start running and will perform a series of tests on your RAM.
- Allow the test to run for multiple passes to ensure thorough evaluation.
- If Memtest86 detects any errors, take note of the specific error messages or codes.
- If errors are found, it indicates faulty RAM that should be replaced.
Memtest86 is a comprehensive tool that thoroughly examines the RAM, providing accurate results. It is highly recommended to run this test overnight or when you can afford an extended period of time, as multiple passes increase the reliability of the test.
Alternatively, you can use Memtest86+ as another RAM testing option. The process is similar, but it may vary depending on the Linux distribution you are using. Consult the documentation or community resources specific to your Linux distribution for detailed instructions on how to run Memtest86+.
Regularly testing your RAM on Linux is essential in order to detect any potential issues early on. Faulty RAM can lead to system crashes, data corruption, and overall instability. By performing regular memory tests, you can ensure the reliability and performance of your Linux system.
Remember that RAM testing requires technical knowledge, and it is important to follow the instructions carefully. If you are uncertain or uncomfortable with conducting the tests, seek assistance from experienced Linux users or consult professional support.
Common RAM Issues and Troubleshooting Tips
RAM-related issues can cause significant disruptions in your computer’s performance. Understanding and troubleshooting common RAM problems can help you resolve these issues effectively. Here are some common RAM issues and troubleshooting tips:
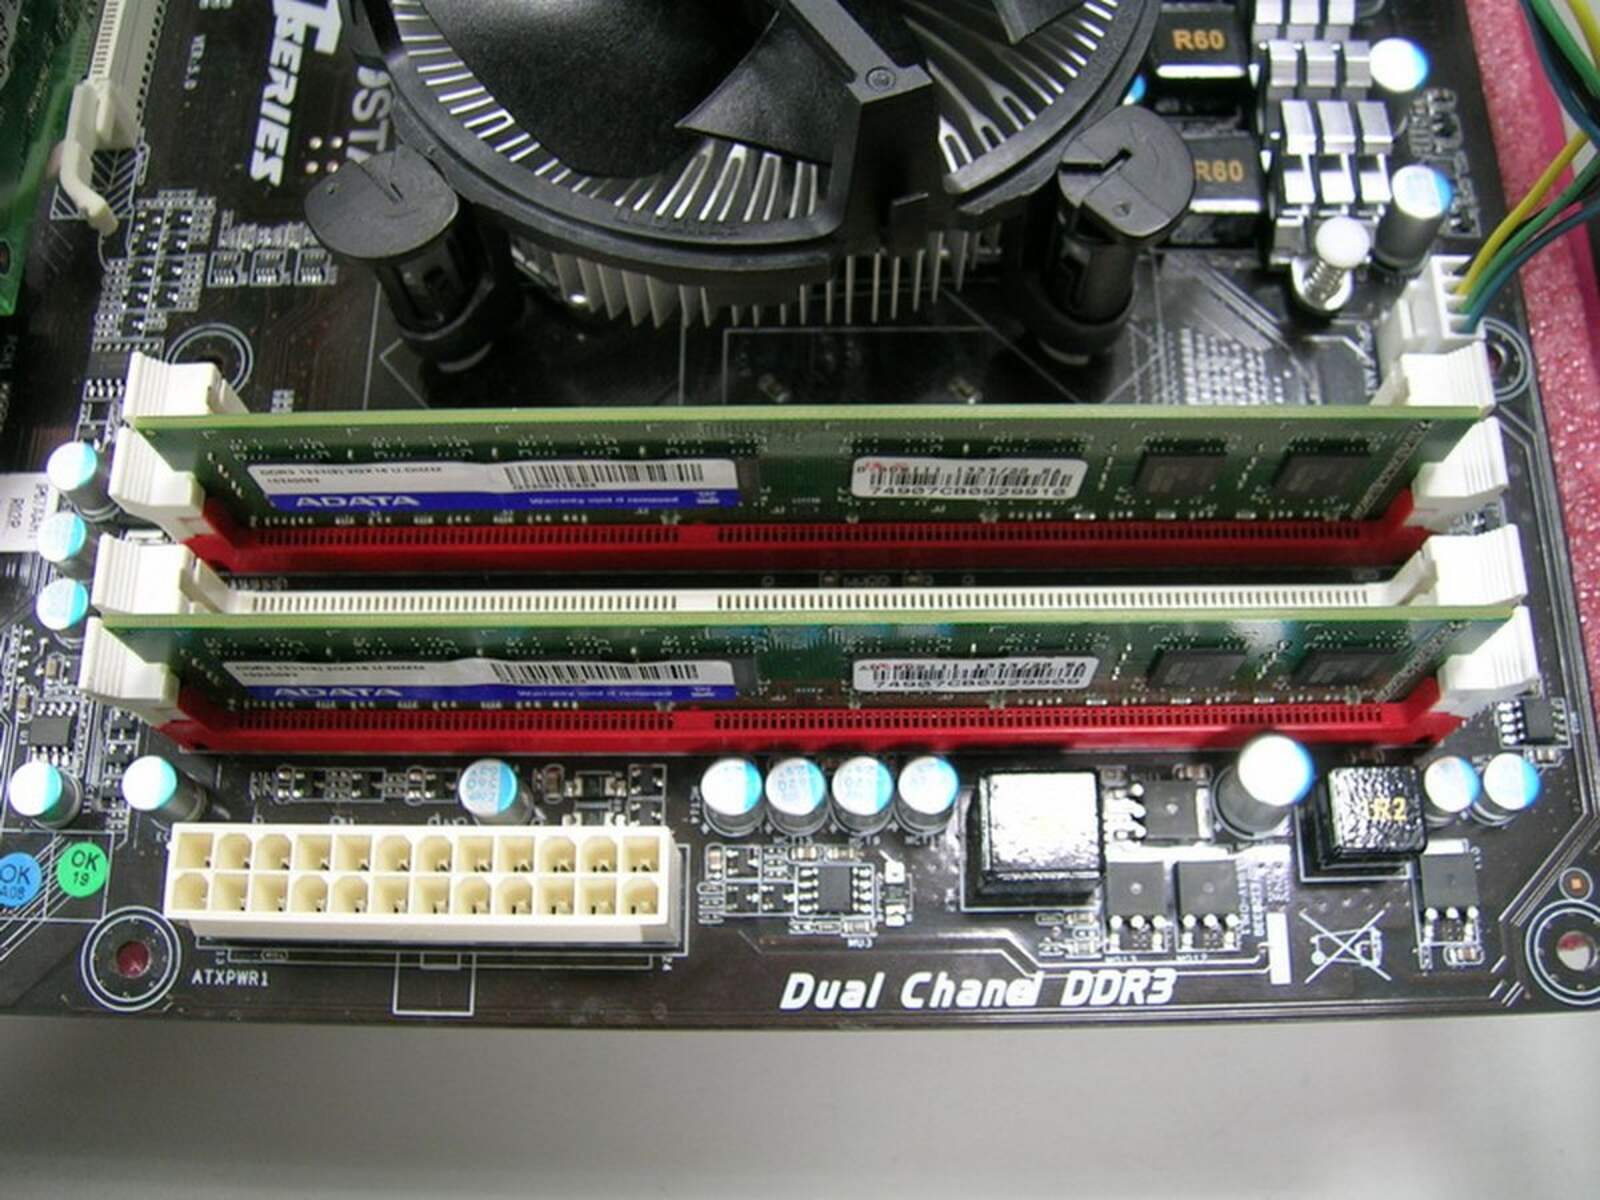
- RAM Incompatibility: When upgrading or installing new RAM modules, it is essential to ensure compatibility with your motherboard and existing RAM. Check the specifications and supported memory types of your motherboard before purchasing new RAM.
- Loose RAM Connection: Improperly inserted RAM modules can cause system instability. Make sure the RAM is firmly and correctly seated in the memory slots of your motherboard.
- Overheating: Insufficient cooling or poor ventilation can lead to RAM overheating. Ensure that your computer’s cooling system is functioning properly, and clean any dust or debris that may restrict airflow.
- Insufficient Power Supply: Inadequate power supply to the system can cause RAM-related issues. Verify that your power supply unit is supplying enough power to support all components, including the RAM.
- Memory Leaks: Some software programs may cause memory leaks, leading to a gradual reduction in available RAM over time. Monitor your system’s memory usage and identify any memory-hogging applications that may be causing the issue.
- Bad RAM Module: Faulty RAM modules can cause various problems. Test each RAM module individually by removing and reinserting them one at a time to identify if any specific module is causing issues.
- Corrupted Memory: Corrupted memory data can result in system crashes and errors. Run memory diagnostic tools to identify and repair any corrupt segments of your RAM.
- Incorrect RAM Settings: Improper BIOS settings or overclocking can lead to RAM instability. Make sure your BIOS settings are set to default or recommended values for your RAM speed and timings.
- Insufficient RAM Capacity: If your system is running out of available RAM, it can lead to slow performance and frequent crashes. Consider upgrading your RAM capacity to meet the demands of your computing needs.
By troubleshooting these common RAM issues, you can significantly improve the stability and performance of your computer system. Always refer to the documentation and guidelines provided by the manufacturer for specific troubleshooting steps related to your hardware configuration.
If you are unable to resolve RAM issues on your own or suspect a hardware malfunction, it is recommended to seek professional assistance from an experienced technician or contact the manufacturer’s support for further guidance.
When to Consider Replacing RAM
RAM modules, like any hardware component, have a limited lifespan. It is important to know when it may be necessary to replace your RAM. Here are some signs that indicate it may be time to consider replacing your RAM:
- Frequent and Unresolved System Crashes: If your computer experiences recurring crashes and system instability, even after troubleshooting other possible causes, faulty RAM could be to blame.
- Consistent Errors and Blue Screen of Death (BSOD): Regular error messages, particularly those related to memory, or frequent encounters with the Blue Screen of Death suggest potential RAM problems.
- Unreliable Performance and Slow Processing: If your system is noticeably slower, takes longer to respond, or struggles with everyday tasks, it could be due to failing RAM that is unable to keep up with your computer’s demands.
- Memory Diagnostic Tool Results Indicating Errors: Running a memory diagnostic tool, such as Memtest86, and consistently encountering errors during testing is a strong indication of faulty RAM.
- Inability to Upgrade or Expand System Memory: If you are unable to add additional memory modules to your system or upgrade to a higher capacity due to compatibility or technical limitations, replacement may be necessary to meet your computing needs.
- Obsolete or Outdated RAM Technology: As technology advances, older RAM types may become obsolete or incompatible with newer systems. If your RAM is no longer supported or difficult to replace, it may be advisable to upgrade to a newer and compatible module.
It is important to note that these signs may also indicate other hardware or software issues. Therefore, it is essential to perform proper troubleshooting and diagnosis to confirm that your RAM is the cause of the problems.
Replacing RAM modules is generally a straightforward process. However, it is important to consult your computer’s user manual or seek professional assistance if you are unsure about the compatibility or installation procedure.
Remember, before replacing RAM, it is recommended to back up your important data to prevent any potential loss due to hardware changes.
Ultimately, if you experience persistent RAM-related issues that significantly impact your computer’s performance and cannot be resolved through other means, it is likely time to consider replacing your RAM to restore stability and optimize your system’s performance.
Conclusion
Understanding how to determine if your RAM is working properly is crucial for maintaining an efficient and stable computer system. By recognizing the signs of faulty RAM and knowing how to test RAM on different operating systems, you can diagnose and resolve potential issues effectively.
RAM-related problems can manifest through various symptoms, such as system crashes, blue screen errors, frequent application crashes, and slow performance. However, it is important to note that these symptoms can also be caused by other hardware or software issues, making it necessary to perform proper diagnostics.
Testing RAM on Windows can be done using the built-in Windows Memory Diagnostic tool, while macOS offers the Apple Hardware Test or Apple Diagnostics tool for memory testing. Linux users can rely on tools like Memtest86 or Memtest86+ for comprehensive RAM testing.
Common issues with RAM, such as incompatibility, loose connections, overheating, or power supply problems, can often be resolved through troubleshooting steps. However, in cases of faulty RAM modules, memory leaks, or other unresolvable issues, replacing the RAM may be the best solution.
Regularly ensuring the functionality of your RAM and addressing any issues promptly can significantly improve your computer’s performance and prevent further complications. Remember to follow manufacturer guidelines, consult documentation, and seek professional assistance when necessary.
In conclusion, by staying proactive in checking and troubleshooting your RAM, you can maintain a reliable and efficient computer system that meets your computing needs.