What is GPU Overclocking
GPU overclocking refers to the process of increasing the clock speed of a graphics processing unit (GPU), which is the main component responsible for rendering images, videos, and animations on your computer’s display. By pushing the GPU beyond its factory-set limits, overclocking can potentially boost the performance of your graphics card and enhance your gaming or computing experience.
Typically, GPUs are designed with a certain level of performance in mind, and manufacturers set the clock speed at a conservative level to ensure stability and compatibility with a wide range of systems. However, many GPUs have the potential to operate at higher speeds without causing any major issues.
When you overclock your GPU, you essentially increase its clock frequency, which leads to faster processing and improved frame rates. This can result in smoother gameplay, better graphics quality, and shorter rendering times for creative tasks like video editing or 3D modeling.
It’s important to note that overclocking a GPU is not without its risks. When you increase the clock speed, you are also raising the temperature and power consumption of the graphics card, which can lead to instability, crashes, or even permanent damage if not done properly.
Additionally, not all GPUs are created equal, and not all are capable of achieving the same level of overclocking. This means that the benefits and potential drawbacks of overclocking will vary depending on the specific graphics card model you have.
Overall, GPU overclocking can be an effective way to squeeze out some extra performance from your graphics card. However, it requires careful consideration of your system’s capabilities and knowledge of the potential risks involved. In the following sections, we will discuss how to identify if your GPU is already overclocked, how to safely overclock a GPU, and when it may be necessary to revert the overclocking settings for optimal performance and stability.
Benefits of GPU Overclocking
GPU overclocking can offer several benefits for both gamers and creative professionals. While the exact advantages will vary depending on your specific system and GPU model, here are some common benefits of overclocking:
- Increased Performance: By raising the clock speed of your GPU, you can achieve higher frame rates in games, smoother gameplay, and reduced rendering times for creative applications. This can result in a more immersive and responsive experience.
- Improved Graphics Quality: Overclocking your GPU can lead to improved image quality, sharper textures, and enhanced details in games and other visually demanding applications. This can help you enjoy games at higher resolutions or enable better visual effects.
- Extended Lifespan: While overclocking may seem counterintuitive, when done properly, it can prolong the useful lifespan of your GPU. By increasing performance, you may be able to delay the need to upgrade to a new graphics card, saving you money in the long run.
- Customizability: Overclocking allows you to have full control over your GPU’s performance. You can tweak the clock speed, voltage, and power limits to find the optimal balance between performance and stability, tailored to your specific needs and preferences.
- Better Compatibility: Overclocking your GPU can potentially improve the compatibility of certain games or applications that demand a higher level of graphics performance. It can help you achieve the recommended system requirements for smoother gameplay or better rendering speeds in resource-intensive tasks.
It’s essential to note that the magnitude of these benefits will vary depending on your specific GPU, cooling solution, and system configuration. Additionally, while overclocking can provide a performance boost, it’s crucial to maintain stable and safe operating conditions for your GPU to avoid any potential risks.
In the next sections, we will explore how to identify if your GPU is already overclocked, how to safely overclock a GPU, and when it may be necessary to revert the overclocking settings.
Signs of GPU Overclocking
If you suspect that your graphics card has been overclocked, there are a few signs you can look out for to confirm your suspicions. Here are some common indicators of GPU overclocking:
- Higher Clock Speed: One of the most obvious signs of GPU overclocking is a higher clock speed than the default specifications provided by the manufacturer. You can check the clock speed of your GPU using software utilities like GPU-Z or MSI Afterburner.
- Elevated GPU Temperature: Overclocking a GPU increases its power consumption and generates more heat. Therefore, an overclocked GPU tends to run at higher temperatures than usual. If you notice that your GPU temperature is consistently higher than average, especially during demanding tasks, it may be an indication of overclocking.
- Increased Fan Noise: As an overclocked GPU produces more heat, the cooling fans on the graphics card may need to spin faster to dissipate the extra heat. This can result in louder fan noise. If you notice a significant increase in fan noise during gaming sessions or other GPU-intensive tasks, it could be a sign of overclocking.
- System Instability: Overclocking can push the GPU beyond its stable limits, leading to system crashes, freezes, or graphical glitches. If you experience frequent crashes or instability during gaming or other GPU-intensive activities, it could be due to an unstable overclock.
- Artifacts or Glitches: An overclocked GPU may exhibit visual anomalies, such as graphical artifacts, screen tearing, or pixelation. These visual glitches can occur during gaming or when running graphics-intensive applications.
It’s important to note that some GPUs come factory overclocked, meaning they are designed to operate at higher clock speeds out of the box. In such cases, the signs of overclocking may not be apparent. Therefore, it’s a good practice to check the default clock speeds and other specifications of your GPU from the manufacturer’s website or documentation to determine if any overclocking has been applied.
In the following sections, we will discuss how to check the clock speed of your GPU, monitor its temperature, and perform other diagnostics to accurately determine if your GPU is overclocked.
Checking GPU Clock Speed
Checking the clock speed of your GPU is a straightforward process and can help you determine if your graphics card has been overclocked. Here are a few methods to check the clock speed:
- GPU-Z: GPU-Z is a popular and reliable software utility that provides detailed information about your graphics card. Download and install GPU-Z from the official website, launch the program, and it will display various parameters, including the GPU clock speed. Compare the reported clock speed with the default specifications provided by the manufacturer to see if any overclocking has been applied.
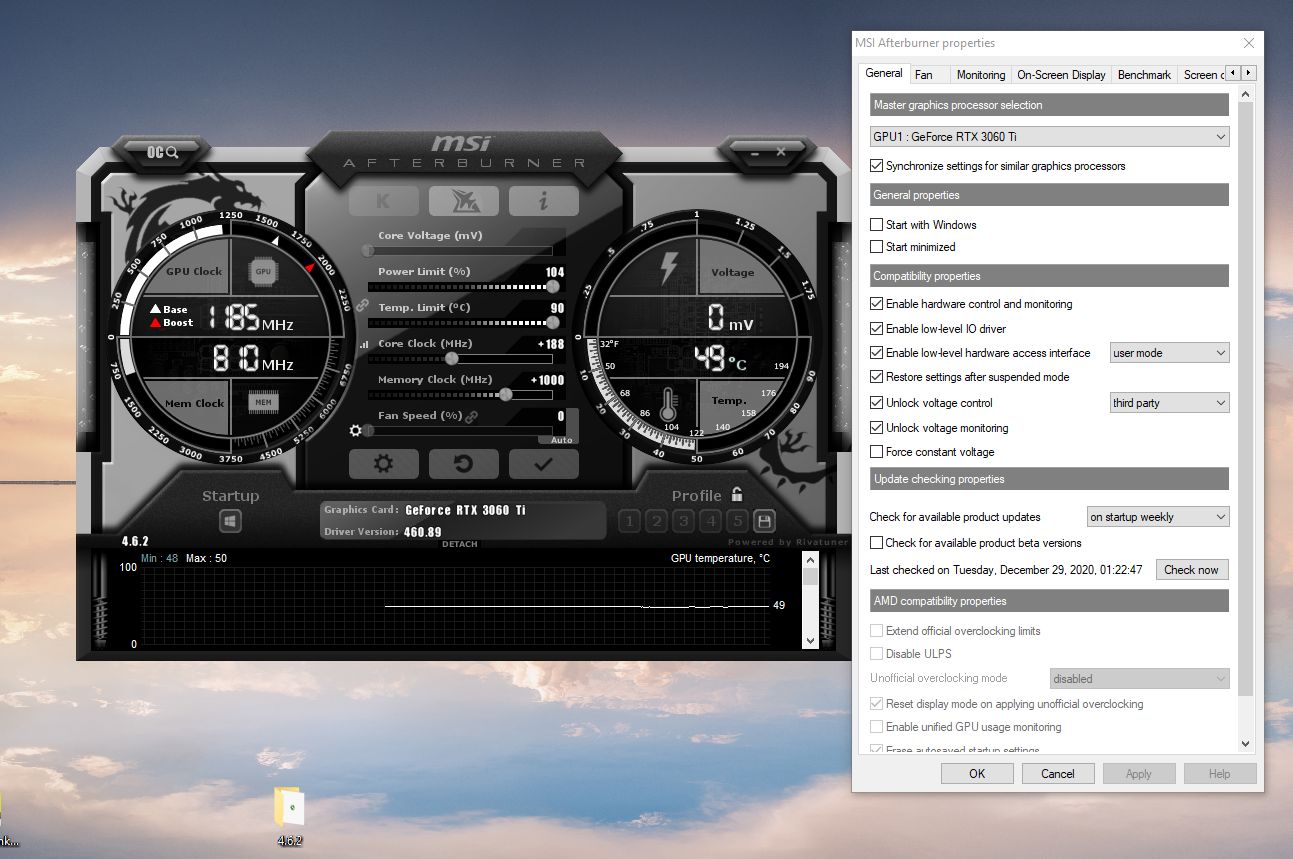
- MSI Afterburner: MSI Afterburner is a powerful overclocking tool that also allows you to monitor various aspects of your GPU, including clock speed. Install MSI Afterburner, launch the program, and it will display the core clock and memory clock speeds. Again, compare the readings with the default specifications to identify any overclocking.
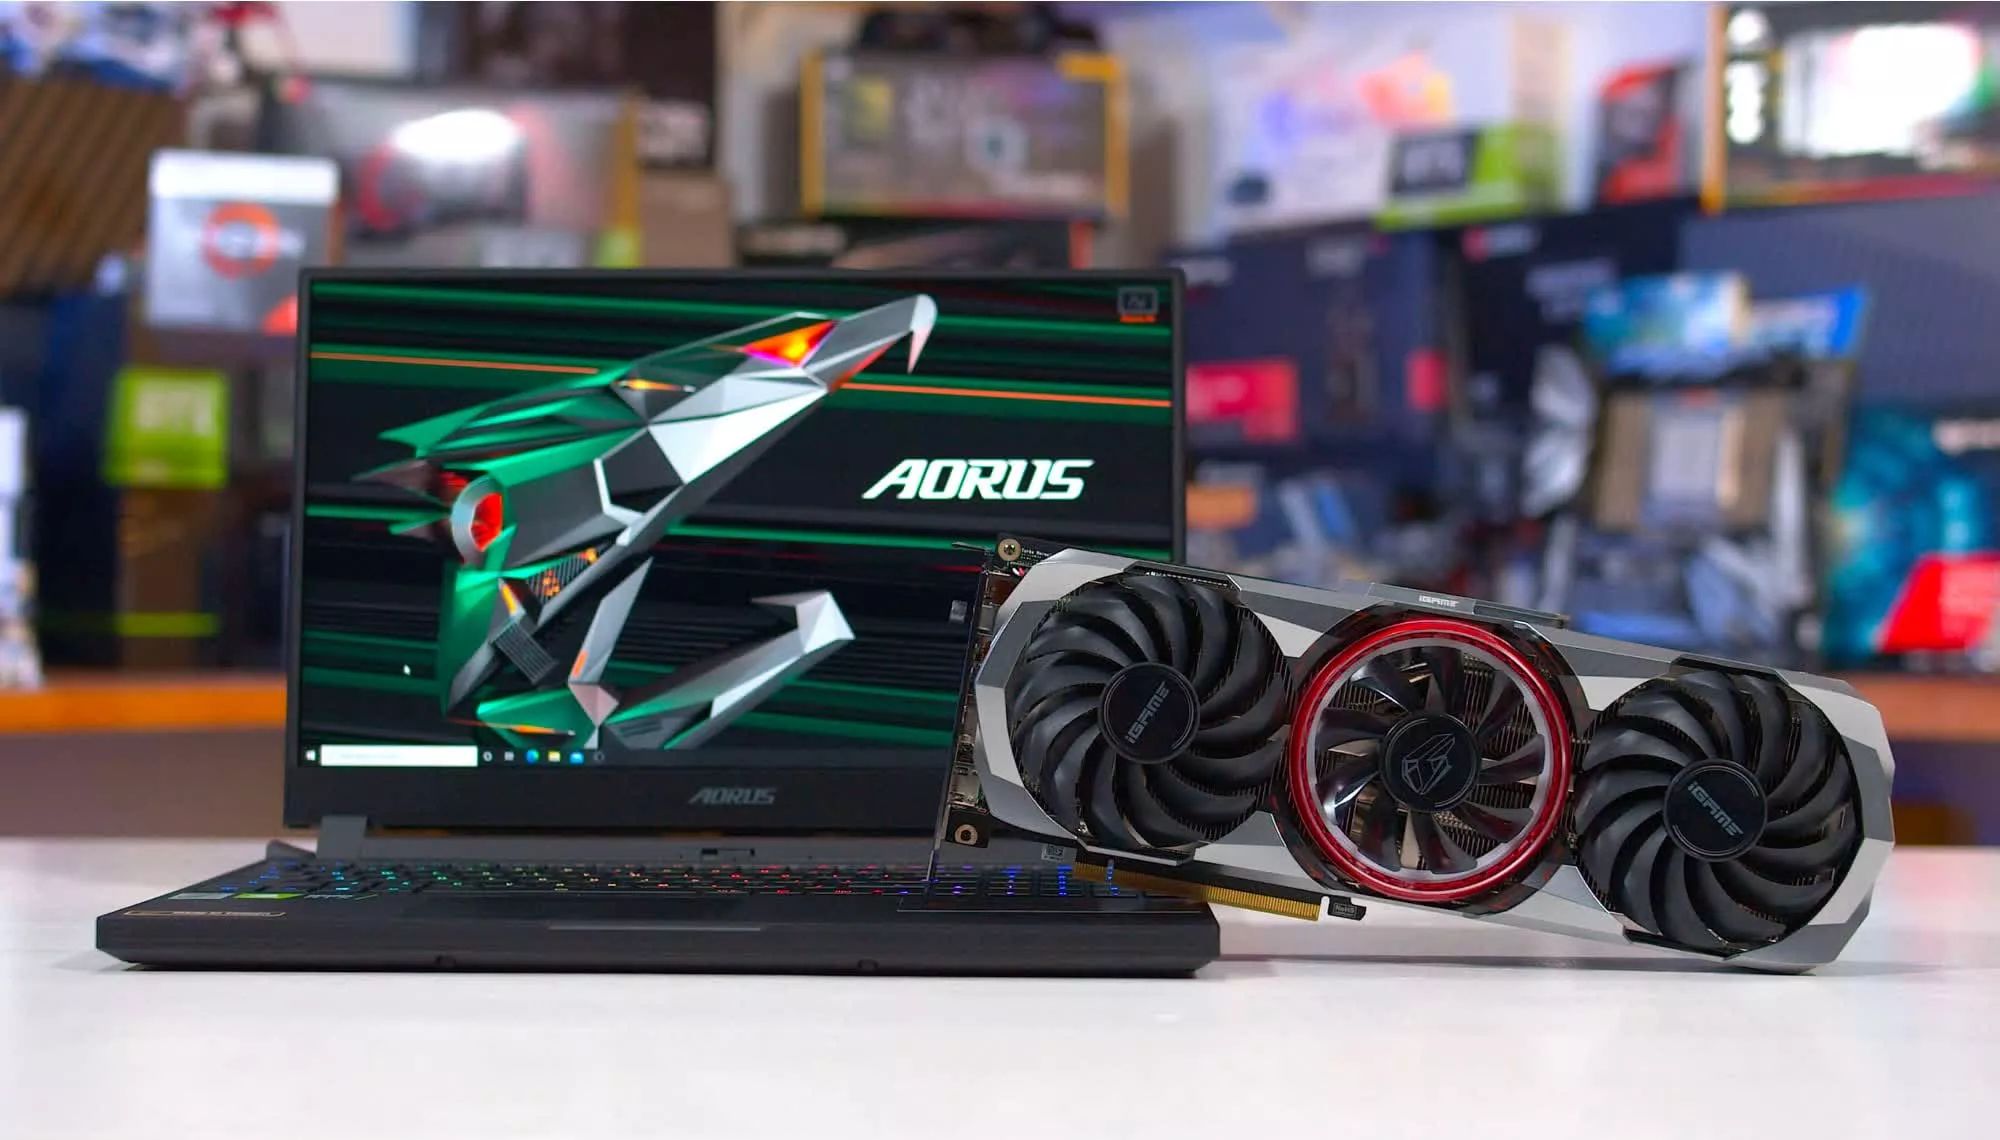
- GPU Manufacturer Software: Some GPU manufacturers provide their own software utilities for monitoring and overclocking their graphics cards. These software applications, like ASUS GPU Tweak, EVGA Precision X, or Gigabyte AORUS Engine, often have built-in monitoring tools that display the clock speed of your GPU. Refer to the manufacturer’s website or product documentation to find and install the appropriate software for your GPU model.
By using any of these methods, you can easily check the current clock speed of your GPU and compare it to the default specifications. If the reported clock speed is higher than the manufacturer’s specifications, it’s an indication that your GPU has been overclocked.
It’s worth mentioning that modern GPUs often have dynamic clock speeds that can vary based on factors such as temperature, power consumption, and the load on the GPU. Therefore, you may observe fluctuations in the reported clock speed even without any intentional overclocking. Make sure to consider the default specifications as a reference point to determine if the deviation is significant enough to imply overclocking.
In the following sections, we will explore how to check the GPU temperature, monitor GPU utilization, and identify potential artifacts or glitches as additional methods to determine if your GPU is overclocked.
Checking GPU Temperature
Monitoring the temperature of your GPU is crucial in determining if it has been overclocked or if it is running within safe limits. Here’s how you can check the GPU temperature:
- Software Monitoring Tools: Many software utilities, such as GPU-Z, MSI Afterburner, or HWMonitor, can provide real-time temperature readings for your GPU. Install any of these tools, launch them, and look for the temperature readings related to your graphics card. Keep in mind that the acceptable temperature range may vary depending on the specific GPU model, so refer to the manufacturer’s guidelines for typical temperature limits.
- GPU Manufacturer Software: As mentioned earlier, GPU manufacturers often provide their own software utilities that come bundled with their graphics cards. These utilities often include temperature monitoring features. Check the software provided by your GPU manufacturer, such as ASUS GPU Tweak, EVGA Precision X, or Gigabyte AORUS Engine, as they usually display the GPU temperature in real-time.
- BIOS or UEFI: Some motherboard BIOS or UEFI interfaces allow you to view the GPU temperature. Restart your computer, enter the BIOS or UEFI setup, and explore the hardware monitoring sections to find the GPU temperature reading. However, not all motherboards offer this feature, so it may not be available in your system.
When checking the GPU temperature, it’s essential to compare it with the recommended operating temperature range provided by the GPU manufacturer. If the temperature consistently exceeds these limits, it might indicate that the GPU is overclocked. Overclocking increases power consumption and generates more heat, which can push the temperature beyond normal levels.
It’s worth noting that factors such as ambient room temperature, airflow within the computer case, and the cooling solution of your GPU can also affect the temperature readings. Ensure proper airflow and ventilation in your system to maintain effective cooling for the GPU.
In the next sections, we will discuss how to monitor GPU utilization, check for artifacts or glitches, and run benchmark tests to further assess if your GPU has been overclocked.
Monitoring GPU Utilization
Monitoring the GPU utilization can provide valuable insights into whether your graphics card is being overclocked or pushed to its limits. Here are a few methods to monitor GPU utilization:
- Task Manager: The Task Manager in Windows allows you to monitor the GPU utilization of running processes. Press Ctrl+Shift+Esc to open the Task Manager, go to the “Performance” tab, and select “GPU” from the sidebar. You’ll see a graph displaying the GPU utilization percentage of active processes.
- Software Monitoring Tools: Various third-party software utilities, such as MSI Afterburner, HWMonitor, or GPU-Z, can provide real-time GPU utilization readings. Install any of these tools, launch them, and look for the GPU utilization graph or percentage readings.
- Gaming Overlays: Many modern games offer built-in overlays that display GPU utilization, among other performance metrics, while playing. Check the game settings or options to enable the overlay and monitor the GPU utilization during gameplay.
- Benchmarking Software: Benchmarking tools, like 3DMark or FurMark, can not only measure the performance of your GPU but also display the GPU utilization during the benchmarking process. Run these tests and observe the GPU utilization readings to assess whether the GPU is being pushed to its maximum potential.
By monitoring the GPU utilization, you can get an idea of how intensively your graphics card is being utilized. If the utilization consistently reaches high percentages even during less demanding tasks, it may suggest that the GPU is overclocked or being pushed beyond its factory limits.
However, keep in mind that a high GPU utilization alone does not necessarily indicate overclocking. GPU utilization can be influenced by various factors, including the complexity of the rendered scene, the specific demands of the application or game, and the optimization level of the software. Therefore, it’s essential to consider other signs and indicators, such as clock speed, temperature, and stability, to make an accurate assessment of GPU overclocking.
In the next sections, we will discuss how to check for artifacts or glitches and run benchmark tests to further evaluate if your GPU has been overclocked.
Checking for Artifacts or Glitches
One of the key indicators of GPU overclocking is the presence of visual artifacts or glitches during gaming or other GPU-intensive tasks. Here are a few methods to check for artifacts or glitches:
- Visually Inspect: While running graphics-intensive applications or games, keep an eye out for any unusual visual anomalies, such as screen tearing, flickering, pixelation, or distorted textures. These artifacts or glitches can appear during gameplay or when viewing high-resolution images or videos on your computer.
- Take Screenshots or Record Videos: Capture screenshots or record videos of your gameplay or GPU-intensive tasks. Review the screenshots or videos carefully, zooming in on various parts of the image to look for any irregularities or visual glitches that may have occurred during the recording.
- Artifact Scanning Tools: Certain software utilities, like the Artifact Scanner in MSI Afterburner, can help identify artifacts or glitches by stress-testing your GPU and scanning for any visual abnormalities. These tools can simulate intense graphics loads and help reveal any instability caused by GPU overclocking.
- Benchmark and Stress Test Tools: Running benchmark or stress test applications, such as 3DMark or FurMark, can also help uncover any artifacts or glitches. These tests push your GPU to its maximum capabilities, revealing any instability or visual anomalies that may occur as a result of overclocking.
If you notice consistent or recurring artifacts or glitches during GPU-intensive tasks, it may be an indication that your graphics card is overclocked beyond its stable limits. Overclocking increases the workload on the GPU, and if the overclock is not stable, it can cause visual distortions or abnormalities in the rendered images or videos.
However, it’s important to note that artifacts or glitches can also occur due to other factors, such as outdated graphics drivers, incompatible software, or hardware issues. Therefore, it’s recommended to rule out these possibilities by updating your drivers and ensuring compatibility before concluding that the artifacts are solely due to GPU overclocking.
In the next section, we will discuss the importance of running benchmark tests to evaluate the performance and stability of your GPU, whether it is overclocked or not.
Running Benchmark Tests
Running benchmark tests is an essential step in evaluating the performance and stability of your GPU, whether it has been overclocked or not. Benchmarking can provide valuable insights into the overall capabilities of your graphics card and help identify any potential issues. Here are a few reasons why running benchmark tests is important:
- Performance Evaluation: Benchmark tests provide a standardized way to measure the performance of your GPU. They typically simulate demanding graphics loads or specific gaming scenarios, allowing you to compare your GPU’s performance against other similar systems or established benchmarks. This can help you gauge the effectiveness of any overclocking attempts or identify any performance bottlenecks.
- Stability Testing: Running benchmark tests can reveal the stability of your GPU under demanding conditions. If your graphics card is overclocked and not stable, benchmark tests can often uncover instability through crashes, freezes, or visual artifacts. This can help you determine if the overclock is pushing the GPU beyond its stable limits and if any adjustments need to be made.
- Troubleshooting: Benchmark tests can assist in troubleshooting potential issues with your GPU. If you experience performance degradation, graphical glitches, or other anomalies during everyday use, running a benchmark test can help determine if the issues persist under a controlled environment. This can help narrow down the cause of the problem and guide you towards appropriate solutions.
- Comparison Testing: Benchmark tests allow you to compare your GPU’s performance against other similar systems or different graphics cards. This can help you make informed decisions when considering upgrades or determining if your current GPU is meeting your performance needs. It also provides a point of reference to assess the impact of any overclocking attempts.
When running benchmark tests, it’s essential to ensure that you use reputable and reliable benchmarking software, such as 3DMark, Heaven Benchmark, or Unigine Superposition. Follow the instructions provided by the benchmarking software to perform the test, and pay close attention to the results, including the overall score, frame rates, and stability indicators.
Remember that benchmark results can vary depending on several factors, including system configuration, cooling capabilities, and underlying software. Therefore, it’s best to use benchmarks as a general guide rather than the sole determinant of your GPU’s capabilities or overclocking success.
In the next sections, we will explore how to safely overclock a GPU, discuss the risks associated with overclocking, and provide guidance on when to revert overclocking settings if necessary.
How to Safely Overclock a GPU
Overclocking a GPU can be an effective way to boost performance, but it must be done carefully to minimize the risks of instability or damage. Here are some steps to safely overclock your GPU:
- Research and Understand: Before proceeding with overclocking, research your specific GPU model to understand its overclocking capabilities and limitations. Read user forums, guides, and reviews to gather insights from other users who have overclocked the same GPU.
- Use Reliable Software: Choose a reliable overclocking software tool like MSI Afterburner, ASUS GPU Tweak, or EVGA Precision X. These tools provide a user-friendly interface to adjust the core clock, memory clock, voltage, and fan speed of your GPU while providing real-time monitoring and safety features.
- Incrementally Increase Clock Speed: Start by increasing the core clock speed in small increments (e.g., 10 MHz) and then test the stability of your GPU using benchmark tests or stress tests. Monitor the temperature and watch for any signs of instability, such as artifacts or crashes. Gradually increase the clock speed and retest until instability occurs.
- Monitor Temperature and Voltage: Keep a close eye on the GPU temperature during the overclocking process. High temperatures can affect stability and longevity, so ensure that the GPU remains within safe limits. Also, monitor the voltage levels to prevent overloading the GPU with excessive power.
- Adjust Fan Speed and Cooling: As the GPU’s clock speed increases, it generates more heat. Ensure adequate cooling by adjusting the fan speed or improving airflow within your computer case. Consider using third-party cooling solutions, such as aftermarket graphics card coolers or additional case fans, if necessary.
- Test for Stability: Run benchmark tests or stress tests for an extended period to assess the stability of your overclocked GPU. Make sure there are no crashes, artifacts, or other anomalies during the testing phase. If instability is detected, dial back the clock speed until the GPU becomes stable.
- Document Your Settings: Once you have found a stable overclocking configuration, document all the settings, including the core clock, memory clock, voltage, and fan speed. This helps you easily revert to the stable settings if needed or troubleshoot any issues that may arise in the future.
Remember, every GPU is unique, and the overclocking process can be a trial-and-error method. Be patient, take small steps, and test for stability at each stage to ensure a safe and stable overclock. It’s essential to strike a balance between performance gains and the longevity of your GPU.
Additionally, keep in mind that overclocking your GPU may void its warranty, so proceed with caution and be aware of the potential risks involved.
In the following sections, we will discuss the risks associated with overclocking a GPU and provide guidance on when to revert overclocking settings if necessary.
Risks of Overclocking a GPU
While overclocking can yield performance benefits, it is important to be aware of the potential risks involved. Here are some risks associated with overclocking a GPU:
- System Instability: Overclocking a GPU can push it beyond its stable limits, leading to system instability. This can manifest as crashes, freezes, or graphical glitches during gaming or other GPU-intensive tasks. An unstable overclock can negatively impact the overall performance and functionality of your system.
- Reduced Lifespan: Overclocking increases the workload and temperature of the GPU, which can accelerate the aging process. Running a GPU at higher frequencies and voltages than intended may shorten its lifespan, potentially leading to a shorter overall lifespan or premature failure of the graphics card.
- Higher Power Consumption: Overclocking a GPU increases its power requirements, leading to higher power consumption. This can result in increased electricity costs and generate more heat, requiring efficient cooling solutions to maintain safe operating temperatures.
- Voided Warranty: Overclocking your GPU may void the warranty provided by the manufacturer. Most manufacturers consider overclocking as an unauthorized modification and may refuse to honor warranty claims related to overclocking-related issues. It’s crucial to check the manufacturer’s warranty policy before proceeding with overclocking.
- Increased Heat Output: Overclocking generates more heat, which can strain the cooling system of your GPU. If your graphics card’s cooling solution is insufficient or if your computer case has poor airflow, the increased heat output from overclocking may lead to higher temperatures and potential damage to the GPU.
- Data Loss: In rare cases, unstable overclocking can lead to data corruption or loss. Sudden crashes or freezes may cause files or applications to become corrupted, resulting in data loss or system instability. It is essential to regularly back up your important data to minimize the risk of data loss.
It’s crucial to weigh the benefits against the risks before deciding to overclock your GPU. Understanding and accepting these risks can help you make an informed decision based on your specific needs and priorities.
In the following section, we will discuss when it may be necessary to revert GPU overclocking settings to mitigate potential risks and ensure optimal performance and stability.
When to Revert GPU Overclocking
While GPU overclocking can provide performance benefits, there are situations where reverting the overclocking settings may be necessary. Here are some scenarios when it may be appropriate to revert GPU overclocking:
- System Instability: If you experience frequent crashes, freezes, or graphical glitches during gaming or other GPU-intensive tasks, it may indicate that the overclocking settings are unstable. Reverting back to the default clock speeds and voltages can help restore stability to your system.
- Excessive Heat: If your GPU consistently runs at high temperatures that are beyond the manufacturer’s recommended limits, it may indicate that the cooling system is unable to handle the increased heat output due to overclocking. Reverting the overclock can help reduce temperatures and prevent potential damage to the GPU.
- Reduced Performance or Compatibility Issues: In some cases, overclocking may result in reduced performance or compatibility issues with certain games or applications. If you notice a decrease in performance or encounter compatibility issues that were not present before overclocking, it may be beneficial to revert to the default settings.
- End of Warranty Coverage: If your GPU is still under warranty and you encounter issues that are eligible for warranty support, it’s advisable to revert the overclocking settings before seeking assistance from the manufacturer. Overclocking may void the warranty, and the manufacturer may not provide support for overclocking-related issues.
- Preparing for System Upgrades: When planning to upgrade other components in your system, it may be a good idea to revert GPU overclocking temporarily. This ensures that the system is stable during the upgrade process and prevents potential compatibility issues or complications that may arise from overclocked GPU settings.
Monitoring the overall performance, stability, and temperature of your system regularly can help you identify when it is appropriate to revert GPU overclocking settings. It’s important to strike a balance between achieving performance gains and maintaining a stable and reliable computing experience.
If you decide to revert the overclocking settings, consult the software utility you used for overclocking (e.g., MSI Afterburner, ASUS GPU Tweak) and simply reset the clock speeds and voltages to their default values.
Remember, overclocking is not always necessary or beneficial for every system. It’s crucial to assess your needs, consider the risks involved, and make an informed decision based on the specific requirements and capabilities of your system.
Conclusion
GPU overclocking can be an effective way to enhance the performance of your graphics card, but it is important to approach it with caution and understanding. By following the proper steps and taking necessary precautions, you can safely overclock your GPU and potentially unlock its full potential.
Throughout this article, we have explored the concept of GPU overclocking, the benefits it offers, and the signs that indicate whether a GPU has been overclocked. We discussed methods to check GPU clock speed, monitor temperature, and assess GPU utilization to determine if overclocking has been applied.
Furthermore, we provided guidance on how to safely overclock a GPU, emphasizing the importance of gradual adjustments, temperature monitoring, and stability testing. We also discussed the risks associated with overclocking, including system instability, increased power consumption, and reduced lifespan of the GPU.
Lastly, we examined the situations where reverting GPU overclocking settings may be necessary, such as experiencing system instability or encountering performance and compatibility issues. It is crucial to assess the need for reverting overclocking settings based on the specific context and requirements of your system.
Remember, overclocking a GPU is a personal choice that comes with potential risks and benefits. It requires careful consideration, research, and monitoring to ensure a safe and stable overclock. Understanding the limitations and risks, as well as knowing when to revert the overclock, is essential for maintaining the longevity and optimal performance of your GPU.
Proceed with caution, prioritize stability, and always monitor the temperature and performance of your GPU during the overclocking process. By doing so, you can maximize the potential of your graphics card and enjoy a better gaming or computing experience.