Introduction
Welcome to this guide on how to take a screenshot with a Logitech keyboard. Logitech keyboards are known for their durability, functionality, and user-friendly features. Taking a screenshot is a handy skill that allows you to capture and save important information or memorable moments on your computer screen. Whether you want to save a funny meme, capture an error message for troubleshooting purposes, or create a tutorial, knowing how to take a screenshot can be incredibly useful.
In this article, we will explore the step-by-step process of taking a screenshot using a Logitech keyboard. We will cover various methods, including using the Print Screen key alone or in combination with the Function key. Regardless of the Logitech keyboard model you have, these methods should work on most standard Logitech keyboards.
Before we delve into the specific steps, it’s important to note that there might be slight variations in the keyboard layout or function keys depending on the Logitech keyboard model you own. However, the general process remains the same across most Logitech keyboards, and we will provide instructions that should be applicable to a wide range of models.
Compatibility
Before we begin, let’s discuss the compatibility of taking screenshots with a Logitech keyboard. Logitech keyboards are designed to be compatible with a wide range of operating systems, including Windows, macOS, and Chrome OS. This means that you can use the methods outlined in this guide regardless of the operating system you are using.
In terms of keyboard models, the methods described here should work for most standard Logitech keyboards. However, it’s important to note that some Logitech keyboards might have specific features or additional keys that are not covered in this article. If you have a specialized Logitech keyboard, we recommend referring to the user manual or the Logitech website for specific instructions on how to take screenshots.
Additionally, it’s worth mentioning that the methods discussed here primarily focus on taking screenshots on a desktop or laptop computer. If you are using a Logitech keyboard with a mobile device or a tablet, the process of taking screenshots might differ. We recommend consulting the user manual or doing a quick online search for specific instructions related to your mobile device or tablet.
Step 1: Understand the Print Screen Key
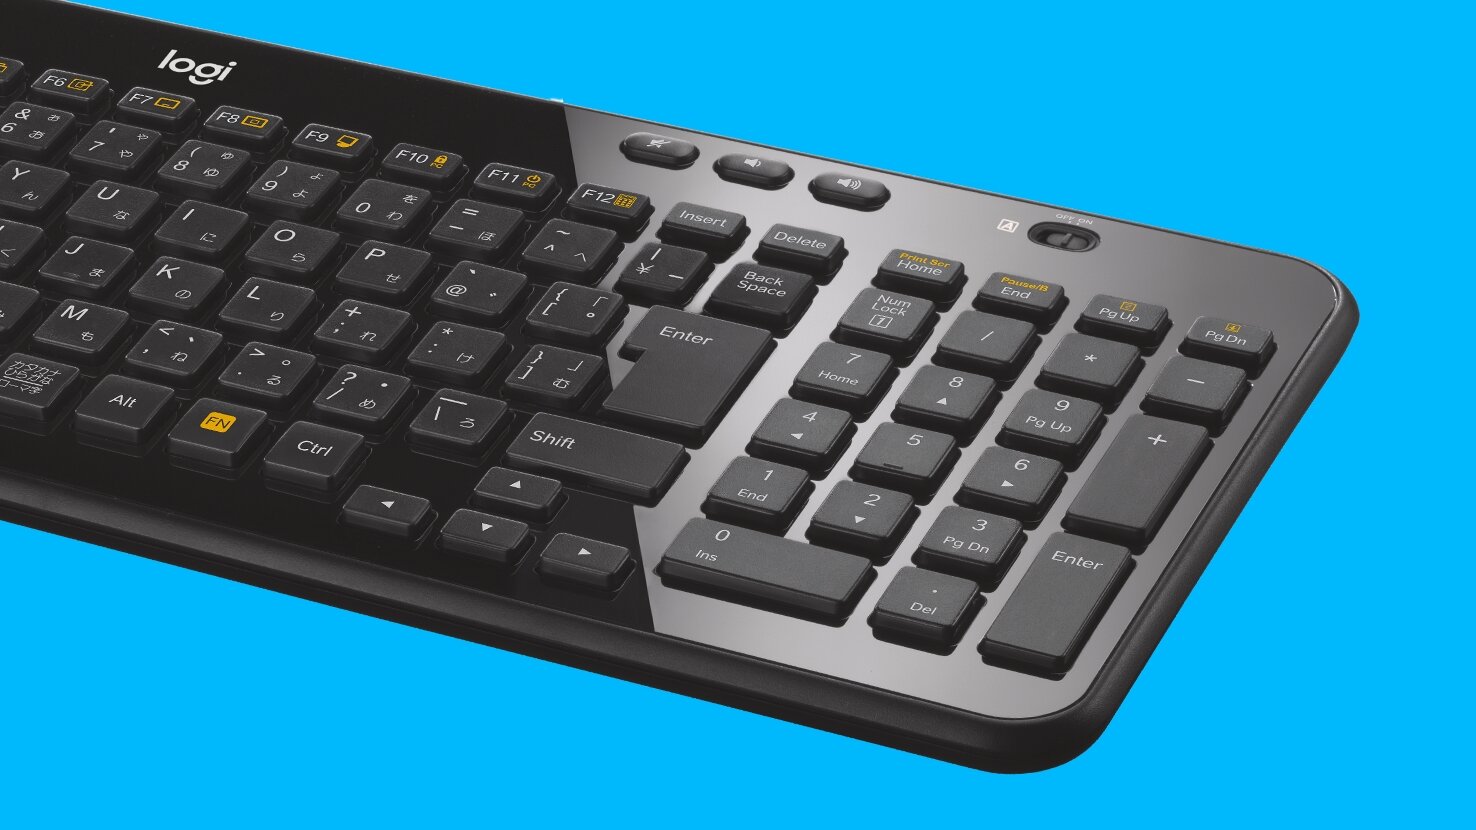
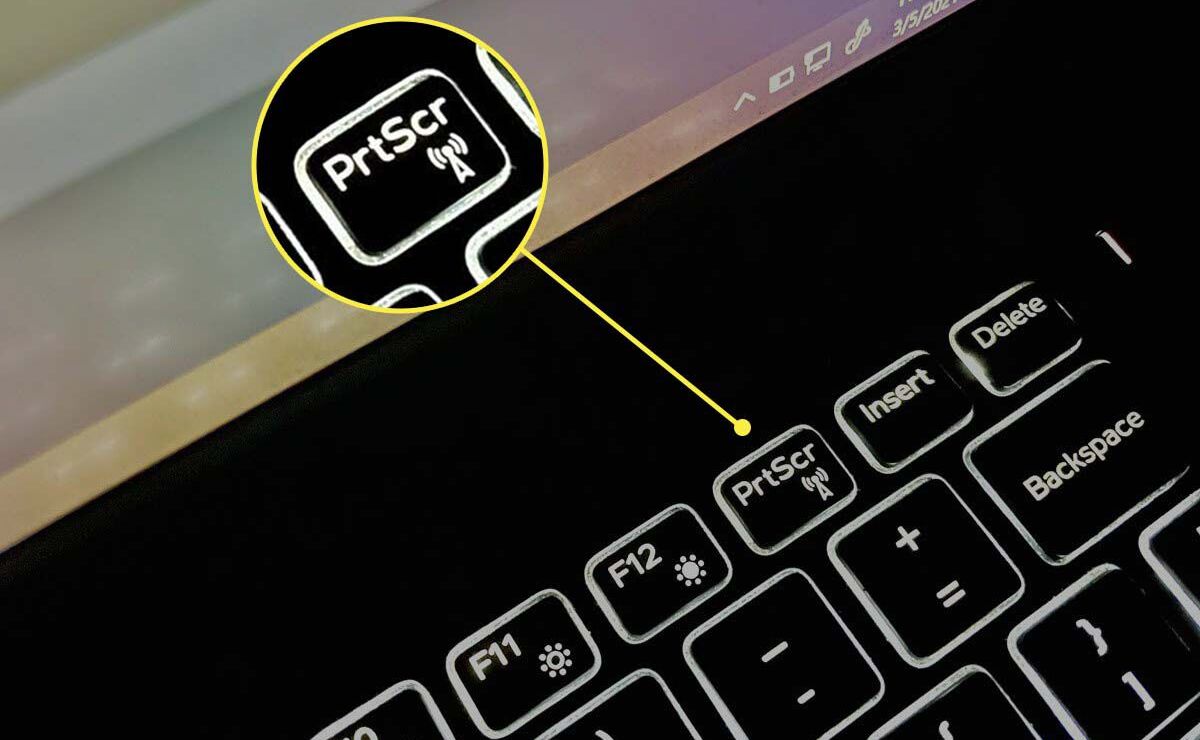
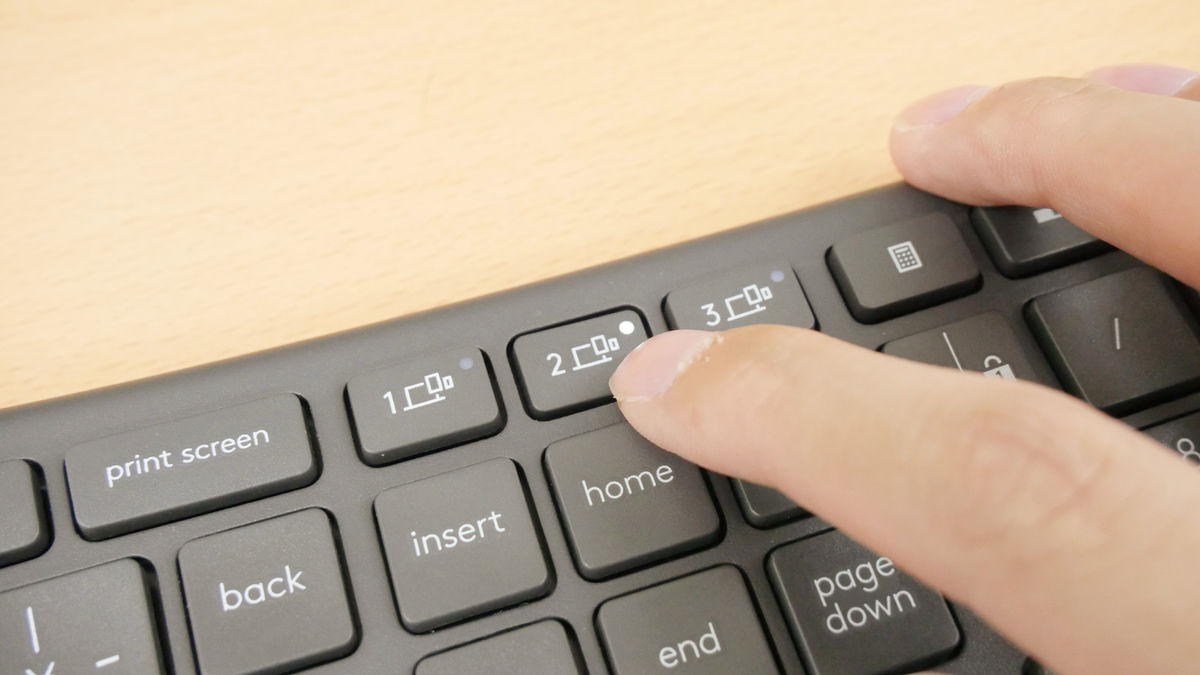
The first step in taking a screenshot with a Logitech keyboard is to understand the function of the Print Screen key. The Print Screen key, often labeled as “PrtSc” or “PrtScn”, is a key located on the top right corner of most Logitech keyboards. It is usually situated near the Function keys (F1, F2, etc.) or in the same row as the Home, End, and Delete keys.
The primary function of the Print Screen key is to capture a snapshot or screenshot of the entire contents displayed on your computer screen. When you press the Print Screen key, it automatically copies an image of the screen contents to your computer’s clipboard.
It’s important to note that pressing the Print Screen key alone does not save the screenshot as an image file. Instead, it saves a copy of the screenshot to your clipboard, which you can then paste into an image editing or word processing program to save, edit, or share as needed.
In the next steps, we will explore how to use the Print Screen key in conjunction with other keys on the Logitech keyboard to perform different types of screenshots.
Step 2: Identify the Function Key
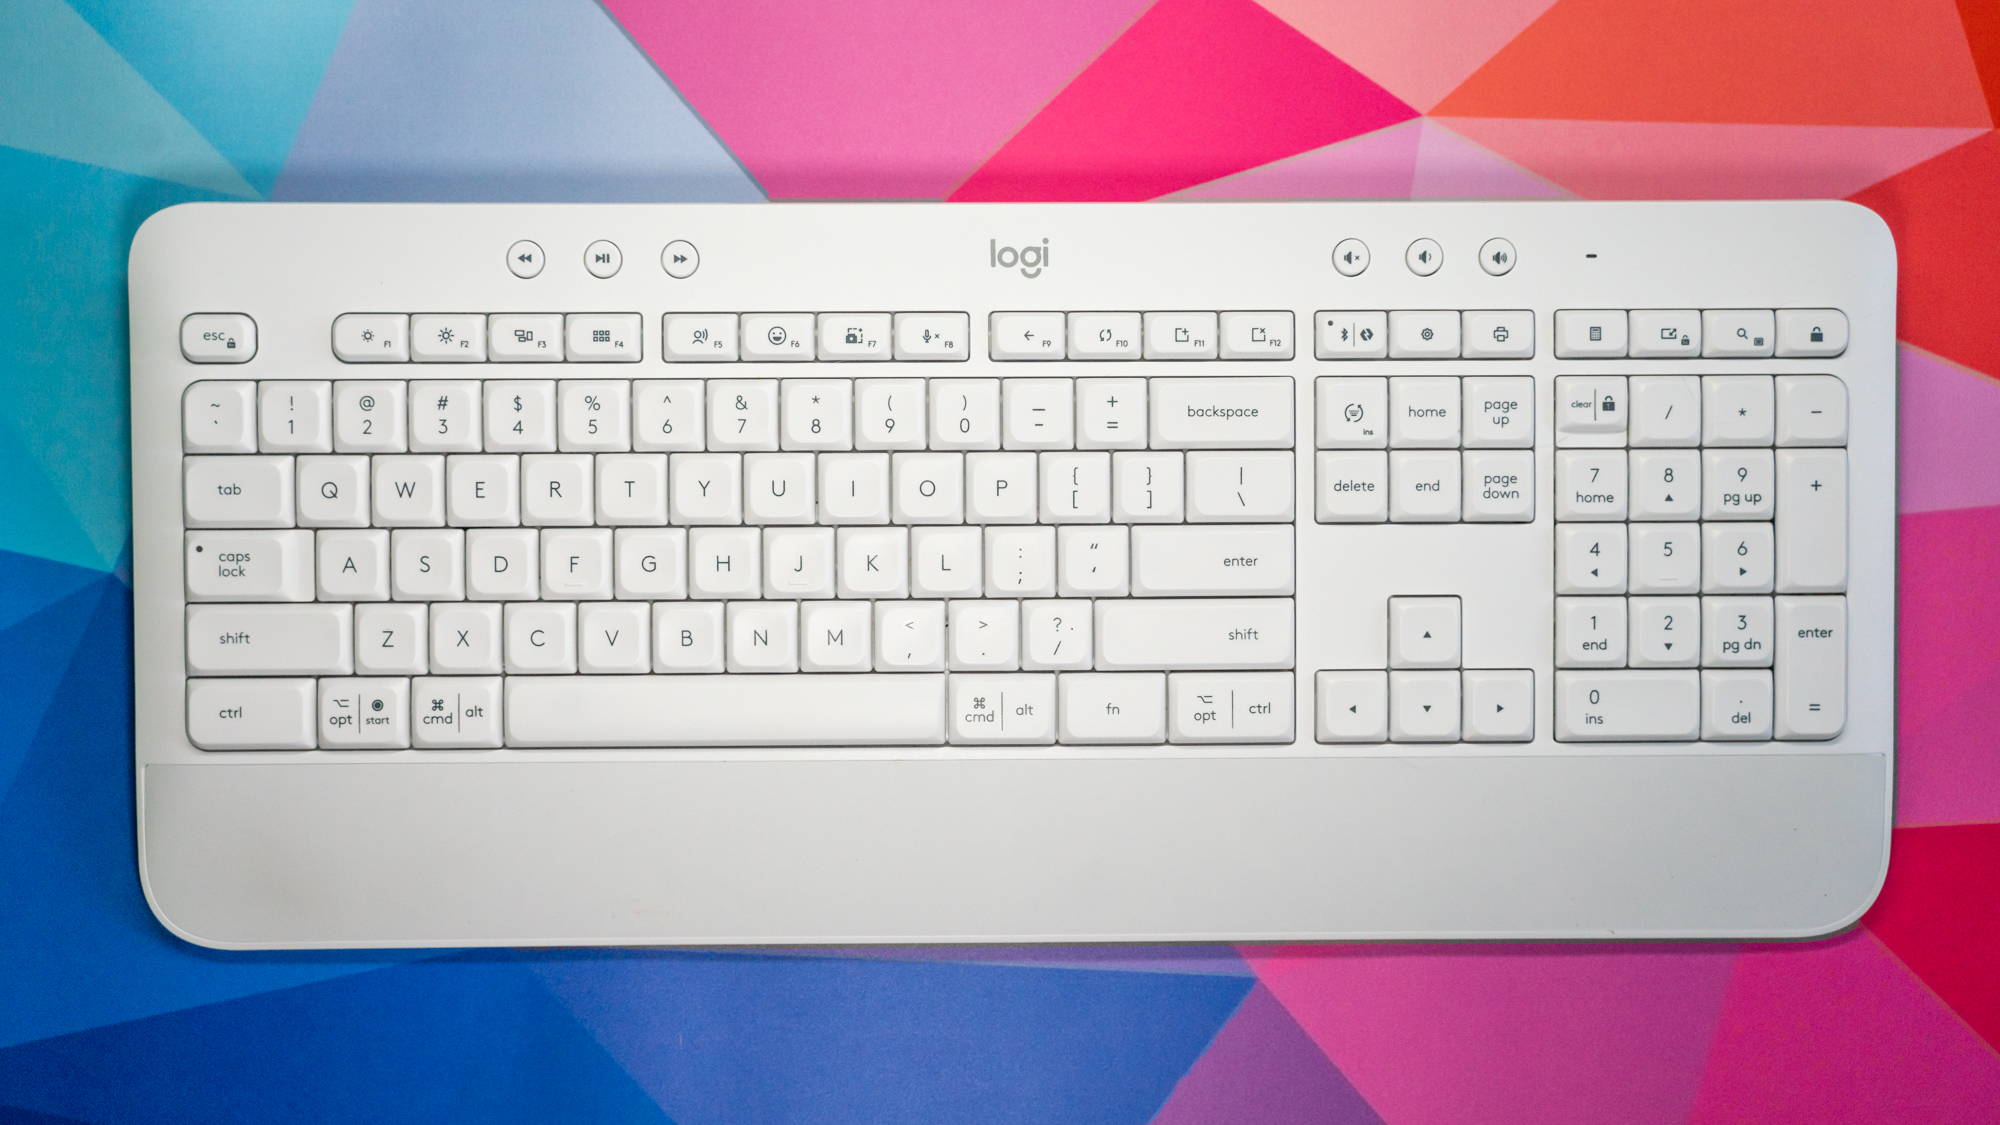
The next step is to identify the Function (Fn) key on your Logitech keyboard. The Function key is typically located in the bottom row of keys, often near the left or right Ctrl key. It is labeled as “Fn” and is used to activate secondary functions or special features on the keyboard.
When used in combination with other keys, the Function key can modify the behavior of certain keys, including the Print Screen key, to perform additional functions. In the case of taking screenshots, we will be using the Function key to enable specific screenshot-related features.
If you’re unsure which key is the Function key on your Logitech keyboard, refer to the user manual or look for a key with the label “Fn” or an icon that resembles a small square or rectangle.
It’s worth mentioning that not all Logitech keyboards have a dedicated Function key. Some models might have alternative keys or different key combinations to perform specific tasks. If you can’t find the Function key on your Logitech keyboard or if it doesn’t have one, you can still proceed with the following steps using the Print Screen key alone.
Now that you have identified the Function key on your Logitech keyboard, let’s move on to the next steps to learn how to take different types of screenshots using the Print Screen key and the Function key combination.
Step 3: Using the Print Screen Key
Now that you understand the Print Screen key and its basic function, let’s explore how to use it to capture screenshots on your Logitech keyboard.
To capture a full-screen screenshot using the Print Screen key alone, follow these steps:
- Make sure the content you want to capture is displayed on your computer screen.
- Press the Print Screen (PrtSc) key on your Logitech keyboard. This will capture a snapshot of the entire screen and save it to your clipboard.
- Open an image editing program or a word processing program like Microsoft Word or Paint.
- Paste the captured screenshot into the program by pressing Ctrl + V (or right-click and select “Paste”). This will insert the screenshot as an image.
- Save the screenshot as an image file by selecting “Save As” and choosing a file format (such as JPEG or PNG) and a location on your computer.
By following these steps, you can quickly and easily capture a full-screen screenshot using the Print Screen key on your Logitech keyboard.
It’s important to note that when using the Print Screen key alone, it captures the entire contents of your screen, including any open windows, taskbars, and desktop icons. If you only want to capture a specific area or an individual window on your screen, we’ll cover how to do that in the next step using the Function key in combination with the Print Screen key.
Step 4: Using the Function Key in Combination with the Print Screen Key
If you want more control over the screenshot and only need to capture a specific area or an individual window on your screen, you can use the Function key in combination with the Print Screen key on your Logitech keyboard. This combination allows you to perform advanced screenshot functions.
To capture a specific area or a single window using the Function and Print Screen keys, follow these steps:
- Ensure that the content you want to capture is displayed on your screen.
- Press and hold the Function (Fn) key on your Logitech keyboard.
- While holding the Function key, press the Print Screen (PrtSc) key.
- Release both keys.
By following these steps, your cursor will change to a crosshair, allowing you to select the specific area of the screen you want to capture. Click and drag your cursor to create a selection box around the desired area, and then release the mouse button.
The selected area will be captured and saved to your clipboard. To save it as an image file, open an image editing program or a word processing program, paste the screenshot (Ctrl + V or right-click and select “Paste”), and save the image file in the desired format and location on your computer.
If you want to capture a specific window rather than an area, follow the same steps as above. However, instead of clicking and dragging the cursor, simply click on the window you wish to capture. This will automatically select and capture the entire window along with its content.
Using the Function and Print Screen keys in combination gives you greater flexibility and precision when capturing screenshots with your Logitech keyboard.
Step 5: Locating the Screenshot
After you have taken a screenshot with your Logitech keyboard, you might be wondering where the captured image is located and how to access it. The location of the screenshot can vary depending on the settings and operating system you are using. However, there are a few common locations to check.
The most common location for the captured screenshot is the clipboard. When you press the Print Screen key or the Function + Print Screen key combination, the screenshot is copied to your computer’s clipboard. From there, you can paste it into an image editing program or a word processing program.
To access the screenshot from the clipboard, open an image editing program or a word processing program and press Ctrl + V to paste the screenshot. The screenshot will be inserted into the program as an image, and you can save it or edit it as needed.
Alternatively, you can save the screenshot directly to your computer by opening an image editing program or a word processing program and selecting “File” or “Save As.” Choose a location on your computer where you want to save the screenshot and give it a name. Select a file format, such as JPEG or PNG, and click “Save.”
In addition to the clipboard and image editing programs, some operating systems automatically save screenshots to a designated folder. For example, on Windows, screenshots taken with the Print Screen key are saved in the “Screenshots” folder within the “Pictures” directory. On macOS, screenshots are saved on the desktop by default.
If you’re having trouble locating the screenshots on your computer, you can try searching for files with names like “Screenshot” or by using the file extension of the image format (e.g., .png or .jpeg).
By understanding where to find your screenshots, you can easily access and manage them for further use or sharing purposes.
Conclusion
Congratulations! You have now learned how to take screenshots with your Logitech keyboard. Whether you need to capture the entire screen, a specific area, or a single window, these step-by-step instructions have provided you with the knowledge to easily and efficiently capture screenshots.
Remember, on most Logitech keyboards, the Print Screen key allows you to capture the entire screen, while the Function key in combination with the Print Screen key gives you more control over the area or window you want to capture.
After capturing a screenshot, you can access it from your clipboard and paste it into an image editing program or a word processing program for saving, editing, or sharing purposes. Alternatively, some operating systems automatically save screenshots to a designated folder for easy access.
While these instructions are a general guide, it’s important to note that Logitech keyboards may have slight variations in layout and function keys. Therefore, consulting the user manual or the Logitech website specific to your keyboard model can provide additional guidance tailored to your device.
We hope this guide has been helpful in assisting you with taking screenshots using your Logitech keyboard. Now you can capture and save important information, share interesting content, or troubleshoot issues with ease. Happy screenshotting!