Introduction:
Welcome to our guide on how to remove the zoom feature on your iPhone. The zoom function on your iPhone can be helpful for users with visual impairments or those who prefer larger text, but it can also be accidentally activated or cause issues for some users. If you find yourself unintentionally zoomed in and struggling to navigate your iPhone, don’t worry, we’ve got you covered.
In this article, we will walk you through the various methods you can use to disable the zoom feature on your iPhone. Whether you’re looking to permanently turn off zoom or simply want to temporarily disable it, we have the solutions for you!
Unlocking zoom on your iPhone can be done through your device’s settings or by using an accessibility shortcut. We will explore both options to ensure you can choose the method that works best for you. Additionally, we’ll cover disabling zoom through the use of VoiceOver, a useful feature for users with visual impairments.
Furthermore, we will address any potential issues you may encounter when attempting to remove the zoom feature. This comprehensive guide is designed to help you smoothly navigate through any zoom-related problems, providing you with the knowledge you need to regain control of your iPhone.
So, if you’re ready to take control of your iPhone and bid farewell to the zoom feature, let’s dive into the step-by-step instructions that will guide you through the process of disabling zoom on your device.
Unlocking Zoom on iPhone:
If your iPhone’s screen is zoomed in and you’re having trouble navigating or accessing certain features, the first step is to unlock the zoom function. Unlocking zoom can be done in a few different ways, depending on your device’s settings. Let’s explore two common methods to unlock zoom on your iPhone.
Method 1: Disabling Zoom via Settings:
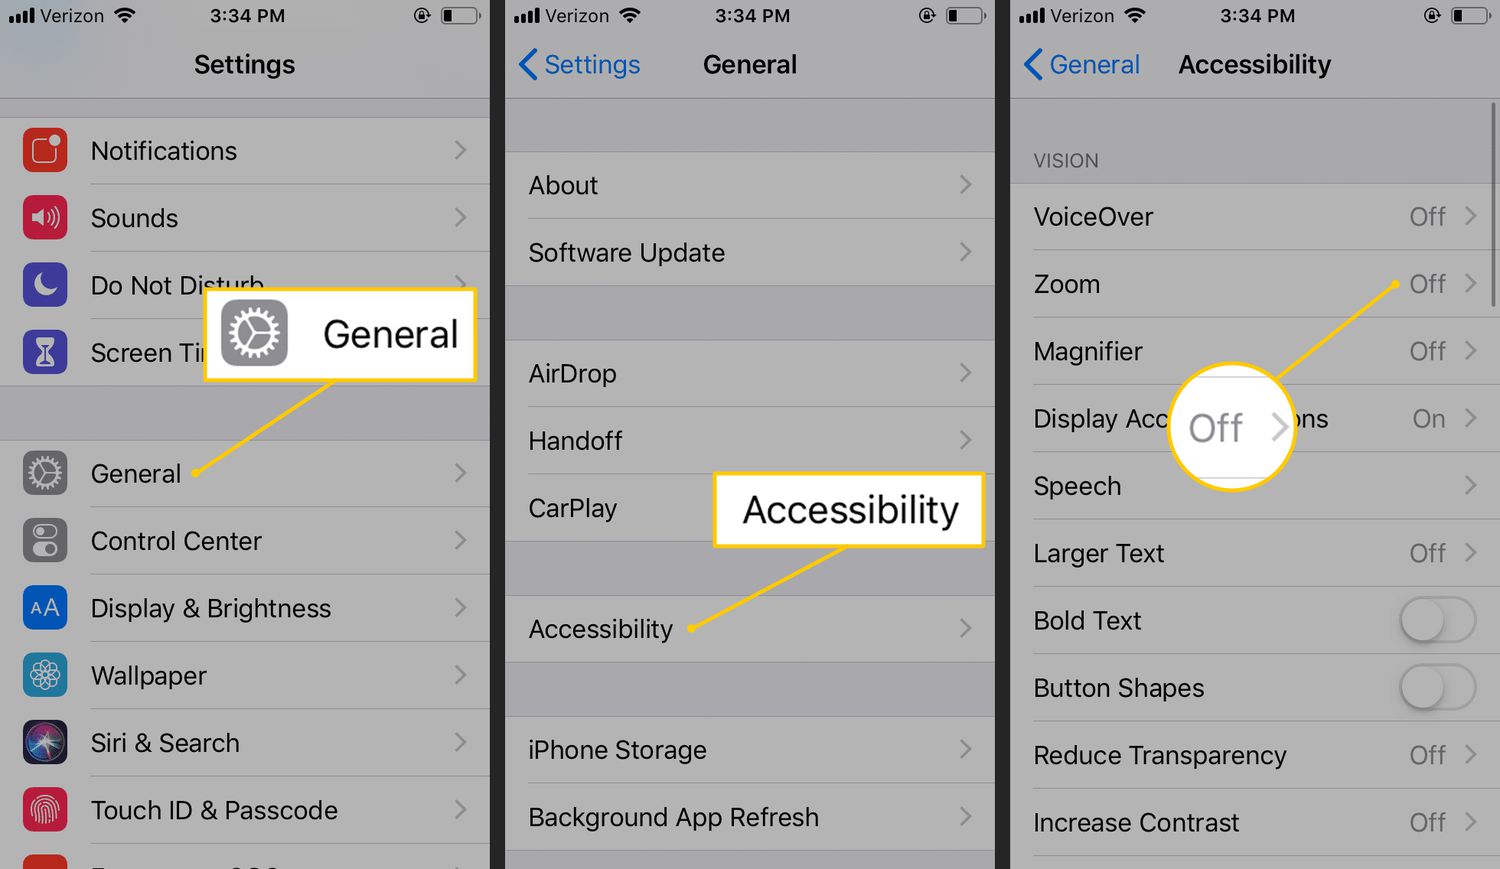
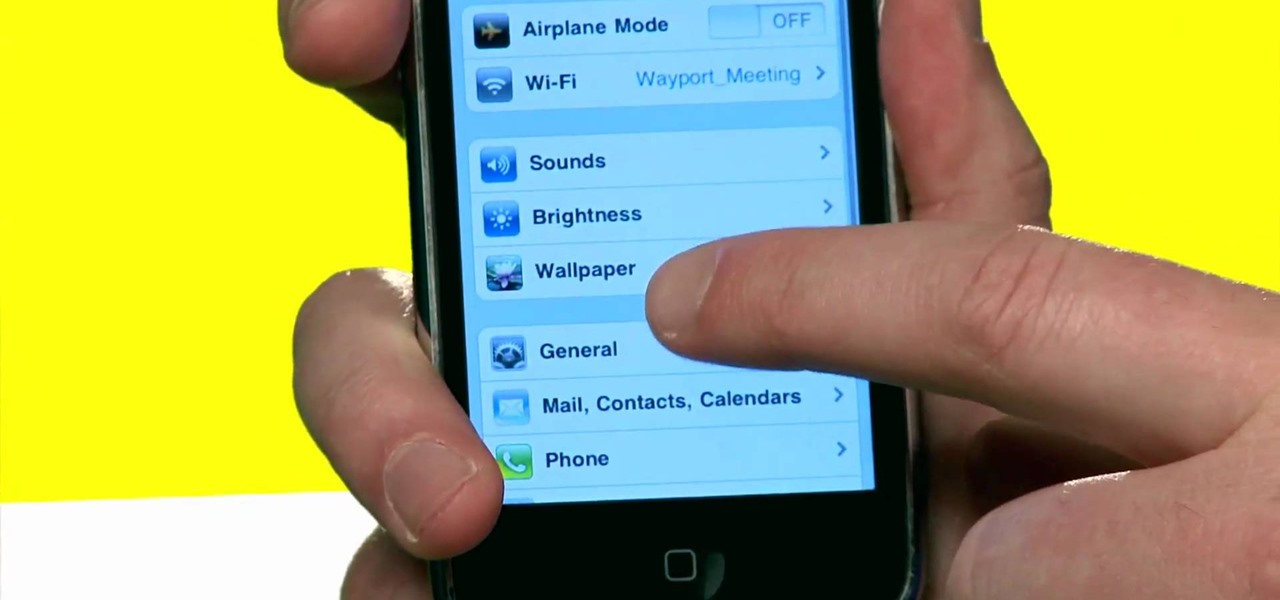
1. Open the “Settings” app on your iPhone. It is represented by a gray gear icon.
2. Scroll down and tap on “Accessibility.”
3. In the “Vision” section, tap on “Zoom.”
4. On the next screen, ensure that the toggle switch next to “Zoom” is turned off. It should no longer be green.
5. Exit the Settings app and check if the zoom function is disabled. If it is still enabled, try restarting your iPhone and check again.
Method 2: Disabling Zoom via Accessibility Shortcut:
1. Open the “Settings” app and tap on “Accessibility.”
2. Scroll down and select “Accessibility Shortcut” at the bottom of the page.
3. On the next screen, choose “Zoom” as your selected option by tapping on it. A checkmark should appear next to Zoom.
4. Exit the Settings app and triple-press the home button (for iPhones with a home button) or the side button (for Face ID iPhones). This will toggle the zoom function on or off.
5. Check if the zoom feature is disabled. If not, try restarting your iPhone and attempting the process again.
Once you have followed these steps, the zoom function on your iPhone should be unlocked, allowing you to navigate your device without any zoom-related issues. If the zoom feature is still active, don’t worry, there are a few additional troubleshooting steps we can explore to resolve the issue.
Next, we will discuss how to disable zoom on your iPhone by using VoiceOver. This method is particularly useful for users who rely on VoiceOver for accessibility purposes but want to turn off the zoom function. Stay tuned!
Disabling Zoom via Settings:
If you want to disable the zoom function on your iPhone, you can do so through the device’s settings. Here’s a step-by-step guide on how to disable zoom via settings:
1. Start by unlocking your iPhone and accessing the home screen.
2. Locate and tap on the “Settings” app, which is represented by a gray gear icon.
3. Scroll down the settings menu and find the “Accessibility” option. Tap on it to proceed.
4. Within the “Accessibility” menu, look for the “Vision” section. Tap on “Zoom” to access the zoom settings.
5. On the “Zoom” screen, you’ll find a toggle switch next to the “Zoom” function. Make sure this switch is turned off. If it is green, simply tap on it to toggle it off, and the color should change to gray.
6. After turning off the zoom function, exit the settings app and return to your iPhone’s home screen.
7. Now, check to see if the zoom feature is disabled. You should no longer experience any zoom-related issues when using your iPhone.
It’s important to note that disabling zoom via settings will permanently turn off the zoom function on your iPhone. If you ever wish to use zoom again in the future, you will need to follow the same steps and toggle the switch back on.
If you find that disabling the zoom function via settings did not resolve the issue, you can try restarting your iPhone and repeating the process. In some cases, a simple restart can help apply the changes and disable the zoom feature successfully.
Next, we’ll discuss an alternative method to disable zoom on your iPhone by using an accessibility shortcut. Keep reading to learn more.
Disabling Zoom via Accessibility Shortcut:
Another convenient method to disable the zoom feature on your iPhone is by utilizing the Accessibility Shortcut. This allows you to toggle the zoom function on or off quickly and easily. Here’s how you can disable zoom via the Accessibility Shortcut:
1. Begin by unlocking your iPhone and navigating to the home screen.
2. Locate the “Settings” app, represented by a gray gear icon, and tap on it.
3. Scroll through the settings menu until you find the “Accessibility” option. Tap on it to proceed.
4. Look for the “Accessibility Shortcut” menu at the bottom of the page and select it.
5. On the “Accessibility Shortcut” screen, you’ll see a list of available options. Choose “Zoom” by tapping on it. A checkmark should appear next to the “Zoom” option.
6. Exit the settings app and return to your iPhone’s home screen.
7. Now, to disable the zoom function quickly, triple-press the home button if you have an iPhone with a home button, or triple-press the side button if you have a Face ID iPhone.
8. The zoom feature should now be disabled. You won’t encounter any issues related to zoom when using your iPhone.
The Accessibility Shortcut is a handy feature that allows you to toggle various accessibility settings with ease. By selecting the “Zoom” option in the Accessibility Shortcut settings, you can quickly enable or disable the zoom function whenever you need to.
If, after following these steps, you find that the zoom feature is still active on your iPhone, try restarting your device and repeating the process. This can sometimes resolve any temporary issues and ensure the zoom function is successfully disabled.
Next, we’ll explore how to disable zoom using VoiceOver, which is particularly useful for users who rely on VoiceOver for accessibility purposes. Keep reading to learn more!
Disabling Zoom using VoiceOver:
If you use VoiceOver as an accessibility feature on your iPhone, you might have noticed that the zoom function interferes with the VoiceOver experience. In this section, we’ll explain how you can disable zoom using VoiceOver on your iPhone:
1. Unlock your iPhone and locate the “Settings” app on your home screen. Tap on it to open the settings.
2. Scroll through the settings menu and select “Accessibility.”
3. In the “Accessibility” menu, choose “VoiceOver” to access the VoiceOver settings.
4. Once in the VoiceOver settings, scroll down and select “Zoom.”
5. On the “Zoom” screen, you will find a switch to toggle the zoom function with VoiceOver. Make sure this switch is turned off.
6. Exit the settings app and return to your iPhone’s home screen.
7. With VoiceOver enabled and the zoom function disabled, you can now navigate your iPhone using the VoiceOver feature without interference from zoom.
Disabling the zoom function using VoiceOver ensures a seamless and unobstructed experience for users who rely on this accessibility feature. By following the above steps, you can overcome any conflicts between zoom and VoiceOver, allowing you to use your iPhone comfortably.
If you find that disabling zoom using VoiceOver doesn’t resolve the issue, you may need to explore further troubleshooting options or seek assistance from Apple Support.
Now that you have successfully disabled the zoom function using different methods, let’s address any potential issues you may encounter and how to resolve them.
Resolving Zoom Issues:
While disabling the zoom function on your iPhone should resolve any related issues, there may be some scenarios where you encounter difficulties. Here are a few common zoom issues and their possible solutions:
1. Zoom re-enabling after disabling:
If you notice that the zoom function keeps re-enabling itself even after you have disabled it, try the following troubleshooting steps:
- Restart your iPhone: Simply restart your device and check if the zoom feature remains disabled.
- Reset all settings: Go to “Settings,” tap on “General,” select “Reset,” and choose “Reset All Settings.” Note that this will reset all your settings back to factory defaults, so make sure to back up your data beforehand.
2. Zoom not disabling despite following the steps:
If you have followed the instructions to disable zoom but it is still active, try the following solutions:
- Update your iPhone: Make sure you have the latest iOS version installed on your device by going to “Settings,” then “General,” and selecting “Software Update.” Install any available updates.
- Contact Apple Support: If the issue persists, it is recommended to reach out to Apple Support for further assistance. They can provide personalized guidance to help resolve the problem.
It’s important to remember that troubleshooting steps may vary depending on your specific device and iOS version. If the above suggestions do not resolve your zoom issues, consider seeking professional help or contacting Apple Support directly.
Now that we have covered methods to disable zoom and resolve common issues, you should be able to navigate your iPhone without any zoom-related complications. If you ever need to re-enable the zoom feature, simply follow the appropriate steps mentioned earlier in this article.
In the next section, we will conclude our guide with a summary of the key points covered. Stay tuned!
Conclusion:
In this comprehensive guide, we have explored various methods to disable the zoom feature on your iPhone. Whether you use the settings, accessibility shortcuts, or VoiceOver, you now have the knowledge to unlock and disable zoom, allowing for a smoother iPhone experience.
We started by explaining the importance of unlocking the zoom function and the potential issues it can cause. We then delved into disabling zoom via settings, where you can permanently turn off the zoom feature. Additionally, we discussed disabling zoom using the Accessibility Shortcut, providing a convenient way to toggle the zoom function on or off with just a triple-press of a button.
We also covered how to disable zoom using VoiceOver, catering to users who rely on this accessibility feature. By following the steps outlined in this article, you can now navigate your iPhone comfortably without any interference from the zoom function.
If you encounter any issues during the process of disabling zoom, we provided troubleshooting steps to address common problems. From restarting your iPhone to updating your software, these troubleshooting suggestions can help resolve any persistent zoom issues you may face.
Remember, disabling zoom does not mean you can never utilize the feature again. If you need to use zoom in the future, you can easily enable it by revisiting the settings on your iPhone.
We hope this guide has been helpful in assisting you in taking control of the zoom feature on your iPhone. By disabling zoom, you can enjoy a more streamlined and efficient user experience. If you encounter any further difficulties or have any additional questions, don’t hesitate to reach out to Apple Support for further assistance.
Now, armed with this knowledge, go forth and enjoy your iPhone without any zoom-related obstacles!