Introduction
Welcome to the world of gaming! If you’re looking to take your PlayStation 3 (PS3) apart for repairs, upgrades, or cleaning, you’ve come to the right place. In this guide, we’ll walk you through the step-by-step process of disassembling your PS3 console. While it may seem daunting at first, with the right tools, precautions, and a bit of patience, you’ll be able to tackle the task with ease.
Before we dive into the nitty-gritty of dismantling your PS3, it’s important to note that opening the console may void your warranty. If your PS3 is still under warranty, it’s recommended to contact Sony support or a professional technician for assistance. However, if your console is out of warranty or you’re confident in your DIY skills, then let’s get started!
Why would you want to take your PS3 apart? There could be several reasons. It could be to clean out the dust that has accumulated over time, replace a faulty part, upgrade the hard drive for more storage space, or simply to satisfy your curiosity and see what’s inside. Whatever the reason, just remember that taking apart your PS3 requires attention to detail and careful handling of its internal components.
In this guide, we’ll provide a detailed walkthrough of each step, complete with images and instructions, to ensure that you can follow along easily. We’ll cover all the necessary precautions you need to take, as well as the tools you’ll need to have on hand. So grab your screwdriver, put on your DIY hat, and let’s dive into the exciting world of PS3 disassembly!
Required Tools and Precautions
Before starting the disassembly process, it’s important to gather the necessary tools to ensure a smooth and successful endeavor. Here’s a list of the tools you’ll need:
- A small Phillips screwdriver: This will be used to remove the screws securing various parts of the console.
- A flathead screwdriver or plastic pry tool: Handy for gently prying open panels or disconnecting cables.
- An anti-static wrist strap: This helps prevent damage to sensitive electronic components by dissipating any static electricity in your body.
- A clean, lint-free cloth: Useful for wiping down and cleaning components as you go.
- Cotton swabs or a soft brush: Perfect for removing dust or dirt from hard-to-reach areas.
- Isopropyl alcohol: A high percentage of isopropyl alcohol (90% or higher) is ideal for cleaning components.
- A container or tray: This will come in handy for organizing and keeping track of screws and small parts.
Now that you have your tools ready, let’s talk about the precautions you should take before diving into the disassembly process:
- Ensure that your PS3 is completely powered down and unplugged from any power source.
- Place your PS3 on a clean, static-free workspace. Avoid working on carpeted surfaces as they tend to generate static electricity.
- Wear the anti-static wrist strap to prevent any electrostatic discharge that may damage the sensitive internal components.
- Handle components with care, especially when unplugging cables and connectors. Pulling too hard or at the wrong angle can lead to damage.
- Keep track of screws and small parts by using a container or tray. This will help ensure that you can easily reassemble the console later.
- Take your time and double-check each step before proceeding. Rushing through the process can result in costly mistakes.
By following these precautions and having the right tools at hand, you’ll be well-prepared to take apart your PS3 without any hiccups. Now that everything is in order, let’s move on to the first step: preparing the workspace!
Step 1: Prepare the Workspace
Before you begin disassembling your PlayStation 3 (PS3), it’s crucial to prepare a suitable workspace. Creating an organized and clean environment will make the process smoother and help prevent any damage to your console. Here’s what you need to do:
- Choose a well-lit area: Find a spot with ample lighting to ensure you can see the components and screws clearly.
- Clear the workspace: Remove any unnecessary items from your workspace to avoid distractions and create a clutter-free area to work in.
- Use an anti-static mat: Place an anti-static mat on your workspace. This helps to dissipate any static electricity and protects sensitive electronic components from damage.
- Clean the workspace: Use a lint-free cloth to wipe down the surface of your workspace. Removing dust and debris will help keep your console clean during the disassembly process.
- Keep your tools within reach: Arrange your tools and small containers for screws and parts within easy reach. This will help you stay organized and prevent any accidental loss or misplacement of components.
- Prepare an assembly diagram or take photos: Before you start disassembling, it’s advisable to have an assembly diagram or take pictures of your console. This will serve as a reference when reassembling the PS3 later.
By following these steps to prepare your workspace, you’ll create an ideal environment for dismantling your PS3. Having a clean, well-organized area with proper lighting and anti-static protection will make the disassembly process more comfortable and minimize the risk of accidental damage to your console. Once your workspace is ready, you can move on to the next step: powering down and unplugging the console.
Step 2: Power Down and Unplug the Console
Before you begin taking apart your PlayStation 3 (PS3), it’s crucial to ensure that the console is completely powered down and unplugged from any power source. This step is vital to prevent any electrical shock or damage to the internal components of the console. Follow these steps to power down and unplug your PS3:
- Save your progress and exit any running games or applications: Make sure to save your progress and close any games or applications that are currently running on your PS3. This will prevent any data loss and ensure a clean shutdown.
- Go to the Home Menu: Press the PlayStation button on your controller to access the Home Menu. From there, navigate to the far right and select the Power option.
- Select the Shut Down option: In the Power menu, choose the Shut Down option. Your PS3 will initiate the shutdown process. Wait for the console to power down completely.
- Unplug all cables and connections: Once the PS3 is powered down, carefully unplug all cables and connections from the back of the console. This includes the power cord, HDMI or AV cables, Ethernet cable, and any other peripheral connections.
- Disconnect any memory devices: If you have any external memory devices, such as USB flash drives or external hard drives, make sure to disconnect them from the PS3.
By following these steps, you’ll ensure that your PS3 is powered down safely, minimizing any potential risks during the disassembly process. Remember, safety should always be a priority when working with electronic devices. With your console powered down and unplugged, you’re now ready to move on to the next step: removing the hard drive.
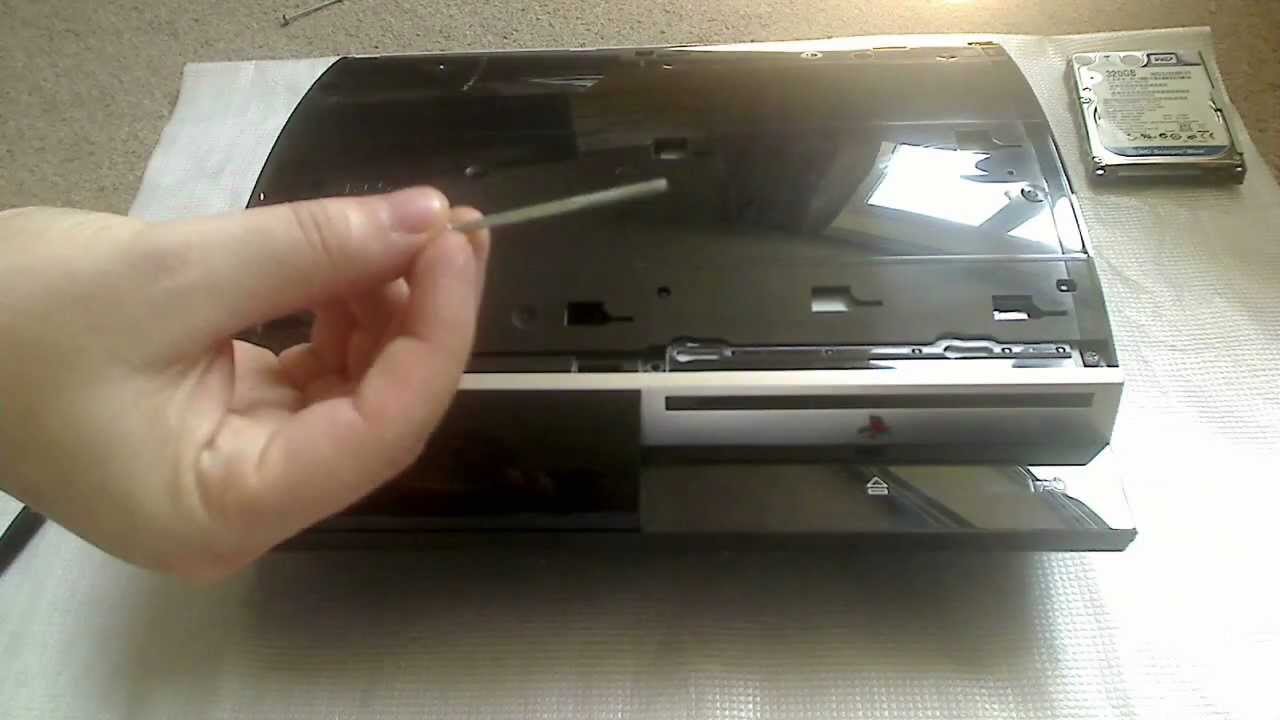
Step 3: Removing the Hard Drive
Now that you have safely powered down and unplugged your PlayStation 3 (PS3), it’s time to tackle the first component – the hard drive. The hard drive is where your game data, saves, and system files are stored. Follow these steps to remove the hard drive from your PS3:
- Locate the hard drive cover: On the left side of your PS3, you’ll find a panel with the PS3 logo. This is the hard drive cover.
- Use a small screwdriver or plastic pry tool: Gently insert the tool into the groove of the hard drive cover and carefully pry it open. Be cautious not to apply excessive force, as you don’t want to damage the cover or the console.
- Remove the hard drive bracket: Once the cover is removed, you’ll see the hard drive bracket held in place by a single screw. Use your screwdriver to unscrew it.
- Slide out the hard drive: Once the screw is removed, carefully slide the hard drive out of its slot. It may require a bit of wiggling or gentle pulling to release it completely.
- Disconnect the SATA connector and power cable: On the back of the hard drive, you’ll find a SATA connector and a power cable connected to it. Gently disconnect these cables by pulling them straight out.
With the hard drive successfully removed from your PS3, you can now decide whether you want to replace it with a new one, upgrade the storage capacity, or simply clean and reinsert it. If you’re replacing or upgrading the hard drive, make sure to follow the appropriate instructions for installing the new drive. If you’re cleaning the hard drive, use a lint-free cloth or compressed air to remove any dust or debris.
Remember to handle the hard drive with care and avoid touching the exposed circuitry or the connectors. Keep the hard drive in a safe place during the disassembly process to prevent any accidental damage or data loss.
Now that you’ve successfully removed the hard drive from your PS3, you can proceed to the next step: removing the bottom panel.
Step 4: Remove the Bottom Panel
After successfully removing the hard drive from your PlayStation 3 (PS3), it’s time to move on to the next step: removing the bottom panel. The bottom panel covers the internal components of the console and provides access for further disassembly. Follow these steps to remove the bottom panel:
- Flip your PS3 console upside down: Carefully turn your PS3 console upside down so that the bottom is facing up. Make sure to place it on a soft, non-scratch surface to avoid any damage.
- Locate the screw holes: On the bottom panel, you’ll find several screw holes. These are typically secured with standard Phillips screws.
- Remove the screws: Use a small Phillips screwdriver to unscrew all the screws holding the bottom panel in place. Make sure to keep the screws organized and in a safe place for reassembly.
- Gently remove the bottom panel: Once all the screws are removed, gently lift and remove the bottom panel from your PS3 console. It may require a bit of prying or sliding to release it completely.
With the bottom panel removed, you’ll now have better access to the internal components of your PS3. This will allow you to proceed with the disassembly process more efficiently. Take this opportunity to inspect the internals of your console for any dust or debris that may have accumulated over time.
Remember to handle the bottom panel with care and avoid any excessive force that could lead to damage. Keep the panel in a safe place to avoid misplacement during the disassembly process.
Now that you have successfully removed the bottom panel, you can move on to the next step: disconnecting the Blu-ray drive. Stay tuned for the following section to continue the disassembly process of your PS3!
Step 5: Disconnecting the Blu-ray Drive
With the bottom panel successfully removed from your PlayStation 3 (PS3), the next step is to disconnect the Blu-ray drive. The Blu-ray drive allows you to play games, watch movies, and access various media on your console. Follow these steps to disconnect the Blu-ray drive:
- Locate the Blu-ray drive: The Blu-ray drive is typically positioned towards the front of your PS3 console. It is a disc drive with a ribbon cable and several connectors.
- Disconnect the ribbon cable: Carefully locate the ribbon cable that is connected to the Blu-ray drive. Gently release the latch or connector holding the cable in place, and then gently pull the cable straight out to disconnect it.
- Disconnect any power or data cables: Look for any additional power or data cables connected to the Blu-ray drive. These may vary depending on the specific model of your PS3. Gently unplug these cables by pulling them straight out of their connectors.
- Remove any screws securing the Blu-ray drive: Check if there are any screws securing the Blu-ray drive to the console’s frame. If so, use a small Phillips screwdriver to remove them.
- Gently remove the Blu-ray drive: Once all the cables and screws are disconnected, gently slide or lift the Blu-ray drive out of its slot. Be cautious not to damage any surrounding components or connectors.
With the Blu-ray drive successfully disconnected, you can now clean it or replace it if needed. If you’re cleaning the drive, use a lint-free cloth or compressed air to remove any dust or debris. If you’re replacing it, carefully install the new drive using the reverse steps of this process.
Remember to handle the Blu-ray drive with care, as it contains delicate components. Avoid touching the laser lens or any exposed connectors to prevent damage.
Now that you’ve successfully disconnected the Blu-ray drive, you’re ready to move on to the next step: removing the Wi-Fi and Bluetooth board. Stay tuned to continue the disassembly process of your PS3!
Step 6: Removing the Wi-Fi and Bluetooth Board
Continuing with the disassembly of your PlayStation 3 (PS3), the next step is to remove the Wi-Fi and Bluetooth board. This board is responsible for wireless connectivity and communication in your console. Follow these steps to remove the Wi-Fi and Bluetooth board:
- Locate the Wi-Fi and Bluetooth board: The board is usually positioned near the front of your PS3 console. It is a smaller circuit board with connectors and antennas.
- Disconnect the cables: Carefully locate the cables connected to the Wi-Fi and Bluetooth board. Gently release any latches or connectors holding the cables in place, and then gently pull the cables straight out to disconnect them. These cables may include Wi-Fi antenna cables and Bluetooth cables.
- Remove any screws securing the board: Check if there are any screws securing the Wi-Fi and Bluetooth board to the console’s frame. Remove these screws using a small Phillips screwdriver.
- Gently remove the board: Once all the cables and screws are disconnected, gently slide or lift the Wi-Fi and Bluetooth board out of its slot. Take care not to damage any other components or connectors in the process.
Now that the Wi-Fi and Bluetooth board is removed, you can clean or replace it if necessary. If you’re cleaning the board, use a clean, lint-free cloth or compressed air to remove any dust or debris. If you’re replacing it, install the new board using the reverse steps of this process.
Remember to handle the Wi-Fi and Bluetooth board with care, as it is sensitive and can be easily damaged. Avoid touching any exposed circuits or connectors to prevent any mishaps.
Now that you’ve successfully removed the Wi-Fi and Bluetooth board, you’re ready to move on to the next step: removing the power supply. Stay tuned for the following section to continue the disassembly process of your PS3!
Step 7: Removing the Power Supply
As we continue with the disassembly of your PlayStation 3 (PS3), the next step is to remove the power supply. The power supply is responsible for providing electricity to the console and its various components. Follow these steps to remove the power supply:
- Locate the power supply unit: The power supply unit is usually located towards the back of your PS3 console. It is a rectangular metal box connected to the console’s internal components.
- Disconnect all cables: Carefully locate and disconnect all cables connected to the power supply. These may include the power cable, fan cable, and any other auxiliary cables.
- Remove any screws securing the power supply: Check for screws or mounting brackets securing the power supply to the console’s frame. Use a small Phillips screwdriver to remove these screws or brackets.
- Gently remove the power supply: Once all the cables and screws are disconnected, carefully slide or lift the power supply out of its slot. Take care not to damage any other components or connectors in the process.
With the power supply successfully removed, you can clean it or replace it if necessary. If you’re cleaning the power supply, use a clean, lint-free cloth or compressed air to remove any dust or debris. If you’re replacing it, carefully install the new power supply using the reverse steps of this process.
Remember to handle the power supply with care, as it contains high-voltage components. Avoid touching any exposed circuits or connectors to prevent any electrical mishaps.
Now that you’ve successfully removed the power supply, you’re ready to move on to the next step: disconnecting the motherboard. Stay tuned for the following section to continue the disassembly process of your PS3!
Step 8: Disconnecting the Motherboard
Continuing with the disassembly of your PlayStation 3 (PS3), the next step is to disconnect the motherboard. The motherboard is the central circuit board that houses the main components of your console. Follow these steps to disconnect the motherboard:
- Locate the motherboard: The motherboard is the largest circuit board in your PS3 console. It is typically positioned in the middle and is connected to various components.
- Disconnect all cables and connectors: Carefully locate and disconnect all cables and connectors connected to the motherboard. These may include power cables, data cables, fan cables, and speaker cables, among others.
- Remove any screws securing the motherboard: Check for screws or mounting brackets securing the motherboard to the console’s frame. Use a small Phillips screwdriver to remove these screws or brackets.
- Gently remove the motherboard: Once all the cables and screws are disconnected, carefully lift and remove the motherboard from its position. Take care not to damage any other components or connectors in the process.
With the motherboard successfully disconnected, you can clean it or replace it if necessary. If you’re cleaning the motherboard, use compressed air or a clean, lint-free cloth to remove any dust or debris. If you’re replacing it, carefully install the new motherboard using the reverse steps of this process.
Remember to handle the motherboard with care, as it contains delicate electronic components. Avoid touching any exposed circuits or connectors to prevent damage.
Now that you’ve successfully disconnected the motherboard, you’re ready to move on to the next step: removing the fan and heat sink assembly. Stay tuned for the following section to continue the disassembly process of your PS3!
Step 9: Removing the Fan and Heat Sink Assembly
As we progress with the disassembly of your PlayStation 3 (PS3), it’s time to remove the fan and heat sink assembly. This assembly is responsible for keeping the internal components cool and preventing overheating. Follow these steps to remove the fan and heat sink assembly:
- Locate the fan and heat sink assembly: The assembly is usually located near the back or side of the motherboard. It consists of a fan and a heat sink connected to the CPU and GPU.
- Disconnect the fan cable: Carefully locate the cable connecting the fan to the motherboard. Gently release any latch or connector holding the cable in place and then pull the cable straight out to disconnect it.
- Remove any screws securing the heat sink: Check for screws or mounting brackets securing the heat sink to the motherboard or console’s frame. Use a small Phillips screwdriver to remove these screws or brackets.
- Gently remove the fan and heat sink assembly: Once all the cables and screws are disconnected, carefully lift and remove the fan and heat sink assembly from its position. Take care not to damage any other components or connectors in the process.
With the fan and heat sink assembly successfully removed, you have the opportunity to clean it thoroughly. Over time, dust and debris can accumulate on the fan blades and heat sink, reducing their effectiveness. Use compressed air or a clean, lint-free cloth to carefully remove any dirt or dust.
If you plan to replace the thermal paste between the heat sink and the CPU/GPU, now is the time to do so. Remove the old thermal paste using isopropyl alcohol and a lint-free cloth and apply a small, pea-sized amount of new thermal paste evenly on the surface of the CPU and GPU. This helps to ensure optimal heat transfer when reassembling.
Remember to handle the fan and heat sink assembly with care, as it contains delicate components. Avoid touching the fan blades or any exposed circuits to prevent damage.
Now that you’ve successfully removed the fan and heat sink assembly, you’re ready to move on to the next step: detaching the power button board. Stay tuned for the following section to continue the disassembly process of your PS3!
Step 10: Detaching the Power Button Board
As we proceed with the disassembly of your PlayStation 3 (PS3), the next step is to detach the power button board. This board houses the power button and other control buttons on your console. Follow these steps to detach the power button board:
- Locate the power button board: The power button board is typically positioned near the front of the PS3 console, usually connected to the chassis or front panel.
- Disconnect the ribbon cable: Carefully locate the ribbon cable that is connected to the power button board. Gently release the latch or connector holding the cable in place, and then gently pull the cable straight out to disconnect it.
- Detach any screws or connectors: Check for any screws or connectors securing the power button board to the console’s chassis. Use a small Phillips screwdriver to remove these screws or gently detach the connectors as needed.
- Gently remove the power button board: Once all the cables, screws, and connectors are detached, carefully slide or lift the power button board out of its position. Take care not to damage any other components or connectors while doing so.
With the power button board detached, you have the opportunity to clean it or replace it if necessary. If you’re cleaning the board, use a lint-free cloth or cotton swabs moistened with isopropyl alcohol to gently remove any dirt or grime.
If you’re replacing the power button board, be sure to acquire the correct replacement part specific to your PS3 model. Carefully install the new board using the reverse steps of this process.
Ensure that all connectors and cables are properly reattached when reassembling the console. Double-check to make sure the ribbon cable is securely connected to the power button board. This ensures proper functionality of the power button and other control buttons.
Remember to handle the power button board with care, as it contains delicate components. Avoid applying excessive force or bending the ribbon cable to prevent damage.
Now that you’ve successfully detached the power button board, you’re ready to move on to the next step: separating the cooling system. Stay tuned for the following section to continue the disassembly process of your PS3!
Step 11: Separating the Cooling System
As we progress with the disassembly of your PlayStation 3 (PS3), it’s time to separate the cooling system. The cooling system is crucial for keeping your console’s internal components at optimal temperatures during operation. Follow these steps to separate the cooling system:
- Locate the cooling system components: The cooling system typically consists of a fan, heat sink, and associated brackets or shrouds. It is usually positioned near the motherboard and CPU/GPU area.
- Remove any screws or brackets: Check for screws or brackets securing the cooling system components. Use a small Phillips screwdriver to carefully remove these fasteners and set them aside.
- Gently disconnect the fan cable: Locate the cable connecting the cooling fan to the motherboard or power supply board. Gently release any connector or latch holding the cable in place, and then carefully disconnect the cable.
- Separate the fan and heat sink assembly: With the screws and connectors detached, gently lift and separate the fan from the heat sink assembly. Take care not to damage any other components or connectors during this process.
With the cooling system separated, you have the opportunity to clean it thoroughly. Over time, dust and debris can accumulate on the fan blades and heat sink, compromising their cooling efficiency. Use compressed air or a clean, lint-free cloth to carefully remove any dirt or dust from these components.
Additionally, inspect the thermal paste between the heat sink and the CPU/GPU. If it appears dry, brittle, or worn out, it is recommended to remove the old thermal paste using isopropyl alcohol and a lint-free cloth. Apply a small, pea-sized amount of high-quality thermal paste to the CPU and GPU, ensuring even coverage for efficient heat transfer.
When reassembling the cooling system, ensure that all screws, brackets, and cables are properly reattached. Double-check the fan cable connection to the motherboard or power supply board to ensure proper functionality.
Remember to handle the cooling system components with care, as they contain delicate fins, blades, and sensitive electronic components. Avoid excessive force or bending of any parts to prevent damage.
Now that you’ve successfully separated the cooling system, you’re ready to move on to the next step: removing the disc drive motor. Stay tuned for the upcoming section to continue the disassembly process of your PS3!
Step 12: Removing the Disc Drive Motor
Continuing with the disassembly of your PlayStation 3 (PS3), the next step is to remove the disc drive motor. The motor is responsible for spinning the discs and allowing you to play games or watch movies on your console. Follow these steps to remove the disc drive motor:
- Locate the disc drive motor: The motor is housed within the disc drive assembly, typically positioned near the front of the PS3 console.
- Disconnect any cables: Carefully locate and disconnect any cables connected to the disc drive motor. These cables may include data cables or power cables that provide connectivity and power to the motor.
- Remove any screws or brackets: Check for screws or brackets securing the disc drive motor to the console’s chassis or the disc drive assembly. Use a small Phillips screwdriver to remove these fasteners and set them aside.
- Gently remove the disc drive motor: Once all the cables and fasteners are taken care of, carefully lift and remove the disc drive motor from its mounting position. Be cautious not to damage any other components or connectors during this process.
With the disc drive motor successfully removed, you have the opportunity to clean it or replace it if necessary. Use a clean, lint-free cloth or compressed air to gently remove any dust or debris that may have accumulated on the motor.
If you’re replacing the disc drive motor, ensure you acquire the correct replacement part specific to your PS3 model. Carefully install the new motor using the reverse steps of this process, ensuring proper cable connections and securing any screws or brackets.
Remember to handle the disc drive motor with care, as it contains delicate internal components. Avoid applying excessive force or causing any impact to prevent damage.
Now that you’ve successfully removed the disc drive motor, you’re ready to move on to the next step: disconnecting and removing the power button ribbon. Stay tuned for the following section to continue the disassembly process of your PS3!
Step 13: Disconnecting and Removing the Power Button Ribbon
As we continue with the disassembly of your PlayStation 3 (PS3), the next step is to disconnect and remove the power button ribbon. The power button ribbon connects the console’s power button to the motherboard, allowing you to turn your PS3 on and off. Follow these steps to disconnect and remove the power button ribbon:
- Lift the power button board: Carefully lift the power button board, which we detached earlier, to expose the power button ribbon connector.
- Release the latch: Locate the small latch on the power button ribbon connector. This latch secures the ribbon in place. Gently lift the latch using a small tool or your fingernail, allowing the ribbon to be released.
- Disconnect the power button ribbon: Once the latch is lifted, gently pull the power button ribbon straight out of the connector. Take care not to use excessive force or twist the ribbon to prevent any damage.
- Set the power button ribbon aside: Once disconnected, set the power button ribbon aside in a safe place to avoid misplacement or damage during the disassembly process.
By following these steps, you have successfully disconnected and removed the power button ribbon from your PS3. This step allows for easier access to the additional components within the console.
If you plan on reassembling the console, make sure to reconnect the power button ribbon securely before proceeding. Ensure that the ribbon is aligned correctly with the connector and that the latch is securely closed to prevent any connectivity issues with the power button.
Remember to handle the power button ribbon with care, as it is thin and delicate. Avoid bending or crimping the ribbon to prevent any potential damage.
Now that you’ve successfully completed this step, you’re ready to move on to the next: separating the power supply from the motherboard. Stay tuned for the upcoming section to continue the disassembly process of your PS3!
Step 14: Separate the Power Supply from the Motherboard
Continuing with the disassembly of your PlayStation 3 (PS3), the next step is to separate the power supply from the motherboard. The power supply is responsible for providing electricity to the console’s components. Follow these steps to separate the power supply from the motherboard:
- Locate the power supply: The power supply is usually positioned towards the back of the PS3 console. It is a larger component with cables and connectors attached.
- Identify the power supply connectors: Look for the cables and connectors originating from the power supply and connecting to the motherboard. These connectors may include the main power cable, fan cables, and other auxiliary cables.
- Disconnect the power supply connectors: Gently pull each connector straight out to disconnect it from the motherboard. Take care not to apply excessive force or damage any surrounding components.
- Remove any screws or brackets securing the power supply: Check for screws or brackets holding the power supply in place. Use a small Phillips screwdriver to remove these screws or brackets.
- Separate the power supply from the motherboard: Once all connectors and fasteners are removed, carefully lift and separate the power supply from the motherboard. Take caution not to damage any other components or connectors during this process.
With the power supply separated from the motherboard, you have the opportunity to clean it or replace it if necessary. Use a clean, lint-free cloth or compressed air to gently remove any dust or debris from the power supply unit.
If you’re replacing the power supply, ensure you acquire the correct replacement part specific to your PS3 model. Carefully install the new power supply using the reverse steps of this process, securely connecting all cables and fasteners.
Remember to handle the power supply with care, as it contains delicate electronics. Avoid applying excessive force or causing any impact to prevent damage.
Now that you’ve successfully separated the power supply from the motherboard, you’re ready to move on to the next step: unplugging all remaining cables. Stay tuned for the following section to continue the disassembly process of your PS3!
Step 15: Unplug All Remaining Cables
As we continue with the disassembly of your PlayStation 3 (PS3), it is now time to unplug all remaining cables. This step ensures a clean separation of the various components and allows for easier removal of the motherboard. Follow these steps to unplug all remaining cables:
- Identify the remaining cables: Take a close look at the remaining cables connected to the motherboard. These can include data cables, power cables, fan cables, speaker cables, and other miscellaneous connectors.
- Gently disconnect each cable: Starting from one end, gently detach each cable from its corresponding connector by pulling it straight out. Avoid applying unnecessary force and handle the connectors with care to prevent damage.
- Set aside disconnected cables: As each cable is removed, set it aside in a safe place to avoid misplacement or damage.
By following these steps, you will successfully unplug all remaining cables from your PS3 console. This step allows for a clearer path when removing the motherboard and ensures a smoother disassembly process. Remember to handle the cables with care and avoid any excessive bending or tugging that could potentially damage them.
Now that all remaining cables have been unplugged, you are ready to move on to the next step: removing the thermal paste. Stay tuned for the upcoming section to continue the disassembly process of your PS3!
Step 16: Removing the Thermal Paste
As we progress with the disassembly of your PlayStation 3 (PS3), the next step is to remove the thermal paste. Thermal paste, also known as thermal compound, is a substance applied between the CPU/GPU and the heat sink to facilitate heat transfer and ensure optimal cooling. Follow these steps to remove the thermal paste:
- Locate the CPU and GPU: The CPU and GPU are typically the two main processors, often covered by a heat sink.
- Prepare isopropyl alcohol and a lint-free cloth: Dampen a lint-free cloth with isopropyl alcohol. Make sure the cloth is moist, but not dripping wet.
- Gently wipe off the old thermal paste: Carefully wipe off the old thermal paste from both the CPU and GPU using the damp cloth. Ensure that all residue is removed, leaving a clean and smooth surface.
- Inspect for residue and repeat if necessary: Inspect the surfaces of the CPU and GPU to ensure that all the thermal paste has been removed. If any residue remains, repeat the wiping process until the surfaces are clean and free of any previous thermal paste.
Removing the old thermal paste is important to achieve proper heat transfer and ensure efficient cooling in your PS3 console. By cleaning the surfaces, you pave the way for applying a fresh layer of thermal paste when reassembling the console.
Remember to use isopropyl alcohol with a high percentage (90% or higher) to effectively dissolve the thermal paste. Avoid using excessive force or scratching the surfaces to prevent damage to the CPU and GPU.
With the thermal paste removed, ensure both the CPU and GPU are clean and free of any residue. This will allow for a fresh application of thermal paste when reassembling your PS3 console.
Now that you have successfully removed the old thermal paste, you can proceed to the next step: taking apart the power supply. Stay tuned for the upcoming section to continue the disassembly process of your PS3!
Step 17: Taking Apart the Power Supply
Continuing with the disassembly of your PlayStation 3 (PS3), the next step is to take apart the power supply. Taking apart the power supply will allow you to clean its internal components or replace any faulty parts. Follow these steps to take apart the power supply:
- Ensure the power supply is completely disconnected: Double-check that the power supply is fully unplugged from any power source to prevent any risk of electrical shock.
- Inspect the power supply for any visible screws or clips: Examine the exterior of the power supply to identify any screws or clips that may be securing its casing.
- Remove any screws: Carefully remove any screws found on the exterior of the power supply using a small Phillips screwdriver.
- Separate the casing of the power supply: Using a flathead screwdriver or plastic pry tool, gently separate the casing of the power supply, starting from one corner. Take care not to use excessive force and avoid damaging any internal components.
- Continue opening the power supply: Gradually work your way around the edges of the power supply, incrementally separating the casing. Be patient and ensure that all the clips are released before completely separating the casing.
Important Note: Once you have successfully opened the power supply casing, DO NOT attempt to manipulate any of the internal components, such as capacitors. Tampering with these components can be dangerous and may pose a risk of electric shock.
With the power supply casing open, you can inspect the internal components for any dust or debris that may have accumulated over time. Use compressed air or a clean, lint-free cloth to gently remove any dirt or dust, being careful not to touch any internal electronic components.
If you encounter any issues with the power supply, such as a faulty fan or capacitors, it is recommended to seek professional assistance or replace the power supply entirely. Modifying or repairing the power supply without proper knowledge or tools can be hazardous and may void your warranty.
Remember to exercise caution when handling the power supply, as it contains high-voltage components. Avoid touching any internal components and always prioritize your safety.
Now that you have successfully taken apart the power supply, you can proceed to the next step: removing the motherboard. Stay tuned for the upcoming section to continue the disassembly process of your PS3!
Step 18: Removing the Motherboard
As we progress with the disassembly of your PlayStation 3 (PS3), the next step is to remove the motherboard. The motherboard houses the various components and circuits that make up the core functionality of your console. Follow these steps to remove the motherboard:
- Identify the motherboard: Locate the large circuit board that serves as the main component of your PS3 console. It is typically positioned in the center and has a multitude of connectors and components attached to it.
- Disconnect any remaining cables and connectors: Carefully inspect the motherboard for any remaining cables or connectors. Gently detach each cable, being mindful of any latches or connectors that may be holding them in place.
- Remove any screws or brackets securing the motherboard: Check for screws or brackets attaching the motherboard to the console’s frame. Use a small Phillips screwdriver to remove these fasteners, taking note of their locations for reassembly.
- Gently lift and remove the motherboard: Once all cables and screws are disconnected, gently lift and remove the motherboard from its mounting position. Take care not to damage any other components or connectors during this process.
By following these steps, you successfully remove the motherboard from your PS3 console. This step allows for easier access to individual components for cleaning, repair, or replacement.
If you plan on reassembling the console, ensure that all cables and connectors are securely reattached to the motherboard and that any necessary latches or fasteners are properly in place. Carefully align the motherboard with the appropriate slots and guides before gently pressing it back into position.
Remember to handle the motherboard with care, as it contains delicate circuitry and sensitive components. Avoid applying excessive force or dropping it, as this may cause irreparable damage.
Now that you’ve successfully removed the motherboard, you’re ready to move on to the next step: cleaning and reassembly. Stay tuned for the upcoming section to continue the disassembly process of your PS3!
Step 19: Cleaning and Reassembly
Now that you have disassembled your PlayStation 3 (PS3) console, it’s time to give everything a thorough cleaning and prepare for reassembly. Follow these steps to clean and reassemble your PS3:
- Clean all components: Use a clean, lint-free cloth or compressed air to remove any dust or debris from each component, including the motherboard, fan, heat sink, power supply, and any other detached parts.
- Inspect for damage or wear: Take a close look at each component to check for any signs of damage or wear. Pay attention to connectors, cables, and circuits to ensure they are not bent, frayed, or broken.
- Apply new thermal paste: If you removed the heat sink assembly, it’s important to apply a fresh layer of thermal paste to ensure efficient heat transfer. Follow the manufacturer’s instructions for the appropriate amount and method of application.
- Reassemble the console: Starting with the motherboard, carefully reattach cables, connectors, and screws according to their respective locations. Take your time to ensure each component is properly seated and secured.
- Double-check connections and screws: Before closing the console, double-check that all cables and connectors are securely attached and that any screws or brackets are tightened appropriately.
- Clean the external casing: While the console is disassembled, take the opportunity to clean the external casing with a damp cloth. Remove any grime, fingerprints, or dust to restore its appearance.
Once you have completed the cleaning and reassembly steps, you are ready to power up your PS3 and enjoy your gaming experience. The proper cleaning and reassembly process ensures optimal performance, longevity, and reliability of your console.
In the future, make sure to clean your console regularly and keep it in a well-ventilated area to prevent dust build-up and overheating. Regular maintenance will help prolong the lifespan of your PS3 and maintain its performance.
Remember to consult the official PS3 documentation or seek professional assistance if you encounter any difficulties during the reassembly process or if you require further technical support.
Congratulations on successfully cleaning and reassembling your PS3! Get ready to experience countless hours of gaming enjoyment.
Conclusion
Congratulations on successfully completing the disassembly, cleaning, and reassembly of your PlayStation 3 (PS3) console! By following the step-by-step process outlined in this guide, you have gained valuable knowledge and hands-on experience in taking apart and maintaining your console.
Throughout the disassembly process, you learned how to prepare your workspace, safely power down the console, and remove each component with care. You were guided through removing the hard drive, bottom panel, Blu-ray drive, Wi-Fi and Bluetooth board, power supply, motherboard, fan and heat sink assembly, power button board, cooling system, disc drive motor, power button ribbon, and even took apart the power supply. The steps were designed to ensure a smooth and successful disassembly while placing emphasis on safety and careful handling of the components.
During the cleaning phase, you learned the importance of removing dust and debris to maintain proper airflow and cooling within your console. You also had the opportunity to inspect each component for any damage or wear, allowing for necessary repairs or replacements.
In the reassembly stage, you carefully connected cables, secured screws, and ensured proper alignment of components. By following these steps, you have restored your PS3 to a functional state, ready to provide countless hours of gaming enjoyment.
Remember, the process of disassembling and reassembling your PS3 requires attention to detail, patience, and a cautious approach. Improper handling or inattentiveness may result in damage to your console, so it’s always wise to proceed with care and seek professional assistance if needed.
Your newly acquired knowledge can also be applied to future cleaning and maintenance of your PS3. Regular cleaning and upkeep will help preserve the performance and longevity of your console, ensuring that it continues to provide an exceptional gaming experience.
We hope that this guide has been helpful to you, and that you feel confident in your ability to undertake similar projects in the future. Enjoy your gaming adventures with your newly cleaned and reassembled PlayStation 3!