Why 3D Printing?
3D printing is revolutionizing the way we manufacture and create objects. This groundbreaking technology allows us to transform virtual designs into tangible physical objects with incredible precision and detail. From prototyping to complex production, 3D printing has the potential to disrupt multiple industries and open up a world of possibilities.
One of the key advantages of 3D printing is its ability to create highly customized and personalized products. Traditional manufacturing methods often have limitations when it comes to customizing products according to individual needs. With 3D printing, each item can be tailor-made, allowing for unique designs and personalized features.
Another major benefit of 3D printing is its ability to rapidly prototype ideas and concepts. In the past, creating prototypes required significant time and expense, but 3D printing has made the process much more accessible. Companies and individuals can now iterate on designs quickly, test functionality, and make improvements before committing to large-scale production.
Additionally, 3D printing can significantly reduce waste compared to traditional manufacturing methods. By using only the necessary materials for each object, 3D printers minimize the amount of excess material and energy wastage. This environmentally friendly aspect of 3D printing aligns with the growing sustainability concerns of our world.
The versatility of 3D printing is yet another reason why it is gaining widespread popularity. It can produce objects of varying complexity and materials ranging from plastics to metals, ceramics, and even living tissue. This opens up opportunities for applications in industries such as healthcare, aerospace, automotive, fashion, and art.
3D printing also enables a more decentralized approach to manufacturing. With 3D printers becoming more affordable and accessible, individuals and small businesses can now produce products locally, reducing the need for large manufacturing plants and global supply chains.
As technology continues to advance, we can expect even more exciting developments in the field of 3D printing. From advancements in materials and printing techniques to the integration of artificial intelligence and automation, the future of 3D printing holds limitless possibilities.
Getting Started with 3D Printing
If you’re eager to dive into the world of 3D printing, here are some essential steps to help you get started:
1. Research: Begin by familiarizing yourself with the basics of 3D printing. Learn about the different types of printers, materials, and printing processes available. Explore online communities, forums, and tutorials to gain insights from experienced users.
2. Set a Budget: Determine your budget for purchasing a 3D printer. Price ranges vary significantly, so it’s important to find a printer that suits your needs and financial capabilities.
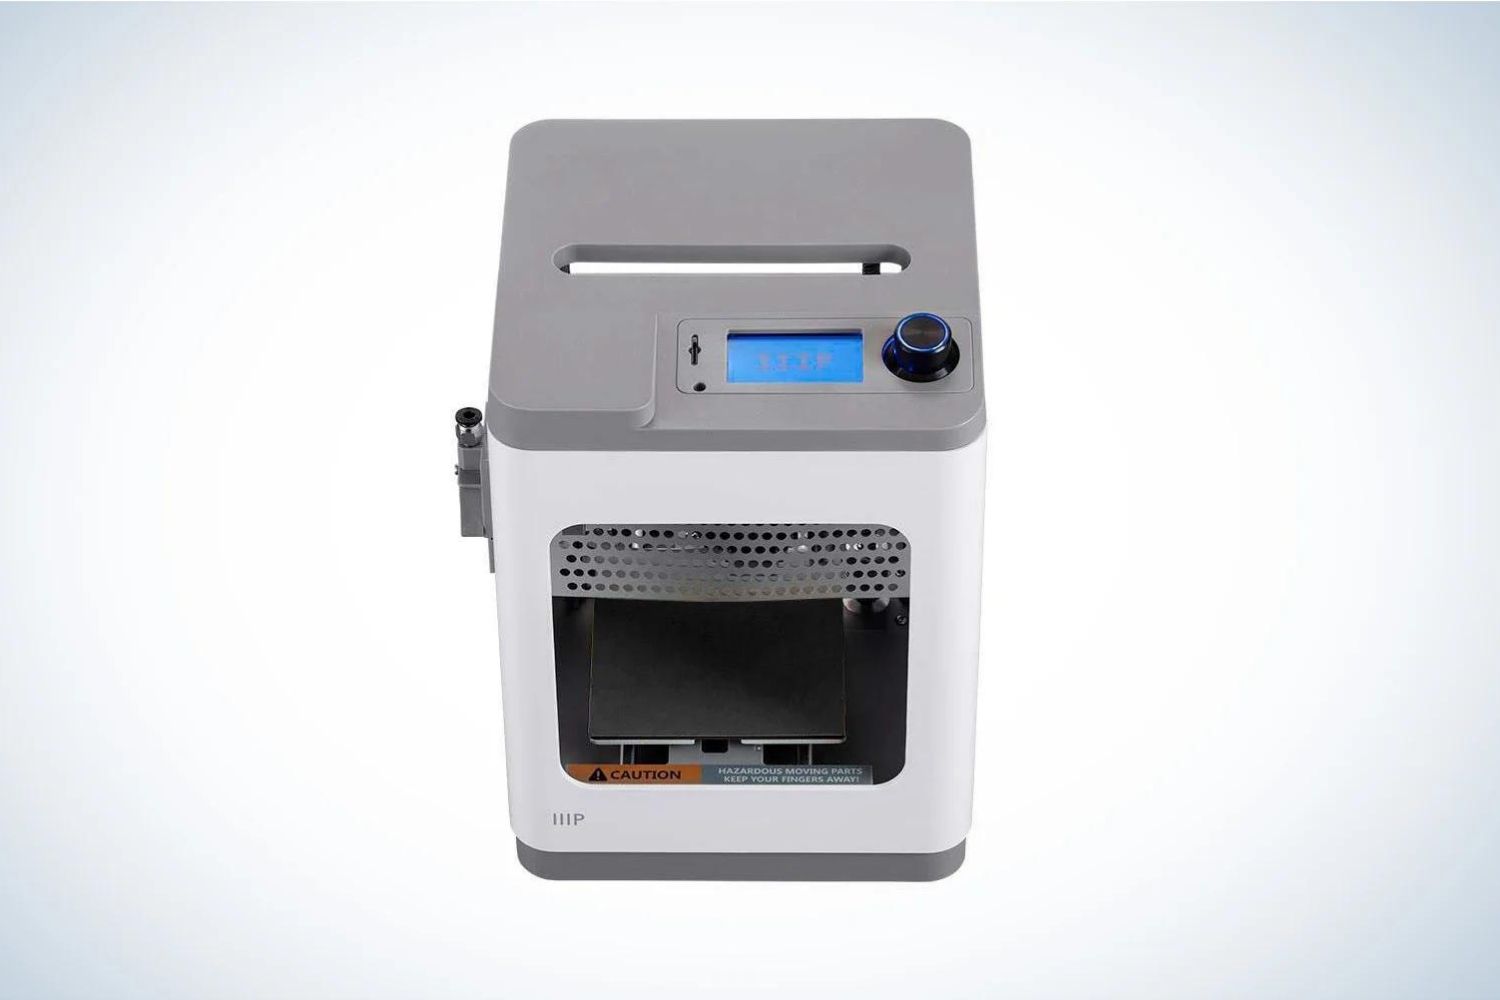
3. Choose a Printer: Consider factors such as print quality, build volume, printing speed, and ease of use when selecting a 3D printer. There are various options available in the market, ranging from consumer-grade to professional-grade printers.
4. Learn 3D Design: Familiarize yourself with 3D modeling software such as Tinkercad, Fusion 360, or SketchUp. These tools allow you to create or modify 3D models that can be printed. Online tutorials and courses can help you develop your design skills.
5. Find 3D Models: If you’re not comfortable creating your own designs, there are numerous online platforms like Thingiverse and MyMiniFactory where you can download ready-to-print 3D models. These platforms offer a wide range of objects across various categories.
6. Prepare Files for Printing: Once you have a 3D model, you’ll need to prepare it for printing. This involves tasks such as scaling, support generation, and slicing. Slicing software like PrusaSlicer or Ultimaker Cura translate your 3D model into instructions that the printer can understand.
7. Choose the Right Material: Select the appropriate material for your project. Common options include various types of plastics, metals, wood filaments, and flexible materials. Consider the properties, strength, and cost of the material to ensure that it suits your desired application.
8. Calibrate Your Printer: Accurate calibration is critical for successful 3D printing. Follow the manufacturer’s instructions to level the print bed, calibrate the extruder, and fine-tune other printer settings. Proper calibration ensures optimal print quality and reduces the risk of failed prints.
9. Start Printing: Load the prepared file onto your printer and start the printing process. Pay attention to the printer’s temperature settings, print speed, and layer height to achieve the desired results. Don’t forget to monitor the progress periodically and address any issues that arise.
10. Learn from Experience: Don’t be discouraged by initial challenges or failed prints. Learning from your mistakes is part of the process. Experiment with different settings, materials, and designs to refine your skills and achieve better results over time.
By following these steps and continuously expanding your knowledge, you’ll become more proficient in the art of 3D printing. Remember, practice and creativity will elevate your abilities, allowing you to bring your ideas to life in three dimensions.
Choosing the Right 3D Printer
With a wide range of 3D printers available in the market, finding the right one for your needs can be a daunting task. Here are key factors to consider when making your selection:
1. Print Technology: Different 3D printers use different print technologies, such as Fused Deposition Modeling (FDM), Stereolithography (SLA), or Selective Laser Sintering (SLS). Research and understand the strengths and limitations of each technology to ensure it aligns with your application requirements.
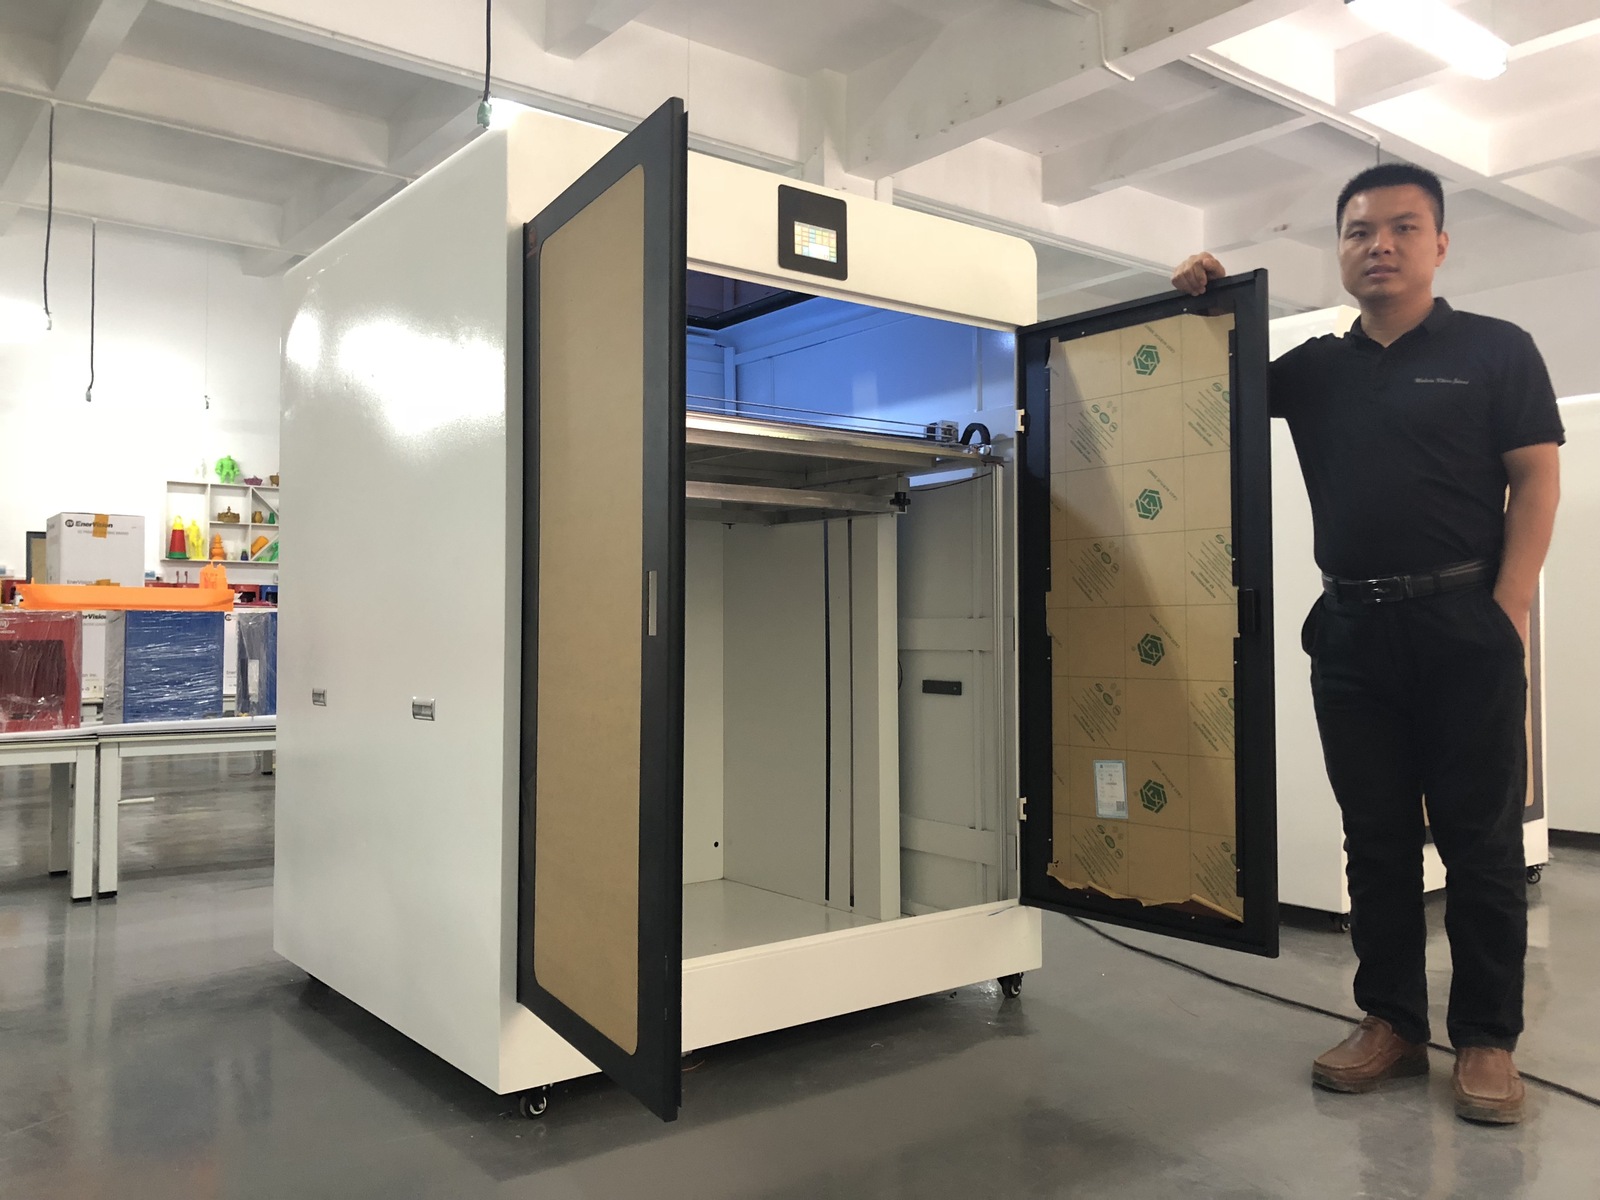
2. Build Volume: The build volume refers to the maximum size of the object you can print. Consider the types of projects you plan to undertake and choose a printer with an appropriate build volume that can accommodate your desired object sizes.
3. Print Quality: Print resolution determines the level of detail and smoothness of the prints. Higher resolution results in finer details, but it may also increase printing time. Assess your priorities between speed and print quality to make an informed decision.
4. Printing Materials: Check the compatibility of the printer with the materials you intend to use. Not all printers can handle a wide range of materials. Consider the availability and cost of the materials you plan to use for your prints.
5. Ease of Use: Consider the user interface and ease of operation of the printer. A user-friendly interface, intuitive controls, and clear instructions can make the printing process smoother, especially for beginners.
6. Connectivity and Software: Evaluate the connectivity options and the type of software provided with the printer. Look for features such as Wi-Fi connectivity, USB ports, or an SD card slot for convenient file transfer. Software tools play a crucial role in preparing your models and controlling the printing process.
7. Support and Community: Research the reputation of the printer manufacturer and make sure they offer reliable customer support. Joining online communities and forums related to the specific printer model can provide valuable insights, troubleshooting advice, and tips from experienced users.
8. Price: Determine your budget and find a printer that offers the best value for money. While it may be tempting to opt for cheaper options, consider the long-term costs, including maintenance, replacement parts availability, and ongoing material expenses.
9. Reviews and Recommendations: Read reviews and seek recommendations from reliable sources to gain insights into the performance and reliability of the printer models you are considering. Pay attention to feedback regarding build quality, print consistency, and customer satisfaction.
By carefully evaluating these factors, you can choose a 3D printer that suits your specific needs and helps you achieve your desired printing goals. Take your time, do thorough research, and consider your priorities to make an informed decision that will set you on the path to successful 3D printing adventures.
Understanding 3D Models and File Formats
Before diving into 3D printing, it’s crucial to understand the basics of 3D models and file formats. A 3D model is a digital representation of a three-dimensional object or shape. It serves as the blueprint for the physical object you want to create using a 3D printer.
There are several file formats commonly used for 3D printing. Each format stores information about the geometry, surface textures, and colors of the model. Here are a few popular formats:
1. STL (Standard Tessellation Language): STL is the most widely used file format in 3D printing. It represents the surface geometry of an object using a collection of triangles. This format is supported by nearly all 3D printers and slicing software, making it a universal choice for printing.
2. OBJ (Wavefront Object): OBJ files store not only the geometry but also additional information, such as material properties and texture coordinates. Although OBJ files are commonly used in computer graphics and 3D modeling software, not all 3D printers support this format natively.
3. AMF (Additive Manufacturing File Format): AMF is a newer file format specifically designed for 3D printing. It can store more complex geometries, colors, materials, and multiple objects within a single file. AMF files provide increased flexibility and support advanced features, but not all printers and software fully support this format yet.
4. 3MF (3D Manufacturing Format): 3MF is an emerging file format that aims to address some of the limitations of other formats. It supports advanced features like color, textures, multiple materials, and slicing information. While it offers more capabilities, not all 3D printers and software fully support 3MF files.
5. Other Formats: There are numerous other file formats, such as PLY, FBX, and STEP, that are used in various industries and applications. These formats may require conversion to a compatible format supported by your 3D printer and slicing software.
When working with 3D models, it’s important to ensure the model is properly optimized and error-free. This includes checking for manifold geometry, watertightness, and correct scale. Failing to address these issues may result in printing errors or unexpected results.
To prepare your 3D models for printing, you will need software that can manipulate, repair, and optimize the models as needed. Popular options include Autodesk Meshmixer, Blender, and MeshLab. These tools allow you to make adjustments, add supports, hollow out models, and perform other necessary modifications before printing.
Remember to always check the compatibility of your chosen file format with your 3D printer and slicing software. Understanding the intricacies of 3D models and file formats will allow you to effectively prepare and optimize your models for successful 3D printing.
Software Tools for 3D Printing
When it comes to 3D printing, having the right software tools is essential for creating and preparing your 3D models. These tools enable you to manipulate, optimize, and slice your models, ensuring successful prints. Here are some software tools commonly used in the world of 3D printing:
1. 3D Modeling Software: To create or modify 3D models, you’ll need dedicated 3D modeling software. Popular options include Autodesk Fusion 360, Tinkercad, SketchUp, and Blender. These software tools offer a range of features and complexity levels, catering to both beginners and experienced users.
2. Slicing Software: Slicing software takes your 3D model and generates the instructions necessary for the 3D printer to create the object layer by layer. Some popular slicing software options include Ultimaker Cura, PrusaSlicer, and Simplify3D. These tools allow you to adjust print settings, add supports, optimize print time, and preview the sliced model before printing.
3. Mesh Repair and Optimization: It’s important to ensure that your 3D models are free of errors and optimized for printing. Mesh repair and optimization software like MeshLab and Netfabb can help identify and fix common issues, such as non-manifold geometry, overlapping faces, and holes in the mesh.
4. Support Generation: When printing complex or overhanging objects, support structures are often required to provide stability during the printing process. Software tools like Ultimaker Cura and PrusaSlicer can automatically generate support structures based on customizable parameters, ensuring successful prints with minimal post-processing.
5. CAD Software: Computer-Aided Design (CAD) software is commonly used in professional settings to create precise and detailed 3D models. Programs like Autodesk AutoCAD and SolidWorks offer advanced design capabilities, allowing for precise tolerances, mechanical assemblies, and complex geometries.
6. File Repair and Conversion: Occasionally, you may encounter issues with your 3D model file formats or need to convert between different formats. Software tools like Autodesk Meshmixer and 3D Builder can repair and perform file format conversions, ensuring compatibility with your printer and other software.
7. Firmware and Printer Management: Some 3D printers may require firmware updates and specific software tools to manage printer settings and parameters. Manufacturers often provide proprietary software for their printers, allowing users to control temperature settings, monitor print progress, and manage printer profiles.
8. Online Platforms and Communities: Online platforms like Thingiverse, MyMiniFactory, and Cults provide a vast library of ready-to-print 3D models contributed by users worldwide. These platforms also allow for community engagement, sharing of ideas, and collaboration within the 3D printing community.
It’s worth mentioning that the specific software tools you choose will depend on your printing needs, level of expertise, and the type of 3D printer you use. Consider experimenting with different software options to find the ones that best fit your workflow and deliver the desired results for your 3D prints.
Preparing Your 3D Models for Printing
Properly preparing your 3D models is crucial to ensure successful and high-quality prints. Before sending your models to the printer, there are several steps you should follow:
1. Scale and Orientation: Adjust the scale of your model to the desired size for printing. Ensure that the dimensions are accurate and suitable for your intended use. Additionally, orientate your model in the optimal position to minimize overhangs and ensure better adhesion to the print bed.
2. Check for Errors: Thoroughly inspect your 3D model for any errors or issues before printing. Look for non-manifold geometry, intersecting faces, or any missing details. Use software tools like MeshLab or Netfabb to repair these errors and ensure the model is printable.
3. Generate Supports: If your model has complex overhangs or unsupported regions, consider generating support structures using slicing software such as Ultimaker Cura or PrusaSlicer. Supports provide stability during the printing process and are removable after printing is complete.
4. Hollowing Out Models: For large or solid models that consume a significant amount of filament or take a long time to print, consider hollowing out the interior using software tools like Meshmixer. This reduces material usage and printing time while maintaining the external shape and structure of the model.
5. Set Print Parameters: Configure the print settings in your slicing software, including layer height, print speed, temperature, and infill density. These settings affect print quality, strength, and printing time. Experiment and optimize these parameters based on your desired outcome and the capabilities of your printer.
6. Check for Supports and Overhangs: Review your model in the sliced preview provided by your slicing software. Make sure that the generated supports are correctly placed and that there are no unsupported overhangs that may cause print failure or poor quality. Adjust support settings as required.
7. Save Sliced File: Once your model is sliced and the settings are finalized, save the sliced file in the appropriate format supported by your printer, such as G-code. This file contains the information necessary for the printer to create the object layer by layer.
8. Send to Printer: Transfer the sliced file to your 3D printer using the designated method, such as USB or an SD card. Ensure that the printer is properly calibrated, the print bed is level, and the nozzle is clean before starting the print.
9. Monitor and Maintain: While the printing process is in progress, periodically check on the print to ensure it is proceeding smoothly. Address any issues that may arise, such as warping or adhesion problems. Keep the printer in a clean and well-maintained condition to ensure consistent and reliable results.
By following these steps, you’ll be better prepared to achieve successful 3D prints. Remember that each model may require specific considerations, so adapt your preparation process accordingly. With practice and experience, you’ll become more proficient at preparing your 3D models for optimal printing results.
Material Options for 3D Printing
One of the advantages of 3D printing is the range of materials available for creating objects. The choice of material for your 3D prints depends on factors such as the desired functionality, appearance, durability, and cost. Here are some common material options used in 3D printing:
1. PLA (Polylactic Acid): PLA is a widely used thermoplastic material derived from renewable resources such as corn starch or sugarcane. It is known for its ease of use, low warp, and biodegradability. PLA is suitable for a variety of applications, including prototypes, figurines, and educational models. It is available in a wide range of colors and is ideal for beginners due to its forgiving printing properties.
2. ABS (Acrylonitrile Butadiene Styrene): ABS is a versatile and durable thermoplastic that offers higher strength and temperature resistance compared to PLA. It is commonly used for functional parts, automotive components, and household items. ABS can be more challenging to print due to its tendency to warp, so an enclosed printer or a heated print bed is recommended.
3. PETG (Polyethylene Terephthalate Glycol-Modified): PETG combines the properties of both PLA and ABS, offering ease of use, durability, and good impact resistance. It is popular for functional parts, mechanical components, and transparent prints. PETG has low warping tendencies and good layer adhesion, making it a reliable choice for a wide range of applications.
4. Nylon: Nylon is a strong and flexible material that exhibits excellent chemical resistance. It is commonly used in applications that require durability, such as functional prototypes, gears, and mechanical parts. Nylon can be challenging to print due to its high melting temperature and its tendency to absorb moisture, requiring careful drying and printer adjustments.
5. PLA/PHA (Polyhydroxyalkanoate): PLA/PHA is a blend of PLA and a biodegradable copolyester called PHA. It combines the ease of printing and biodegradability of PLA with improved impact resistance and flexibility. PLA/PHA is suitable for a wide range of applications, including engineering prototypes, artistic prints, and functional parts that require some flexibility.
6. Resin: Resin is used in stereolithography (SLA) and digital light processing (DLP) printers. It produces highly detailed and smooth prints with intricate geometries. Resin offers a wide range of properties, including high resolution, strength, flexibility, and transparency. It is commonly used for jewelry, dental models, and highly detailed prototypes. However, resin printing requires specialized equipment and post-processing with UV curing.
7. Metal Filaments: Metal-infused filaments combine metal powders, such as brass, copper, or stainless steel, with a base polymer like PLA or ABS. These filaments allow you to create objects with a metallic appearance and some properties of the respective metal. They are often used for decorative items, jewelry, and artistic prints that require a metallic finish.
8. Wood Filaments: Wood filaments contain a mixture of polymer and finely ground wood fibers. They offer a unique aesthetic, creating prints that resemble wood when sanded and finished. Wood filaments are commonly used in artistic prints, decorative objects, and models that require a natural and organic appearance.
These are just a few examples of the materials available for 3D printing. It’s important to consider the specific properties, printing requirements, and desired outcomes for your project. As 3D printing technology continues to advance, new materials are constantly being developed, broadening the possibilities for creating objects with diverse characteristics and appearances.
Calibrating Your 3D Printer
Calibrating your 3D printer is a crucial step to ensure accurate and reliable prints. Proper calibration helps optimize print quality, improve adhesion, and minimize printing issues. Here are some key calibration steps to consider:
1. Leveling the Print Bed: Leveling the print bed is essential for ensuring consistent and even first layers. Follow your printer’s instructions to adjust the bed’s leveling screws or knobs. Use a piece of paper or a feeler gauge to achieve the optimal distance between the nozzle and the bed. This step is crucial for proper layer adhesion and print quality.
2. Calibrating the Extruder Steps/mm: The extruder motors push filament through the nozzle during printing. Ensuring accurate extrusion is important for maintaining dimensional accuracy. Use calibration prints and software tools to fine-tune your extruder’s steps/mm value, which determines how much filament is extruded with each motor rotation.
3. Setting the Nozzle Temperature: Different materials require different nozzle temperatures for optimal printing. Consult the material manufacturer’s recommendations and adjust the nozzle temperature accordingly. Use a reliable thermometer or thermal camera to verify the actual temperature of the nozzle.
4. Adjusting the Flow Rate: Flow rate, also known as extrusion multiplier, controls the amount of filament that is extruded during printing. Use calibration prints or software tools to adjust the flow rate to achieve accurate and consistent print dimensions. Keep in mind that flow rate can vary depending on the specific material and printer setup.
5. Fine-Tuning Retraction Settings: Retraction is the process of pulling filament back into the nozzle between printed sections or during travel moves. Proper retraction helps reduce stringing, oozing, and other print defects. Experiment with retract settings in your slicing software to find the right balance for your specific printer and filament combination.
6. Testing Print Speeds: Print speeds can significantly impact print quality and performance. Experiment with different print speeds to find a balance between speed and print quality. Consider adjusting speeds for different parts of your model, such as higher speeds for infill and lower speeds for perimeters and fine details.
7. Fine-Tuning Cooling Settings: Cooling settings are critical, especially for models with small details or overhangs. Proper cooling helps solidify layers and improve print quality. Adjust fan speeds, nozzle fan duct position, and other cooling settings to optimize print cooling, ensuring well-defined and stable prints.
8. Checking Belt Tension: Proper belt tension is important for accurate movement of the printer’s components. Over time, belts can loosen or stretch, affecting print precision. Check and adjust the tension of the belts according to the manufacturer’s guidelines to ensure smooth and precise movements during printing.
9. Verifying Print Dimensions: Periodically measure printed parts to ensure dimensional accuracy. Use calipers or other measuring tools to compare the printed object’s dimensions with the design specifications. If necessary, make adjustments to your slicer settings or perform additional calibrations to achieve accurate prints.
10. Documenting Changes and Settings: Keep a record of the changes you make during the calibration process. Documenting important settings and their results allows you to refer back and reproduce successful prints or troubleshoot any issues that may arise in the future.
Regular calibration and maintenance are essential for achieving consistent and high-quality prints. Take the time to fine-tune your printer’s settings and document the changes you make. With proper calibration, you can ensure that your 3D printer is optimized for accurate and reliable printing results.
Printing Your First 3D Object
Printing your first 3D object can be an exciting and rewarding experience. Here’s a step-by-step guide to help you navigate the process:
1. Prepare the 3D Model: Ensure that your 3D model is optimized, error-free, and ready for printing. Follow the steps outlined in the earlier section on preparing 3D models, including scaling, orientation, and checking for errors.
2. Slice the Model: Use slicing software, such as Ultimaker Cura or PrusaSlicer, to convert your 3D model into a format that the printer can understand. Adjust the print settings to suit your preferences and the requirements of the specific object you’re printing.
3. Prepare the Printer: Ensure that your printer is in good working condition and properly calibrated. Check that the print bed is level, the nozzle is clean, and the filament is loaded correctly. Pay attention to any specific recommendations or requirements from the printer manufacturer.
4. Load the Filament: Load the filament of your choice into the printer’s extruder. Follow the manufacturer’s instructions to feed the filament through the guide tube and into the extruder until it reaches the nozzle. Ensure that the filament is securely loaded and properly seated in the extruder drive gear.
5. Start the Print: Transfer the sliced file to your printer using the designated method, such as USB or an SD card. Select the file from the printer’s menu or control panel and start the print. Observe the printer as it starts the printing process to ensure proper adhesion and layer deposition.
6. Monitor the Print: Keep an eye on the printing progress, especially during the initial layers. Ensure that the layers are properly adhering to the print bed and that the extrusion is consistent. Address any issues that may arise, such as bed adhesion problems, filament jams, or other mechanical issues.
7. Allow the Print to Complete: Let the printer continue the print process until it completes all the layers of the object. Avoid interrupting or stopping the print unless absolutely necessary. Be patient, as some prints can take a significant amount of time, depending on the size and complexity of the object.
8. Post-Processing: Once the print is complete, carefully remove the object from the print bed. Use tools like a scraper, spatula, or tweezers to gently detach the object, taking care not to damage the print bed or the object itself. Remove any support structures or rafts that may have been generated during the print.
9. Inspect and Clean the Print: Examine the printed object for any imperfections, such as stringing, rough surfaces, or other defects. Depending on the material used, you may need to perform additional post-processing steps, such as sanding, smoothing, or applying coatings to improve the appearance or functionality of the print.
10. Learn from the Experience: Reflect on the printing process and the outcome of your first print. Take note of any challenges or areas for improvement. Each print is an opportunity to learn, experiment, and refine your skills. Embrace this learning experience to enhance your future prints and discover the full potential of 3D printing.
Printing your first 3D object may require some patience and adjustments, but it’s a stepping stone towards mastering the art of 3D printing. Enjoy the process, learn from each print, and let your creativity soar as you continue to explore the possibilities of this incredible technology.
Troubleshooting and Maintenance Tips
While 3D printing can be a rewarding experience, it’s not uncommon to encounter challenges along the way. To help you troubleshoot and maintain your 3D printer, here are some valuable tips:
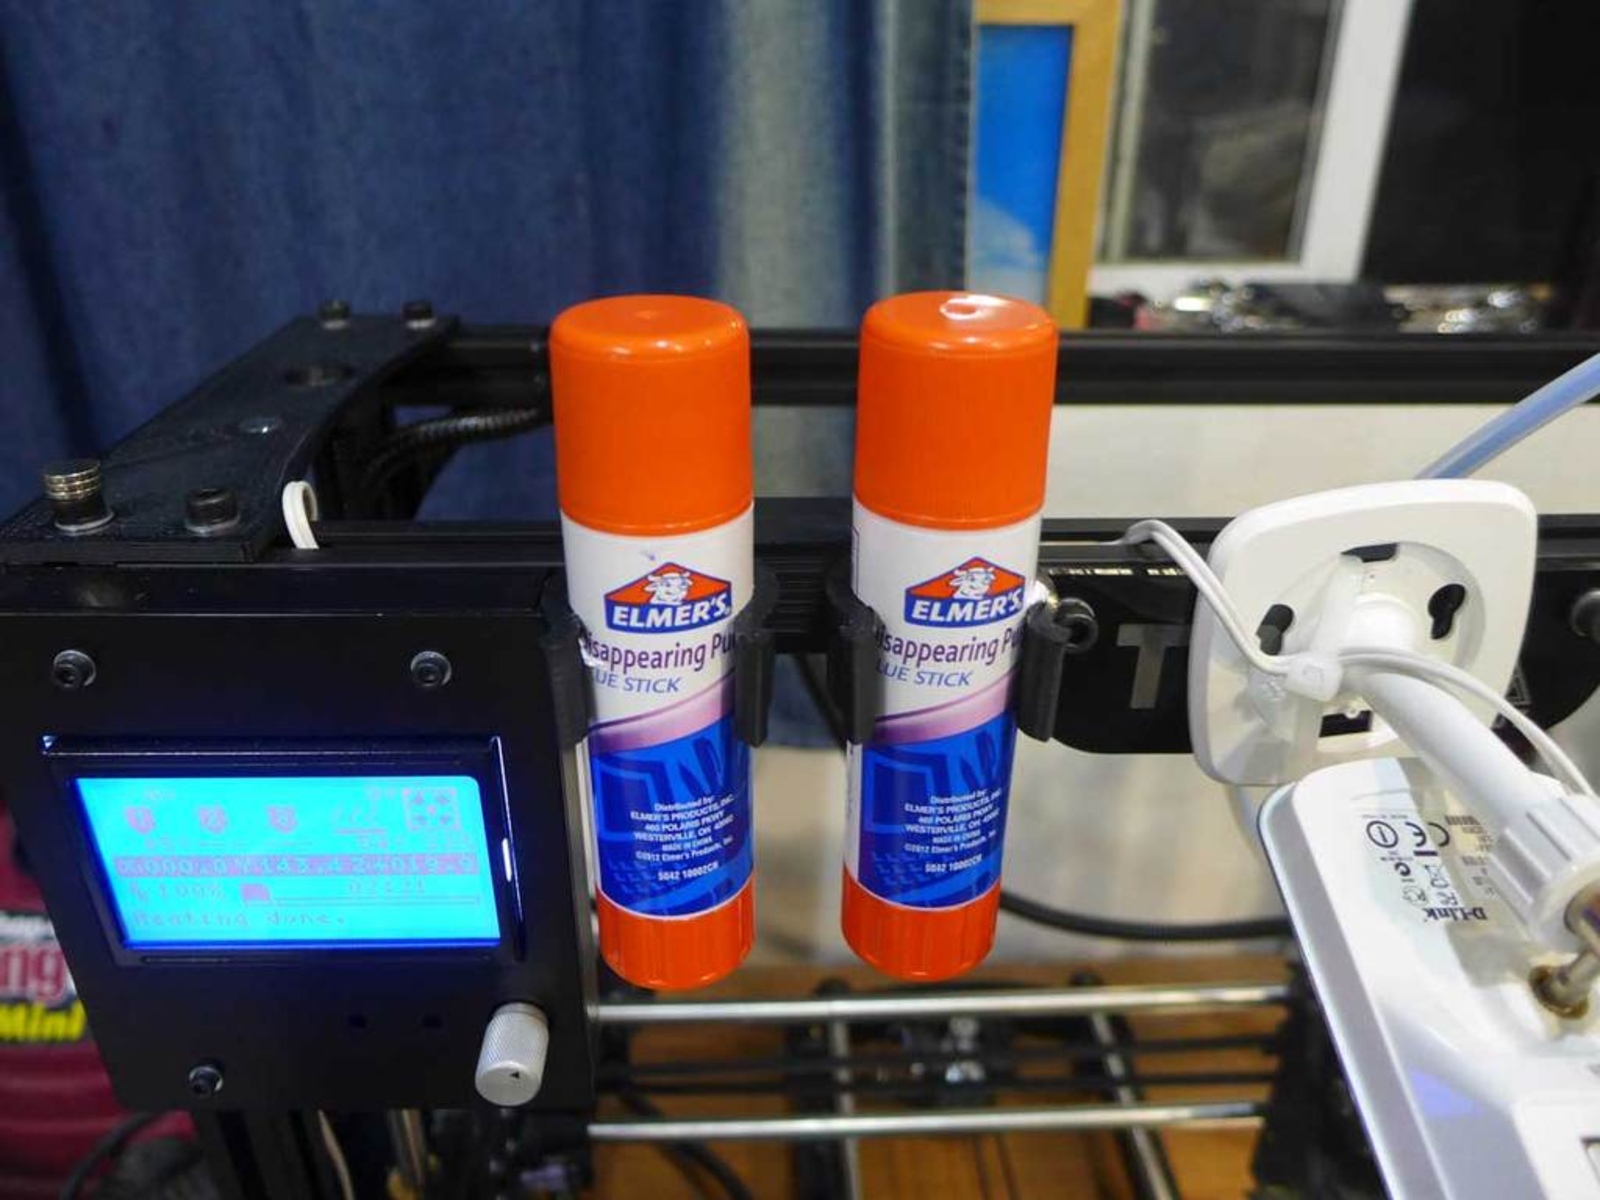
1. Poor Adhesion: If your print has trouble sticking to the print bed, ensure that the bed is properly leveled and clean. Additionally, consider using adhesion aids such as painter’s tape, glue sticks, or specialized adhesives like 3D printing bed adhesive sprays or ABS juice.
2. Filament Jams: If the filament gets stuck or jams within the extruder, check for any obstructions or debris that may be blocking the filament path. Heat up the extruder to the recommended temperature and carefully clear the jam using provided tools or by manually feeding the filament through the extruder.
3. Stringing and Oozing: Stringing occurs when the filament leaves unwanted strands during travel moves. Reduce the nozzle temperature slightly, increase retraction settings, or enable coasting and wipe features in the slicing software to minimize stringing and oozing between print parts.
4. Layer Shifting: If you notice shifting or misalignment of layers during printing, make sure that the belts on your printer are properly tensioned. Loose belts can cause shifts in the print. Check for any mechanical issues or loose components and tighten as necessary.
5. Overheating and Warping: Overheating or warping can occur, especially with materials like ABS. Ensure your printer is in a well-ventilated area and use an enclosure or draft shields to control temperature fluctuations. Adjust the cooling settings in your slicer and consider using a heated bed or an adhesive for better adhesion and heat distribution.
6. Nozzle Clogging: If the nozzle becomes clogged, first check the filament for any debris or dust particles. Heat the nozzle to the recommended temperature and perform a cold pull or use a nozzle cleaning tool to remove any clogs. Regularly clean the nozzle to prevent blockages.
7. Maintenance and Lubrication: Regularly clean and lubricate the moving parts of your printer, such as guide rods, lead screws, and bearings, to ensure smooth and reliable movement. Refer to the manufacturer’s guidelines for specific maintenance procedures and recommended lubricants.
8. Firmware and Software Updates: Stay up to date with firmware updates and software upgrades for your 3D printer. These updates often include bug fixes, performance enhancements, and new features. Follow the manufacturer’s instructions to safely update your printer’s firmware and software.
9. Filament Storage: Properly store your filament to prevent moisture absorption, which can lead to poor print quality and filament degradation. Use airtight containers or desiccant packs to maintain a dry environment for your filaments. Avoid exposure to sunlight or excessive heat that can adversely affect filament properties.
10. Continuous Learning and Troubleshooting: 3D printing is an ongoing learning process. Seek out online resources, forums, and tutorials to expand your knowledge. Pay attention to troubleshooting guides and tips specific to your printer model and material selection. Embrace challenges as opportunities to discover solutions and improve your printing skills.
By following these troubleshooting and maintenance tips, you’ll be well-equipped to handle common issues and maintain your 3D printer in optimal condition. Remember to have patience and persistence, as mastering 3D printing is a journey that rewards continuous learning and exploration.
Exploring Advanced 3D Printing Techniques
As you become more comfortable with 3D printing, you can explore advanced techniques that push the boundaries of what is possible. These techniques allow you to create intricate designs and functional prints with enhanced features. Here are some advanced 3D printing techniques to consider:
1. Multi-Material Printing: Some 3D printers offer the capability to print with multiple materials simultaneously. This allows you to create complex objects with different properties or colors. Multi-material printing opens up possibilities for creating functional prototypes, intricate models, and multi-color designs, enhancing the versatility of your prints.
2. Dual Extrusion: Dual extrusion involves using two separate extruders to simultaneously print with different materials. This technique can be used to create objects with multi-color or multi-material features. It is commonly used for creating functional parts with flexible elements, water-soluble support structures, or objects with multiple color gradients.
3. Variable Layer Height: Variable layer height involves utilizing different layer heights within a single print. You can increase layer height for parts of a print that require less detail, allowing faster print times, and decrease layer height for intricate sections that require higher precision. This technique strikes a balance between print speed and print quality, optimizing both aspects of the print.
4. Gradient and Fade Effects: With advanced slicers and multi-material printers, you can achieve gradient or fade effects in your prints. By transitioning from one color to another gradually, you can create stunning visual effects and unique color patterns. Experiment with different color combinations to add aesthetic appeal to your prints.
5. Embedded Hardware: Advanced 3D printing techniques allow for the integration of electronics and hardware into printed objects. This includes embedding sensors, LEDs, switches, connectors, or even microcontrollers directly into your prints. This technique opens up possibilities for creating functional IoT devices, wearables, or interactive objects.
6. Support Materials: In addition to traditional support structures, some printers and materials enable the use of soluble support materials. These supports can be dissolved in a specific solution, leaving behind clean, intricate prints. Soluble supports simplify the post-processing and enable the printing of complex geometries that would be otherwise challenging to achieve.
7. Bioprinting: Bioprinting is a cutting-edge technique that involves using specialized 3D printers to print living tissues and organs. By layering cells and biocompatible materials, scientists are working towards creating functional organs for transplants, tissue engineering, and drug testing applications. While still in the research stage, bioprinting shows immense potential for revolutionizing the medical field.
8. Composite Materials: Composite materials combine different materials to create prints with unique properties. These materials may include carbon fiber, glass fiber, metal particles, or other reinforcing elements. Composite prints offer enhanced strength, stiffness, and heat resistance, making them suitable for engineering applications, aerospace, and automotive industries.
9. 3D Scanning and Photogrammetry: Combine the power of 3D printing with 3D scanning or photogrammetry techniques to recreate real-world objects in a digital format. By scanning existing objects or environments, you can create accurate 3D models for replication or modification. This technique enables the reverse engineering of parts or the creation of customized designs based on real-world objects.
10. Generative Design: Generative design combines algorithmic programming and 3D printing to create optimized and innovative designs. By inputting specific parameters and constraints, software algorithms generate complex and efficient geometries that are difficult or impossible to create using traditional design methods. Generative design maximizes strength-to-weight ratios and material utilization while pushing the boundaries of conventional design thinking.
By exploring these advanced 3D printing techniques, you can unleash your creativity and discover new possibilities. With continued experimentation and learning, you’ll be able to create intricate prints and functional objects that showcase the true potential of 3D printing technology.
Future of 3D Printing
The future of 3D printing holds immense potential for further advancements and transformative applications. As the technology continues to evolve, here are some exciting developments that we can anticipate:
1. Expansion of Materials: We can expect a broader range of materials suitable for 3D printing. Researchers and manufacturers are actively exploring new materials, including conductive filaments, biocompatible polymers, high-performance alloys, and even graphene. The availability of diverse materials will enable the creation of previously unimaginable objects with enhanced functionality and properties.
2. Faster Printing Speeds: As technology improves, faster printing speeds will become a reality. Innovations in hardware, such as faster solenoids and more efficient print heads, will contribute to accelerated print times, making 3D printing an even more accessible and efficient manufacturing process.
3. Increased Resolution and Precision: The drive for higher resolution and greater precision will continue. Advances in hardware, including improved stepper motors, linear rails, and finer nozzle technologies, will enable more intricate and detailed prints. This increased precision will expand the possibilities for applications such as microfluidics, jewelry, and miniaturized engineering components.
4. Multi-Material Integration: The integration of multiple materials within a single print will become more seamless and versatile. This will enable the creation of complex objects with different material properties in a single printing process. Objects with integrated electronics, embedded sensors, and conductive pathways will become more common, propelling advancements in wearable technology, robotics, and electronic devices.
5. Bioprinting and Organ Manufacturing: Bioprinting will advance further, with scientists aiming to print functional human tissues and organs. This technology has the potential to revolutionize healthcare by enabling personalized organ transplants, drug testing on 3D-printed tissues, and advancements in regenerative medicine. This field will continue to grow, pushing the boundaries of medical science.
6. Sustainable and Recyclable Materials: The focus on sustainability and environmental impact will lead to the development of more sustainable and recyclable materials for 3D printing. Bio-based and eco-friendly materials, as well as recycling programs for post-printing waste, will become more prevalent, addressing concerns of material waste and promoting a circular economy.
7. Additive Manufacturing in Large-Scale Applications: Additive manufacturing techniques will increasingly be adopted in large-scale industries such as automotive, aerospace, construction, and manufacturing. 3D printing’s ability to create complex geometries, decrease material waste, and integrate functionalities directly into components will disrupt traditional manufacturing processes and provide significant cost and time savings.
8. Integration of Artificial Intelligence (AI) and Machine Learning: AI and machine learning algorithms will play a larger role in optimizing printing processes. These technologies will analyze data, predict potential issues, and automatically adjust the printing parameters to achieve optimal results. This level of automation and optimization will enhance print quality, efficiency, and reliability.
9. Decentralized Production and Distributed Manufacturing: The accessibility of 3D printing technology will continue to drive decentralized production. Local manufacturing and on-demand production will reduce reliance on global supply chains. 3D printers will be more commonplace in homes, schools, and small businesses, enabling customized and localized production of goods.
10. Collaboration and Open-Source Innovation: The spirit of collaboration and open-source innovation that has propelled 3D printing will continue to thrive. Online communities, sharing platforms, and collaborative design projects will foster knowledge exchange, idea sharing, and cooperative development. This collaborative approach will accelerate advancements in 3D printing technology and expand its possibilities.
The future of 3D printing is indeed promising, with continuous advancements and exciting possibilities on the horizon. As the technology evolves, it will continue to revolutionize industries, democratize manufacturing, and empower individuals to unleash their creativity.