Introduction
Welcome to the world of Google Wifi, a powerful and easy-to-use mesh networking system that ensures a strong and reliable internet connection throughout your home or office. With Google Wifi, you can bid farewell to dead zones and buffering interruptions, and say hello to seamless streaming, fast downloads, and lag-free online gaming.
Setting up Google Wifi is a breeze, even for those who may not be tech-savvy. In this guide, we will walk you through the step-by-step process of setting up your Google Wifi devices, configuring your network settings, and optimizing your coverage.
Whether you’re a homeowner, a small business owner, or someone who simply wants to enjoy a reliable internet connection, Google Wifi is here to make your life easier. With its sleek design and advanced features, you can wave goodbye to frustrating internet problems and say hello to a fast, reliable, and secure network.
So, if you’re ready to transform your online experience and unleash the full potential of your internet connection, let’s dive into the setup process and get your Google Wifi up and running!
Step 1: Unboxing and connecting the Google Wifi devices
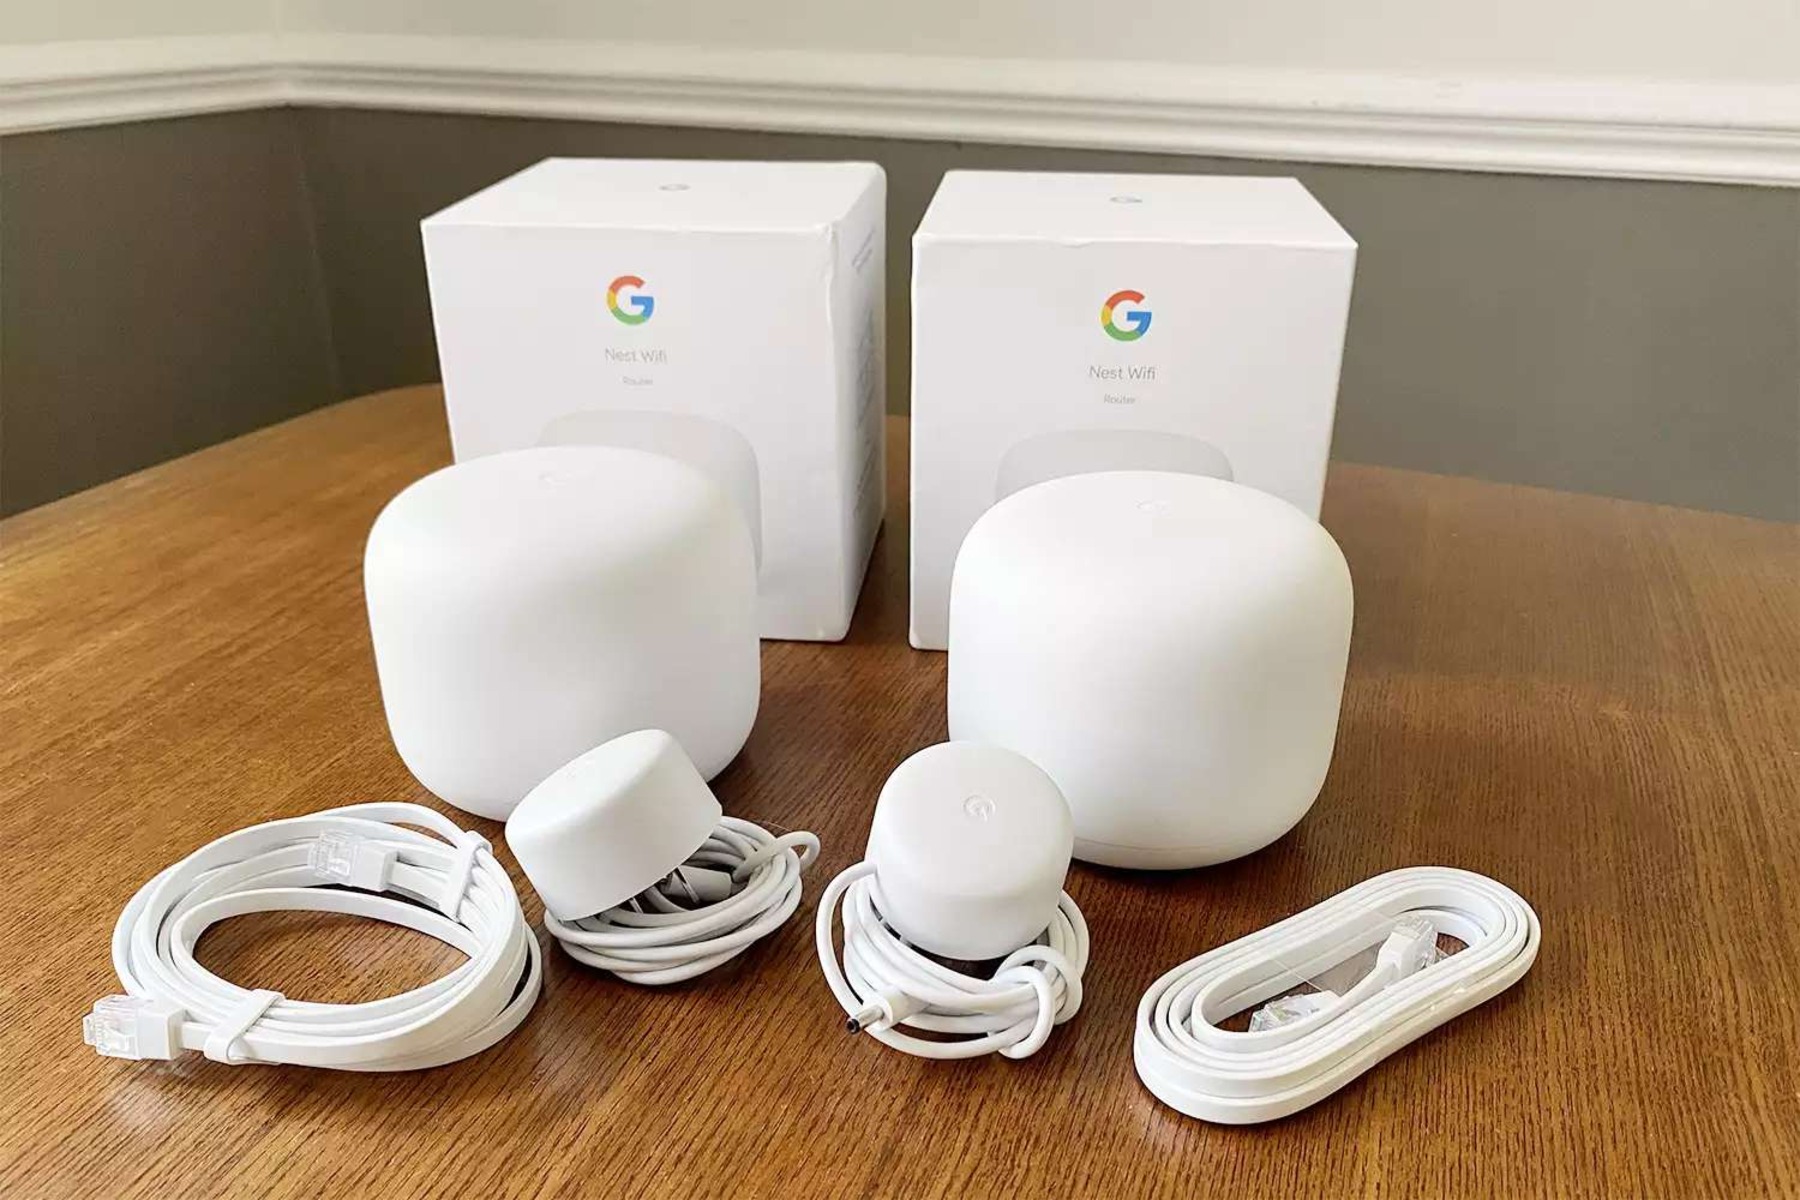
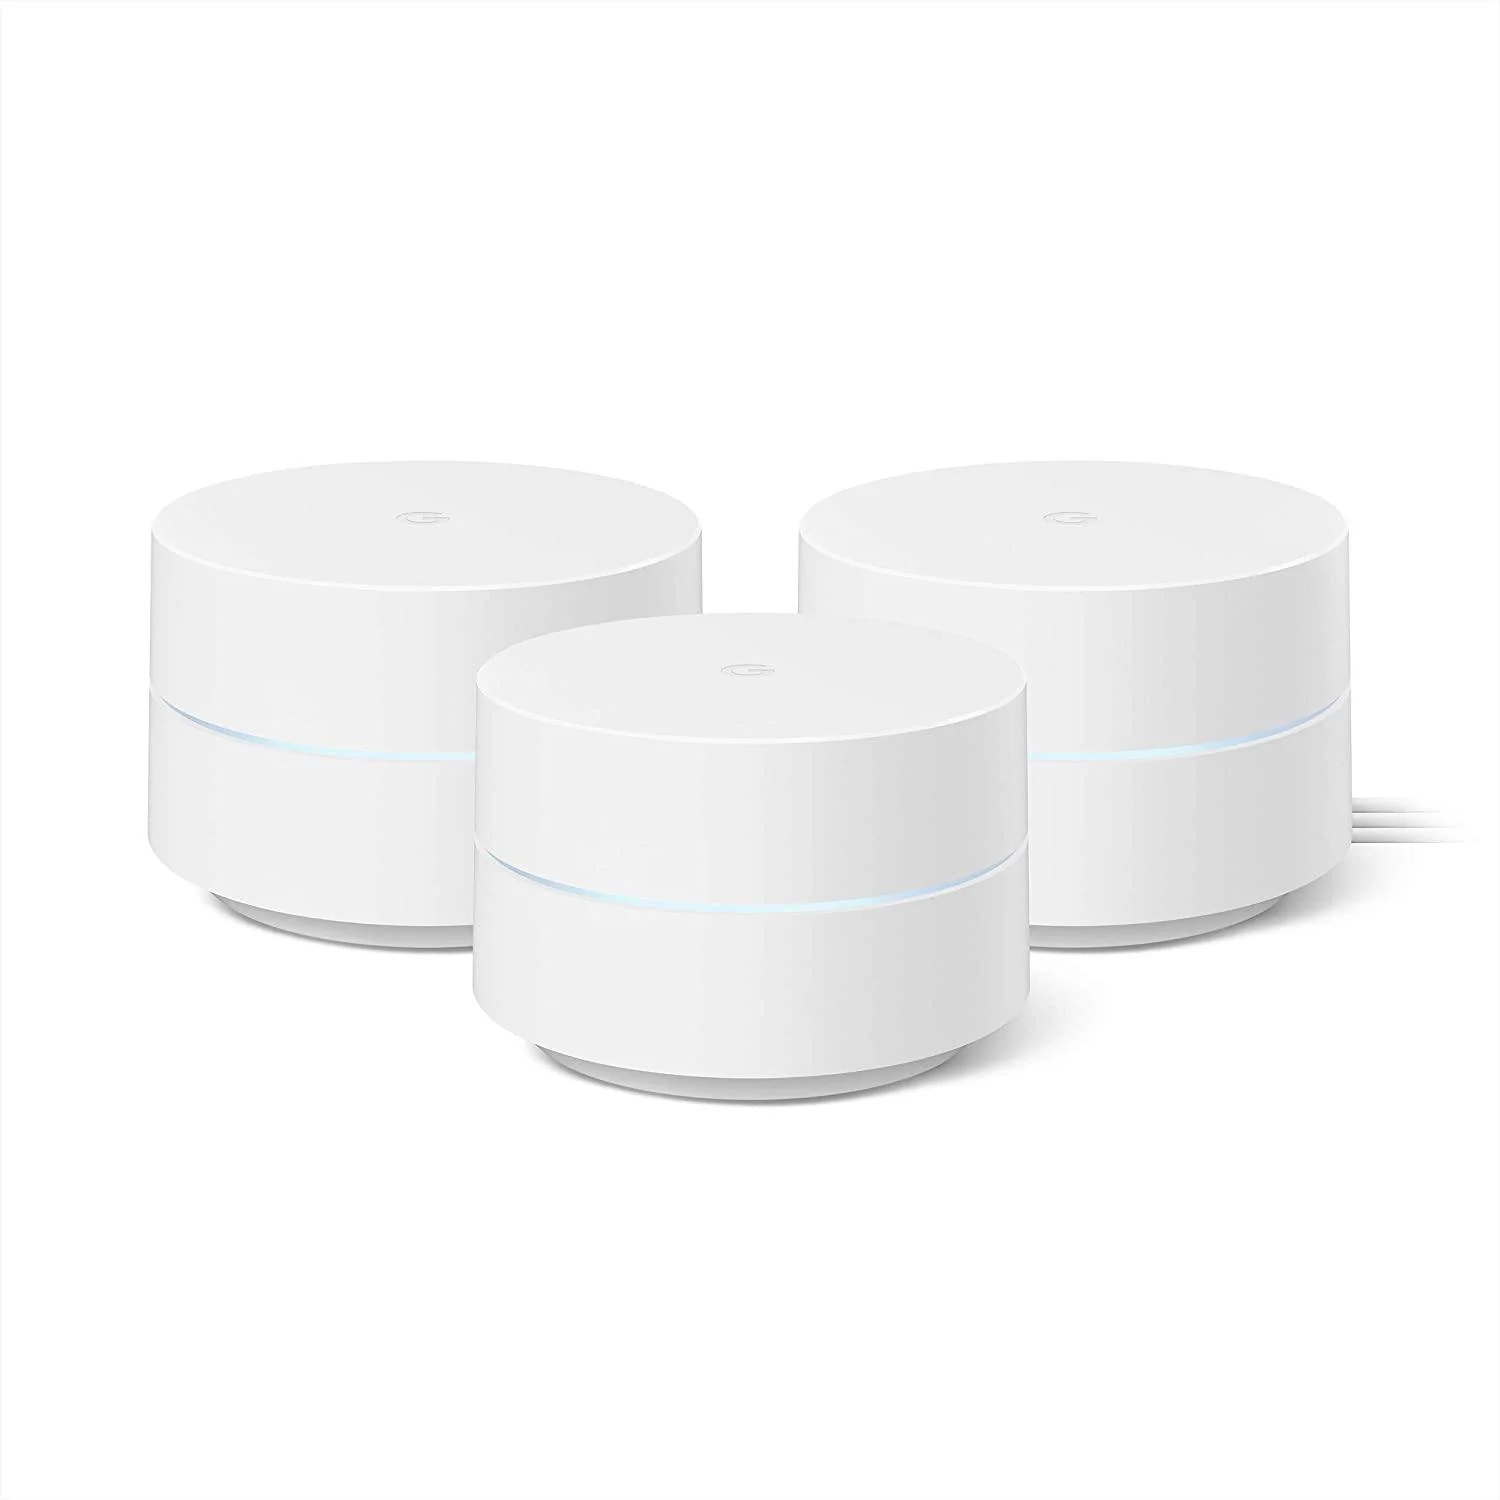
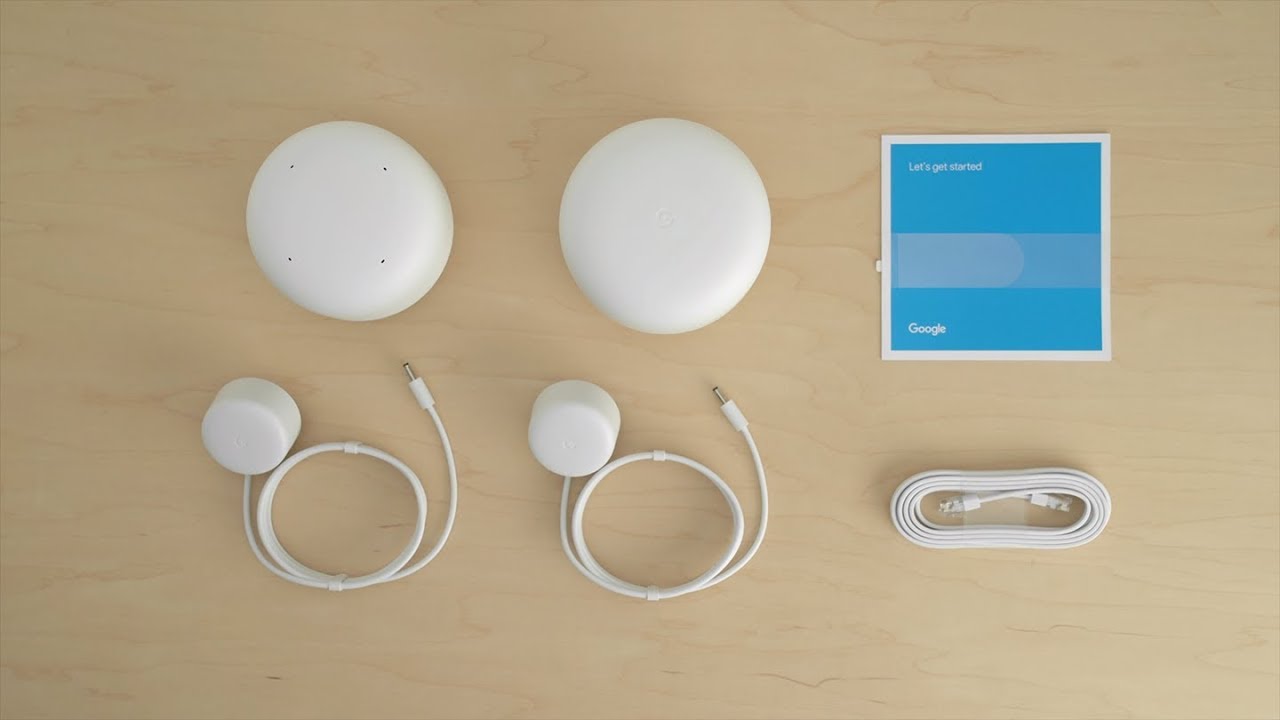
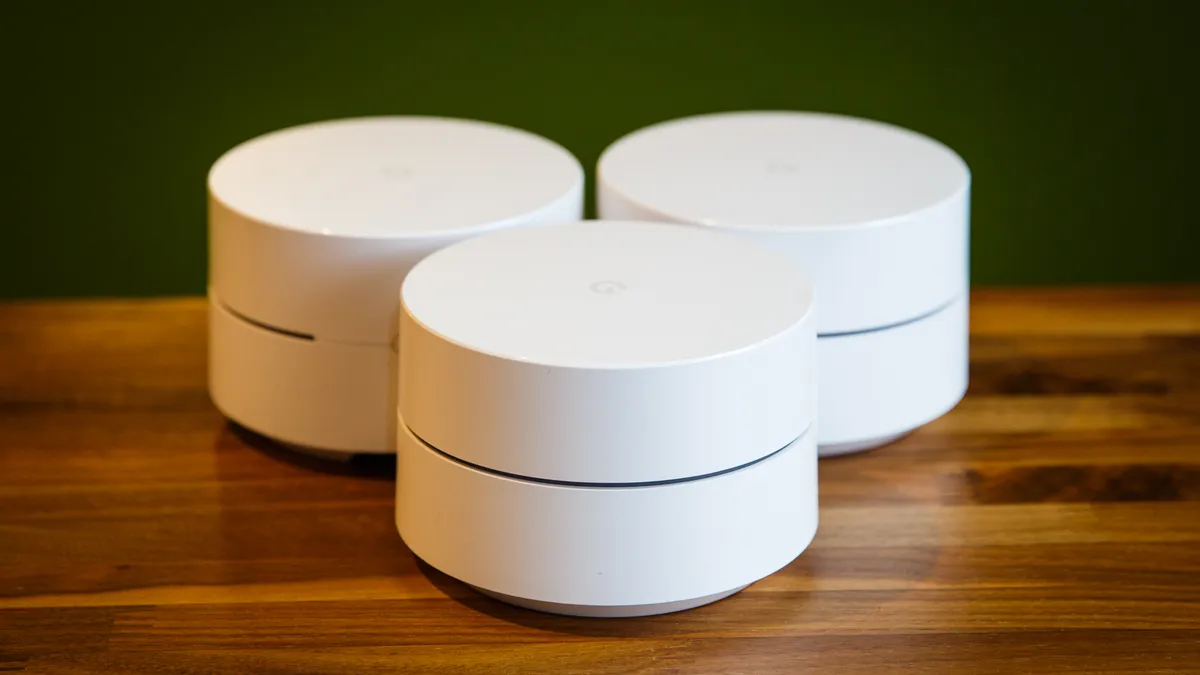
The first step in setting up your Google Wifi is to unbox the devices and connect them to power and your modem. When you open the box, you will find one or more Google Wifi points, depending on the package you purchased. Each Google Wifi point looks like a small white cylinder and has a power port and an Ethernet port.
To begin, locate the modem provided by your internet service provider (ISP) and disconnect any existing router or gateway from it. Then, take one of the Google Wifi points and connect it to your modem using the included Ethernet cable. Plug one end of the cable into the Ethernet port on the modem, and the other end into the Ethernet port on the Google Wifi point.
Next, plug the Google Wifi point into a power outlet using the included power adapter. The LED light on the front of the Google Wifi point will blink blue, indicating that it is powering on and ready to be set up.
If you have purchased additional Google Wifi points for broader coverage, repeat these steps for each additional point. Place the additional Google Wifi points in different areas of your home or office, ensuring that they are within a reasonable distance of each other.
Once all the Google Wifi points are connected to power and your modem, they will automatically communicate with each other and create a mesh network, enabling seamless coverage throughout your space.
Now that your Google Wifi devices are connected and ready, it’s time to move on to the next step: downloading and installing the Google Wifi app.
Step 2: Downloading and installing the Google Wifi app
Once you have successfully connected your Google Wifi devices, it’s time to download and install the Google Wifi app on your smartphone or tablet. The Google Wifi app is available for both Android and iOS devices and provides a simple and intuitive interface to manage and customize your network settings.
To get started, open the app store on your device and search for “Google Wifi.” Look for the official Google Wifi app, which has a white icon with a blue circular pattern. Once you find the app, tap on it to begin the download and installation process.
Once the app is installed, open it and sign in with your Google account. If you don’t have a Google account, you can create one by following the on-screen prompts. Having a Google account not only allows you to manage your Google Wifi network but also gives you access to additional features and services provided by Google.
After signing in, the Google Wifi app will guide you through a series of setup steps, including verifying your internet connection and identifying the Google Wifi devices you have set up. Follow the on-screen instructions carefully, and make sure to grant any necessary permissions that the app requests, such as location access, for optimal functionality.
During the setup process, the app will detect and list the Google Wifi points you have connected. Confirm that the names and locations displayed are correct, and proceed to the next step. This is also a good time to update the firmware of the Google Wifi points if a new version is available.
Once the initial setup is complete, the app will prompt you to create a network name and password for your Google Wifi network. Choose a unique and secure network name (SSID) and a strong password to protect your network from unauthorized access.
With the Google Wifi app installed and set up, you now have complete control over your network’s settings, including managing connected devices, monitoring network activity, and enabling advanced features like parental controls and guest network access.
In the next step, we will cover how to set up the primary Wifi point, which will serve as the main hub for your Google Wifi network.
Step 3: Creating a Google account or signing in
In order to fully utilize the features and benefits of the Google Wifi system, you will need to create a Google account or sign in with an existing account. A Google account not only allows you to manage your Google Wifi network but also grants you access to a wide range of Google services, such as Gmail, Google Drive, and Google Photos.
If you already have a Google account, you can simply sign in to the Google Wifi app using your existing credentials. Open the app and select the “Sign in” option. Enter your email address or phone number associated with your Google account, followed by your password. Once you have entered the correct information, tap “Next” to proceed.
If you don’t have a Google account, you can easily create one by selecting the “Create account” option on the sign-in screen. The app will guide you through the account creation process, which typically includes providing your name, choosing an email address, and creating a password. Make sure to choose a strong password to protect your account.
Additionally, you may be required to provide a phone number for account verification purposes. This step helps ensure the security of your account and allows for account recovery options in case you ever forget your password.
Once you have successfully created a Google account or signed in with your existing account, you will have access to all the features and settings offered by the Google Wifi system.
Having a Google account also enables seamless integration with other Google services. For example, you can easily back up your Google Wifi settings to your Google account, making it convenient to restore your network settings or set up a new Google Wifi device in the future. Additionally, a Google account allows you to access your network remotely and make changes while on the go.
In the next step, we will cover how to set up the primary Google Wifi point and configure your network settings.
Step 4: Setting up the primary Wifi point
Now that you have downloaded the Google Wifi app and signed in to your Google account, it’s time to set up the primary Google Wifi point. The primary point will serve as the main hub for your Google Wifi network and will be responsible for connecting to your modem and managing the network settings.
To begin the setup process, open the Google Wifi app and tap on the “+” icon on the top left corner of the screen. The app will detect the primary Google Wifi point that you have connected to your modem. Confirm the detection and tap “Next” to proceed.
Next, you will be prompted to scan the QR code located on the bottom of your Google Wifi point. This QR code contains the necessary information to securely connect your primary Google Wifi point to the app. Align your smartphone or tablet’s camera with the QR code and wait for the app to scan and connect to the device.
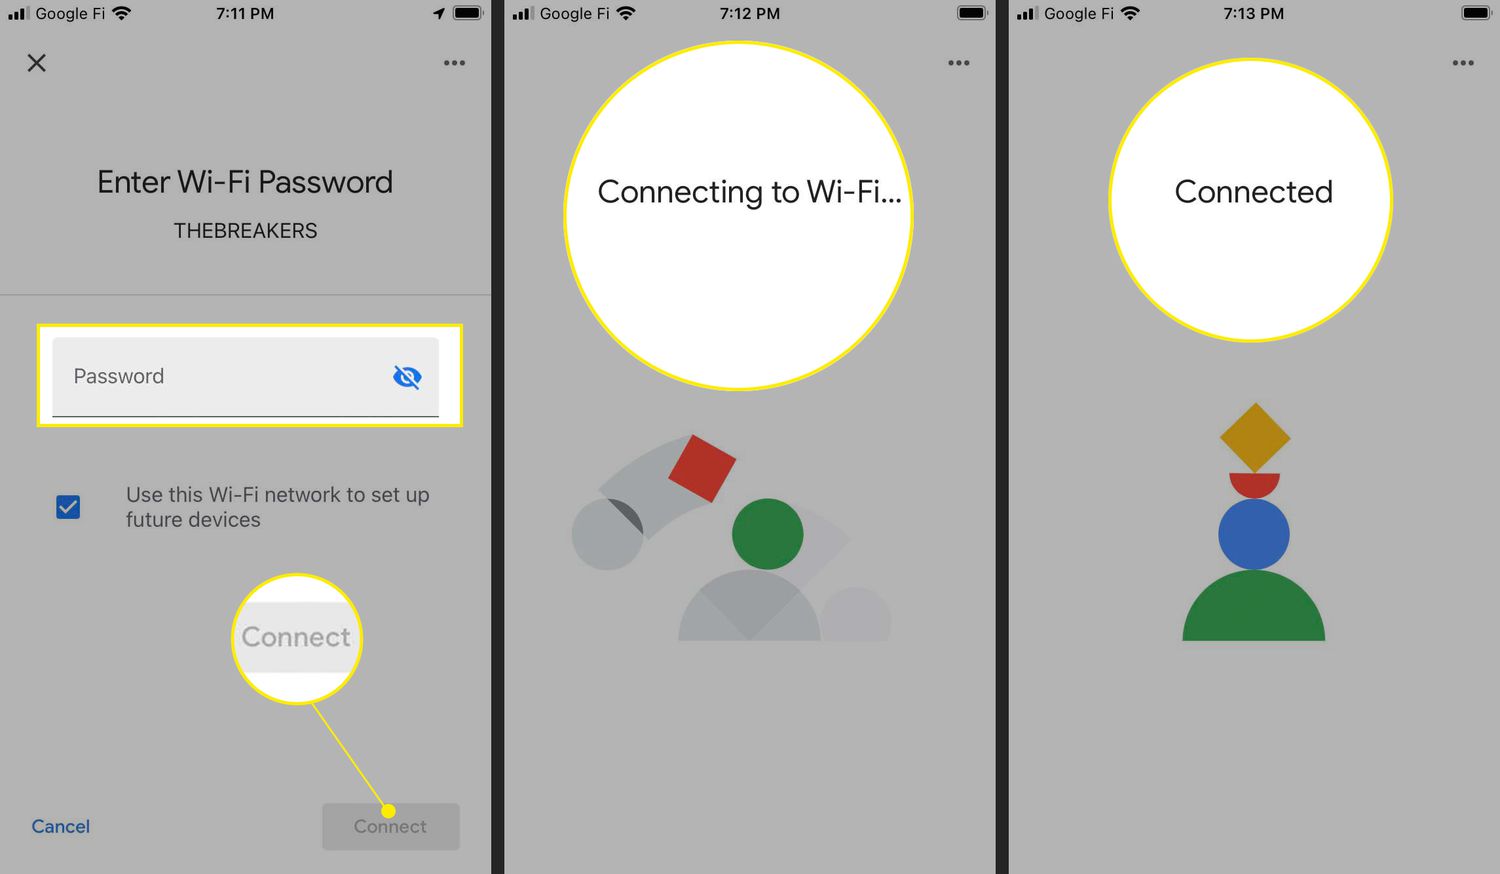
Once the connection is established, the app will guide you through a series of setup steps. These steps include giving your network a name (SSID) and password, choosing the location of your primary Google Wifi point, and configuring additional network settings. Follow the on-screen instructions carefully, and take note of the network name and password as you will need them to connect your devices to the network.
During the setup process, you will also have the option to enable guest network access. Enabling the guest network allows your visitors to connect to the internet without having access to your main network. This provides an added layer of security and privacy for your personal devices.
Once you have completed the setup steps, the Google Wifi app will confirm that the primary Google Wifi point is successfully connected to your network. You can now proceed to connect your devices to the Google Wifi network and enjoy a fast and reliable internet connection throughout your home or office.
In the next step, we will cover how to add additional Google Wifi points to expand the coverage of your network.
Step 5: Connecting additional Wifi points (if applicable)
If you have purchased additional Google Wifi points to expand the coverage of your network, you can easily connect them to your existing Google Wifi network. The additional Google Wifi points work together seamlessly to create a mesh network, ensuring a strong and reliable internet connection throughout your entire space.
To begin, make sure that the additional Google Wifi points are powered on and placed within a reasonable distance of each other. Open the Google Wifi app on your smartphone or tablet and tap on the “+” icon to add a new device.
The app will automatically detect the additional Google Wifi points that are within range. Confirm the detection and proceed to the next step. The app will prompt you to scan the QR code located on the bottom of each additional Google Wifi point in the same way as you did with the primary point.
Once the QR code is scanned and the connection is established, the app will guide you through a series of setup steps for each additional Google Wifi point. These steps include naming the location of each point, configuring network settings, and confirming the connection. Follow the on-screen instructions for each point, and make sure to select the correct location to help with network management.
During the setup process, the app will test the connection between the primary Google Wifi point and the additional points to ensure optimal network performance. Once the setup is complete, the additional Google Wifi points will be seamlessly integrated into your existing network, and your devices will automatically connect to the point with the strongest signal.
With the additional Google Wifi points connected, you can enjoy enhanced coverage and a more reliable connection throughout your entire home or office. Whether you’re in the living room, kitchen, or basement, you can stay connected without any degradation in speed or performance.
In the next step, we will cover how to position the Google Wifi points for optimal coverage and performance.
Step 6: Positioning the Wifi points for optimal coverage
Now that you have all the Google Wifi points set up, it’s important to place them strategically to ensure optimal coverage and performance throughout your home or office. The placement of your Wifi points can greatly impact the strength and reliability of your internet connection, so it’s worth spending some time finding the best locations.
Here are some tips to help you position your Google Wifi points for optimal coverage:
- Place the primary Google Wifi point in a central location: The primary point should be positioned in the middle of your space to ensure maximum coverage. This will help evenly distribute the Wifi signal and minimize dead spots.
- Consider the proximity to devices and walls: Avoid placing the Google Wifi points too close to walls or other objects, as this can interfere with the Wifi signal. Similarly, try not to position them too far away from your devices, as this can result in weaker signal strength.
- Elevate the Wifi points: If possible, place the Google Wifi points at an elevated position, such as on a shelf or mounted on a wall. This can help improve signal range and reduce interference from obstacles on the ground.
- Avoid interference: Keep the Google Wifi points away from other electronic devices that may cause interference, such as cordless phones, microwaves, and baby monitors. Additionally, avoid placing the Wifi points near large metal objects or mirrors, as these can reflect and disrupt the Wifi signal.
- Consider multi-story placements: If you have multiple floors, it’s beneficial to position Wifi points on each floor to ensure consistent coverage throughout your entire home or office. Placing them near stairwells or in central areas can help distribute the signal evenly.
Keep in mind that every space is unique, and the optimal positioning of the Google Wifi points may vary. It’s a good idea to experiment with different placements and use the Google Wifi app’s network check feature to assess signal strength in different areas.
By strategically positioning your Google Wifi points, you can enjoy a strong and reliable internet connection in every corner of your space, ensuring a seamless online experience for all your devices.
In the next step, we will cover how to configure Wifi settings and explore the advanced features offered by the Google Wifi system.
Step 7: Configuring Wifi settings and advanced features
With your Google Wifi points properly positioned, it’s time to configure various Wifi settings and explore the advanced features offered by the Google Wifi system. These settings and features allow you to customize your network according to your preferences and enhance your overall internet experience.
To configure Wifi settings and access advanced features, open the Google Wifi app on your smartphone or tablet. From the main screen, tap on the “Settings” tab to access the different options available.
Here are some key settings and features you can explore in the Google Wifi app:
- Network Settings: Under the “Network & General” section, you can modify your network name (SSID) and password, enable or disable guest network access, and adjust IP settings. Here, you can also set up a custom DNS server or enable IPv6 support if needed.
- Family Wi-Fi: With the “Family Wi-Fi” feature, you can create profiles and manage internet usage for different members of your household. This includes setting bedtime schedules, pausing internet access, and filtering content for specific devices or profiles.
- Device Prioritization: If you have specific devices or applications that require high-speed connectivity, you can use the “Device Prioritization” feature to give them priority access to the network. This ensures that important tasks, such as video conferencing or online gaming, receive the necessary bandwidth.
- Advanced Network Settings: For more advanced users, the Google Wifi app provides options to configure DHCP and IP reservations, port management, and DNS proxy settings. These settings allow you to fine-tune your network according to your specific requirements.
- Network Check: The “Network Check” feature helps you diagnose and troubleshoot any potential issues with your Google Wifi network. It provides insights into signal strength, network speed, and latency to help you identify and address any connectivity problems.
Feel free to explore other settings and features in the Google Wifi app to further customize your network. The app offers a user-friendly interface that allows you to easily navigate and make changes as needed.
By configuring Wifi settings and utilizing advanced features, you can ensure that your Google Wifi network operates optimally, meets your specific requirements, and provides a fast and reliable internet connection for all your connected devices.
In the next step, we will cover how to manage connected devices and prioritize specific devices on your Google Wifi network.
Step 8: Managing connected devices and prioritizing devices
Managing connected devices and prioritizing certain devices on your Google Wifi network allows you to have more control over your internet usage and ensures that important activities receive the necessary bandwidth. The Google Wifi app provides a simple and intuitive interface to manage and prioritize devices on your network.
To manage connected devices, open the Google Wifi app on your smartphone or tablet and select the “Devices” tab. You will see a list of all devices currently connected to your network, along with details such as device names, IP addresses, and signal strengths.
From the device list, you can perform various actions, such as naming or renaming devices, assigning them to specific users, or prioritizing their access to the network. Prioritizing a device gives it temporary access to a larger share of bandwidth, ensuring smoother performance for bandwidth-intensive activities like streaming, gaming, or video conferencing.
To prioritize a device, simply tap on the device from the list and select the “Prioritize” option. You can choose the duration for which the device will be prioritized, ranging from 15 minutes to 4 hours. Once prioritized, the device will receive higher priority access to the network, ensuring a smoother and faster experience for that device.
In addition to device prioritization, the Google Wifi app also allows you to set up profiles and assign devices to specific users or groups. This is especially useful for managing internet usage for family members or employees. With profile-based management, you can set time limits for specific devices or groups, enforce content filters, and even schedule internet pauses during specific times or for specific users.
By effectively managing connected devices and prioritizing specific devices or activities, you can ensure that your Google Wifi network delivers an optimal experience for all users. Whether it’s giving priority bandwidth to a video call, managing internet usage for your children, or optimizing connectivity for your smart home devices, the Google Wifi app offers the flexibility and control you need.
In the next step, we will cover some common troubleshooting tips to help you address any issues that may arise with your Google Wifi network.
Step 9: Troubleshooting common issues
While Google Wifi is designed to provide a seamless and reliable internet experience, you may occasionally encounter some common issues. Fortunately, the Google Wifi app offers helpful troubleshooting tools to help you address these issues and ensure smooth operation of your network.
Here are some common issues and their corresponding troubleshooting steps:
- Slow or intermittent connection: If you are experiencing slow or intermittent internet connection, try power cycling your modem and all Google Wifi points. Simply unplug them from power, wait for a few seconds, and then plug them back in. This simple step can often resolve connectivity issues.
- Network not detected: If the Google Wifi app is unable to detect your network or Google Wifi points, ensure that all devices are powered on and properly connected. Check that the Ethernet cables are securely plugged in and that the LED lights on the Google Wifi points are solid blue. If the issue persists, try restarting your smartphone or tablet and relaunch the Google Wifi app.
- Poor signal strength or dead zones: If you are experiencing weak signal or dead zones in certain areas of your space, try repositioning your Google Wifi points. Experiment with different locations to find the optimal placement that provides the best coverage. You can also use the network check feature within the Google Wifi app to assess the signal strength in different areas and make adjustments accordingly.
- Devices not connecting: If your devices are having trouble connecting to the Google Wifi network, ensure that you are using the correct network name (SSID) and password. Double-check the information in the Google Wifi app to make sure it matches what you entered on your devices. If the issue persists, try forgetting the network on your device and reconnecting to it.
- Firmware updates: Periodically, Google releases firmware updates to improve the performance and security of the Google Wifi system. To ensure that your network is running on the latest firmware version, open the Google Wifi app, go to the “Settings” tab, and select the “Network & General” option. From there, select “Wifi points” and check for updates. If a new firmware version is available, follow the prompts to update your Google Wifi points.
In addition to these troubleshooting steps, Google provides comprehensive support resources on its website. If you are unable to resolve an issue, you can visit the Google Wifi support page for more information or contact Google’s customer support for further assistance.
By following these troubleshooting steps, you can quickly address common issues and ensure the optimal performance and reliability of your Google Wifi network.
In the next step, we will cover the importance of keeping your Google Wifi firmware up to date and how to perform firmware updates.
Step 10: Updating Google Wifi firmware
Regularly updating the firmware of your Google Wifi points is crucial for ensuring optimal performance, security, and access to the latest features and improvements. Google periodically releases firmware updates to address bugs, enhance performance, and provide new functionalities.
To check for and update the firmware of your Google Wifi points, follow these steps:
- Open the Google Wifi app on your smartphone or tablet.
- Tap on the “Settings” tab at the bottom of the screen.
- Select the “Network & General” option.
- Choose “Wifi points” from the list of options.
- Tap on “Check for Wi-Fi point updates”.
- If a new firmware version is available, you will be prompted to update.
- Follow the on-screen prompts to initiate the firmware update.
Note: It is recommended to keep your Google Wifi points connected to the power source during the firmware update process to prevent any interruptions.
The firmware update process may take a few minutes. During the update, the LED light on each Google Wifi point will turn solid magenta. After the update is complete, the LED light will return to its normal state.
It’s essential to keep your Google Wifi firmware up to date as the updates often bring bug fixes, security patches, and performance optimizations to improve the overall functionality of your network. Outdated firmware can leave your network vulnerable to security threats and may result in subpar performance.
By regularly checking for and installing firmware updates, you can ensure that your Google Wifi network continues to deliver the best possible performance and security for your connected devices.
Congratulations! You have successfully completed all the steps to set up, configure, and manage your Google Wifi network. Enjoy a seamless and reliable internet experience throughout your home or office!
Conclusion
Congratulations, you have successfully set up your Google Wifi network and are now ready to enjoy a fast, reliable, and seamless internet experience. By following the steps outlined in this guide, you have configured your Google Wifi points, customized your network settings, and explored advanced features to optimize your connectivity.
Google Wifi provides a powerful mesh networking system that eliminates dead zones and ensures consistent coverage throughout your space. With its user-friendly interface and intuitive app, managing your network, prioritizing devices, and troubleshooting common issues is made simple.
Remember, proper placement of your Google Wifi points is crucial for optimal coverage. By strategically positioning the devices and considering factors such as proximity to walls, interference, and multi-story placements, you can maximize the reach and performance of your network.
Additionally, exploring advanced settings and features within the Google Wifi app allows you to further customize and enhance your network. From managing connected devices and prioritizing specific activities to setting up profiles for family members or employees, you have the flexibility to tailor the network to your specific needs.
Regularly updating the firmware of your Google Wifi points is also important. Firmware updates provide critical bug fixes, security patches, and performance improvements, ensuring that your network operates at its best.
Should you encounter any issues, the Google Wifi app’s troubleshooting tools and the support resources provided by Google can help you resolve them swiftly. From slow connections to device connectivity problems, the app offers guidance and solutions to keep your network running smoothly.
Now that you’re familiar with the setup process, configuration options, and troubleshooting steps, you can confidently manage and optimize your Google Wifi network. Enjoy fast and reliable internet connectivity, seamless streaming, and lag-free online gaming in every corner of your home or office.
Thank you for choosing Google Wifi, and may you have an exceptional online experience!