Introduction
Setting up a network in VMware Workstation is an essential skill for anyone working in virtualized environments or studying network configurations. VMware Workstation allows you to create virtual machines and simulate various networking scenarios, making it an ideal tool for learning and testing network setups.
In this guide, we will walk you through the steps to set up a network in VMware Workstation. We will cover different network configurations, including host-only, NAT, bridged, and custom networks. By the end of this tutorial, you will have a clear understanding of how to create and connect virtual machines to different network types.
Before we begin, make sure you have VMware Workstation installed on your computer. If you haven’t installed it yet, you can download the software from the official VMware website and follow the installation process.
Whether you are a beginner or an experienced user, this guide will provide you with a comprehensive overview of how to set up networks in VMware Workstation. So, let’s dive in and get started with the first step: installing VMware Workstation.
Prerequisites
Before you begin setting up a network in VMware Workstation, make sure you have the following prerequisites in place:
- A computer with sufficient resources: VMware Workstation requires a computer with adequate processing power, memory, and storage to run smoothly. Make sure your computer meets the minimum system requirements specified by VMware.
- VMware Workstation installed: Ensure that you have VMware Workstation installed on your computer. You can download the software from the official VMware website and follow the installation instructions.
- Operating system: Make sure you have a compatible operating system installed on your computer. VMware Workstation supports various Windows, Linux, and macOS versions. Check the VMware documentation for the list of supported operating systems.
- Virtual machine images: Prepare any virtual machine images or ISO files that you plan to use in VMware Workstation. These images will be used to create virtual machines and test network configurations.
- Basic understanding of networking: Having a basic understanding of networking concepts such as IP addresses, subnetting, DHCP, and DNS will be beneficial when setting up networks in VMware Workstation.
By ensuring that you have these prerequisites in place, you will be well-prepared to follow the steps in this guide and successfully set up networks in VMware Workstation. Take the time to gather the necessary resources and familiarize yourself with networking concepts if needed.
Now that you have the prerequisites covered, let’s move on to the first step: installing VMware Workstation.
Step 1: Installing VMware Workstation
The first step in setting up a network in VMware Workstation is to install the software on your computer. Follow the instructions below to complete the installation:
- Download the VMware Workstation installer: Go to the official VMware website and download the VMware Workstation installer appropriate for your operating system.
- Run the installer: Locate the downloaded installer file and double-click on it to launch the installation wizard.
- Accept the license agreement: Read and accept the VMware Workstation End User License Agreement (EULA) to proceed with the installation.
- Choose the installation location: Select the destination folder where you want to install VMware Workstation or keep the default location.
- Choose the user interface (UI) option: VMware Workstation offers two UI options – Enhanced Keyboard Driver and Normal Keyboard Driver. Select the one that suits your preference.
- Enter the license key: If you have a license key, enter it during the installation process. Otherwise, choose the evaluation mode option.
- Configure product updates: Choose whether you want to check for product updates automatically or manually.
- Complete the installation: Review the installation settings and click on the “Install” button to start the installation process. Wait for the installation to complete.
- Restart your computer: Once the installation is finished, restart your computer to ensure that all changes take effect.
- Verify the installation: After restarting, launch VMware Workstation to verify that it has been installed successfully.
Once you have completed these steps, you will have VMware Workstation installed on your computer, ready to be used for network setups. In the next step, we will show you how to create a new virtual machine in VMware Workstation.
Step 2: Creating a new Virtual Machine
After installing VMware Workstation, the next step is to create a new virtual machine. Follow the steps below to create a virtual machine:
- Launch VMware Workstation: Open the VMware Workstation application on your computer.
- Click on “Create a New Virtual Machine”: In the Home tab, click on the “Create a New Virtual Machine” option.
- Choose the installation method: Select the method through which you want to install the operating system on the virtual machine. You can choose to install it from an installation disk, an ISO image, or a network installation.
- Select the Guest Operating System: Choose the operating system you plan to install on the virtual machine. VMware Workstation provides a list of predefined options based on the operating system installation method selected. If your desired operating system is not listed, select “I will install the operating system later”.
- Specify the virtual machine name and location: Enter a name for the virtual machine and choose a location to store the virtual machine files on your computer.
- Configure the hardware settings: Customize the hardware settings of the virtual machine, including the memory allocation, number of processors, virtual hard disk size, and network adapter type. Ensure that you allocate enough resources for an optimal system performance.
- Specify the installation media: If you selected an installation method that requires an installation disk or ISO image, specify the source by browsing your computer or inserting the disk into the drive.
- Check the summary and finish: Review the summary of your virtual machine configuration and click on “Finish” to create the virtual machine.
Once the virtual machine is created, you can proceed with installing the operating system and configuring the network settings within the virtual machine. In the next step, we will show you how to configure the network adapter in VMware Workstation.
Step 3: Configuring the Network Adapter
Configuring the network adapter in VMware Workstation is an important step to enable network connectivity for your virtual machine. Follow the steps below to configure the network adapter:
- Select the virtual machine: In VMware Workstation, locate the virtual machine you created and power it on.
- Go to the “Virtual Machine” menu: Click on the “Virtual Machine” menu option on the top menu bar.
- Select “Network Adapter”: From the drop-down menu, hover over “Network Adapter” and choose the appropriate network adapter type based on your network requirements.
- Choose network connection type: Select the desired network connection type. You can choose between Bridged, NAT, Host-Only, or Custom.
- Configure adapter settings: Depending on the network connection type chosen, configure the adapter settings accordingly. For example, if you choose Bridged, you may need to specify the physical network adapter to bridge the virtual machine to.
- Enable the network adapter: Ensure that the network adapter is enabled by checking the “Connect at power on” option.
- Save the settings: Click on “OK” to save the network adapter settings.
By following these steps, you have successfully configured the network adapter for your virtual machine in VMware Workstation. The network adapter settings, such as the connection type, play a crucial role in determining how your virtual machine will interact with the network. In the next step, we will explore the Virtual Network Editor in VMware Workstation.
Step 4: Virtual Network Editor
The Virtual Network Editor in VMware Workstation allows you to modify and create virtual networks that your virtual machines can connect to. Follow the steps below to access and manage the Virtual Network Editor:
- Launch VMware Workstation: Open VMware Workstation on your computer.
- Go to the “Edit” menu: Click on the “Edit” menu option on the top menu bar.
- Select “Virtual Network Editor”: From the drop-down menu, choose “Virtual Network Editor”.
- Authenticate as an administrator: If prompted, provide administrator credentials to access the Virtual Network Editor. This step may vary depending on your operating system.
- Modify existing networks: In the Virtual Network Editor window, you can modify the settings of existing virtual networks, such as the network name, subnet, and DHCP settings. You can also enable or disable specific virtual networks.
- Create new networks: To create a new virtual network, click on the “Add Network” button. Specify the network name, subnet settings, and DHCP settings as needed.
- Customize advanced network settings: If you require more advanced network configurations, you can access the “Host Virtual Network Mapping” tab in the Virtual Network Editor. This tab allows you to map physical network adapters to virtual networks for specific purposes.
- Save and apply network changes: After making any necessary modifications, click on “Apply” to save and apply the changes to the virtual networks.
- Close the Virtual Network Editor: Click on “OK” and close the Virtual Network Editor window.
The Virtual Network Editor provides you with granular control over the virtual networks in VMware Workstation. By utilizing this tool, you can create and manage virtual networks that suit your desired network configurations and connectivity requirements. In the next step, we will explore the different types of networks you can set up in VMware Workstation.
Step 5: Setting up a Host-Only Network
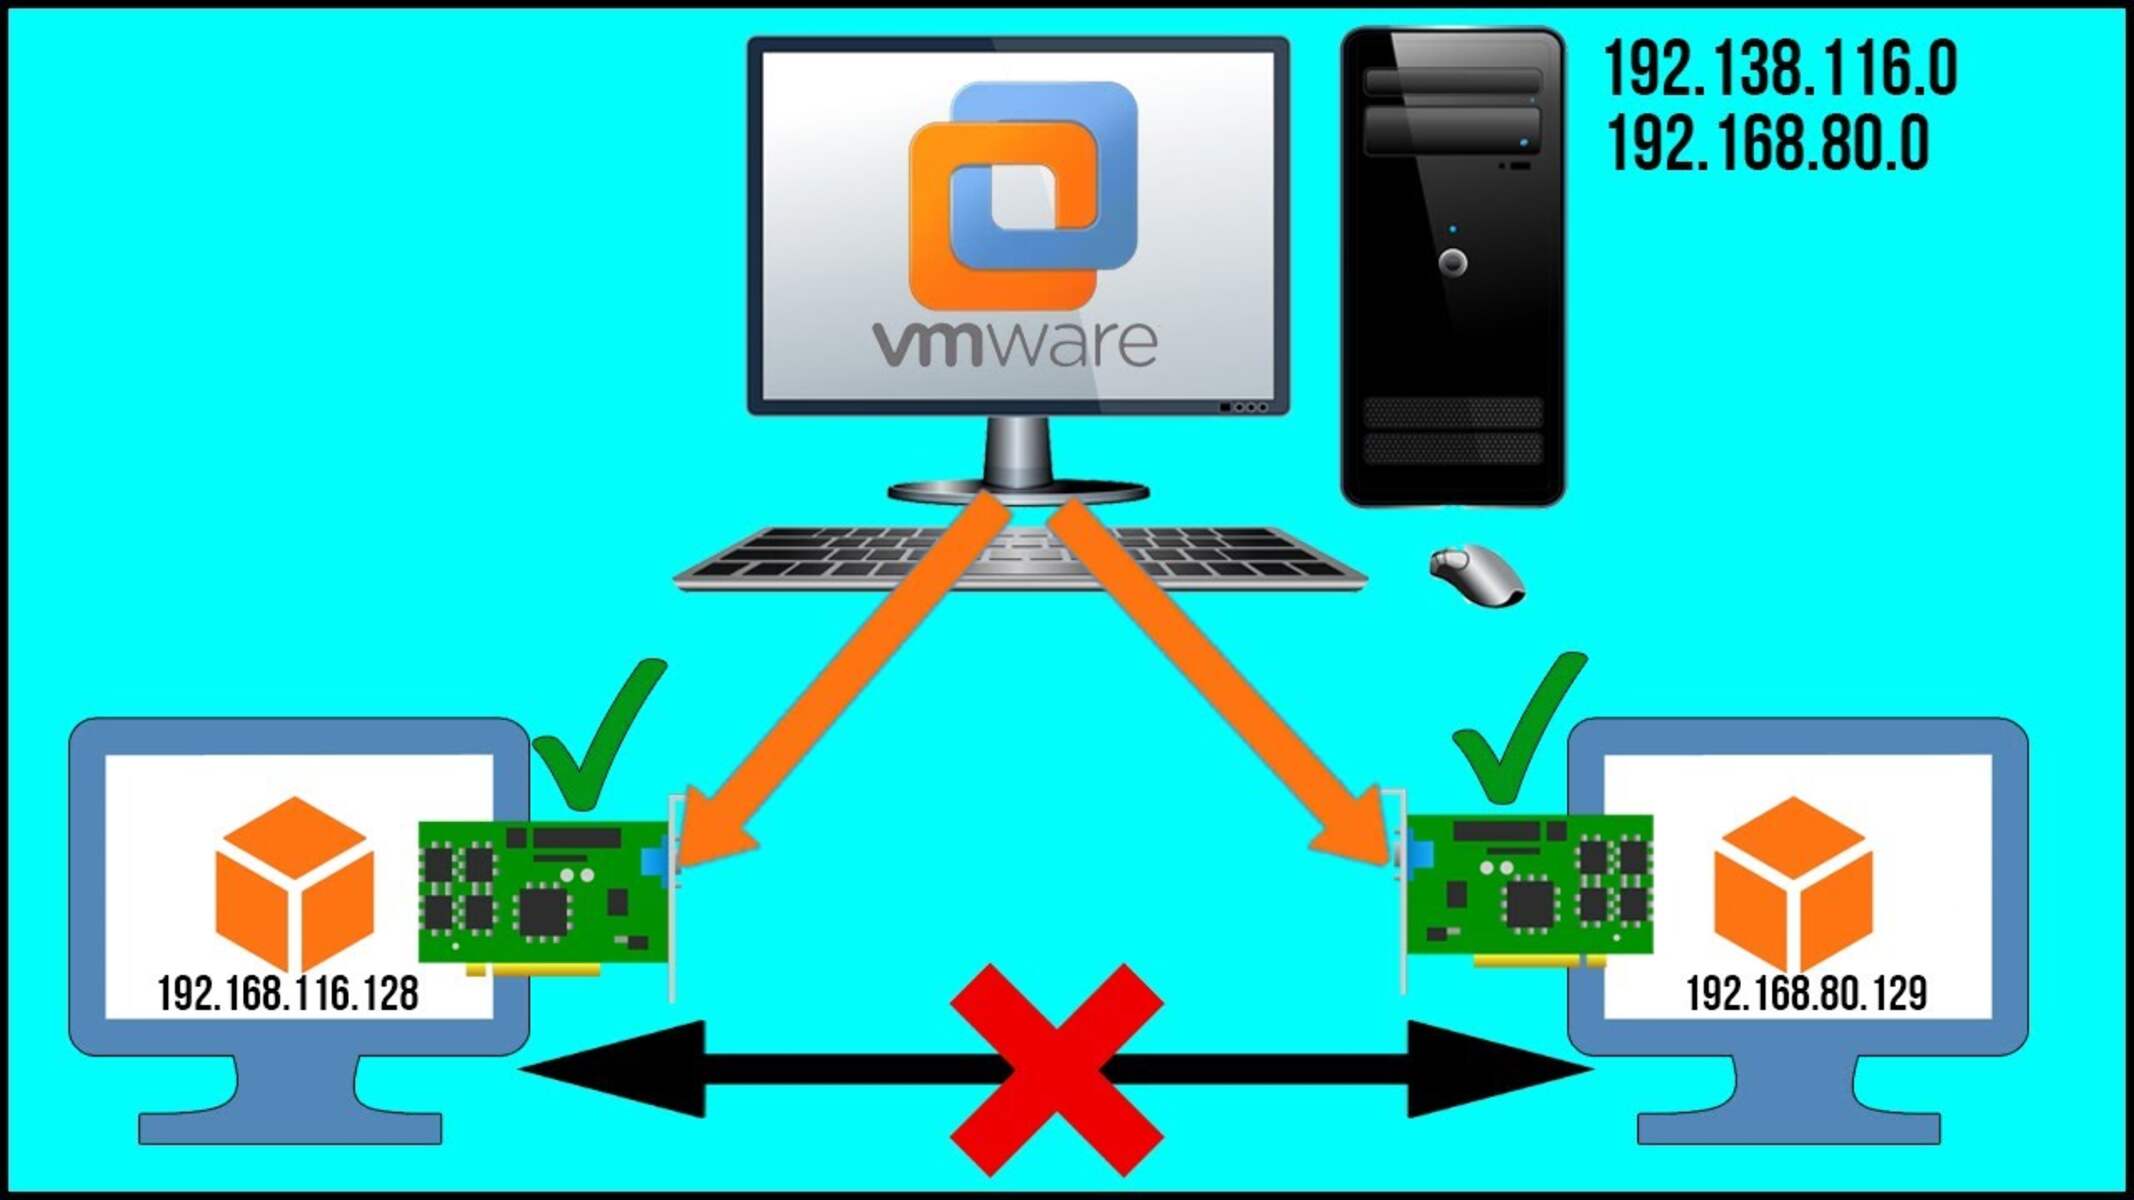
A host-only network in VMware Workstation allows communication between virtual machines and the host computer while isolating them from external networks. Follow the steps below to set up a host-only network:
- Open the Virtual Network Editor: Launch VMware Workstation and go to the “Edit” menu. Select “Virtual Network Editor”.
- Access the host-only network settings: In the Virtual Network Editor window, select the “Host Virtual Network Mapping” tab.
- Create a new host-only network: Click on the “Add Network” button to create a new host-only network.
- Configure the host-only network: Give the network a name and specify the subnet settings.
- Enable DHCP: If you want the virtual machines to obtain IP addresses automatically, enable the DHCP settings for the host-only network.
- Assign the host-only network to the virtual machine: In the virtual machine settings, select the host-only network as the network adapter for the virtual machine.
- Save the network settings: Click on “Apply” in the Virtual Network Editor window to save the host-only network settings.
- Verify network connectivity: Power on the virtual machine and ensure that it is able to communicate with the host and other virtual machines on the same host-only network.
By setting up a host-only network, you can create a private network where your virtual machines can interact with each other and the host computer. This configuration is useful for scenarios where you need to test network services or host local resources within the virtual machines. In the next step, we will explore setting up a NAT network in VMware Workstation.
Step 6: Setting up a NAT Network
A NAT (Network Address Translation) network in VMware Workstation allows virtual machines to have access to external networks through the host computer’s network connection. Follow the steps below to set up a NAT network:
- Open the Virtual Network Editor: Launch VMware Workstation and go to the “Edit” menu. Select “Virtual Network Editor”.
- Access the NAT network settings: In the Virtual Network Editor window, select the “NAT” tab.
- Configure the NAT network: Verify that the NAT network is enabled. You can also customize the network subnet and gateway IP if needed.
- Assign the NAT network to the virtual machine: In the virtual machine settings, select the NAT network as the network adapter for the virtual machine.
- Enable DHCP: By default, the NAT network provides DHCP services to the virtual machines. Ensure that the DHCP settings are enabled in the virtual machine’s network adapter settings.
- Save the network settings: Click on “Apply” in the Virtual Network Editor window to save the NAT network settings.
- Verify network connectivity: Power on the virtual machine and ensure that it can connect to external networks through the NAT network.
Setting up a NAT network allows your virtual machines to access the Internet and communicate with other devices on external networks. This configuration is beneficial when you need to provide internet connectivity to your virtual machines while still maintaining their isolation from the external network. In the next step, we will explore setting up a bridged network in VMware Workstation.
Step 7: Bridged Networking
Bridged networking in VMware Workstation allows virtual machines to connect directly to the physical network, just like any other device on the network. Follow the steps below to set up a bridged network:
- Open the Virtual Network Editor: Launch VMware Workstation and go to the “Edit” menu. Select “Virtual Network Editor”.
- Access the bridged network settings: In the Virtual Network Editor window, select the “Bridged” tab.
- Verify bridged network configuration: Ensure that the bridged network is enabled, and select the appropriate physical network adapter to bridge the virtual machine to.
- Assign the bridged network to the virtual machine: In the virtual machine settings, select the bridged network as the network adapter for the virtual machine.
- Save the network settings: Click on “Apply” in the Virtual Network Editor window to save the bridged network settings.
- Verify network connectivity: Power on the virtual machine and ensure that it has network connectivity and can communicate with other devices on the physical network.
By setting up a bridged network, your virtual machine will be directly connected to the physical network, allowing it to seamlessly communicate with other devices on the network. This configuration is useful when you want your virtual machine to have the same network capabilities as the host computer, such as accessing network resources and services. In the next step, we will explore setting up a custom network in VMware Workstation.
Step 8: Custom Networking
In VMware Workstation, you have the flexibility to set up custom network configurations tailored to your specific requirements. Follow the steps below to set up a custom network:
- Open the Virtual Network Editor: Launch VMware Workstation and go to the “Edit” menu. Select “Virtual Network Editor”.
- Access the custom network settings: In the Virtual Network Editor window, select the “Custom” tab.
- Create a new custom network: Click on the “Add Network” button to create a new custom network.
- Configure the custom network settings: Specify the network name, subnet, gateway IP, and DNS settings for the custom network.
- Assign the custom network to the virtual machine: In the virtual machine settings, select the custom network as the network adapter for the virtual machine.
- Save the network settings: Click on “Apply” in the Virtual Network Editor window to save the custom network settings.
- Verify network connectivity: Power on the virtual machine and ensure that it has network connectivity according to the custom network configuration.
Setting up a custom network allows you to have complete control over the network configuration for your virtual machines. This is especially useful if you have specific network requirements or if you want to mimic a particular network environment for testing or learning purposes. By creating a custom network, you can fine-tune network settings to suit your needs. In the next step, we will explore how to connect virtual machines to the networks you have set up in VMware Workstation.
Step 9: Connecting Virtual Machines to Networks
Once you have set up the desired network configurations in VMware Workstation, the next step is to connect your virtual machines to these networks. Follow the steps below to connect virtual machines to networks:
- Open VMware Workstation: Launch VMware Workstation on your computer.
- Select the virtual machine: Choose the virtual machine you want to connect to a network.
- Go to the virtual machine settings: Click on the “Edit virtual machine settings” option or navigate to the settings of the virtual machine.
- Select the network adapter: Choose the network adapter option in the virtual machine settings.
- Choose the network connection type: Select the desired type of network connection, such as Bridged, NAT, Host-Only, or Custom.
- Configure network adapter settings: Depending on the network connection type, configure additional adapter settings, such as the network adapter name, IP address settings, and DHCP settings.
- Save the settings: Click on “OK” or save the settings to apply the network adapter configuration.
By connecting your virtual machines to the appropriate networks, you enable them to communicate and interact with other devices on the network. This connectivity allows virtual machines to access network resources, services, and the internet based on the network configuration you have chosen. Ensure that the network adapter settings are properly configured in each virtual machine to establish the desired network connectivity.
With this step completed, your virtual machines are now connected to the networks you have set up in VMware Workstation. You can proceed to configure the operating systems within the virtual machines to optimize network settings and ensure seamless communication. Remember to consider security measures and network functionality when connecting virtual machines to networks.
Conclusion
Congratulations! You have successfully learned how to set up a network in VMware Workstation. Throughout this guide, we covered various network configurations, including host-only, NAT, bridged, and custom networks. By following the steps outlined in each section, you now have the knowledge to create and connect virtual machines to these networks.
Setting up a network in VMware Workstation is a valuable skill for anyone working with virtual machines or studying network configurations. It allows you to simulate real-life network scenarios, test network services, and gain hands-on experience in a virtualized environment.
Remember that before setting up any virtual network, it is essential to consider your specific network requirements and the purpose of your virtual machines. By choosing the right network configuration, you can ensure optimal performance, security, and connectivity for your virtual machines.
Whether you need a private host-only network for isolated communication, NAT network for internet connectivity, bridged network for direct access to the physical network, or a custom network with specific settings, VMware Workstation provides the flexibility to cater to your individual needs.
By following the step-by-step instructions in this guide, you have gained the knowledge and confidence to set up networks in VMware Workstation and connect virtual machines to your desired network configurations. Now, you can continue exploring the vast possibilities of virtualization and network configurations within VMware Workstation.
Remember to regularly practice and experiment with different network setups to further enhance your skills and understanding. VMware Workstation offers a powerful platform for learning and testing network configurations, so take advantage of it to deepen your knowledge in networking and virtualization.
Thank you for following along with this guide. We hope it has been informative and helpful in navigating the world of network configuration in VMware Workstation. Happy networking!


