Introduction
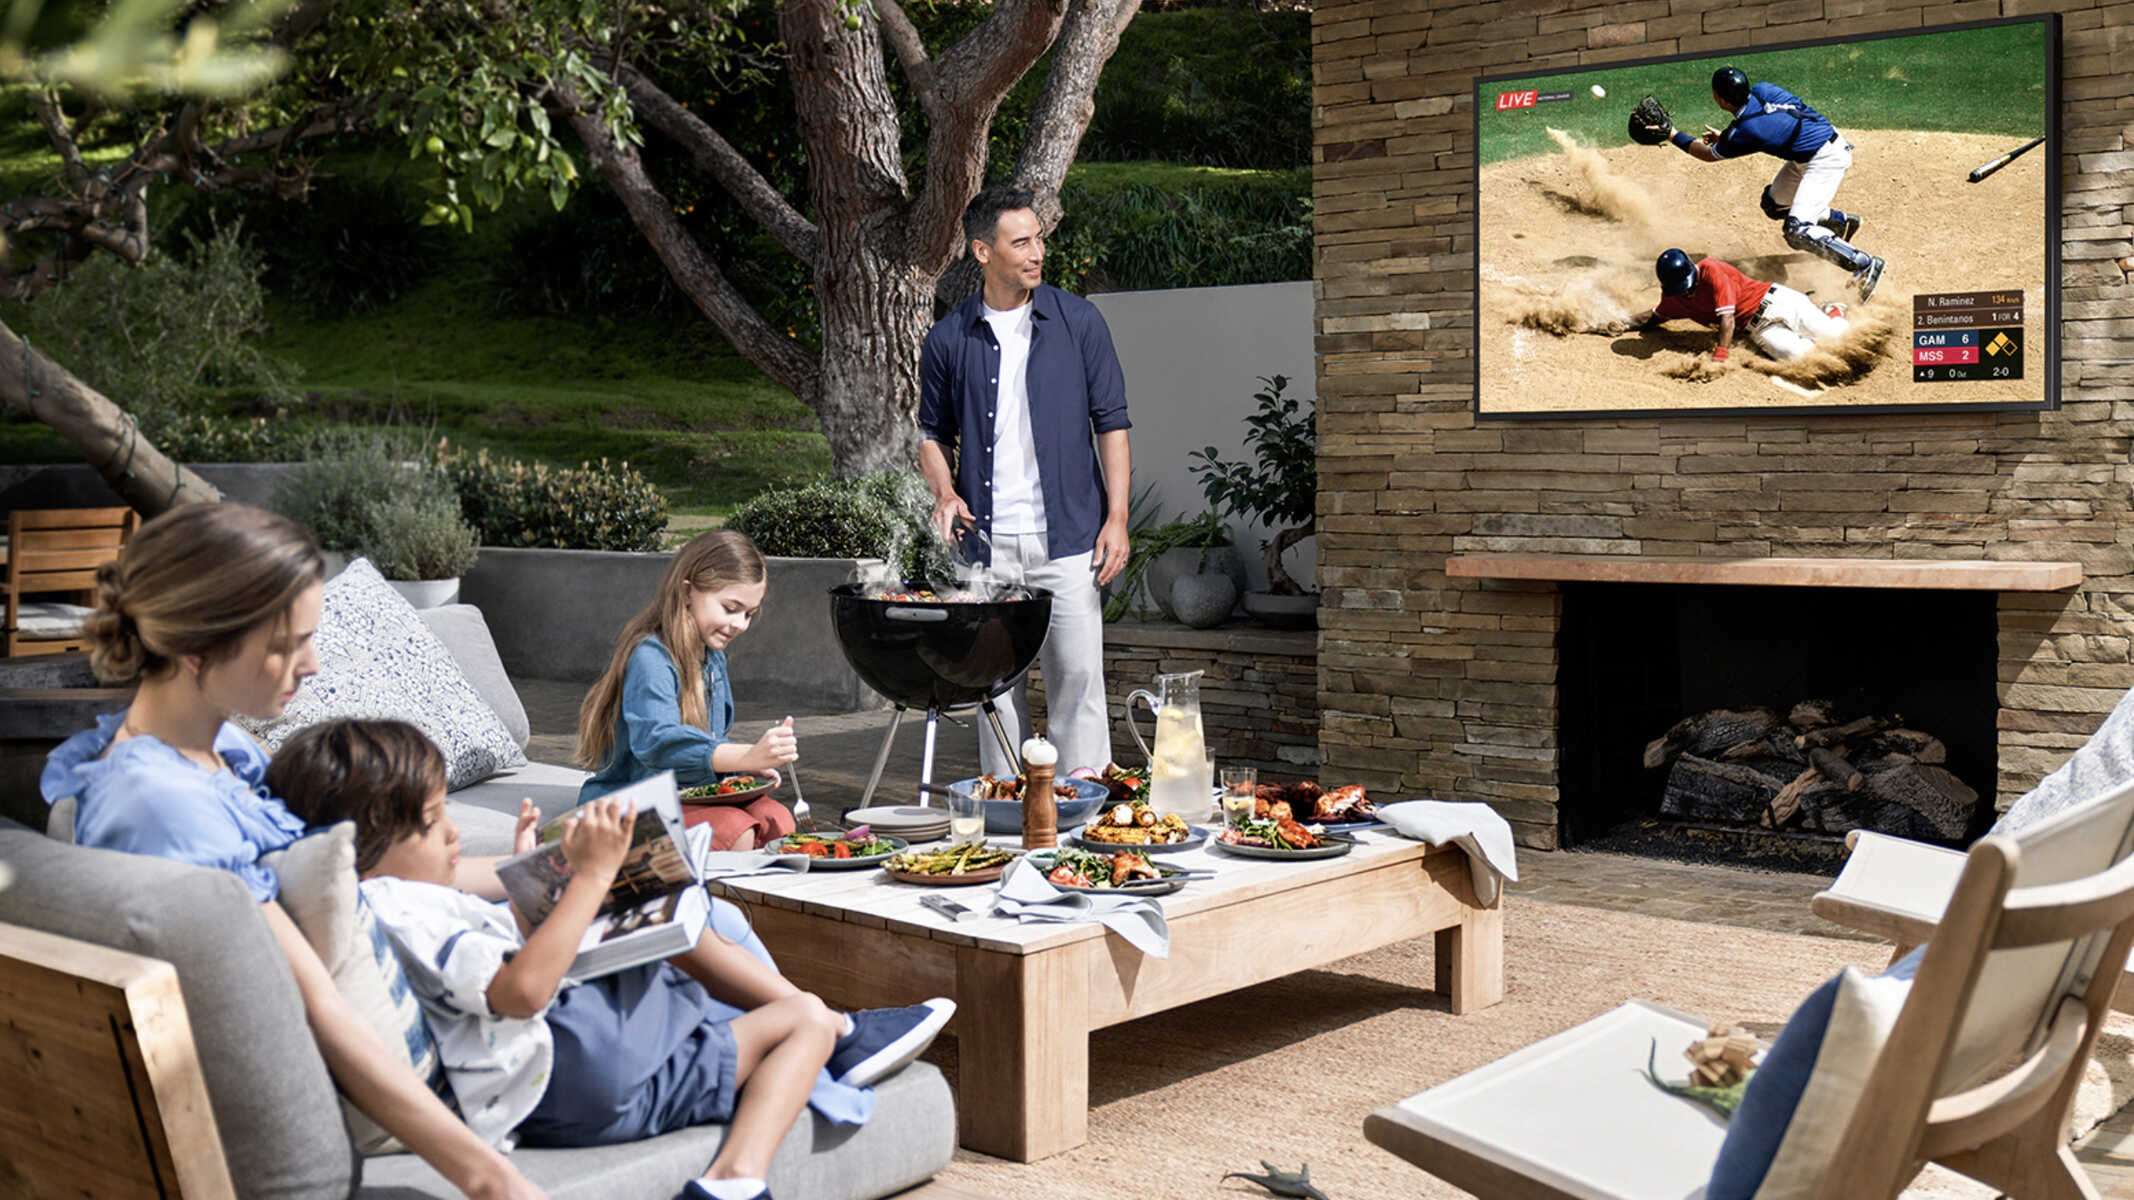
Are you planning a fun-filled outdoor movie night or a captivating presentation under the stars? One of the key components you’ll need is a projector. But how do you go about setting up a projector outside?
In this guide, we will walk you through the step-by-step process of setting up a projector outside, from choosing the right projector to adjusting image quality and addressing common issues. Whether you’re hosting a movie night in your backyard, organizing a business presentation in an open-air venue, or simply enjoying a slideshow of memories on a summer evening, our tips and tricks will ensure a smooth and successful setup.
Before we delve into the details of the setup process, it’s important to note that setting up a projector outside requires some careful planning and consideration. Factors such as ambient light, outdoor location, and necessary equipment all play a role in creating an optimal viewing experience.
So, let’s get started and explore the world of outdoor projector setups. By the end of this guide, you’ll be equipped with the knowledge and know-how to create your own outdoor cinema or presentation space.
Choosing the Right Projector
When setting up a projector outside, selecting the right projector is crucial for achieving a high-quality and immersive experience. Here are some factors to consider when choosing the right projector:
- Brightness: Since outdoor environments can have more ambient light than indoor spaces, choosing a projector with high brightness is essential. Look for projectors with at least 2000 lumens or higher brightness for better visibility.
- Resolution: The projector’s resolution determines the clarity and sharpness of the projected image. Opt for a projector with a minimum resolution of 1080p for detailed visuals. If you plan to use the projector for large-scale outdoor events, consider a 4K resolution projector for an even more impressive display.
- Contrast Ratio: The contrast ratio determines the difference between the darkest and lightest parts of an image. A higher contrast ratio produces more vibrant colors and improves overall image quality. Look for projectors with a contrast ratio of at least 2000:1 for optimal performance.
- Portability: Since you’ll be using the projector outdoors, it’s important to consider its portability. Look for lightweight and compact projectors that are easy to carry and set up. Additionally, consider projectors with built-in handles or carrying cases for added convenience.
- Connectivity Options: Ensure that the projector has various connectivity options such as HDMI, USB, and VGA ports. This will allow you to connect it to different devices like laptops, media players, or streaming devices for versatile usage.
Consider these factors while selecting a projector that meets your specific requirements and budget. Remember, investing in a projector with higher specifications will provide a better viewing experience and ensure your outdoor presentations or movie nights are a success.
Choosing the Right Outdoor Location
Choosing the right outdoor location for your projector setup is crucial for the overall viewing experience. Here are some factors to consider when selecting the perfect location:
- Space: Ensure that the chosen location offers enough space to accommodate your audience comfortably. Consider the number of people attending and their seating arrangements. It’s important to have ample room for chairs or blankets to ensure everyone has a good view of the projected image.
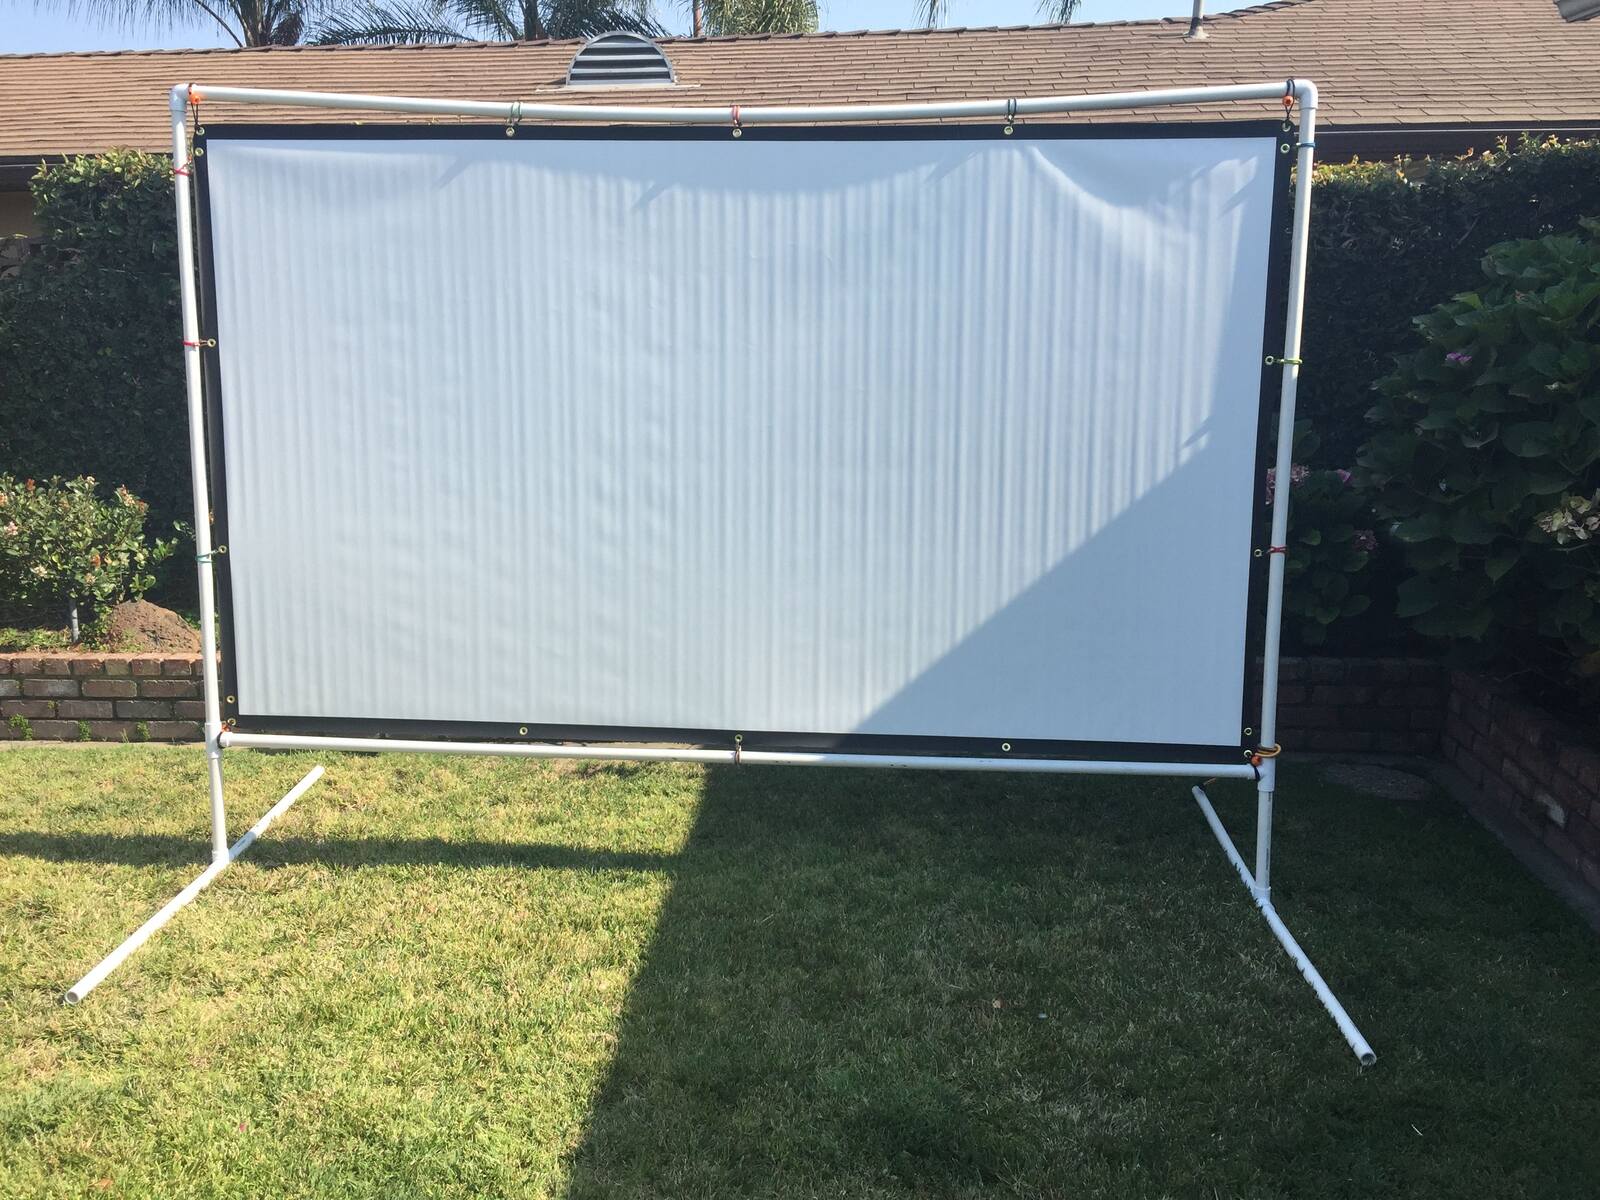
- Surface: Look for a smooth and flat surface to project onto, such as a white wall, a large screen, or a projector screen. Avoid projecting onto rough or textured surfaces, as they may distort the image and affect the overall quality.
- Ambient Light: Consider the amount of ambient light in the location. Try to choose a spot that is not directly exposed to harsh sunlight or bright street lights, as this can wash out the projected image. If there are unavoidable light sources, consider using blackout curtains, shades, or a pop-up canopy to create a darker viewing environment.
- Obstructions: Check for any potential obstructions that could block the projector’s light or obstruct the viewers’ line of sight. Look for trees, poles, or buildings that may cast shadows. Additionally, ensure that there are no objects that could interfere with the projector’s placement, such as branches or structures.
- Accessibility: Consider the accessibility of the chosen location. Ensure that there is a nearby power source to connect the projector and any additional audio equipment. Also, make sure that the location is easily accessible for you to set up and dismantle the equipment.
By considering these factors, you can select an outdoor location that provides an optimal viewing experience for your audience. Remember to test the setup in advance to ensure that the projected image is clear, visible, and enjoyable from various viewing angles.
Gathering the Necessary Equipment
Before setting up your projector outside, it’s important to gather all the necessary equipment to ensure a smooth and successful setup. Here’s a list of essential equipment you’ll need:
- Projector: Choose the projector that meets your specific requirements, considering factors such as brightness, resolution, contrast ratio, portability, and connectivity options.
- Screen or Surface: Depending on the location and your preferences, you may choose to project onto a white wall, a large screen, or a purpose-built projector screen. Alternatively, you can use a white blackout cloth or a sheet as a makeshift screen for smaller setups.
- Audio Equipment: Enhance your outdoor experience by including audio equipment. This can range from portable Bluetooth speakers to a full-fledged sound system, depending on the size of your setup and the desired audio quality.
- Cables and Adapters: Ensure you have the necessary cables and adapters to connect the projector to your video source. This may include HDMI cables, VGA cables, or adapters for different input/output ports.
- Power Supply: Make sure you have a reliable power supply to operate the projector and any additional equipment. Depending on the location, you may need extension cords or portable power banks to ensure uninterrupted power.
- Mounting or Tripod Stand: Consider how you will securely position and stabilize the projector. A tripod stand or a mounting bracket can provide stability and flexibility in adjusting the projector’s height and angle.
Take inventory of the equipment you already have and make a list of any additional items you may need to acquire or borrow. Being well-prepared with all the necessary equipment will ensure a hassle-free setup and a more enjoyable outdoor projection experience.
Setting Up the Projector
Now that you have all the necessary equipment, it’s time to set up your projector for the outdoor viewing experience. Follow these steps to ensure a proper setup:
- Positioning: Choose a stable surface or mount for the projector. Ensure it is at an appropriate height and angle for optimal viewing. Use a tripod stand or a mounting bracket to secure the projector in place.
- Connecting the Cables: Connect the necessary cables from your video source, such as a laptop or media player, to the appropriate input ports on the projector. Make sure the connections are secure to avoid any disruptions during playback.
- Focusing and Adjusting: Turn on the projector and use the focus adjustment ring or menu options to sharpen the projected image. Adjust the zoom, keystone correction, and other settings as needed to achieve the desired image size and proportions.
- Test Projection: Display a test image or video to ensure that the projected content is clear, centered, and properly aligned. Make any necessary adjustments to the projector’s position or settings to achieve the best visual quality.
- Secure the Cables: Keep the cables tidy and secured to avoid tripping hazards or accidental disconnections. Use cable management clips or tape to keep them organized and out of the way.
It’s a good idea to perform a test run before your actual outdoor event to familiarize yourself with the projector’s settings and to identify any issues that may need to be addressed. Taking the time to set up your projector properly will ensure a seamless and enjoyable outdoor viewing experience for you and your audience.
Connecting the Projector to the Source
Once your projector is set up, the next step is to connect it to your video source, such as a laptop, media player, or DVD player. Follow these steps to properly connect the projector:
- Identify the Video Output: Determine the video output available on your video source device. This could be HDMI, VGA, or any other port.
- Select the Correct Cable: Choose the appropriate cable that matches the video output on your source device and the input port on the projector. For example, if your source device has an HDMI output and the projector has an HDMI input, use an HDMI cable for the connection.
- Connect the Cable: Plug one end of the selected cable into the video output port of your source device and the other end into the corresponding input port on the projector. Ensure that the connections are secure.
- Switch on the Projector: Turn on the projector and set it to the appropriate input mode. This is usually done by pressing the “Input” or “Source” button on the projector or the remote control and selecting the corresponding input port.
- Configure the Source Device: On your source device, go to the display settings and select the appropriate display option. This may involve duplicating or extending the screen, depending on your preference. Adjust the resolution settings on the source device to match the recommended resolution of the projector for optimal image quality.
- Test the Connection: Play a video or display a test image on your source device to ensure that the content is properly displayed on the projector. Adjust the projector’s focus or settings if necessary to achieve the desired visual quality.
By following these steps, you can easily connect your projector to the video source and begin projecting your content onto the outdoor screen or surface. It’s always a good idea to test the connection before your actual event to avoid any last-minute complications and ensure a seamless viewing experience.
Adjusting Image Quality and Size
After connecting the projector to the source, it’s important to adjust the image quality and size to ensure the best possible viewing experience. Here are some steps to help you achieve optimal image quality and size:
- Focusing: Use the focus adjustment ring or menu options on the projector to make the projected image as sharp as possible. Adjust it until the text and details are clear and well-defined.
- Zoom and Keystone Correction: If needed, use the zoom feature to adjust the image size to your preference. Be cautious not to distort the image excessively, as this may affect its clarity. Additionally, utilize keystone correction to adjust any distortion caused by projecting from an angle.
- AspectRatio: Make sure the aspect ratio of the projected image matches the content you are displaying. Most projectors have options such as 16:9 (widescreen) or 4:3 (standard) aspect ratios. Select the appropriate one to avoid stretching or squashing the image.
- Brightness and Contrast: Adjust the brightness and contrast settings on the projector to ensure a well-balanced and vibrant image. Avoid setting the brightness too high in dark environments, as this may result in a washed-out image. Adjust the settings according to the ambient light conditions.
- Color Calibration: Some projectors offer color calibration options that allow you to adjust the color temperature, saturation, and other color-related settings. Calibrate the color settings to your preference to achieve accurate and lifelike colors.
- Ambient Light Considerations: Pay attention to the ambient light conditions and adjust the image settings accordingly. In a dark environment, you may want to increase the brightness and contrast. In a brighter environment, you may need to decrease the brightness and make other adjustments to ensure good visibility.
Take the time to experiment with different settings and test the image quality from different viewing distances to find the optimal balance. Keep in mind that the image quality may also be affected by the quality of the source content, so try to use high-resolution videos or images for the best results.
By adjusting the image quality and size effectively, you can create a visually stunning outdoor projection that captivates your audience and enhances their overall viewing experience.
Providing Power to the Projector
Proper power supply is essential for the operation of your projector during outdoor setups. Here are the steps to ensure a reliable power source for your projector:
- Identify Power Requirements: Check the power requirements of your projector, which are typically indicated on the user manual or the projector itself. Note the voltage (e.g., 110-240V) and wattage (e.g., 150W) specifications.
- Locate a Power Source: Position your outdoor setup within reach of a suitable power source. This can be an outdoor power outlet, an indoor outlet with a long extension cord, or a portable power generator. Ensure that the power source is compatible with the voltage requirements of the projector.
- Connect the Power Cord: Plug the power cord of the projector into the power source. Ensure a secure connection to avoid accidental disconnections during the projection. If necessary, use an extension cord or a surge protector to reach the power source.
- Power On the Projector: Turn on the projector and wait for it to initialize. Look for the power indicator light or display on the projector to confirm that it is receiving power. Check if the fan or cooling system starts operating, indicating that the projector is properly connected to the power supply.
- Ensure Power Stability: Make sure there are no power fluctuations or interruptions during the projection. Avoid overloading the power source by plugging in too many devices at once. Consider using a dedicated circuit or separate power source for the projector, especially for larger outdoor setups.
It’s always a good idea to have a backup power plan in case of power outages or unforeseen circumstances. This can include having a fully charged portable power bank, additional batteries, or a backup generator on standby to ensure uninterrupted power supply for the projector.
By following these steps, you can provide a reliable and stable power source for your projector, keeping it running smoothly throughout your outdoor events or presentations.
Adjusting for Ambient Light
Ambient light plays a significant role in the visibility and quality of the projected image during outdoor setups. Here are some tips to help you adjust for ambient light conditions:
- Choose the Right Time: Schedule your outdoor projection during the evening or when natural light is minimal. Dusk or nighttime provides a darker environment, making it easier to achieve better image visibility.
- Shade the Projection Area: Set up your outdoor projection in an area that offers natural shade from trees, buildings, or other structures. This helps reduce direct sunlight or harsh ambient light that may wash out the projected image.
- Use a Screen or Surface: Projecting onto a screen or surface specifically designed for outdoor use can help enhance image quality and visibility. These screens are designed to reflect and optimize the projector’s light, providing a clearer and brighter image in outdoor environments.
- Consider an ALR Screen: An Ambient Light Rejecting (ALR) screen is designed to maximize image performance in well-lit environments. ALR screens have special optical coatings that absorb ambient light, allowing the projected image to stand out more clearly.
- Control Light Spillage: Use blackout curtains, shades, or ambient light-blocking materials to create a darker projection area. These can be used to cover windows or block off unnecessary light sources that may interfere with the projected image.
- Adjust Brightness and Contrast: Increase the projector’s brightness and contrast settings to compensate for ambient light. However, be cautious not to set them too high, as this may result in loss of detail or washed-out colors. Find a balance that delivers a clear and well-defined image without sacrificing overall quality.
- Utilize Exterior Lighting: If you require some lighting in the viewing area, use low-intensity and directed exterior lights. These can help create a pleasant ambiance without significantly affecting the projected image.
Remember to test the projected image under different ambient light conditions and make necessary adjustments. By properly adjusting for ambient light, you will optimize the visibility and overall quality of the outdoor projection, providing a delightful viewing experience for your audience.
Installing Audio Equipment
Audio is an important aspect of any outdoor projector setup, providing an immersive and engaging experience for the audience. Here are the steps to help you install audio equipment for your outdoor projection:
- Determine Audio Requirements: Assess your audio needs based on the size of the outdoor space and number of attendees. Decide whether you need a simple portable Bluetooth speaker or a more powerful sound system for larger gatherings.
- Select the Audio Source: Identify the source of your audio, which can be the same device that is sending the video signal to the projector, such as a laptop or media player. Ensure the source device is connected to the audio equipment using an appropriate cable or wireless connection.
- Position the Audio Equipment: Place the audio equipment in a central location that helps distribute the sound evenly across the viewing area. Consider elevating the speakers or using speaker stands to enhance sound projection and minimize obstruction of the audience’s line of sight.
- Connect the Audio Output: Connect the audio output from the source device to the audio input of the selected sound system or speaker. Use the appropriate cables or wireless connection, such as RCA, auxiliary, or Bluetooth, based on your equipment compatibility.
- Test the Audio: Play a sample audio or video clip to ensure that the audio is projected as expected and is synchronized with the video. Adjust the volume levels on the audio equipment and source device to achieve an optimal listening experience.
Depending on the outdoor space and audience size, you may also consider setting up a surround sound system or additional speakers for a more immersive audio experience. Position the speakers strategically to create a sense of depth and surround sound effect.
Remember to consider any local noise restrictions and be mindful of your neighbors when adjusting the audio volume. Aim to strike a balance that allows your audience to enjoy the audio without causing any disruptions.
By following these steps, you can install and optimize the audio equipment for your outdoor projection setup, delivering clear, high-quality sound that enhances the overall viewing experience.
Troubleshooting Common Issues
While setting up a projector outside, you may encounter some common issues that can affect the overall performance of your outdoor projection. Here are a few troubleshooting tips to help you overcome these issues:
- No Power: If the projector does not turn on, double-check the power connections and ensure that the power source is working. Test the power outlet or try a different power cord if necessary.
- Poor Image Quality: If the projected image appears blurry or distorted, adjust the focus ring on the projector. Ensure that the projection surface is clean and flat. Check the resolution settings on the source device and the projector to ensure they match.
- No Signal: If the projector is not receiving a signal, ensure that the video source is properly connected. Check the input source on the projector and the output settings on the source device. Try using a different cable or port to eliminate any potential connectivity issues.
- Image Cut-off or Misalignment: If the projected image is cut off or not aligned properly, adjust the zoom, keystone correction, or aspect ratio settings on the projector. Ensure that the projector is positioned correctly and perpendicular to the projection surface.
- Overheating and Shutting Down: If the projector overheats and shuts down during use, check the ventilation and cooling system. Ensure that there is adequate airflow around the projector. Clean any dust or debris from the projector’s air vents or filters.
- Poor Audio: If the audio quality is not satisfactory, check the audio connections and ensure that the volume levels are properly adjusted. Confirm that the audio source is working correctly and that the audio equipment is positioned appropriately.
- Interference or Disturbances: If you experience interference or disturbances in the projected image or audio, check for any nearby electronic devices that may be causing interference. Move the projector and audio equipment away from potentially problematic sources or use shielded cables to minimize interference.
Remember to consult the user manual for your projector and audio equipment for specific troubleshooting tips and instructions. Additionally, performing regular maintenance, updating firmware, and keeping the equipment clean can help prevent and resolve potential issues.
If the troubleshooting steps mentioned above do not resolve the problems, it may be worth reaching out to customer support or seeking professional assistance to diagnose and fix any underlying technical issues.
Conclusion
Setting up a projector outside can be a rewarding experience that allows you to enjoy outdoor movie nights, host engaging presentations, or create memorable events. By following the steps provided in this guide, you can ensure a successful outdoor projection setup.
From choosing the right projector for your needs and selecting the perfect outdoor location to gathering the necessary equipment and adjusting for ambient light, each step plays a crucial role in creating a memorable viewing experience for your audience.
Remember to carefully consider factors such as brightness, resolution, and connectivity options when selecting a projector, as these aspects significantly impact image quality. Additionally, choosing the right outdoor location, one with suitable space and minimal ambient light, contributes to the optimal viewing environment.
Gathering the necessary equipment, connecting the projector to the source, and adjusting image quality and size are vital steps to ensure a smooth setup and a visually stunning projection. Furthermore, providing a stable power source and adjusting for ambient light conditions enhance the overall experience.
Finally, troubleshooting common issues that may arise during the setup process will help you overcome any challenges and ensure a seamless projection.
By following these steps and tips, you can create an immersive and captivating outdoor projection experience that will leave your audience impressed and create lasting memories. So, get ready to enjoy the great outdoors with your projector and let the magic unfold!