Choosing the Right Projector for Outdoor TV Viewing
Watching TV outside on a projector can be a fantastic way to enjoy your favorite shows and movies under the open sky. However, to make the experience truly enjoyable, it is crucial to choose the right projector for your outdoor TV viewing needs. Here are some factors to consider when selecting a projector for outdoor use:
1. Brightness: Outdoor environments can be well-lit, especially during daylight hours. Therefore, opt for a projector with high brightness levels, measured in lumens, to ensure a clear and vibrant image even in bright conditions.
2. Resolution: The resolution of the projector determines the clarity and detail of the image. For outdoor viewing, it is recommended to choose a projector with at least 1080p resolution for a crisp and immersive viewing experience.
3. Contrast Ratio: The contrast ratio represents the difference between the brightest and darkest parts of the image. A higher contrast ratio will result in a more vivid and dynamic picture, even in outdoor environments where ambient light may impact the image quality.
4. Portability: Since outdoor TV viewing often involves setting up and disassembling the projector, portability is an important factor to consider. Look for projectors that are lightweight, compact, and easy to transport.
5. Connectivity: Ensure that the projector has multiple connectivity options, such as HDMI, USB, and VGA ports, to easily connect your outdoor viewing setup to various devices such as streaming devices, gaming consoles, or laptops.
6. Durability: Since outdoor environments can be unpredictable, it is important to choose a projector that is designed to withstand different weather conditions. Look for projectors that are dust-resistant and have proper ventilation to prevent overheating.
7. Noise Level: Consider the noise level of the projector, especially if you plan to use it close to seating areas. Look for projectors with quiet operation to avoid distraction during your outdoor TV viewing experience.
By considering these factors, you can select a projector that is specifically suited for outdoor TV viewing, ensuring an immersive and enjoyable experience for you and your guests.
Selecting the Ideal Outdoor Viewing Area
Choosing the right outdoor viewing area is key to creating a comfortable and immersive experience when watching TV on a projector outside. Here are some factors to consider when selecting the ideal outdoor viewing area:
1. Space and Distance: Assess the available space in your outdoor area to determine the best location for setting up your projector and screen. Consider the distance between the seating area and the projected image to ensure optimal visibility and comfort for viewers.
2. Shade and Sunlight: Look for an area that offers a balance of sun and shade. Direct sunlight can wash out the image on the screen, so consider natural shading options such as trees, awnings, or umbrellas. Alternatively, you can choose a spot where you can easily control the amount of sunlight by using blinds or curtains.
3. Background and Surfaces: Consider the background and surfaces surrounding the viewing area. Opt for a location with a plain and unobstructed backdrop to prevent distractions and ensure a clear projection. Additionally, choose a surface for projection that is flat, smooth, and preferably white or light-colored to enhance image quality.
4. Privacy and Noise: Take into account the privacy and noise levels of the chosen outdoor viewing area. Look for a spot where you can enjoy your TV shows and movies without disturbance from neighbors or nearby activities. If needed, consider creating some form of soundproofing or using headphones to enhance the audio experience.
5. Accessibility to Power: Ensure that the outdoor viewing area is easily accessible to a power source. This will allow you to connect the projector and any other devices, such as media players or sound systems, without the hassle of using long extension cords.
6. Comfortable Seating: Provide ample seating options for your viewers. Whether it’s outdoor furniture, blankets, or cushions, make sure everyone has a comfortable place to sit and enjoy the outdoor TV viewing experience.
7. Safety Considerations: Check for any potential safety hazards in the chosen outdoor viewing area. Look out for uneven terrain, low-hanging branches, or any other objects that may pose a risk. It is essential to prioritize the safety of yourself and your viewers during outdoor TV viewing.
By carefully selecting the ideal outdoor viewing area, you can create a space that offers optimal comfort, visibility, and enjoyment for everyone involved.
Setting Up a Screen or Surface for Projection
Setting up a suitable screen or surface for projection is crucial to achieving the best possible image quality and viewing experience when watching TV on a projector outdoors. Here are some guidelines to help you set up a screen or surface for projection:
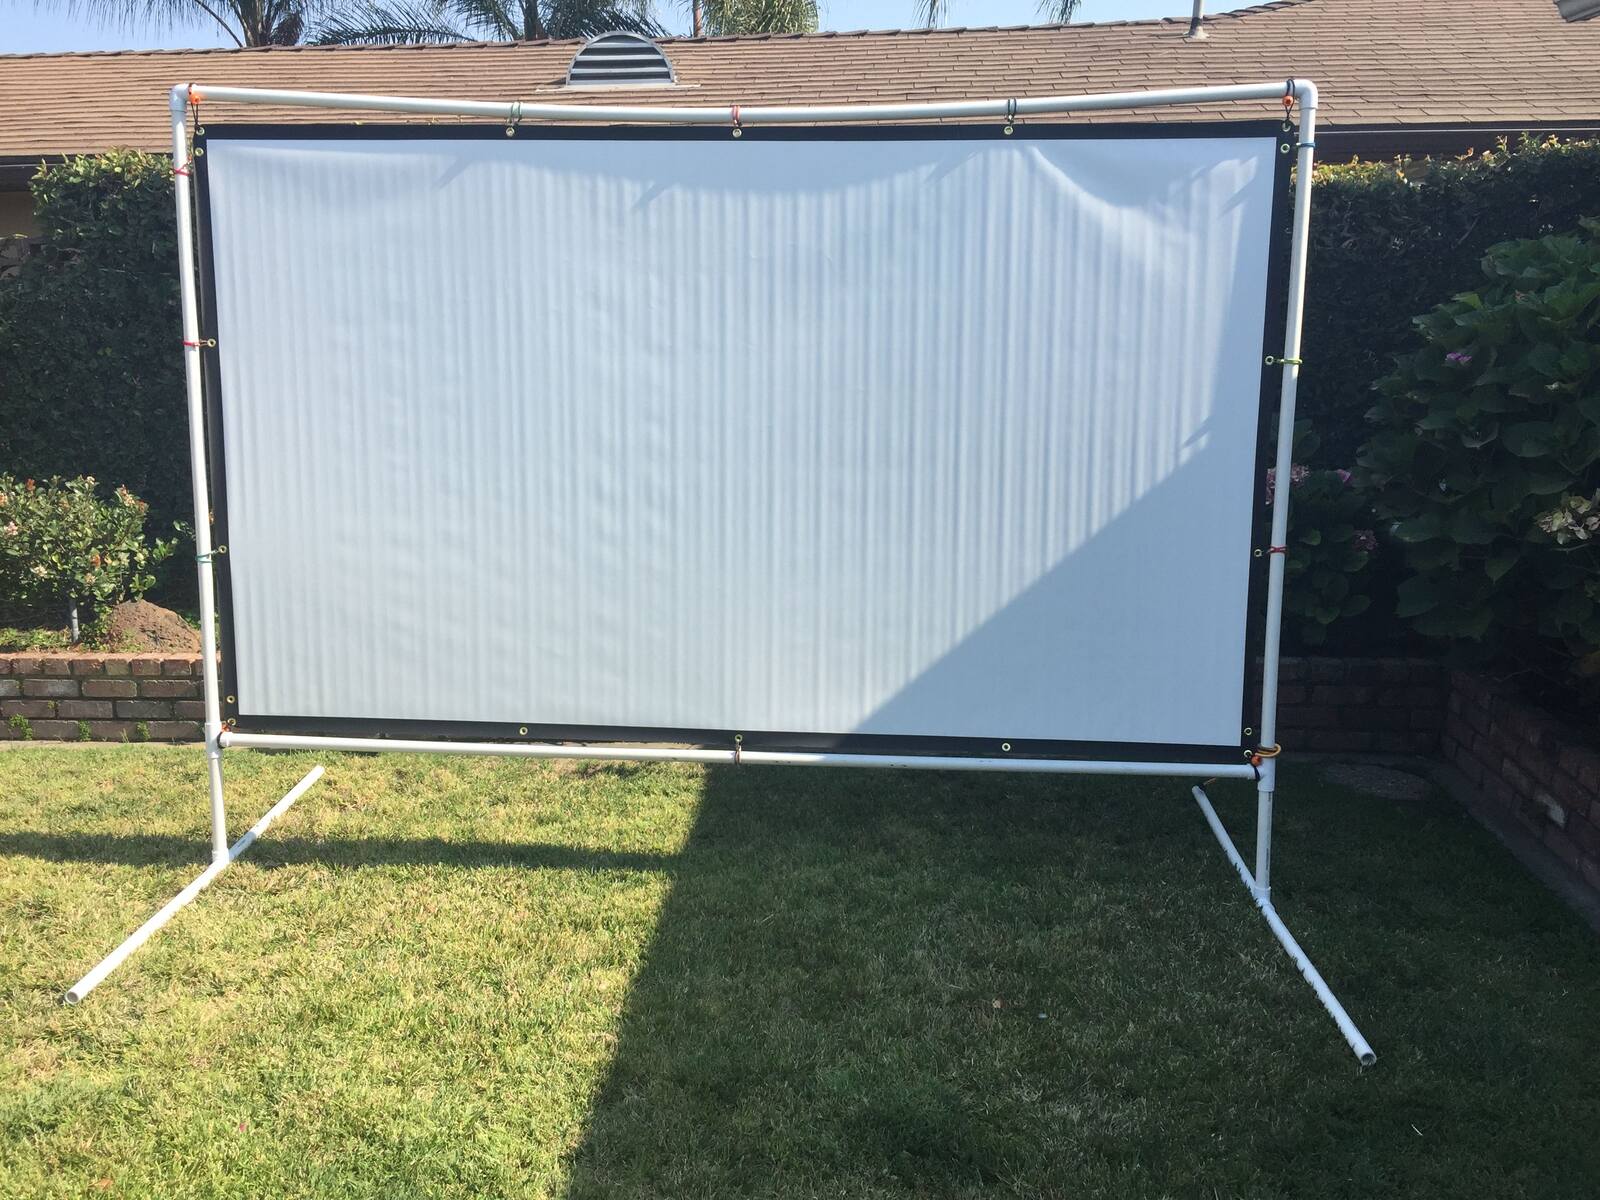
1. Portable Projector Screen: Consider investing in a portable projector screen specifically designed for outdoor use. These screens are easy to set up and offer a smooth, wrinkle-free surface that enhances image quality. They come in various sizes, so choose one that suits your viewing area and desired image size.
2. DIY Projection Surface: If you prefer a more budget-friendly option, you can create your own projection surface. White or light-colored materials such as a large white bedsheet, light-colored wall, or a projector-friendly paint on a smooth surface can work as makeshift screens. Ensure that the surface is free from any wrinkles or imperfections that may distort the image.
3. Proper Screen Placement: Position the screen or projection surface at an appropriate height and angle. Consider the height of the viewers’ eye level and place the screen accordingly to provide a comfortable and unobstructed view. Ensure that the screen is taut to avoid any distortion caused by sagging.
4. Screen Positioning: Place the screen on a stable surface or use secure stands or hooks to ensure it remains steady throughout the viewing session. If using a DIY surface, attach it securely to a wall or frame to minimize movement caused by wind or accidental bumps.
5. Screen Size and Aspect Ratio: Determine the desired screen size and aspect ratio based on your viewing area and seating arrangement. Consider the throw distance of your projector to ensure that the image fits within the screen boundaries and is not too stretched or distorted.
6. Screen Maintenance: Regularly clean the screen or surface to remove dust, dirt, or any other contaminants that may impact image quality. Follow the manufacturer’s instructions for screen cleaning or use a soft, lint-free cloth to gently wipe away any smudges or marks.
7. Adjusting Screen Brightness: Adjust the projector settings to optimize the brightness and contrast levels for the specific screen or surface you are using. This may require some trial and error to find the perfect balance for outdoor viewing conditions.
By following these guidelines, you can set up a screen or projection surface that ensures a clear and immersive viewing experience when watching TV on a projector outdoors.
Connecting Your Projector to External Devices
Connecting your projector to external devices is essential for accessing content and enhancing your outdoor TV viewing experience. Here are some steps to connect your projector to external devices:
1. HDMI Cable: Most projectors have HDMI ports, which provide high-quality audio and video transmission. Connect one end of an HDMI cable to the HDMI output port of your device (e.g., streaming device, laptop, or gaming console) and the other end to the HDMI input port on the projector.
2. VGA Cable: If your device does not have an HDMI port, you can use a VGA cable instead. Connect one end of the VGA cable to the VGA output port of your device and the other end to the VGA input port on the projector. Keep in mind that VGA cables only transmit video signals, so you may need an additional audio cable for sound.
3. Audio Connection: To ensure good sound quality during your outdoor viewing, connect the audio output from your device to an external speaker or sound system. This can be done using an auxiliary cable, RCA cables, or Bluetooth connectivity, depending on the available options on your devices.
4. Wireless Connection: Some projectors support wireless connectivity, allowing you to easily stream content from your mobile devices or laptops. Look for projectors with built-in Wi-Fi or wireless display technologies such as Miracast or AirPlay, and follow the manufacturer’s instructions to connect your device wirelessly.
5. Streaming Devices: If you prefer to stream content directly, consider using popular streaming devices such as Chromecast, Amazon Fire TV Stick, or Roku. Simply plug the streaming device into your projector’s HDMI port, connect to your Wi-Fi network, and access your favorite streaming services.
6. Gaming Consoles: Connect gaming consoles such as PlayStation, Xbox, or Nintendo Switch to your projector for an immersive gaming experience outdoors. Use the appropriate HDMI or VGA cables, and adjust the display settings on the console to match your projector’s resolution and aspect ratio.
7. Additional Devices: Depending on your preferences, you can also connect DVD or Blu-ray players, media players, or even laptops to your projector to access a wide range of content.
Ensure that all connected devices are turned on and set to the correct input source on the projector. Use the projector’s menu or remote control to select the appropriate input source if needed.
By following these steps, you can easily connect your projector to external devices and enjoy a variety of content on your outdoor screen.
Considering Audio Options for Outdoor TV Viewing
When setting up an outdoor TV viewing experience on a projector, considering the audio options is essential to create an immersive and enjoyable environment. Here are some audio options to consider for outdoor TV viewing:
1. Built-in Projector Speaker: Some projectors come with built-in speakers that can provide basic audio output. While these speakers may suffice for small gatherings or casual viewing, they may lack the power and depth required for a more immersive experience.
2. External Speakers: For better audio quality, consider connecting external speakers to your projector. Portable Bluetooth speakers or wireless speakers can provide a more robust sound experience. Alternatively, you can use wired speakers or a soundbar that can be connected to the audio output of your projector or the audio output of your streaming device.
3. Outdoor Sound System: If you intend to have a more extensive outdoor TV viewing setup, consider investing in an outdoor sound system. These systems are designed to withstand outdoor conditions and provide enhanced audio quality over a larger area. Ensure that the sound system is compatible with your projector and that the speakers are strategically placed to provide optimal sound coverage for the viewing area.
4. Wireless Headphones: If you want to enjoy TV viewing without disturbing others or prefer a more personal audio experience, wireless headphones are a great option. Connect the wireless headphones to the audio output of your projector or streaming device for an immersive and private sound experience.
5. Audio Transmitters and Receivers: For large outdoor spaces or when seating arrangements are far from the projector, consider using audio transmitters and receivers. These devices allow you to wirelessly transmit audio signals to multiple speakers placed throughout the outdoor area, ensuring that everyone can enjoy clear and synchronized sound.
6. Synchronize Audio and Video: It is important to ensure that the audio and video remain in sync during outdoor TV viewing. Delays in audio can be distracting and diminish the overall viewing experience. Adjust the audio delay settings on your projector or streaming device, if available, to synchronize the audio with the video output.
7. Volume Control and Equalization: Experiment with the volume control and equalization settings on your sound system or projector to optimize the audio for your outdoor viewing setting. Adjust the volume levels to a comfortable level for the viewers and fine-tune the equalization settings to enhance dialogues, bass, or any other audio elements based on personal preferences.
Make sure to consider the size of your outdoor viewing area, the number of viewers, and the desired audio quality when selecting the audio options for your outdoor TV viewing setup. This will help create an immersive and enjoyable viewing experience for all.
Managing Lighting and Image Quality in Outdoor Spaces
When watching TV on a projector in outdoor spaces, managing lighting and image quality is crucial to ensure a clear and vibrant viewing experience. Here are some tips for effectively managing lighting and optimizing image quality in outdoor environments:
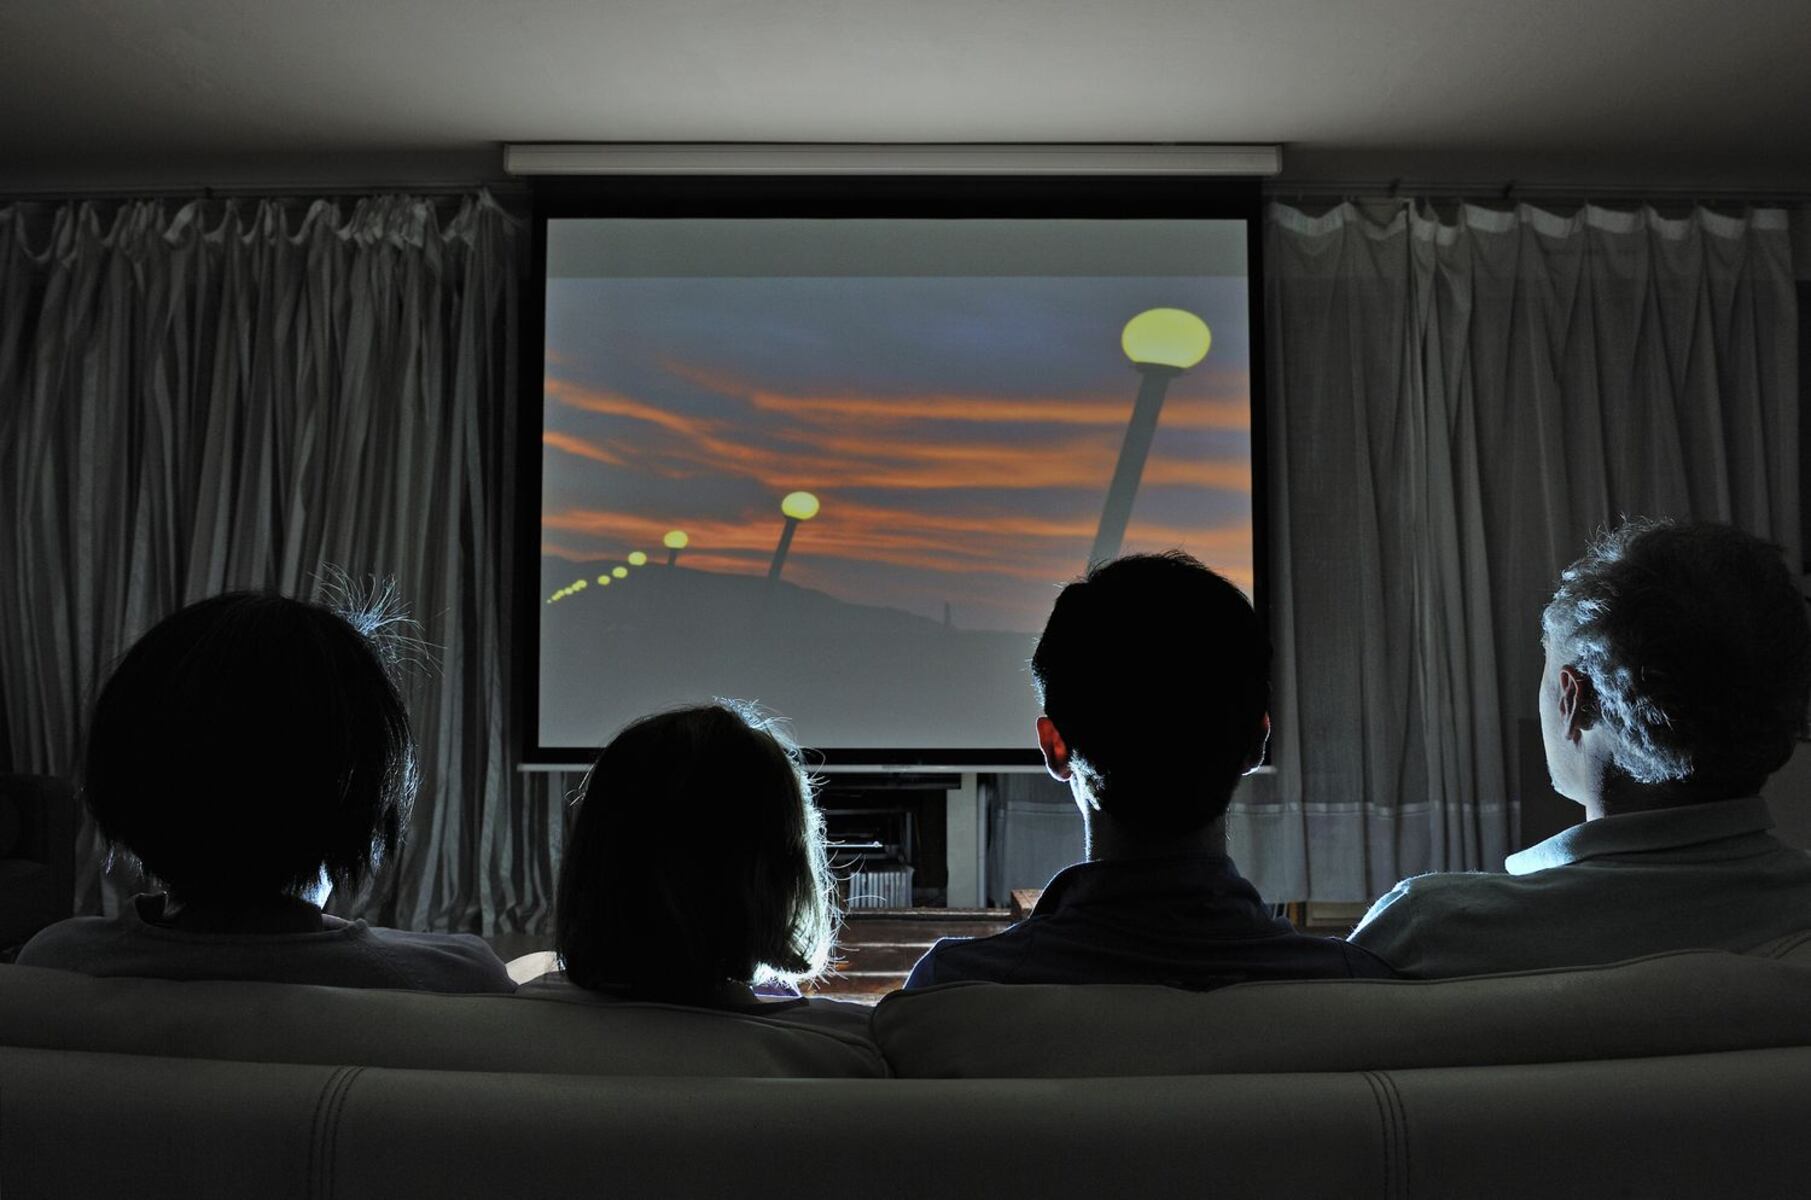
1. Time of Day: Consider the time of day when planning your outdoor TV viewing. Evening or nighttime offers better control over lighting conditions, as natural sunlight won’t interfere with the projected image. However, if you plan to watch during the day, look for shade or create a shaded area to minimize the impact of direct sunlight on the screen.
2. Screen Positioning: Position the screen or projection surface in a way that minimizes glare and ambient light. Consider the angle of the projected image and make adjustments as needed to avoid reflections on the screen. Depending on your setup, you may need to experiment with different screen positions to find the ideal placement for optimal image quality.
3. Ambient Light Control: Minimize ambient light sources in the viewing area, such as nearby streetlights or bright outdoor fixtures. Use curtains, blinds, or outdoor shades to block out unwanted light and improve overall image quality. If possible, position the projector and screen away from external light sources to avoid interference.
4. Contrast and Brightness Settings: Adjust the contrast and brightness settings on your projector to optimize the image quality for the outdoor environment. Find a balance that allows for clear visibility without losing detail in darker or brighter scenes. Use the projector’s menu or remote control to access these settings and make adjustments as necessary.
5. Image Size and Focus: Ensure that the projected image is properly sized and focused for optimal viewing. Adjust the projector’s zoom, throw distance, and focus controls to fill the screen and bring the image into sharp focus. Refer to the projector’s manual for guidance on these adjustments, as they may vary based on the model.
6. Light-blocking Surroundings: Consider the surroundings of the viewing area and block or minimize light sources that may affect the image quality. For example, position the screen away from bright windows, reflective surfaces, or nearby buildings with strong exterior lighting. This will help maintain a consistent level of brightness and contrast in the projected image.
7. Regular Calibration: Calibrate your projector regularly to ensure accurate colors and optimal image quality. Use a calibration disc or software to adjust settings such as color temperature, color saturation, and gamma levels. This will help maintain a consistent and true-to-life image representation during outdoor TV viewing.
By taking these measures to manage lighting and optimize image quality, you can ensure a captivating and enjoyable viewing experience when watching TV on a projector in outdoor spaces.
Dealing with Weather Conditions and Outdoor Projectors
When it comes to outdoor TV viewing on a projector, weather conditions can present challenges that need to be addressed to protect your equipment and ensure a smooth viewing experience. Here are some tips for dealing with different weather conditions when using outdoor projectors:
1. Rain and Moisture: Rain can cause significant damage to your projector, so it’s crucial to protect it from moisture. Consider using a waterproof projector enclosure or cover to shield it from rain and splashes. Avoid direct exposure to rain by placing the projector in a covered or sheltered area. If rain is imminent, it’s best to postpone your outdoor viewing session until the weather clears up.
2. Wind and Dust: Wind can affect the stability of your projector setup and introduce dust and debris onto the lens, reducing image clarity. Secure your projector and screen with sturdy stands, weights, or stakes to prevent them from being toppled over by strong gusts. Consider using a projector hood or enclosure to minimize dust collection on the lens and ensure a clean and clear projected image.
3. Extreme Temperatures: Outdoor projectors can be sensitive to extreme temperatures. High temperatures can affect the internal components of the projector and cause overheating, while freezing temperatures can lead to issues with functionality. Avoid exposing the projector to direct sunlight or extreme heat for extended periods. If the temperature drops below freezing, allow the projector to warm up gradually before using it.
4. Humidity and Condensation: High humidity levels can lead to condensation buildup inside the projector, which can damage the internal electronics. Allow the projector to acclimate to the outdoor environment by giving it sufficient time to adjust to the temperature and humidity before powering it on. If condensation occurs, wait until the projector is dry before use to prevent short circuits and other electrical issues.
5. Winter and Snow: If you plan to use your projector during the winter season, ensure that it is adequately protected from snow. Avoid exposing it to direct contact with snowflakes or moisture. Clear the snow off the projector and screen before use to maintain optimal image quality. If possible, consider using a snowproof enclosure to shield the projector from the elements.
6. Sunlight and Glare: While sunlight can be enjoyable for outdoor activities, it can cause glare and wash out the projected image on the screen. Position your screen in a way that minimizes direct sunlight and use shades, umbrellas, or blinds to block out excessive sunlight. Opt for evening or nighttime viewing when sunlight is not a concern.
7. Storage and Maintenance: When not in use, store your projector in a safe and secure location, preferably indoors, to protect it from prolonged exposure to the elements. Regularly clean and inspect your projector for any signs of damage or wear. Follow the manufacturer’s guidelines for maintenance to ensure the longevity of your outdoor projector.
By taking appropriate measures to address weather conditions, you can protect your outdoor projector and enjoy uninterrupted outdoor TV viewing experiences.
Enhancing Outdoor TV Viewing Experience with Accessories and Furniture
Creating the perfect outdoor TV viewing experience involves more than just a projector and screen. The right accessories and furniture can greatly enhance comfort, convenience, and overall enjoyment. Here are some accessories and furniture options to consider when setting up your outdoor TV viewing area:
1. Outdoor Seating: Invest in comfortable outdoor seating options such as lounge chairs, outdoor sofas, or folding chairs. Choose furniture that is weather-resistant and easy to clean, ensuring durability and longevity.
2. Outdoor Pillows and Cushions: Add extra comfort to your seating area with outdoor pillows and cushions. These accessories provide support and enhance relaxation during extended viewing sessions.
3. Blankets and Throws: For chillier evenings, provide blankets and throws to keep guests cozy and warm. Opt for outdoor blankets that are waterproof and resistant to mildew.
4. Outdoor Rugs: Define your outdoor viewing area with the addition of an outdoor rug. This not only adds a touch of style but also creates a dedicated space for seating and enhances the overall ambiance of the area.
5. Outdoor Tables: Place small outdoor tables around the seating area to provide a surface for drinks, snacks, or even a portable projector stand. Choose weather-resistant and sturdy tables that can withstand outdoor conditions.
6. Portable Projector Stand: If you want more flexibility in projector placement, consider using a portable projector stand. These lightweight stands offer adjustable height and tilt options, allowing you to find the perfect positioning for your projector.
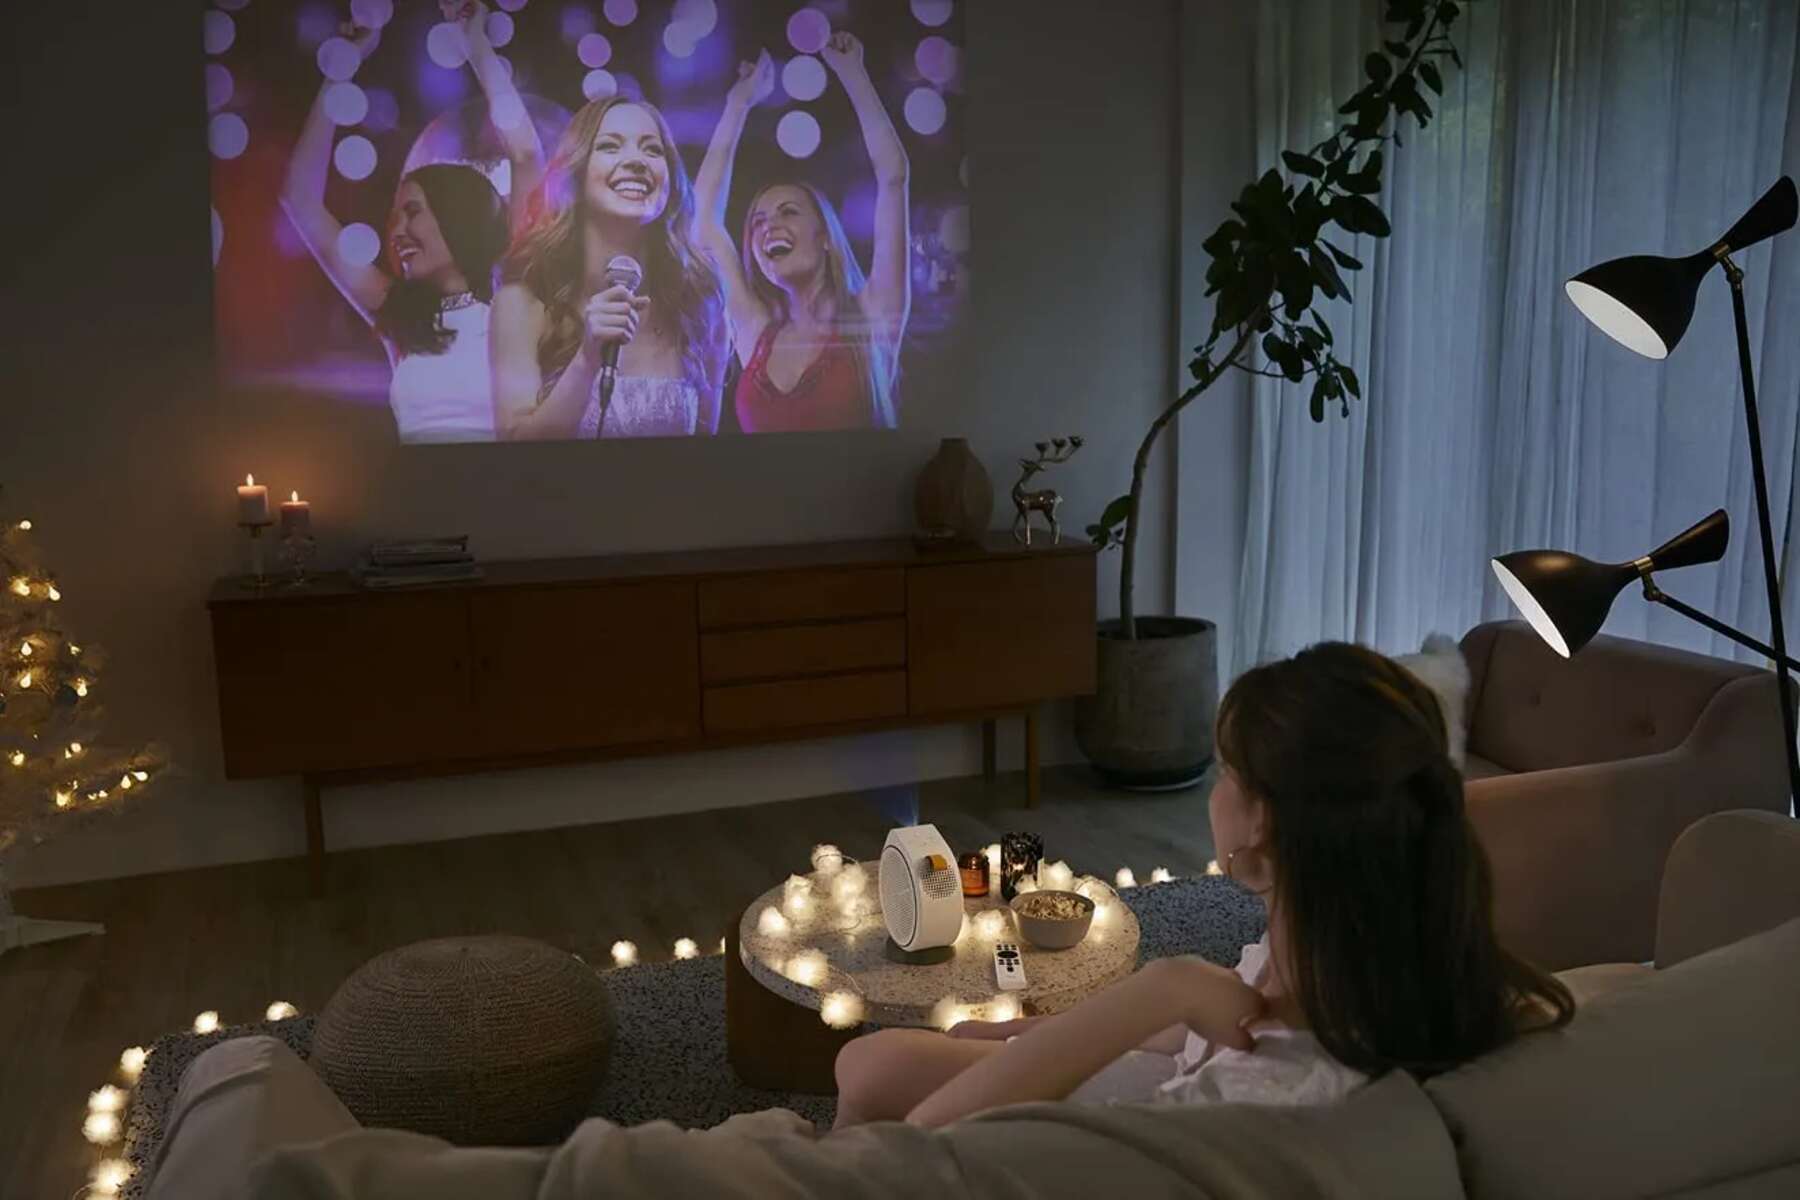
7. Outdoor Lighting: Create a cozy and inviting atmosphere with outdoor lighting. Use string lights, lanterns, or pathway lights to illuminate the viewing area and ensure safety during evening or nighttime viewing. Consider using dimmable lights to adjust the mood and brightness as needed.
8. Food and Beverage Accessories: Arrange a dedicated space for food and beverages close to the seating area. Consider using a cooler for drinks, a bar cart for snacks, or a portable grill for outdoor cooking. Providing easy access to refreshments will enhance the overall outdoor TV viewing experience for your guests.
9. Mosquito Repellent: Keep annoying mosquitoes at bay by using citronella candles, bug zappers, or mosquito-repellent devices. Creating a mosquito-free environment will ensure a more comfortable and enjoyable outdoor viewing experience.
10. Outdoor Speakers: If your projector’s built-in speakers are not sufficient or you want to create a more immersive audio experience, consider investing in outdoor speakers. These weather-resistant speakers can be strategically placed around the viewing area, enhancing sound quality and allowing for a more surround-sound-like experience.
By incorporating these accessories and furniture options, you can transform your outdoor TV viewing area into a comfortable, stylish, and functional space that will enhance the overall viewing experience for yourself and your guests.
Tips for Hosting Outdoor TV Viewing Parties
Hosting an outdoor TV viewing party can be a fun and memorable experience for you and your guests. Here are some tips to help you plan and host a successful outdoor TV viewing party:
1. Choose the Right Content: Select entertaining and crowd-pleasing content that appeals to a wide range of tastes and preferences. Consider popular movies, sports events, or TV shows that are suitable for outdoor viewing.
2. Inform Your Guests: Provide clear information to your guests about the outdoor setting, including dress code, seating arrangements, and any specific instructions or guidelines for the party. Make sure to inform them about any potential weather-related changes or precautions.
3. Plan for Seating and Comfort: Arrange ample seating options to accommodate all your guests comfortably. Mix and match seating styles such as chairs, sofas, and cushions to create a relaxed and inviting atmosphere. Provide blankets or throws for added comfort, especially during cooler evenings.
4. Outdoor Decorations: Set the mood by adding outdoor decorations that complement the theme of the event. Use string lights, lanterns, banners, or themed décor to create an enchanting ambiance and enhance the overall visual appeal of the outdoor space.
5. Food and Drink Selection: Offer a variety of food and drink options to cater to different tastes and dietary preferences. Arrange a buffet-style setup or provide individual portions for convenience. Consider incorporating a themed menu or setting up a popcorn bar for a fun and interactive snacking experience.
6. Audio and Visual Setup: Set up the projector, screen, and audio equipment in advance to ensure everything is working properly. Test the audio and visual quality beforehand to avoid any technical issues during the party. Optimize the seating arrangement to provide optimal viewing angles for all guests.
7. Create a Cozy Atmosphere: Use outdoor lighting, such as string lights, candles, or fire pits, to create a warm and cozy atmosphere. Consider providing outdoor heaters or blankets for cooler evenings to keep your guests comfortable throughout the entire viewing experience.
8. Consider Mosquito Control: If hosting the party in an area prone to mosquitoes, take precautions to minimize their presence. Provide mosquito repellent sprays, citronella candles, or invest in mosquito nets to ensure the comfort of your guests.
9. Provide Entertainment During Breaks: Incorporate some entertainment options during breaks, such as outdoor games, music, or trivia. This keeps the atmosphere lively and engages your guests throughout the event.
10. Be Prepared for Contingencies: Have a backup plan in case of unexpected weather changes or technical difficulties. Prepare a shaded area or alternative indoor space in case of rain or excessive heat. Keep a toolkit or spare devices handy to troubleshoot any technical issues that may arise.
By following these tips, you can ensure that your outdoor TV viewing party is a memorable and enjoyable experience for everyone involved.
Safety Measures for Outdoor Projector Setup
When setting up an outdoor projector for TV viewing, it’s important to prioritize safety to prevent accidents and ensure a secure environment. Here are some safety measures to consider when setting up your outdoor projector:
1. Stable Mounting or Positioning: Ensure that the projector is securely mounted or positioned on a stable surface. Use sturdy stands, tripods, or wall mounts designed for projectors to prevent accidental falls or shifting during use.
2. Proper Cable Management: Organize and secure cables to prevent tripping hazards and accidental disconnections. Use cable organizers, clips, or tape to keep cables neat and out of the way. If cables need to cross walkways, cover them with cable protectors or secure them to the ground to avoid potential accidents.
3. Adequate Ventilation: Keep the projector well-ventilated to avoid overheating. Ensure that there is sufficient space around the projector for proper air circulation. Avoid placing the projector near heat sources or in enclosed spaces that can trap heat. This will help prevent potential damage to the projector and reduce the risk of fire hazards.
4. Outdoor-Friendly Extensions and Power Sources: Use outdoor-rated extension cords and power sources that are designed to withstand outdoor conditions. Ensure that the cords are properly rated for the electrical load and keep them away from water sources to minimize the risk of electrical shock or short circuits.
5. Water and Weather Protection: Protect the projector and any exposed cables from moisture or rain. Use waterproof projector enclosures or covers to shield the equipment from direct exposure. Keep the projector and other electrical components elevated or covered during inclement weather to prevent water damage.
6. Ground Fault Circuit Interrupters (GFCIs): Install GFCIs on all electrical outlets used for the projector setup. GFCIs help protect against electric shock by interrupting the circuit when a ground fault is detected. This is especially important for outdoor electrical connections to ensure the safety of you and your guests.
7. Watch for Trip Hazards: Regularly inspect the area around the projector for potential trip hazards, such as uneven terrain, cables, or objects left in walkways. Clear any clutter and mark any changes in elevation to ensure the safety of your guests during the outdoor viewing experience.
8. Audience Safety: Ensure that the seating area and viewing angle are arranged in a way that provides a clear line of sight to the screen while keeping a safe distance from the projector. Position chairs and seating arrangements to avoid obstructing walkways or emergency exits.
9. Supervise Children: If children are present, ensure they are supervised at all times during the outdoor TV viewing. Keep them away from the projector and any electrical equipment to prevent potential accidents or injuries.
10. Regular Maintenance and Inspections: Conduct regular maintenance and inspections of the projector and associated equipment. Check for any signs of wear, loose connections, or other potential hazards. Replace or repair any damaged components to maintain a safe and reliable outdoor TV viewing setup.
By following these safety measures, you can create a secure environment for your outdoor projector setup, minimizing the risk of accidents and ensuring a safe and enjoyable experience for you and your guests.
Troubleshooting Common Issues with Outdoor Projectors
While outdoor TV viewing on a projector can be a great experience, you may encounter some common issues that can be easily resolved with troubleshooting techniques. Here are some tips for troubleshooting common problems with outdoor projectors:
1. No Power: If the projector isn’t turning on, check that it is securely plugged into a working power source. Ensure that the power cord is undamaged and properly connected to both the projector and the outlet. Test the outlet with another device to verify if it is functioning correctly. If the issue persists, consult the projector’s manual or reach out to the manufacturer for further assistance.
2. Poor Image Quality: If the projected image appears blurry, distorted, or lacks clarity, there are a few things to check. First, ensure that the projector lens is clean and free from dust or smudges. Adjust the focus and zoom controls on the projector to improve image sharpness. Make sure the image resolution matches the projector’s native resolution. Additionally, check the input source and cables for any loose connections or damage.
3. Overheating: Outdoor projectors can sometimes overheat, especially in hot weather conditions. Ensure that the projector has proper ventilation and is not placed in direct sunlight or near other sources of heat. Clean the projector’s air filters regularly to prevent dust buildup that can impede airflow. If the projector continues to overheat, try reducing the brightness level or consider using a fan to improve air circulation around the projector.
4. Connectivity Issues: If you’re having trouble connecting external devices to the projector, double-check the cables for any loose connections or damage. Ensure that the appropriate input source is selected on the projector. Check the compatibility between the projector and the device you’re connecting, ensuring both support the same video or audio output format. If using wireless connectivity, verify that the projector and the device are on the same network and follow the manufacturer’s instructions for setup.
5. Audio Problems: If you’re experiencing issues with the audio from the projector, first check the volume level on both the projector and the connected device. Ensure that the projector is not muted or set to a low volume. Confirm that the audio cables are securely connected and functioning properly. If using external speakers, check their power, volume, and audio input settings. If the problem persists, try connecting a different audio source to the projector to determine if the issue lies with the projector or the connected device.
6. Remote Control Malfunction: If the projector’s remote control is not responding, check the batteries and replace them if necessary. Make sure there are no obstructions between the remote and the projector’s sensor. Ensure that the remote control is within the recommended range specified in the projector’s manual. If the problem persists, try resetting the remote control or consider using a universal remote that is compatible with the projector.
7. Image Size or Positioning Issues: If the projected image is too large or small, adjust the projector’s zoom or lens position to resize the image. If the image is not aligned or centered correctly on the screen, use the projector’s keystone adjustment or lens shift controls to correct the positioning. Experiment with the projector’s positioning or try using adjustable mounts or tripod stands for more flexibility in image placement.
If you encounter any other issues with your outdoor projector, consult the projector’s manual, manufacturer’s website, or reach out to their customer support for further assistance. Troubleshooting techniques may vary depending on the specific brand and model of your projector.
By following these troubleshooting tips, you can resolve common issues and ensure a seamless outdoor TV viewing experience.
Frequently Asked Questions (FAQs) about Watching TV Outside on a Projector
1. Can I use any projector for outdoor TV viewing?
No, not all projectors are suitable for outdoor use. It is recommended to choose a projector specifically designed for outdoor environments. Look for features like high brightness, durability, and weather resistance to ensure optimal performance.
2. What type of screen should I use for outdoor TV viewing?
You have a few options for outdoor screens, including portable projector screens or DIY options like large white bedsheets or projector-friendly paint on a flat surface. Choose a screen that is suitable for outdoor use, provides good image quality, and fits your viewing area.
3. How do I protect my outdoor projector from rain or moisture?
It is important to protect your outdoor projector from rain and moisture to avoid damage. Consider using a waterproof projector enclosure or cover and position the projector in a covered or sheltered area. Avoid exposure to direct rain and moisture as much as possible.
4. Can I watch TV on a projector during the daytime?
Daytime viewing on a projector can be challenging due to the bright ambient light. To improve visibility, select a projector with high brightness levels and position the screen in a shaded area. However, for the best viewing experience, it is recommended to watch TV on a projector during evening or nighttime.
5. Do I need special audio equipment for outdoor TV viewing?
While built-in projector speakers can provide basic audio output, for a more immersive experience, consider using external speakers or an outdoor sound system. You can connect speakers via Bluetooth, AUX cables, or wireless options to enhance the audio quality of your outdoor TV viewing setup.
6. How do I connect my projector to other external devices?
Connectivity options vary depending on the projector model. Most projectors have HDMI or VGA inputs to connect external devices like streaming devices, gaming consoles, or laptops. Use the appropriate cables and follow the projector’s manual for instructions on connecting to external devices.
7. Can I stream content on an outdoor projector?
Yes, you can stream content on an outdoor projector by connecting a streaming device, such as Chromecast or Amazon Fire TV Stick, to the projector. Connect the streaming device to the projector’s HDMI port and access your favorite streaming services via the device’s interface.
8. Can I leave my outdoor projector set up all the time?
While it is possible to leave your outdoor projector set up for extended periods, it is generally recommended to store the projector in a safe and secure location when not in use. This helps protect it from the elements and prolong its lifespan.
9. Can I use a regular white wall as a projector screen?
Yes, you can use a regular white wall as a makeshift projector screen. However, keep in mind that the quality of the image may not be as optimal as using a dedicated projector screen. Ensure that the wall is smooth, clean, and free of any imperfections that may impact the image quality.
10. How far should I position the projector from the screen?
The optimal projector-to-screen distance depends on the throw ratio of your projector and the desired image size. Consult the projector’s manual or use online calculators that can help determine the appropriate distance based on the projector’s specifications.
These FAQs cover some of the common questions related to watching TV outside on a projector. If you have any other specific inquiries or concerns, consult the projector’s manual or reach out to the manufacturer for more information.