Introduction
Welcome to our step-by-step guide on how to set up your Logitech camera. Whether you’re using it for video conferencing, livestreaming, or simply capturing precious moments, getting your camera up and running is an essential first step. By following this guide, you’ll be able to quickly and easily set up your Logitech camera and start using it in no time.
A Logitech camera offers a wide range of features and functionality, enabling you to capture high-quality videos and images. However, before diving into the setup process, it’s important to ensure that your computer meets the system requirements for seamless operation. This will help you avoid any compatibility issues or performance limitations.
Once you’ve confirmed that your system meets the requirements, you can proceed with installing the Logitech Camera software. This software includes the necessary drivers and tools to optimize the performance of your camera. Following the installation, you’ll need to connect the camera to your computer using the appropriate cables or wireless connection.
After the physical connection is established, it’s time to fine-tune the camera settings and preferences according to your specific needs. Adjusting aspects such as resolution, frame rate, autofocus, and exposure will ensure that you achieve the highest quality output for your intended use.
Once everything is set up, it’s important to test the camera to ensure that it’s functioning properly. This includes checking the video and audio feed, as well as testing any additional features or functionalities that your Logitech camera may offer.
If you encounter any issues or difficulties during the setup process, we’ve included some troubleshooting tips to help get you back on track. Our aim is to provide you with a seamless and hassle-free experience as you set up your Logitech camera.
So, without further ado, let’s dive into the step-by-step process of setting up your Logitech camera.
Step 1: Verify System Requirements
Before proceeding with the setup of your Logitech camera, it’s essential to ensure that your computer meets the necessary system requirements. This will guarantee optimal performance and compatibility with the camera software. Here are the key aspects to verify:
Operating System: Check if your computer is running a compatible operating system. Logitech cameras generally support Windows (7, 8, or 10) or macOS (10.10 or later). It’s crucial to have the latest updates installed for a smooth experience.
Processor and RAM: Verify that your computer has a processor and RAM configuration that meets the minimum specifications stated by Logitech. This information can usually be found on their website or in the user manual. Having a powerful processor and sufficient RAM will ensure smooth video streaming and processing.
Graphics Card: Confirm that your computer has a compatible graphics card with updated drivers. A dedicated graphics card will enhance the video quality and overall performance of your Logitech camera.
USB Ports: Check the availability of USB ports on your computer. Most Logitech cameras connect via USB, so make sure you have free ports for the camera connection. Additionally, ensure that USB 2.0 or higher ports are available for faster data transfer.
Internet Connection: If you plan to use your Logitech camera for video conferencing or livestreaming, a stable internet connection is crucial. Make sure you have a reliable network connection with sufficient bandwidth to support the desired video quality.
Software Compatibility: Verify that your computer’s operating system is compatible with the Logitech Camera software. Visit Logitech’s official website or refer to the documentation to check the compatibility list for the specific camera model you own.
By confirming these system requirements, you can avoid any unexpected issues or limitations during the setup process. If your computer falls short in any of these areas, consider upgrading the necessary components or consulting with Logitech to find alternative solutions.
Now that you’ve verified the system requirements, it’s time to move on to the next step – installing the Logitech Camera software.
Step 2: Install Logitech Camera Software
Installing the Logitech Camera software is a crucial step to ensure the proper functioning of your camera. The software package includes drivers, utilities, and additional features that enhance the camera’s performance. Here’s a step-by-step guide to help you through the installation process:
1. Visit the Logitech website: Go to the official Logitech website and navigate to the support section. Look for the Downloads or Drivers page, where you can find the software appropriate for your camera model.
2. Locate your camera model: Browse through the list of available software and locate the one that corresponds to your Logitech camera model. Make sure to download the latest version of the software for optimal performance.
3. Download the software: Click on the download link or button to initiate the software download. Depending on your internet connection speed, this may take a few moments. Save the downloaded file to a location on your computer where you can easily access it.
4. Run the installer: Once the download is complete, locate the downloaded file and double-click to run the installer. This will start the installation process. Follow the on-screen instructions to proceed with the installation.
5. Agree to the terms and conditions: During the installation, you may be prompted to agree to the terms and conditions. Read through them carefully and click on the “Accept” or “Agree” button to continue.
6. Customize the installation (optional): Depending on the software package, you may have the option to customize the installation. This allows you to select specific components or adjust the installation location. Feel free to customize these settings according to your preferences, or you can proceed with the default settings by clicking “Next” or “Install.”
7. Wait for the installation to complete: The software installation process may take a few minutes. Be patient and avoid interrupting the process. Once the installation is finished, you will receive a confirmation message.
8. Restart your computer (if required): Some Logitech camera software installations may require a computer restart. If prompted, save your work and restart your computer to ensure the software is properly integrated into the system.
9. Launch the Logitech Camera software: After the installation and any necessary restarts, launch the Logitech Camera software from your desktop or Start menu. Follow any setup wizards or prompts that may appear to configure the software for your specific camera model.
By following these steps, you’ll be able to install the Logitech Camera software and have your camera ready for use in no time. The next step involves connecting your camera to your computer, so let’s move on to that.
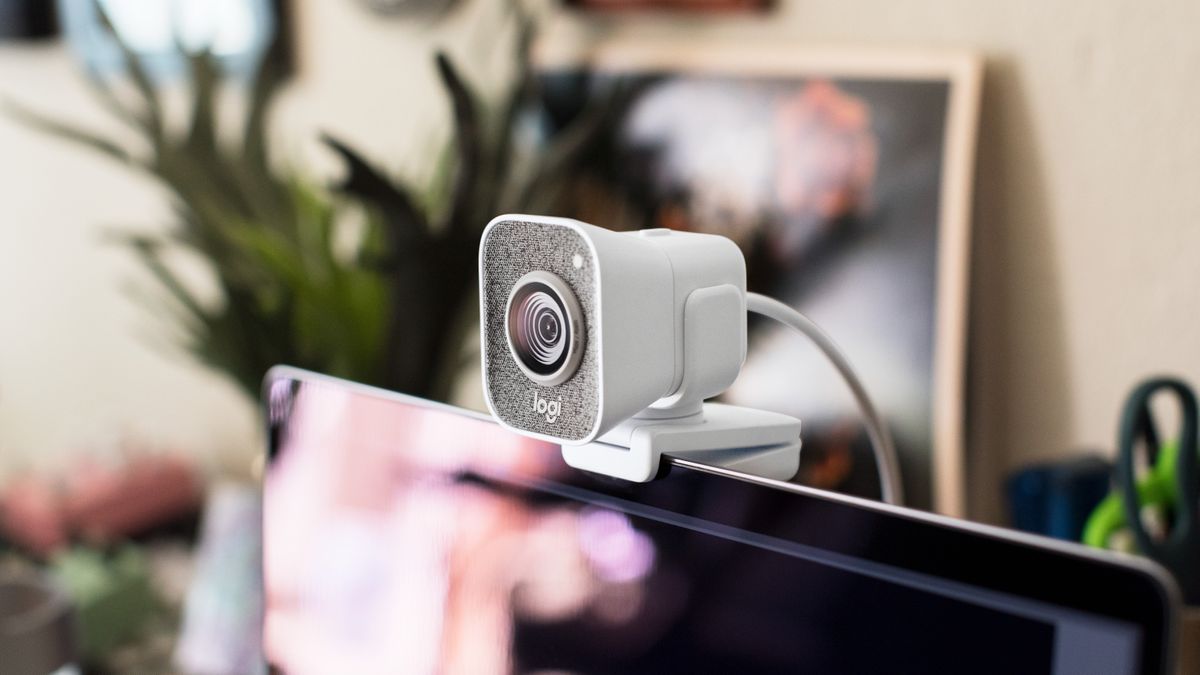
Step 3: Connect Camera to Computer
Now that you have installed the Logitech Camera software, it’s time to connect your Logitech camera to your computer. The method of connection may differ depending on your camera model and the available ports on your computer. Follow these steps to properly connect your camera:
1. Locate the appropriate cable: Depending on your camera model, you may have different cable options for connecting your camera to the computer. Common options include USB, HDMI, and Ethernet cables. Refer to your camera’s manual to determine the correct cable for your specific model.
2. Connect the cable to the camera: Once you have identified the appropriate cable, locate the corresponding port on your camera. It is usually located at the back or side of the camera. Insert one end of the cable firmly into the camera’s port.
3. Connect the cable to the computer: After connecting the cable to the camera, locate the matching port on your computer. Depending on the cable type, this can be a USB port, HDMI port, or Ethernet port. Insert the other end of the cable into the computer’s port securely.
4. Ensure a stable connection: Once the cable is connected, make sure it is securely plugged in on both ends. Avoid any loose connections, as they can cause issues with video and audio transmission. If using a USB cable, ensure it is fully inserted into the USB port.
5. Power on the camera: If your camera requires power, make sure it is powered on. This may involve using a power adapter or connecting the camera to a power source separately. Follow the camera’s instructions to power it on correctly.
6. Wait for device recognition: After connecting the camera to the computer and powering it on, give your computer a moment to recognize the camera. You may see a notification or hear a sound indicating that a new device has been connected.
7. Install additional drivers (if necessary): In some cases, your computer may require additional drivers to fully recognize and utilize the camera. If prompted, follow the instructions to install any necessary drivers. You can usually find these drivers on the Logitech website or included in the software package you previously installed.
8. Open camera software: With the camera connected and recognized by your computer, open the Logitech Camera software that you installed in the previous step. This software provides you with access to the camera’s settings, features, and controls.
By following these steps, you’ll be able to connect your Logitech camera to your computer and start using it for various purposes. Next, we’ll move on to adjusting camera settings and preferences to ensure optimal performance.
Step 4: Adjust Camera Settings and Preferences
After connecting your Logitech camera to your computer, it’s important to adjust the camera settings and preferences to ensure optimal performance and meet your specific requirements. Here’s a step-by-step guide to help you do just that:
1. Open the Logitech Camera software: Launch the Logitech Camera software that you installed earlier. This will provide you with access to various camera settings and controls.
2. Navigate to the settings menu: Within the Logitech Camera software, locate the settings menu. This may be represented by a gear or cog icon. Click on it to open the settings panel.
3. Adjust video resolution: One of the important settings to customize is the video resolution. Choose the resolution that best suits your needs, balancing video quality with file size. Higher resolutions will provide more detail, but may consume more storage space and require a more powerful computer.
4. Set frame rate: The frame rate determines the number of images captured per second. Higher frame rates result in smoother video playback. Consider the intended use of your camera and adjust the frame rate accordingly.
5. Configure autofocus: If your Logitech camera supports autofocus, you can adjust the autofocus settings to ensure that the camera maintains focus on the subject appropriately. Experiment with different autofocus modes, such as continuous autofocus or single autofocus, to see which works best for your needs.
6. Adjust exposure settings: Exposure refers to the amount of light that enters the camera sensor. You can manually adjust exposure settings such as brightness, contrast, and white balance to achieve the desired image quality. Use the software’s controls to fine-tune these settings based on the lighting conditions of your environment.
7. Select audio settings: If your Logitech camera has a built-in microphone or supports audio input, check the audio settings within the software. Adjust the microphone volume, audio quality, and other sound-related options to ensure clear and crisp audio capture.
8. Explore additional features: Logitech cameras often come with additional features and functionalities. These may include face tracking, motion detection, zooming capabilities, and more. Familiarize yourself with these features and experiment with the settings to make the most out of your camera.
9. Preview changes: As you adjust the camera settings, use the software’s preview function to see the real-time effect of your changes. This allows you to fine-tune the settings until you achieve the desired results.
10. Save settings: Once you are satisfied with the adjustments, save your settings within the Logitech Camera software. This ensures that your preferences are retained for future use.
By following these steps and customizing the camera settings and preferences, you can optimize the performance of your Logitech camera for your specific needs. Next, we’ll move on to testing the camera to ensure everything is working as expected.
Step 5: Test the Camera
After adjusting the settings and preferences of your Logitech camera, it’s time to test it to ensure that it is functioning properly. Testing the camera will allow you to verify the video and audio feed, check the quality of the output, and ensure that all features are working as expected. Follow these steps to conduct a thorough camera test:
1. Open an application or software that supports video capture: To test your Logitech camera, open an application or software that allows you to capture or view video. Popular options include video conferencing platforms, livestreaming software, or even the Logitech Camera software that you installed earlier.
2. Select the Logitech camera as the video input source: Within the video settings of the application or software, ensure that the Logitech camera is selected as the video input source. This will direct the application to use the Logitech camera for video capture.
3. Check the video feed: Once you’ve selected the Logitech camera, check the video feed in the application or software. Ensure that you can see the live video feed from the camera on your screen. If the feed is not appearing or appears distorted, double-check the camera connection and settings.
4. Test the audio feed: If your Logitech camera has a built-in microphone or supports audio input, test the audio feed as well. Speak into the microphone or make some noise to check if the audio is being captured and transmitted properly. Adjust the microphone volume and other audio settings as needed.
5. Experiment with different camera features: Explore the features and capabilities of your Logitech camera during the testing phase. This may include adjusting zoom settings, testing autofocus capabilities, or trying out any other additional features that your camera offers. Make sure all features are functioning as intended.
6. Evaluate the video and audio quality: Pay close attention to the quality of the video and audio during the testing process. Look for any pixelation, blurriness, or audio issues. Adjust the camera settings if necessary to improve the output quality.
7. Test in different lighting conditions: Conduct the camera test in various lighting conditions to see how the camera handles different environments. This will help you determine if any further adjustments are needed to optimize the camera for different scenarios.
8. Perform a test recording: If your camera software or application allows it, perform a test recording to assess the overall quality and performance. Review the recording to ensure that both the video and audio are captured as desired.
By thoroughly testing the Logitech camera, you can ensure that it is working properly and ready for use. If you encounter any issues during the testing process, refer back to the troubleshooting tips in the next step. Now that you’ve tested the camera, let’s move on to troubleshooting tips in case you run into any problems along the way.
Step 6: Troubleshooting Tips
While setting up your Logitech camera, you might encounter some issues or difficulties. Don’t worry! We’ve compiled a list of troubleshooting tips to help you overcome common challenges and ensure a smooth camera setup process. Here are some suggestions to troubleshoot common camera-related issues:
1. Check the camera connection: Make sure that all cables are securely connected to both the camera and the computer. A loose or faulty connection can cause video or audio feed problems.
2. Restart the camera and computer: Sometimes, a simple restart can resolve minor issues. Try turning off both the camera and the computer, then power them on again to see if the issue is resolved.
3. Update camera drivers and software: Check for any available updates for your Logitech camera drivers and software. Outdated drivers can lead to compatibility issues. Visit the Logitech website or use their software update tool to ensure you have the latest versions installed.
4. Verify camera compatibility: Ensure that your Logitech camera is compatible with your computer’s operating system. Check the specifications and confirm that your camera model is officially supported by your operating system version.
5. Adjust video resolution and frame rate: If you’re experiencing video lag or stuttering, consider lowering the video resolution or frame rate settings. This can help reduce processing strain on your computer, especially if it has limited resources.
6. Check audio settings: If you’re having audio-related issues, ensure that the microphone is properly connected and selected as the audio input source. Adjust the microphone volume and ensure that you don’t have any mute settings enabled.
7. Update operating system and third-party software: Keeping your operating system and other relevant software up to date can resolve many compatibility issues. Update your operating system, video conferencing software, or any other applications that interact with the camera.
8. Consult Logitech support: If you’ve tried all the troubleshooting steps and are still facing issues, don’t hesitate to reach out to Logitech’s customer support. They have dedicated support channels, including online forums and help centers, where you can find solutions or contact their support team for further assistance.
Remember, each troubleshooting step should be performed methodically and in a logical order. If one step doesn’t solve the issue, move on to the next. It’s essential to remain patient and thorough during the troubleshooting process.
By following these troubleshooting tips, you’ll be able to overcome common camera-related issues and ensure that your Logitech camera setup is successful. If all goes well, you’re now ready to make the most of your Logitech camera and enjoy its features to the fullest.
Conclusion
Congratulations on successfully setting up your Logitech camera! By following this comprehensive guide, you have learned how to verify system requirements, install the Logitech Camera software, connect the camera to your computer, adjust camera settings and preferences, test the camera, and troubleshoot common issues. You are now equipped with the knowledge and skills to make the most of your Logitech camera for various purposes.
Remember to regularly update your camera drivers and software to ensure optimal performance and compatibility. Experiment with different settings and features to find the best configuration for your specific needs. Whether you’re using your Logitech camera for video conferencing, livestreaming, or capturing memorable moments, proper setup and customization will enhance your overall experience.
If you encounter any difficulties or have additional questions, don’t hesitate to reach out to Logitech’s customer support. They are there to assist you and provide further guidance.
We hope this guide has been helpful in setting up and maximizing the potential of your Logitech camera. Enjoy the enhanced video and audio quality, as well as the advanced features, that your camera offers. Capture and share memorable moments, engage in seamless video conferencing, or explore the world of livestreaming with confidence. Have fun and make the most of your Logitech camera!