Introduction
Welcome to the world of server racks, where technology and organization come together to create an efficient and secure infrastructure. Whether you’re a small business looking to expand your IT capabilities or a large enterprise managing a vast network of servers, setting up a server rack is a crucial step in streamlining your operations.
A server rack is a specialized cabinet that houses servers, networking equipment, and other essential components of a computer network. It is designed to provide a centralized and secure location for storing and managing this critical technology. Setting up a server rack involves careful planning, proper equipment, and meticulous organization to ensure optimal performance and functionality.
In this article, we will guide you through the process of setting up a server rack, from planning and preparation to configuration and testing. Whether you’re a seasoned IT professional or a beginner in server management, this guide will provide you with the necessary steps and considerations for a successful setup.
Setting up a server rack requires more than just finding a suitable space and placing the servers inside. It involves understanding the unique requirements of your network, considering factors such as cooling, cable management, and power connectivity. By following the steps outlined in this article, you’ll be able to create a well-organized and efficient server rack that meets the needs of your organization.
So, without further ado, let’s dive into the world of server racks and learn how to set up this essential piece of IT infrastructure.
Planning and Preparation
Before diving into the physical setup of a server rack, proper planning and preparation are essential to ensure a smooth and successful installation. Taking the time to consider various factors will help you make informed decisions and avoid potential issues down the line.
The first step in planning and preparation is understanding your specific needs and requirements. Consider the size of your organization, the number of servers you need to accommodate, and the future growth that you anticipate. This will help you determine the size and capacity of the server rack you’ll need.
Next, evaluate the available space in your facility. Choose a location that is easily accessible and provides adequate clearance for maintenance and cable management. Ensure that the area has proper ventilation and is free from excessive dust or moisture, as these can adversely affect the performance of your servers.
Once you have chosen a location, take measurements to determine the dimensions of the server rack that will fit comfortably. Consider any space limitations or physical constraints you may encounter, such as low ceilings or narrow doorways.
Another crucial aspect of planning is considering the power requirements of your servers. Calculate the total power consumption of your equipment to ensure that your chosen location can accommodate the necessary electrical infrastructure. Make sure there are enough power outlets and that they are properly grounded.
In addition to power, network connectivity is another vital consideration. Determine the number of network ports and the type of cabling you’ll need to connect your servers to the network. It’s essential to plan for appropriate networking equipment, such as switches and routers, to facilitate seamless communication.
Lastly, gather the necessary equipment and tools for the installation. This includes server racks, shelves, cable management accessories, and any required hardware for mounting your servers. Having all the necessary equipment on hand before starting the installation process will streamline the setup and minimize delays.
By investing time in careful planning and thorough preparation, you can ensure a smoother and more efficient setup process for your server rack. With all the necessary information and resources at your disposal, you’ll be ready to move on to the next step: choosing a location for the server rack.
Choosing a Location for the Server Rack
When setting up a server rack, one of the most crucial decisions you’ll make is choosing the right location. The location not only affects the accessibility of your servers but also plays a significant role in their performance and longevity. Here are some key considerations to keep in mind when selecting a location for your server rack.
First and foremost, prioritize accessibility. Select a location that is easily accessible to authorized personnel who need to perform routine maintenance, upgrades, or repairs. Ensure there is ample space around the rack to maneuver and access the servers from different angles. This will minimize the risk of accidental damage and make it easier to troubleshoot any issues that may arise.
Temperature regulation is another critical factor to consider. Servers generate a significant amount of heat, so it’s important to choose a location that provides proper ventilation and cooling. Ideally, the room should have a dedicated cooling system or air conditioning to maintain a consistent and moderate temperature. Avoid placing the server rack in areas prone to heat, such as near windows or in direct sunlight.
Alongside temperature, consider the humidity levels in the chosen location. High humidity can be detrimental to server health, leading to corrosion and component failure. Aim for a humidity level between 40% and 60% to create an optimal environment for your servers.
Noise is another factor to consider when choosing a location for your server rack. The fans and airflow mechanisms in a server rack can generate significant noise, which can be disruptive in a shared workspace. If possible, select a location away from quiet areas or consider soundproofing options to minimize noise pollution.
Lastly, make sure the chosen location provides adequate security. Servers often contain sensitive and confidential data, so it’s crucial to protect them from unauthorized access. Consider installing security measures such as locked doors, surveillance cameras, and access control systems to ensure the physical security of your server rack.
When choosing a location for your server rack, keep in mind the accessibility, temperature regulation, humidity levels, noise considerations, and security requirements. By carefully considering all these factors, you can create an optimal environment for your servers, ensuring their longevity and efficient performance. With the location chosen, it’s time to move on to the next step: ensuring proper ventilation and cooling.
Ensuring Proper Ventilation and Cooling
One of the critical aspects of setting up a server rack is ensuring proper ventilation and cooling. Servers generate a significant amount of heat, and without adequate cooling, this heat can lead to performance issues, component failures, and shortened lifespan. Here are some key considerations to ensure proper ventilation and cooling for your server rack.
First and foremost, evaluate the airflow within the chosen location. Ensure that the area around the server rack is clear of obstructions that could impede the flow of air. Avoid placing the rack against walls or other surfaces that may restrict airflow. By allowing for proper air circulation, you can promote efficient cooling and prevent hotspots within the rack.
Consider the orientation of the servers within the rack to optimize airflow. Most server racks are designed for front-to-back airflow, with cool air entering from the front and hot air exiting through the back. Align the servers in a way that enables this airflow pattern to ensure efficient cooling.
Incorporate fans and ventilation systems to enhance the cooling capabilities of your server rack. Rack-mounted cooling fans, for instance, can be installed to improve airflow within the rack. Additionally, consider the inclusion of a dedicated cooling unit or air conditioning system to regulate the temperature within the room where the rack is located.
Manage cable clutter effectively to prevent airflow restrictions and overheating. Use cable management accessories such as cable trays, raceways, and zip ties to organize and route cables neatly. This ensures that cables do not impede the airflow within the rack, allowing for optimal cooling.
Regularly monitor temperature levels within the server rack to ensure efficient cooling. Utilize temperature monitoring tools and sensors to keep track of temperature fluctuations and receive alerts in the event of any abnormalities. This will allow you to take prompt action and prevent potential damage to your servers.
It’s worth noting that cooling requirements can vary depending on the size and power consumption of your servers. Therefore, regularly review and adjust the cooling mechanisms to accommodate any changes in your server configuration.
By taking the necessary steps to ensure proper ventilation and cooling, you can maintain optimal performance and prolong the lifespan of your servers. With ventilation and cooling secured, it’s time to move on to the next step: gathering the necessary equipment and tools for setting up the server rack.
Gathering Necessary Equipment and Tools
Before setting up a server rack, it’s important to gather all the necessary equipment and tools to ensure a smooth and efficient installation. Having everything you need on hand will help streamline the process and minimize delays. Here are the essential items you’ll need to gather.
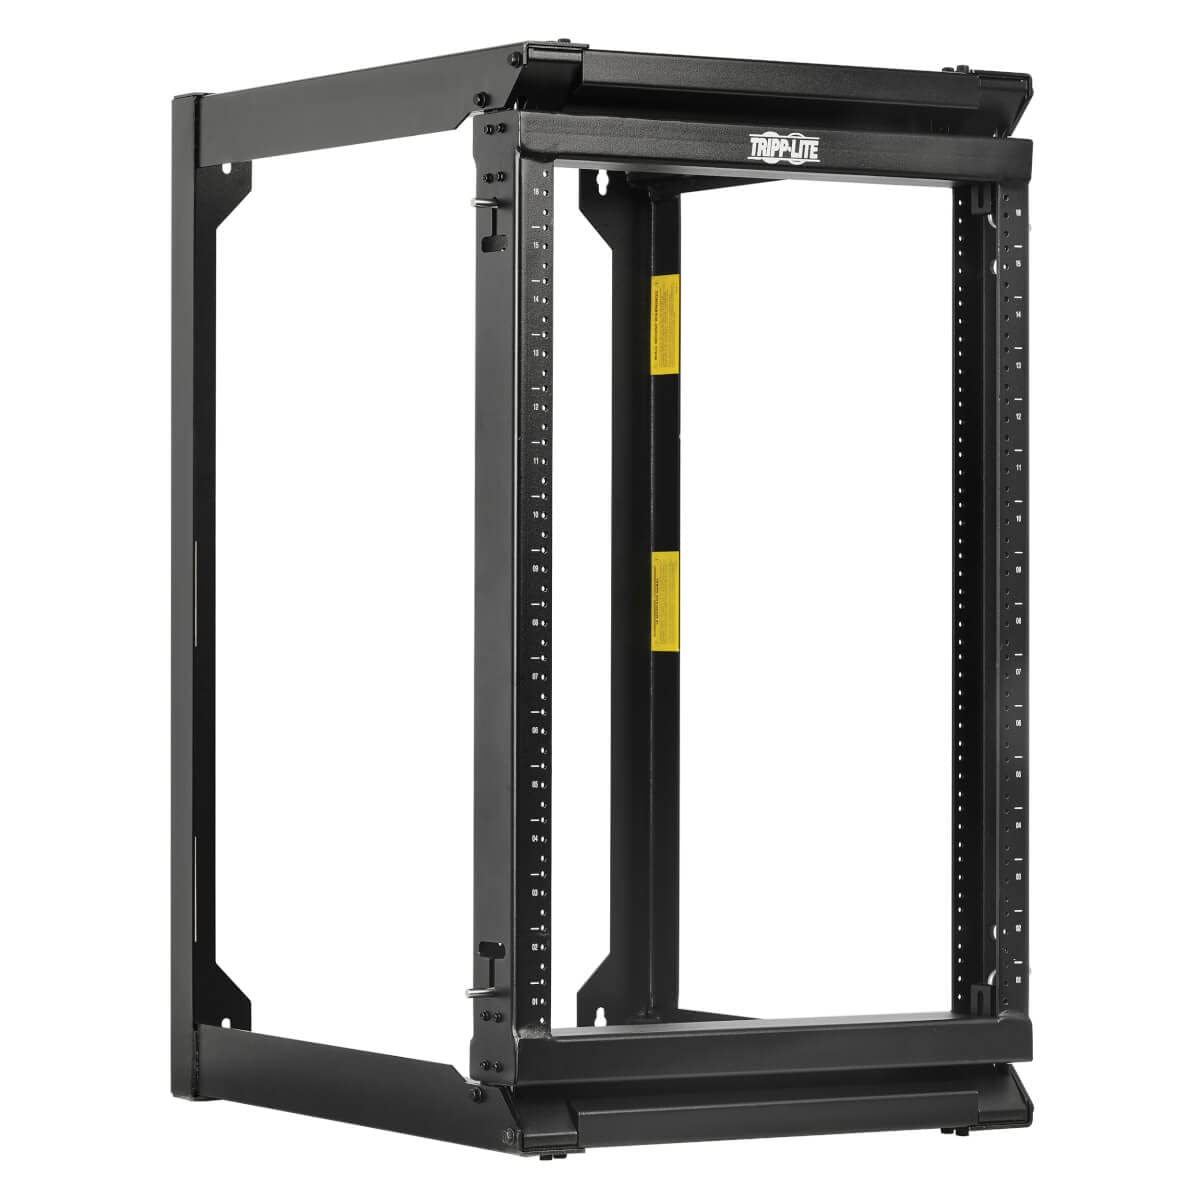
Server Rack: The cornerstone of your setup is the server rack itself. Consider the size and capacity of the rack based on the number of servers and other equipment you plan to install. Ensure it meets industry standards for durability and ventilation.
Shelves and Mounting Hardware: Depending on your server rack and equipment, you may need additional shelves or mounting hardware to secure non-rack mountable devices or accessories. Make sure you have the appropriate shelves and mounting hardware that fit your specific rack model.
Cable Management Accessories: Proper cable management is essential for maintaining organization, airflow, and ease of maintenance within the server rack. Gather cable management accessories such as cable trays, racks, zip ties, and cable labels to keep cables organized and easily identifiable.
Networking Equipment: Consider the networking equipment needed to connect your servers to the network. This may include switches, routers, patch panels, and Ethernet cables. Make sure you have the required number of ports and the appropriate cable lengths.
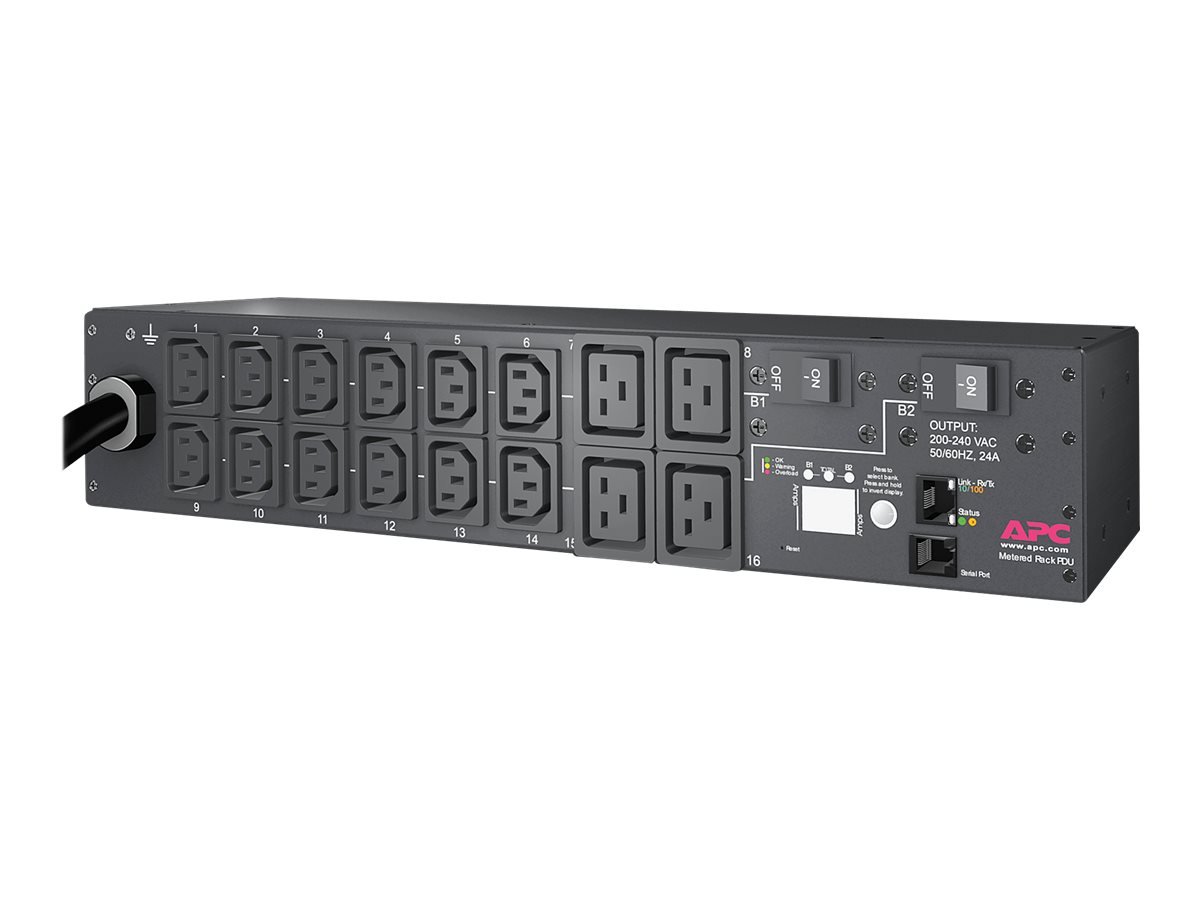
Power Distribution Units (PDUs): PDUs provide power supply and distribution to the servers within the rack. Determine the number and type of PDUs needed based on the power requirements of your servers and the available power outlets in your chosen location.
Toolkit: Assemble a toolkit with essential tools for the installation process. This may include screwdrivers, screws, nuts, cable crimping tools, cable testers, pliers, and wire cutters. Having a well-equipped toolkit will ensure you have everything you need to tackle any challenges or adjustments during the setup.
Server Installation Guide: Depending on the models and brands of your servers, consult the installation guide provided by the manufacturer. Familiarize yourself with the specific installation requirements and recommendations to ensure proper installation and optimal performance.
By gathering all the necessary equipment and tools, you’ll be well-prepared to set up your server rack. Double-check that you have all the required items before proceeding to the next steps, which include assembling the server rack and mounting the servers.
Assembling the Server Rack
Now that you have gathered all the necessary equipment and tools, it’s time to move on to assembling the server rack. Proper assembly is crucial for ensuring stability, organization, and efficient use of space within the rack. Follow these steps to assemble your server rack:
Step 1: Prepare the Space: Clear the area where the rack will be assembled. Ensure that the floor is clean and level to provide a stable foundation. Make sure you have enough space to maneuver around the rack during assembly.
Step 2: Install the Base: Start by installing the base of the server rack. Depending on the model, this may involve attaching feet or caster wheels to the base. Follow the manufacturer’s instructions to securely attach the base to the rack.
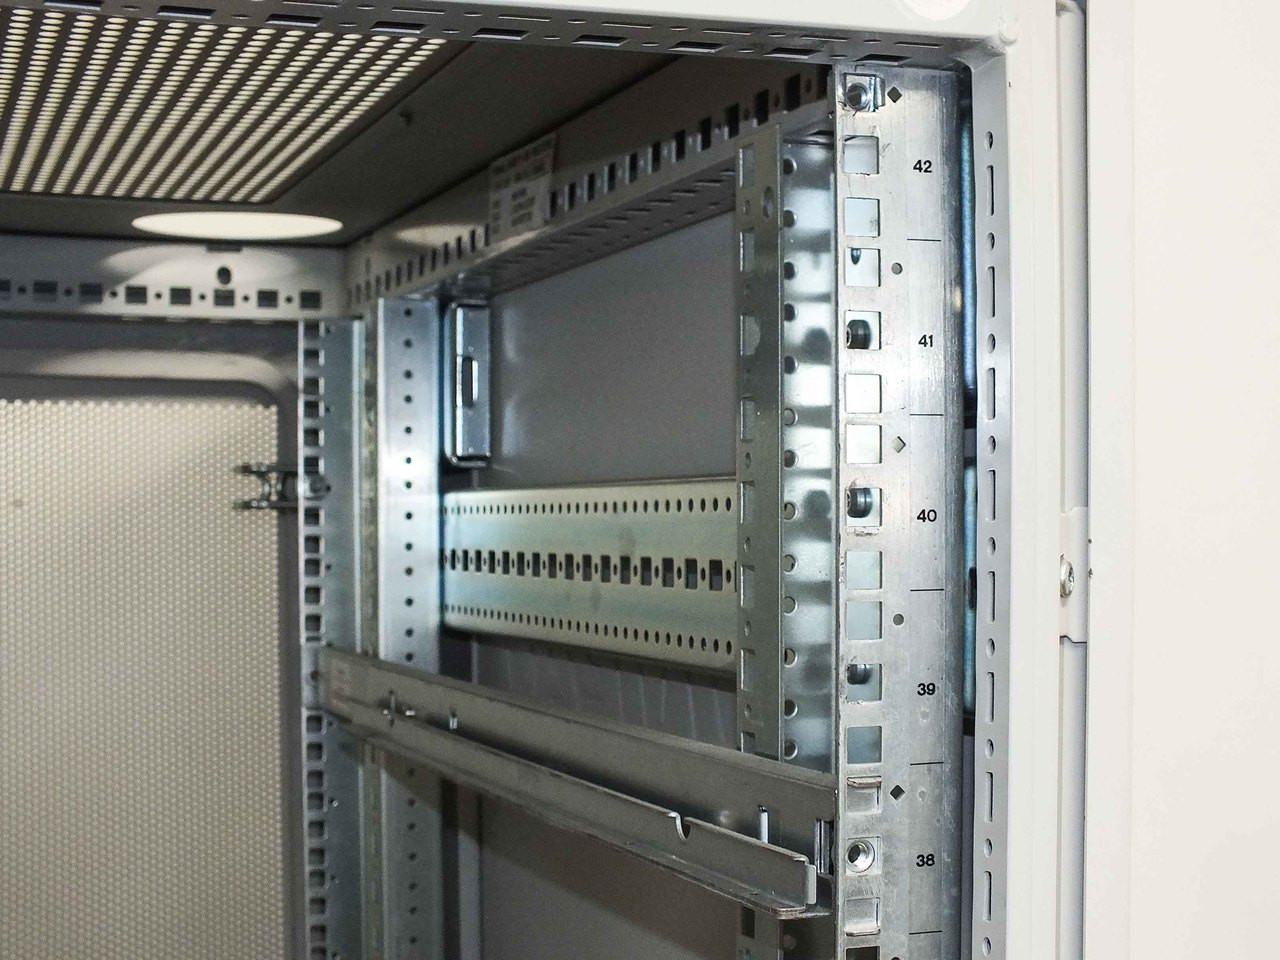
Step 3: Install Vertical Rails: Attach the vertical rails to the sides of the rack. These rails will provide support for the servers and other equipment. Make sure the rails are aligned properly and securely fastened to the rack.
Step 4: Install Shelves: If you have non-rack mountable equipment or accessories, install shelves at the desired positions within the rack. Place the shelves securely on the vertical rails and ensure they are level and stable.
Step 5: Secure Cable Management Accessories: Install cable management accessories such as cable trays or racks to organize and route cables within the rack. These accessories will help maintain a neat and organized appearance while improving airflow and ease of maintenance.
Step 6: Install PDUs and Networking Equipment: Install power distribution units (PDUs) and any networking equipment, such as switches or patch panels, in their designated positions within the rack. Ensure proper cable management and secure the equipment to the rack using the provided mounting hardware.
Step 7: Test Stability: Once all the components are in place, test the stability of the rack by gently shaking it. Verify that the rack is sturdy and does not wobble. If any adjustments are needed, tighten all the connections and fasteners until the rack is secure.
By following these steps, you can successfully assemble your server rack. Take your time during the assembly process to ensure everything is properly aligned and secured. Once the rack is assembled, it’s time to move on to the next step: mounting the servers.
Mounting the Servers
With the server rack assembled, it’s time to move on to the next crucial step: mounting the servers. Properly mounting the servers ensures stability, efficient use of space, and easy access for maintenance. Follow these steps to mount your servers in the rack:
Step 1: Prepare the Servers: Before mounting the servers, make sure they are powered off and disconnected from the power source. Remove any accessories or components that are not necessary for installation, such as side panels or cable management arms.
Step 2: Determine Mounting Orientation: Depending on your server rack and the airflow requirements of your servers, determine the appropriate mounting orientation. Most racks follow a front-to-back airflow pattern, so align the servers accordingly.
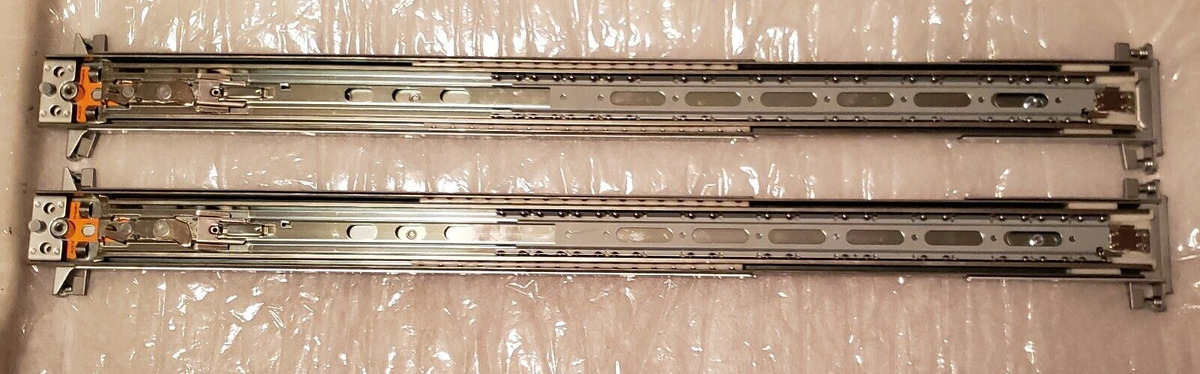
Step 3: Attach Mounting Rails: Most servers come with adjustable mounting rails. Slide the mounting rails from the front or back of the server and align them with the corresponding holes on the server rack’s vertical rails.
Step 4: Secure the Servers: Carefully place the servers onto the mounting rails, ensuring they align with the holes for a secure fit. Use the provided screws or fasteners to secure the servers in place. Tighten the screws, but avoid overtightening to prevent damage to the equipment.
Step 5: Check for Stability: Gently shake the server to check for any wobbling or instability. If the server feels loose, double-check the mounting screws and adjust as necessary until the server is securely mounted without any movement.
Step 6: Repeat for Each Server: Repeat the mounting process for each server you plan to install in the rack. Ensure that there is enough space between servers to allow for proper airflow and access for maintenance.
Step 7: Reconnect Cables and Accessories: Once the servers are securely mounted, reconnect the necessary cables and accessories. Ensure that the cables are neatly organized using the cable management accessories installed earlier.
Step 8: Label the Servers: To facilitate easy identification and troubleshooting, label each server with a unique identifier. This can be done using labels or color-coded tags on the front or rear of each server.
By following these steps, you can successfully mount your servers in the server rack. Take your time to ensure proper alignment, secure fastening, and organized cabling. With the servers mounted, it’s time to move on to the next step: organizing and labeling cables.
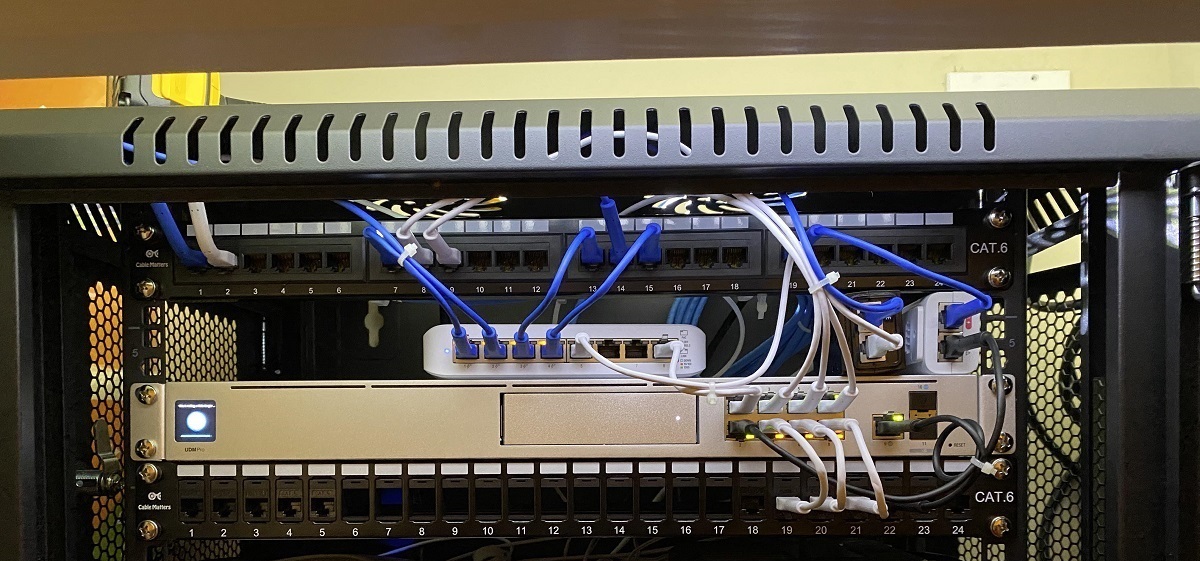
Organizing and Labeling Cables
Proper cable organization and labeling are essential for maintaining a clean and functional server rack. A well-organized cabling system promotes efficient airflow, ease of maintenance, and quick identification of cables when needed. Follow these steps to organize and label the cables in your server rack:
Step 1: Plan Cable Routing: Before you start organizing the cables, plan out the cable routing paths within the rack. Consider the most efficient routes that minimize cable clutter and avoid crossing power cables and signal cables.
Step 2: Use Cable Management Accessories: Utilize cable management accessories such as cable trays, racks, and zip ties to route and secure the cables neatly. These accessories help to prevent cable tangling, ensure proper airflow, and facilitate easy access for maintenance.
Step 3: Bundle Cables: Group cables by their purpose, such as power, network, or peripheral cables. Use Velcro straps or zip ties to create bundles and keep cables together. Avoid over-tightening the straps to allow for easy cable adjustments or additions in the future.
Step 4: Label Each Cable: Attach labels or markers to each cable to identify their purpose or destination. Use clear and legible labels that are easy to read even in low-light conditions. Consider using color-coded labels or cable ties to further differentiate cables.
Step 5: Document Cable Connections: Create a detailed documentation or diagram that outlines the connections and configurations of each cable in the server rack. This documentation will be invaluable for future troubleshooting or equipment changes.
Step 6: Ensure Cable Lengths: Trim excess cable lengths to avoid clutter and maintain a neat appearance. However, leave enough slack in the cables to allow for easy maneuverability during maintenance or future equipment adjustments.
Step 7: Regularly Review and Maintain: Periodically review and maintain the cable organization. Check for any cable clutter, loose connections, or signs of wear and tear. Make adjustments as necessary to ensure ongoing efficiency and reliability.
By following these steps, you can achieve a well-organized and labeled cable system within your server rack. This not only improves the aesthetics of the rack but also enhances functionality and simplifies future troubleshooting or modifications. With the cables organized and labeled, it’s time to move on to the next step: connecting the servers to power and networking.
Connecting the Servers to Power and Networking
Once the server rack is organized and the cables are properly labeled, it’s time to connect the servers to power and networking. Proper connections are crucial for the servers to function optimally and communicate with the network. Follow these steps to connect your servers:
Step 1: Power Connections: Identify the power requirements of each server and choose the appropriate power outlets or power distribution units (PDUs). Plug the power cables of each server into the designated power source, ensuring a secure connection and proper grounding.
Step 2: Network Connections: Determine the networking requirements of your servers. Connect the Ethernet cables from each server to the appropriate ports on the switches or routers. Use patch panels if necessary to facilitate easy cable management and organization.
Step 3: Test Connectivity: After making the power and network connections, power on the servers and verify network connectivity. Check that the servers are receiving power and are successfully connected to the network. Test network connectivity by accessing servers from other connected devices or pinging IP addresses.
Step 4: Configure IP Addresses: If necessary, configure IP addresses and network settings for each server. Depending on your network setup, you may need to manually assign IP addresses or use DHCP to obtain them automatically. Ensure that the servers have unique and appropriate IP addresses for seamless communication within the network.
Step 5: Secure the Connections: Once connectivity has been established and confirmed, secure the power and network connections to prevent accidental disconnections. Use cable management accessories and secure fasteners to keep the cables in place and minimize the risk of disruption.
Step 6: Document and Update: Document the power and network connections for future reference. Update your server documentation or network diagram to reflect any changes made during the connection process. Keeping an updated record of your server connections will simplify troubleshooting and maintenance in the future.
By following these steps, you can connect your servers to power and networking efficiently and effectively. Double-check your connections and test the connectivity to ensure proper functionality. With the servers connected, it’s time to move on to the next step: configuring and testing the server rack.
Configuring and Testing the Server Rack
After connecting the servers to power and networking, it’s time to configure and test the server rack to ensure optimal performance and functionality. This step involves the setup of server software, network configurations, and running tests to verify the proper operation of the rack. Follow these steps to configure and test your server rack:
Step 1: Install Operating Systems: Depending on your server requirements, install the appropriate operating systems on each server. Follow the manufacturer’s instructions or your IT team’s guidelines to ensure a smooth and secure installation process.
Step 2: Configure Network Settings: Configure the network settings for each server according to your network infrastructure. Assign static IP addresses, subnet masks, default gateways, and DNS settings to ensure proper network communication.
Step 3: Set Up Server Roles and Services: Depending on your organization’s needs, configure the servers to fulfill specific roles and provide necessary services. This may include setting up web servers, database servers, file servers, or other specialized services required for your operations.
Step 4: Implement Security Measures: Take the necessary steps to implement appropriate security measures for your server rack. This may include configuring firewalls, setting up access controls, and implementing encryption protocols to safeguard your data and network.
Step 5: Test Connectivity and Functionality: Once the server configurations are complete, it’s time to test the connectivity and functionality of the rack. Verify that all servers can communicate with each other and external devices over the network. Perform tests to ensure that the services and applications on the servers are functioning correctly.
Step 6: Monitor Performance and Conduct Stress Tests: Monitor the performance of the servers and the server rack as a whole. Keep an eye on key metrics such as CPU usage, memory utilization, and network traffic. Conduct stress tests to simulate heavy loads and identify any potential performance bottlenecks or issues.
Step 7: Create Backup and Disaster Recovery Plan: Establish a robust backup and disaster recovery plan for your server rack. Regularly backup critical data and develop a contingency plan to mitigate the impact of system failures or data loss.
By following these steps, you can configure and test your server rack to ensure its efficient operation. Regularly monitor the performance and conduct periodic tests to maintain optimal functionality. With the server rack configured and tested, you’re now ready to harness its power and reliability for your organization’s IT infrastructure.
Conclusion
Setting up a server rack requires careful planning, proper equipment, and meticulous organization. By following the steps outlined in this guide, you can successfully set up a server rack that meets the needs of your organization. From choosing a suitable location for the rack to configuring and testing the servers, each step plays a crucial role in creating a secure and efficient infrastructure.
Proper planning and preparation ensure that you select the right location and gather all the necessary equipment and tools. Choosing a well-ventilated space with proper cooling is essential to keep your servers running smoothly. Organizing and labeling cables improves airflow, simplifies maintenance, and enhances productivity.
Assembling the server rack and mounting the servers require attention to detail to ensure stability and efficient space utilization. Properly connecting the servers to power and networking allows for seamless communication within the rack and the larger network environment.
Configuring and testing the server rack concludes the setup process, ensuring that the servers are running optimally and providing the desired services. Regular monitoring and testing help identify and address any potential issues, ensuring the ongoing performance and reliability of your server rack.
Remember to document your setup and keep track of any changes made along the way. This documentation will prove invaluable for future troubleshooting, upgrading, or scaling your server infrastructure.
By investing time and effort into setting up your server rack, you establish a solid foundation for your organization’s IT operations. With a well-designed and efficiently organized rack, you can streamline your workflows, enhance data security, and ultimately improve the overall productivity of your business.
Now that you have reached the end of this guide, you are equipped with the knowledge and steps necessary to set up a server rack successfully. Apply this knowledge, adapt it to your specific circumstances, and embark on your journey to create a powerful and reliable IT infrastructure.